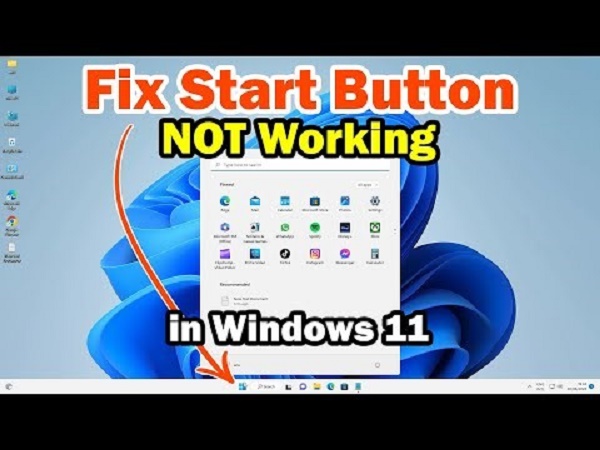
How to Fix Windows Shift S Not Working
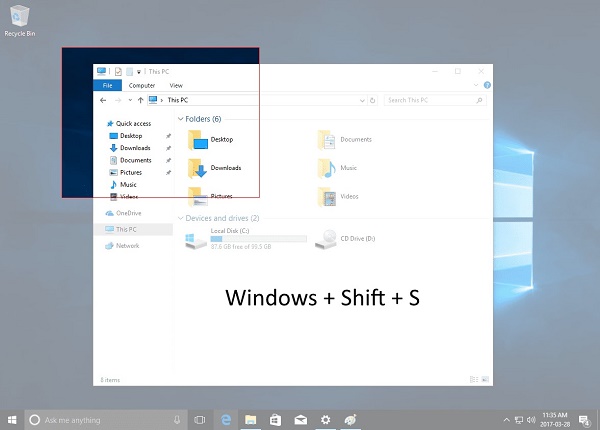
The fastest way to take a screenshot on Windows is using a combination of Windows + Shift + S button. It kills the hassle of launching the snipping tool manually from the start menu and then following the steps to take a screenshot.
However, sometimes, the Windows Shift S shortcut can stop working, and it doesn't respond. when you press the combination of keys. If you’re also facing a similar situation, this guide provides the 6 ultimate solutions to fix the Windows Shift S not working.
Part 1: What Is Windows Shift S Used for?
Windows has an inbuilt tool to capture a screenshot of the computer. Gone are the days when we used to install a third-party application just for taking screenshots and capturing screen recordings, which would take up most of the memory and make your PC slow as a snail.
Pressing the combination of the Windows + Shifts is the shortcut key to launch the snipping tool and take a screenshot. You will get four options on the screen: Rectangular Snip, Freedom Snip, Window Snip, and Fullscreen Snip.
The most common is the rectangle, which helps you capture your screen in a rectangular shape. The Freedom Snip is like a Lasso tool you might be familiar with from Photoshop. Window Snip helps you capture the entire window of an application. And lastly, Fullscreen Snip helps you capture the entire screen, including the taskbar.
However, sometimes, the Window Shift S can stop working for various reasons related to the software part of the computer. The potential reasons for “Windows Shift S not working” include the Snip & Sketch app corruption caused by a virus or malware attacks, the system not registering the keyboard key, or a system bug or glitch disrupting the normal functioning of Snip & Sketch.
Part 2: How to Fix Windows Shift S Not Working
After knowing what the Windows Shift S is used for, let’s main to the solution part of this guide to fix the “Windows Shift S not working Windows 11” issue.
Bonus Tip: Recover Deleted Photos from Windows
If you’ve accidentally deleted or lost photos from a Windows computer, you can use the 4DDiG Windows Data Recovery tool to recover them with a one-click process. It offers robust data recovery solutions to retrieve deleted/lost efficiently and quickly.
Besides recovering deleted photos from Windows, you can also recover all types of files from hard drives, external hard drives, USB flash drives, and SD cards. Below are the steps for how to recover deleted photos from Windows:
Secure
Download
Secure
Download
-
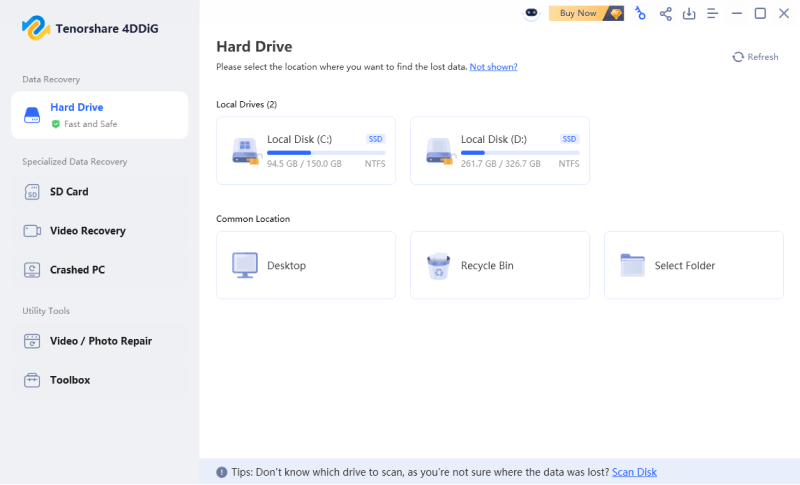
Download and install the 4DDiG Windows Data Recovery program on your computer, then launch it. You’ll be presented with interference similar to the screenshot shown below. Select the drive or the drive from which you want to recover the photos, then click on the recovery button.

-
Once you hit the recover button, it’ll scan, examining the selected location for the deleted/lost files. You can select the file types that you want to recover only, making it easier to target the required files only. You can also pause the process if you identify the required files.

-
After scanning, browse the recovered files and identify which one you want to recover. Select them, and hit the Recover button to move them to a secure location.

Way 2: Enable the Clipboard History Switch
The screenshots you take with the snipping tool move to the clipboard first, and then you can paste them to other places. If the clipboard history isn’t enabled on your computer, it won’t allow it to take the screenshot. Hence,, you would face the “Windows shift not working” issue.
To fix this, enabling the clipboard history switch on the computer is necessary to fix this. Here’s how to enable it with simple steps:
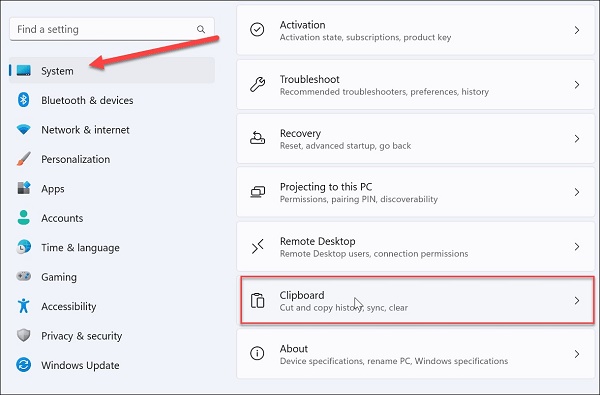
- Press the Windows + I shortcut key, then select the System option.
- Select the Clipboard option from the left sidebar, then turn on the Clipboard History toggle/switch to turn it on from the right side of the screen.
- Now press the Windows + Shift + S key to take a screenshot, then press Windows logo key + V to see if it pastes a screenshot.
Way 3: Turn on Snip & Sketch to Fix Windows Shift S Not Working
If the above solutions don't fix the “shift windows not working” issue, the Snip & sketch may be disabled on your PC. This happens in rare cases, but it’s worth checking before moving to the advanced method to fix the problem.
Here’s how to turn the Snip & Sketch on Windows:
- Press the Windows + R key, and type the gpedit.msc command then hit enter to execute.
-
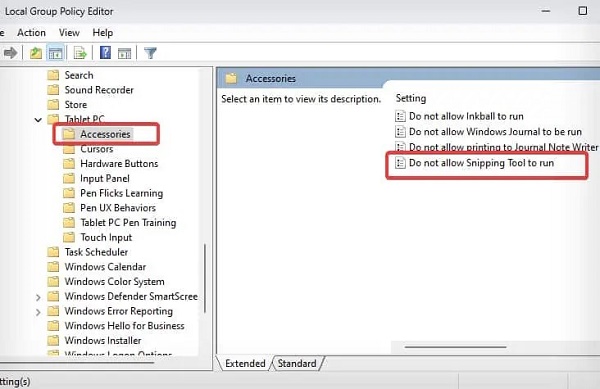
Navigate to the Configuration option > Administrative Templates > Windows Components > Tablet PC, then Accessories.

-
Click on the Do not Allow Snipping tool to run option (last in the list).

-
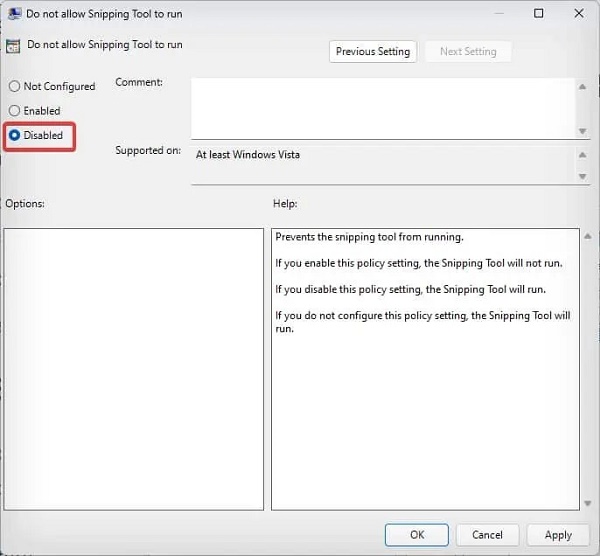
Ensure it's disabled, then click OK, and restart your computer to apply the changes.

Way 4: Reset Snip & Sketch
Sometimes, a bug or glitch in the Snip & Sketch settings can disable its functionality or modify the settings, leading to the “shift windows is not working” issue. Resetting the snip & sketch can eliminate the bugs or glitches and give it a fresh start.
Consider resetting the snip & sketch to fix the “shift windows s not working” by following the steps below:
- Go to the Windows settings by pressing Windows key + I, then select Apps.
-
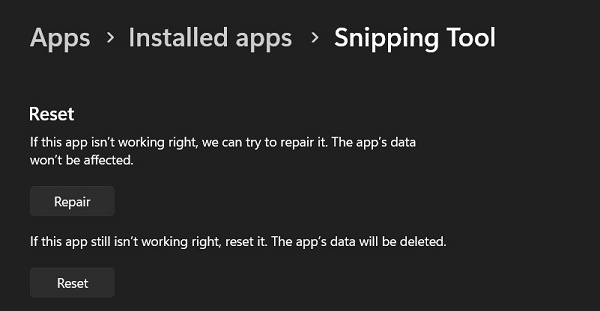
Select the Apps & features from the left side, then scroll down on the right side to find Snip & Sketch app. Click on it, and select the Advanced option.

-
Click the Reset option, and follow the onscreen instructions to complete the process.

Way 5: Reinstall Snip & Sketch
The “Windows Shift S does not work” issue can occur due to the Snip & Sketch corruption caused by a virus attack or a malware. In this case, you would need to uninstall the Snip & Sketch program, and install it again on the computer.
Following are the steps to reinstall the Snip & Sketch on your Windows computer:
- Go to the Start Menu, and search for Snip & Sketch. Right click on it, and select the Uninstall button to remove it from the computer.
- Once done, go to the Microsoft Store, search for Snip & Sketch using the search bar, and reinstall it.
Now restart your computer to apply the changes, then press the Windows + Shift + S shortcut key to take a screenshot. The OS might have a severe problem if it still doesn't work. Try updating the Windows or reverting to the previous version to fix the problem.
Part 3: FAQ
Q 1: Why is my Windows Shift S shortcut not working?
The Windows Shift S shortcut can stop working due to various reasons. Ranging from the shortcut conflict with the Windows OS, the shortcut key isn’t registering due to the problem with the keyboard, or Snip & Sketch tool isn't responding due to data corruption or bugs
Q 2: How do I activate Win Shift S?
Generally, the Window Shift S shortcut key to capture the screenshot is enabled by default. However, it can stop working when the clipboard history is disabled. Go to the Settings app in Windows, select Clipboard, and turn on the switch for it to activate the Win Shift S.
Q 3: Where do Shift Windows s screenshots go?
When you press the combination Windows + Shift + S key of the shortcut and capture a screenshot, it goes to the clipboard history. Then, you can press the Ctrl + V shortcut key to paste the screenshot. That’s why the Windows + Shift + S shortcut key won’t work if the clipboard is disabled.
Concluding Thoughts
Taking a screenshot is a great hassle when the Windows + Shift + S doesn’t respond, as it’s the fastest and easiest way to capture a screenshot on a PC. This guide provides the ultimate solutions to fix the “Windows Shift S not working” issue. If you’ve lost or accidentally deleted the photos on Windows, refer to the 4DDiG Windows Data Recovery tool to recover them quickly with a one-click process.



 ChatGPT
 Perplexity
 Google AI Mode
 Grok
Grok


