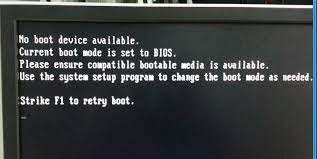
How to Install Windows 11 without TPM 2.0 and Secure Boot [100% Work]
Are you looking to learn how to install Windows 11 without TPM 2.0 and secure boot? Don't worry as you are not alone in this situation. Many users face this same problem, wondering if there's a way to bypass these annoying prerequisites.
Fortunately, this guide is here to help you. In this article, we will show you a reliable method to install Windows 11 without TPM 2.0 and secure boot.
So, let's get started.
Part 1: Overview of TPM and Secure Boot
Before getting straight to the method to install Win 11 without TPM and secure boot, it's essential to first understand what are TPM and Secure Boot.
Well, TPM, or Trusted Platform Module, is a hardware-based security feature that ensures the integrity of your system. It provides a secure area within the computer's motherboard to store sensitive information, such as encryption keys and digital certificates.
TPM plays a crucial role in safeguarding against various security threats, including unauthorized access and tampering.
Secure Boot, on the other hand, is a feature designed to prevent malicious software from loading during the boot process. It ensures that only trusted software components, such as operating system loaders and firmware, are allowed to run, thereby enhancing the overall security of the system.
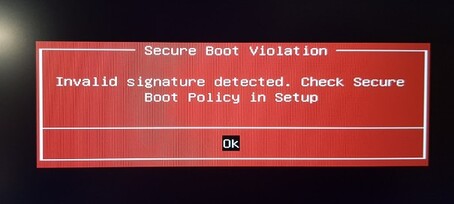
Sometimes when you try to install Windows 11 on your computer, you see errors like "TPM 2.0 must be supported and enabled on this PC" or "This PC must support Secure Boot."
This is because TPM and Secure Boot trigger and prevent you from initiating installation as they take it as a threat to the overall system.
Now you know the basics of TPM and Secure Boot system, it's time to learn to install Windows 11 without Secure Boot and TPM.
Part 2: Can I Get Windows 11 without TPM or Secure Boot?
The short answer? Yes, you can install Windows 11 without TPM 2.0 and Secure Boot, but it requires a workaround. Microsoft initially announced these requirements as part of their hardware specifications for Windows 11, aiming to enhance system security and performance.
Here are the basic requirements of Windows 11:
- 1 GHz or faster core processor
- Secure Boot
- Trusted Platform Module (TPM) 2.0
- 4 GB RAM or higher
- 64 GB storage space or larger
- Internet connectivity and more
However, these requirements left many users with older hardware or custom-built systems unable to upgrade.
Despite the initial stance from Microsoft, there are methods available to bypass these requirements and still install Windows 11. These methods involve using third-party tools and modifying installation files to trick the system into accepting the installation without TPM 2.0 and Secure Boot.
Let's discuss one of the most reliable methods to install Windows 11 bypass TPM and Secure Boot in detail.
Part 3: How to Install Windows 11 without TPM 2.0 and Secure Boot?
Here are simple and easy-to-follow steps with pictures to upgrade to Windows 11 without TPM and secure boot:
Step 1. Create a Windows 11 Bootable USB
First of all, you will have to create a Windows 11 Bootable USB. For that, you will need a reliable media creation tool like 4DDiG Partition Manager.
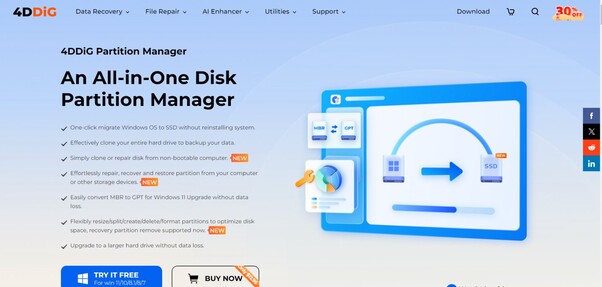
The 4DDiG Partition Manager is a versatile tool designed to streamline disk management and system migration tasks on Windows systems. Its standout feature, the creation of Bootable WinPE Media, allows users to prepare a Windows 11 bootable USB drive with ease, facilitating system repairs, upgrades, or installations without the need for an operating system.
Here's how to use 4DDiG Partition Manager to Create a Windows 11 Bootable USB:
-
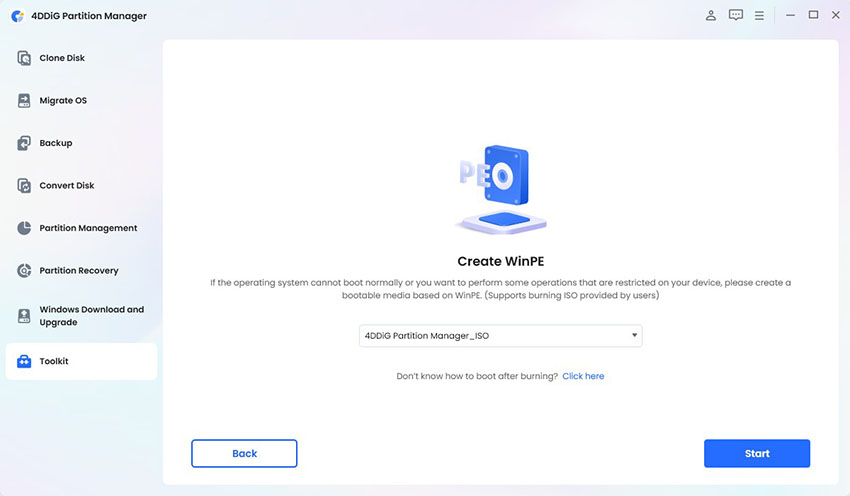
Install and launch 4DDiG Partition Manager on your computer and insert a USB. Now go to Toolkit options and hit the Create WinPE button.
FREE DOWNLOADSecure Download

-
Here you will have to select a way to create the WinPE bootable media based on your needs and then hit the Start button.

-
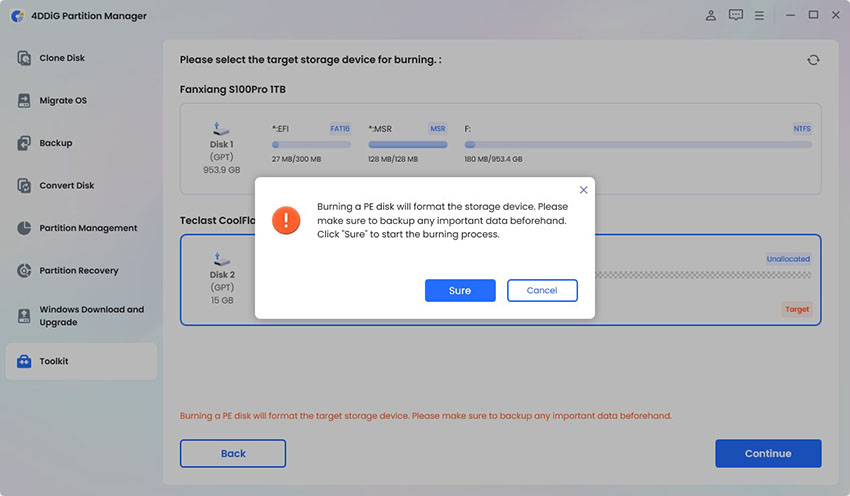
Now a pop-up warning message will appear. Read it carefully and hit the Sure button to continue.

-
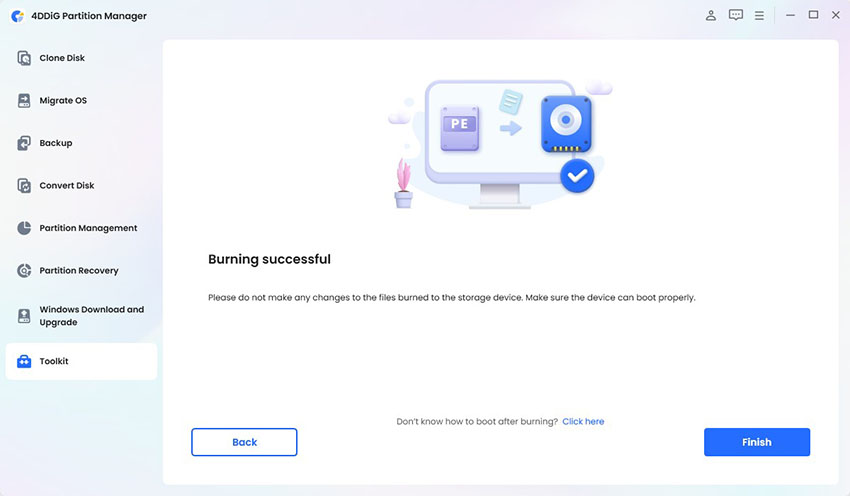
The bootable disk creation process will be started and you will have to wait. Once the process is completed, hit the Finish button.

Step 2. Boot Your PC from the Windows 11 Bootable USB
- Insert the Windows 11 bootable USB drive into your computer.
- Now hold down the Shift key and click Restart.
-
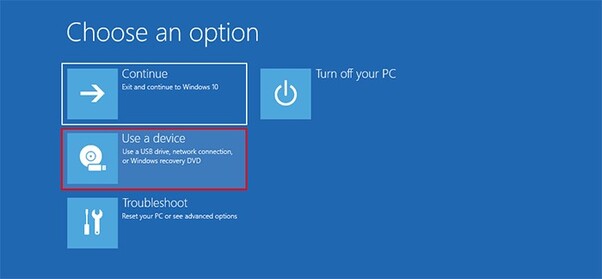
Your computer will restart and bring you to the "Choose an option" screen. Select Use a Device.

- Choose your USB flash drive from the list, and your computer will boot from the Windows 11 USB drive.
Step 3. Initialize Windows 11 Setup
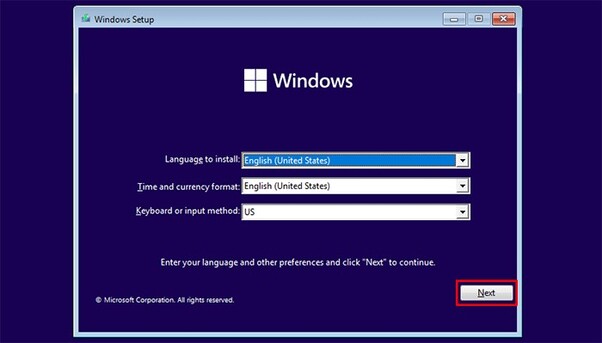
- Once your computer boots from the USB drive, the Windows Setup screen will appear.
-
Choose your preferred language and other options accordingly, then click Next to proceed.

- Click "Install Now" to start the Windows 11 Setup process.
-
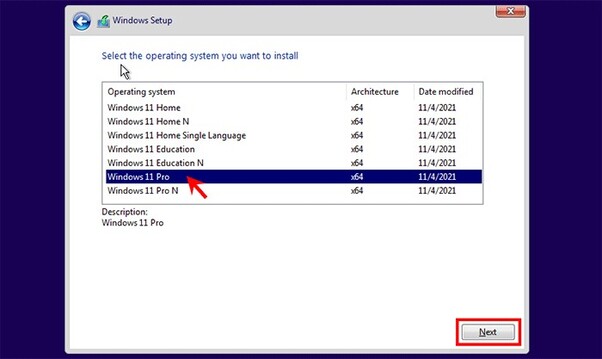
Select the edition of Windows 11 you wish to install (e.g., Windows 11 Pro), then click Next.

Step 4. Bypass TPM and Secure Boot checks
-
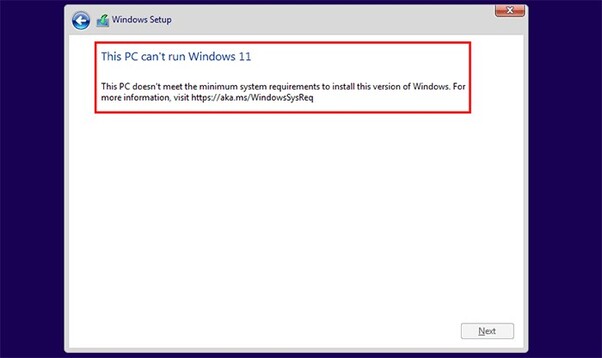
After selecting the edition of Windows 11, you will encounter the message "This PC can't run Windows 11" due to the absence of TPM 2.0 and Secure Boot.

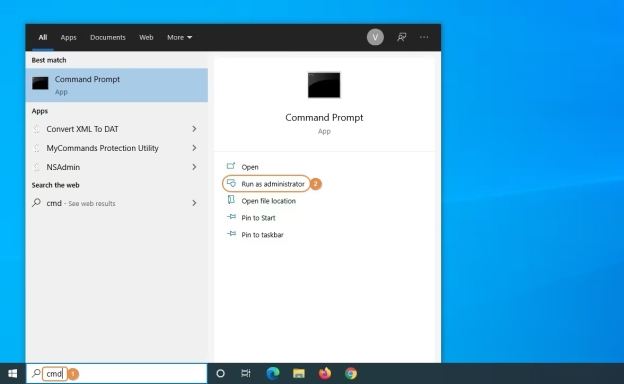
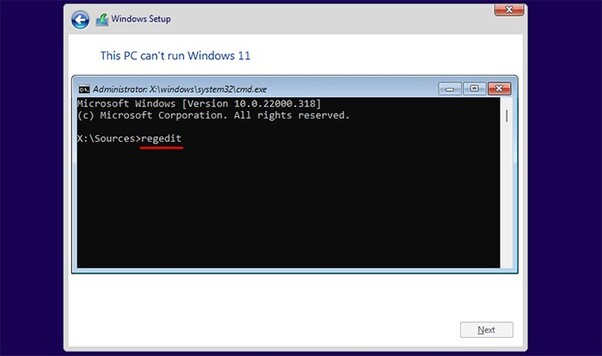
- Press Shift + F10 to open a Command Prompt window.
-
Type "regedit" and hit Enter to launch the Registry Editor.

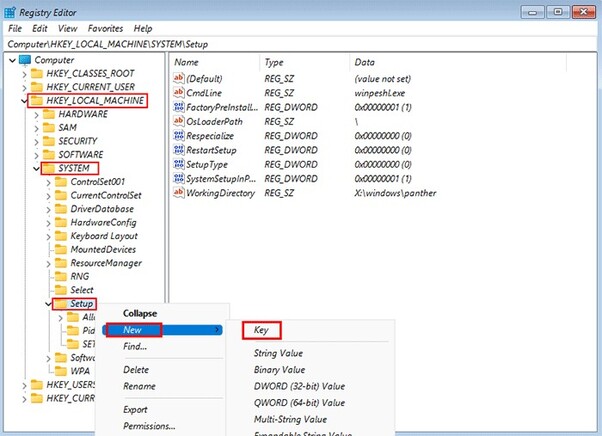
- Go to the key HKEY_LOCAL_MACHINE > SYSTEM > Setup.
-
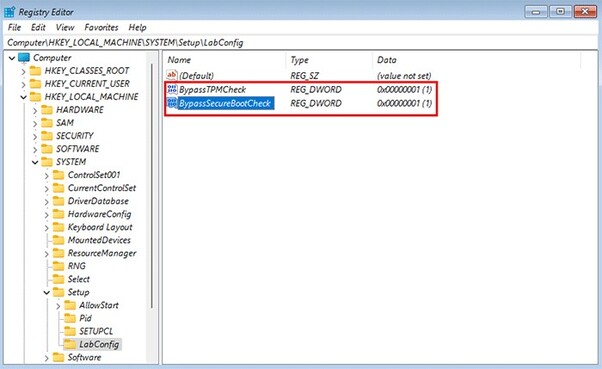
Right-click the Setup key and select New > Key to create a new subkey named "LabConfig."

-
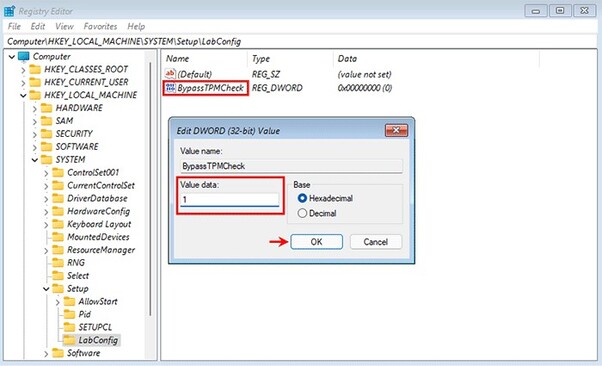
Right-click the LabConfig key, select New > DWORD (32-bit) Value, and name it "BypassTPMCheck." Set its value data to 1.

-
Create another DWORD value named "BypassSecureBootCheck" under the LabConfig key and set its value data to 1 as well.

- Close the Registry Editor and Command Prompt window to return to the Windows Setup screen.
Step 5. Install Windows 11 without TPM 2.0 and Secure Boot
-
Now you will be back on the Windows Setup screen. Now select the Windows 11 edition you wish to install and click Next.

-
Here you will have to follow the on-screen instructions and let Windows 11 install without TPM 2.0 and Secure Boot.

After a few minutes, you will arrive at the Windows 11 desktop, indicating a successful installation without TPM 2.0 and Secure Boot.
Conclusion
So that's how you can install Windows 11 without TPM 2.0 and secure boot. By following the steps given above, you can bypass the hardware requirements and unlock the full potential of your system.
Tools like the 4DDiG Partition Manager made the process easy, allowing you to create a bootable USB drive without hassle.
If you need help with disk management or system migration in the future, remember that 4DDiG Partition Manager is a reliable solution.
Secure Download
💡 Summarize with AI:
You May Also Like
- Home >>
- Windows Fix >>
- How to Install Windows 11 without TPM 2.0 and Secure Boot [100% Work]


 ChatGPT
 Perplexity
 Google AI Mode
 Grok
Grok

