How to Downgrade Windows 11 to 10 without Losing Data?
How to downgrade Windows 11 to 10 without losing data? Backup your data and OS with 4DDiG Partition Manager before downgrading.
Switching to a new operating system can be thrilling, but occasionally, it cannot live up to your expectations or integrate seamlessly with your current hardware and software. If you've upgraded to Windows 11 but now looking at how to downgrade Windows 11 to 10 without losing data , you've come to the right place. Downgrading from Windows 11 to Windows 10 is relatively simple and could help you regain familiarity and compatibility with your old configuration.
This guide will explore the steps and considerations necessary to safely and effectively perform this downgrade, allowing you to preserve your files and applications while transitioning back to Windows 10. Before you explore how to downgrade from Windows 11 to Windows 10, it's essential to back up your data to ensure that your valuable information is recovered.
Part 1: Can You Downgrade from Windows 11 to 10?
You can downgrade from Windows 11 to Windows 10, but it doesn't mean clicking a single button. Although Microsoft offers a rollback option for a short period after upgrading, it is not a long-term fix.
There are two different scenarios for downgrading Windows 11 to Windows 10, depending on the length of the upgrade. The first scenario is when you want to go back to your Windows 10 system within 10 days of upgrading to Windows 11. The other is go back to Windows 10 after 10 days.
Therefore, follow the guide below that explains how to downgrade Windows 11 to Windows 10 (within 10 days or after 10 days). Let’s get started!
Part 2: How to Downgrade from Windows 11 to Windows 10? (Within 10 Days)
It is possible to downgrade from Windows 11 to Windows 10 within the 10-day rollback period, but it's crucial to move quickly because Microsoft only provides this choice for a short time following the update. Here is a step-by-step guide on how to downgrade Windows 11 to 10 without losing data within ten days if you find that it is not fulfilling your expectations or generating compatibility issues.
Before starting:
-
Backup Your Data: This step is essential to keep all critical data and settings when you downgrade. You can use a professional data backup tool, like 4DDiG Partition Manager
-
Gather Necessary Information: A bootable USB device or DVD and your Windows 10 product key should be prepared. These are required to reinstall Windows 10.
1. Access the Recovery Settings
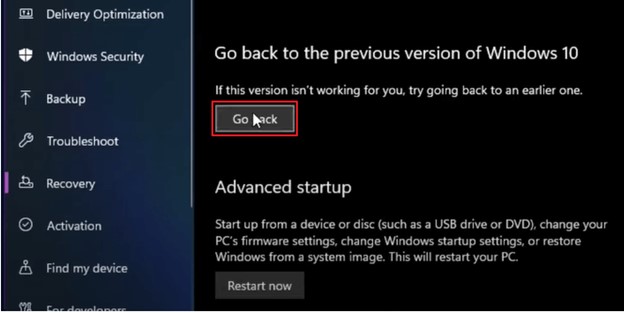
Press the Windows + I keys simultaneously to open the Settings app. Now, you need to select the system from the left and then choose Recovery from the right side. Find the Previous version of Windows under Recovery options and click Go back.
2. Provide Feedback and Reason for Downgrade
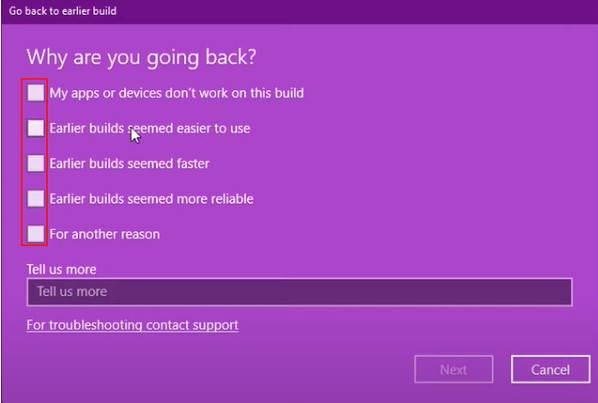
Microsoft will ask you for a reason for the downgrade. Choose a relevant option and provide feedback if necessary. After that, click "Next."
3. Follow on Screen Instructions
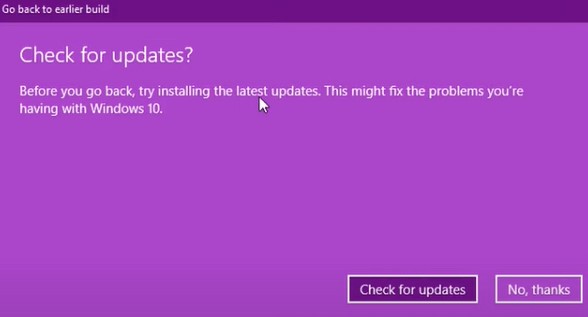
Click "No, thanks" when asked to check for updates instead of rolling back.
4. Start the Downgrade Process
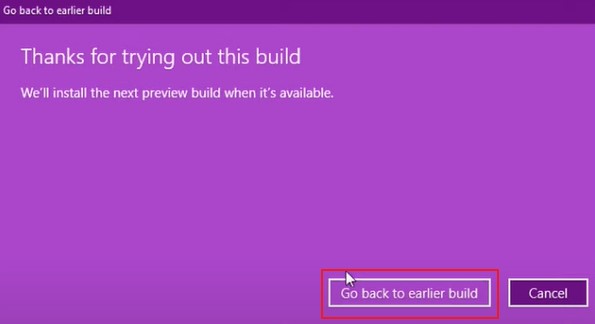
Now, the window pops up that says, "Go Back To Earlier Build," then click on it and start the downgrade process. This process may take some time, so be patient and let it complete.
5. Restore Your Data
You can begin recovering your data once Windows 10 has been successfully installed. You can transfer your files, settings, and apps to your computer using the backup you made earlier. You can also reinstall any programs or apps not included in the first installation of Windows 10.
Therefore, you must remember there is a time limit to downgrade from Windows 11 to Windows 10, so you must decide quickly if you want to do so. The previously mentioned steps also cover the procedure during the Microsoft-provided 10-day go-back window. If you miss this chance, you need to learn the following method on how to go back to Windows 10 after 10 days.
Part 3: How to Go Back to Windows 10 after 10 Days?
Backup Data, Including System before Downgrading
It's worth noting that rolling back Windows 10 after the 10-day period may result in data loss, and it's always recommended to back up your important data, including operating system regularly to avoid such situations.
One such tool that can help you efficiently backup your data and manage your partitions is 4DDiG Partition Manager.
Here are some key features of this powerful tool:
- Disk Cloning: The software offers a disk cloning feature that allows you to create a duplicate disk copy, making it an excellent tool for creating backups or migrating data to a new drive.
- Partition Management: You can quickly create new partitions, resize, extend, split, delete or format existing ones without losing any data with the help of 4DDiG Partition Manager.
- System Migration: This tool can help you migrate Windows OS to SSD/HDD without reinstalling system.
- Data Protection: 4DDiG Partition Manager ensures data safety during partition operations. It employs advanced algorithms to prevent data loss or corruption during tasks.
- Simple user Interface: Beginners and professionals can utilize the software because of its intuitive interface. It streamlines management by providing a visual representation of your disk and partitions.
- Broad compatibility: You can use the software on various computers because it is compatible with several Windows operating systems, including 11, 10, 8.1, 8, and 7.
Follow the below steps that help how to use 4DDiG Partition Manager to clone a disk (backup your data):
-
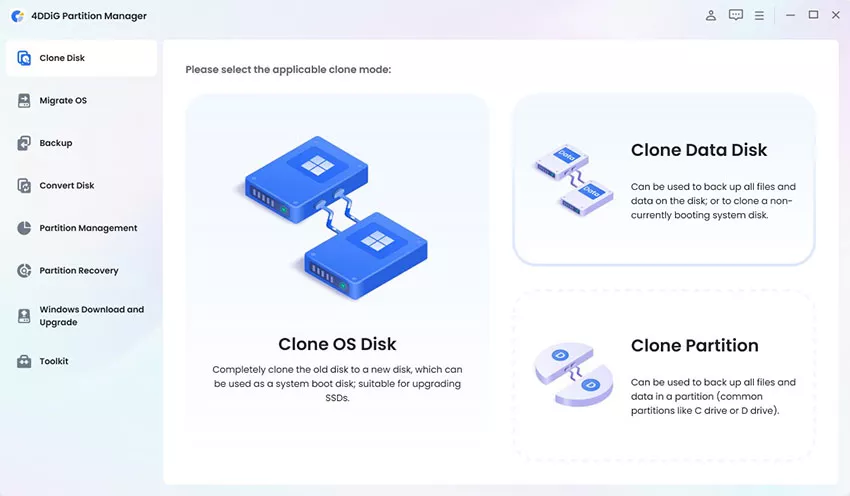
Attach an external disk to it after downloading and installing 4DDiG Partition Manager on your computer. Then run the program and choose "Clone Disk."
FREE DOWNLOADSecure Download

-
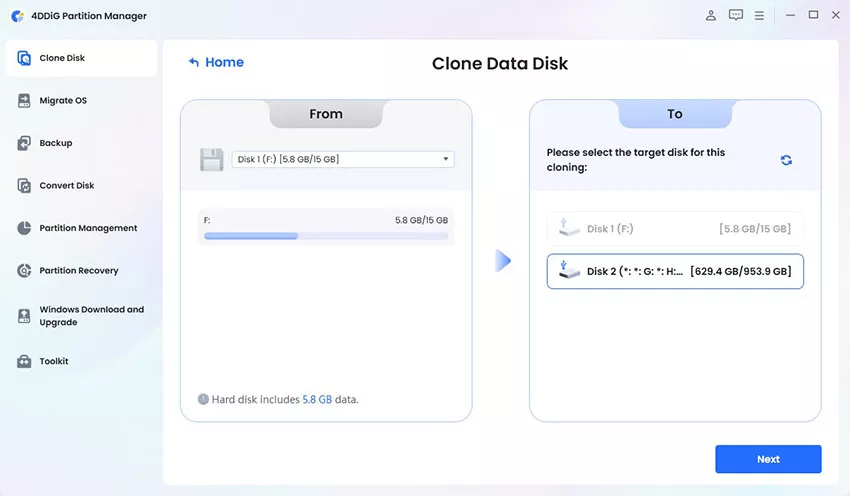
Click the Continue button after choosing a target disk to receive data cloned from the source disk.

-
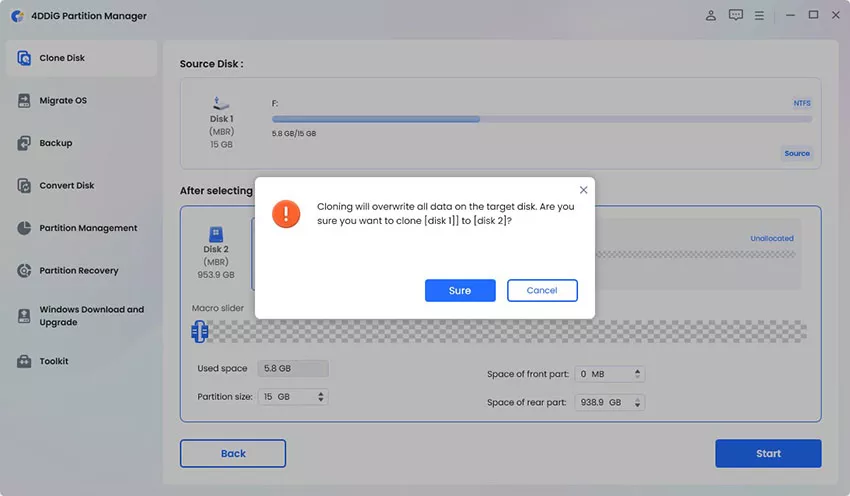
Please be aware that when you click the Sure button after ensuring everything is accurate, cloning will wipe all the data on the target disk.

-
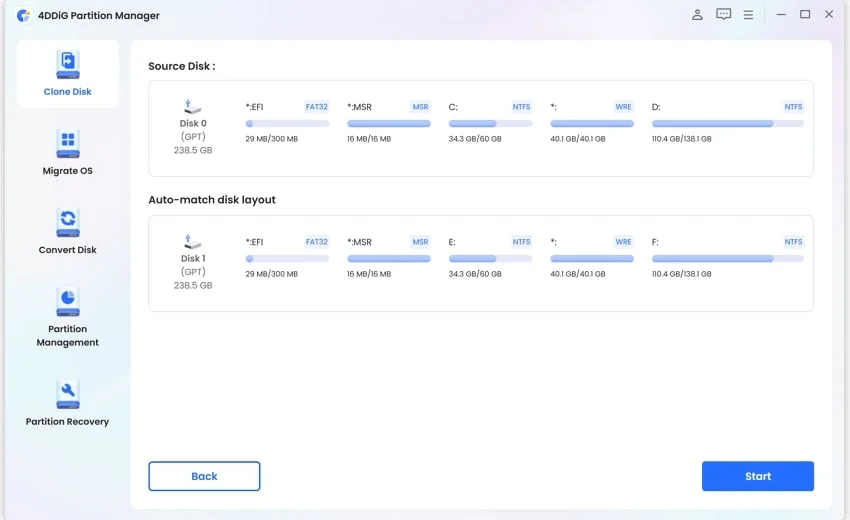
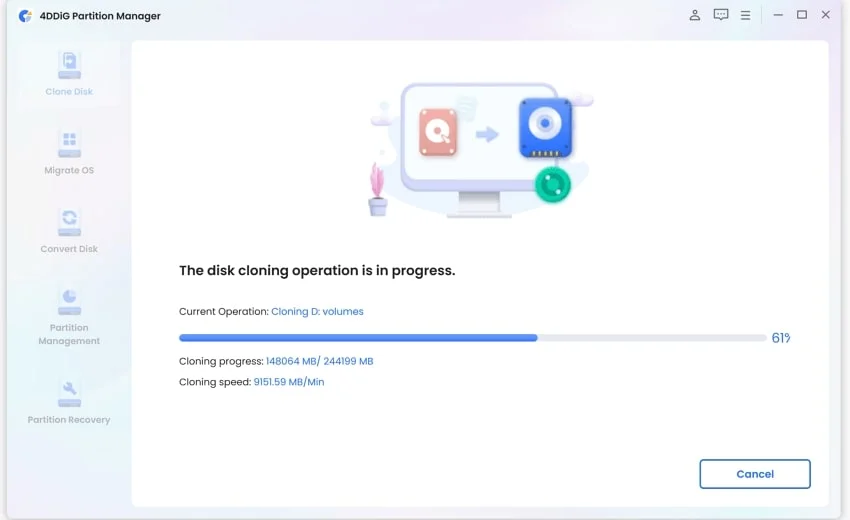
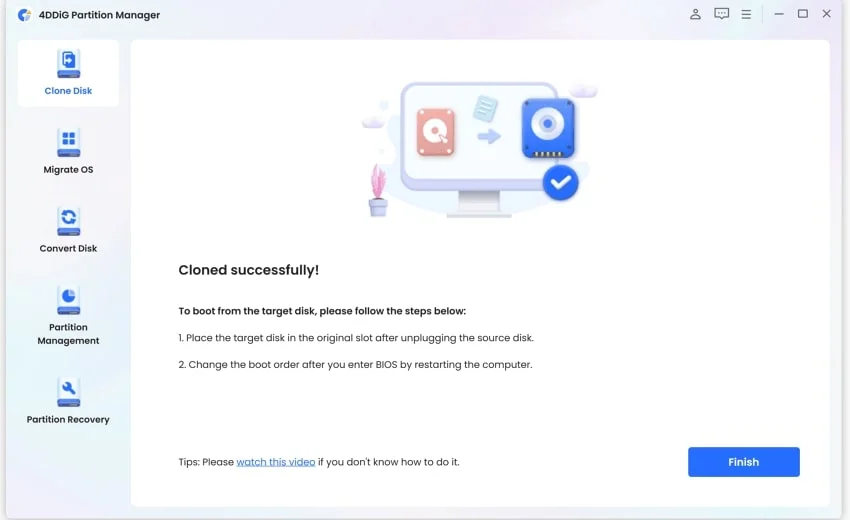
You will then see a preview screen that displays the cloned disk's effect. Click the Start button to begin the cloning process after ensuring the preview is appropriate.

-
Please be patient and refrain from doing additional actions or interrupting the current procedure.


How to Go Back to Windows 10 After 10 Days
Here are the steps you need to follow that helps how to go back to Windows 10 after 10 days:
-
Navigate to the Microsoft website's Windows 10 download page. Click the “Download tool Now” link under the Create Windows 10 installation media section.

- When finished, double-click the downloaded file to open it. Select “Yes” if you see the "Do you want to allow this app to make changes to your device" pop-up window.
- The Windows 10 Installation Setup will now display. After a few seconds, click Accept to confirm your agreement on the terms and conditions.
-
The "Getting a Few Things Ready" screen will appear briefly. Select Upgrade this PC Now, then click Next on the following screen.

- When the download is finished, go to the next screen and click Next > Accept.
-
Make sure to pick “Nothing" , then click Next again.

-
You'll be taken to the "Ready to Install" page now. To begin the installation procedure, click “Install”.

Hate Windows 11 and Want to Downgrade Windows 11 to 10 ? Read This!
Conclusion
In conclusion, we have explained how to downgrade from Windows 11 to Windows 10 without losing data after 10 days or within 10 days. This process may require effort, but it is possible with the right resources and steps. Please always remember that data backup is crucial to prevent data loss during the downgrade. You can use 4DDiG Partition Manager to easily backup your data and operating system within a few minutes. So just give it a try and enjoy your Windows 10 system again!


 ChatGPT
 Perplexity
 Google AI Mode
 Grok
Grok

