How to Access Asus Boot Menu with Asus Boot Menu Key Easily
Are you stuck trying to figure out how to access the Asus boot menu key? Don't worry, you're not alone. Many users face this situation when they need to boot from a different device or troubleshoot their Asus computer.
But fear not as in this article, we have got you covered. We will walk you through the steps to access the Asus boot menu with ease, so you can get back to what you need to do in no time.
Whether you are a tech beginner or just need a quick refresher, understanding the Asus boot menu key and how to use it effectively will be very helpful for you.
So, let's get started.
Part 1: What Is Boot Menu?
Before getting straight to how to access boot menu for Asus, it's essential to first understand what is boot menu.
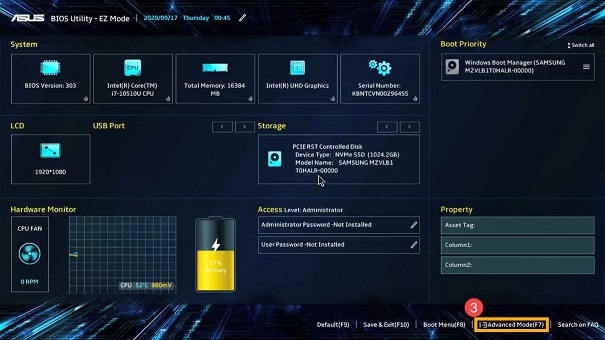
Well, the boot menu is like the gateway to your computer's soul. It's the place where you can tell your system which device to boot from when you turn it on.
Whether you need to boot from a USB drive, a CD/DVD, or even a network connection, the boot menu is where you make that choice.
Now let's discuss how to access Asus boot menu in detail.
Part 2: Asus Boot Menu Key
As you may know, there are different Asus boot menu keys according to the make and model of your laptop. So you will have to press the exact key in order to access the Asus boot menu.
Here are the different Asus boot menu keys for the different Asus laptop models:
- Type
- Models
- BOOT Key
- BIOS Key
- Desktop
- NONE
- F8
- F9
- Laptop
- VivoBook f200ca, f202e, q200e, s200e, s400ca, s500ca, u38n, v500ca, v550ca, v551, x200ca, x202e, x550ca, z202e
- Esc
- Delete
- Laptop
- N550JV, N750JV, N550LF, Rog g750jh, Rog g750jw, Rog g750jx
- Esc
- F2
- Laptop
- Zenbook Infinity ux301, Infinity ux301la, Prime ux31a, Prime ux32vd, R509C, Taichi 21, Touch u500vz, Transformer Book TX300
- Esc
- F2
- Notebook
- k25f, k35e, k34u, k35u, k43u, k46cb, k52f, k53e, k55a, k60ij, k70ab, k72f, k73e, k73s, k84l, k93sm, k93sv, k95vb, k501, k601, R503C, x32a, x35u, x54c, x61g, x64c, x64v, x75a, x83v, x83vb, x90, x93sv, x95gl, x101ch, x102ba, x200ca, x202e, x301a, x401a, x401u, x501a, x502c, x750ja
- F8
- DEL
Part 3: How to Access Boot Menu on Asus Laptop?
Here's how to access Asus boot menu:
-
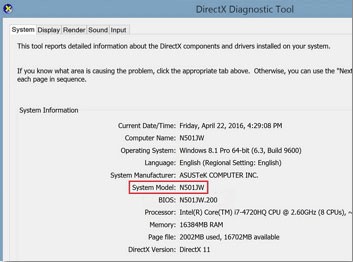
First of all, press the Windows button and type dxdiag in the search box and launch the DirectX Diagnostic Tool. Inside this tool, you can check the model of your Asus laptop.

- Now, turn Off your Asus laptop and press the power button.
- Once you see the Asus logo, consecutively press the designated Asus boot menu key according to the table given above.
- After a few seconds, you will find yourself in the Asus boot menu.
Part 4: How to Boot an Asus laptop from USB without Configuring BIOS?
When it comes to booting your Asus laptop from a USB flash drive, the traditional route involves tweaking BIOS settings to prioritize the USB drive in the boot menu.
This method is often used for utilizing a recovery USB flash drive to address hardware or file-related issues effectively.
However, there's an alternative way that doesn't require going into BIOS configurations. By using a tool like 4DDiG Partition Manager, you can effortlessly manage your Asus HDD and SSD without the hassle of BIOS adjustments.
With its WinPE bootable media creation, 4DDiG Partition Manager allows you to boot an Asus laptop from USB without configuring BIOS settings.
Besides that, there are some other important features of 4DDiG Partition Manager that you must know:
Key Features:
- Create a bootable WinPE Media for versatile usage scenarios.
- Seamlessly transfer your operating system to a new disk.
- Effortlessly copy disks with minimal hassle.
- Recover lost partitions with simplicity and efficiency.
- User-friendly interface for smooth navigation.
How to Use 4DDiG Partition Manager to Create Bootable Flash Drive?
Here are the simple and easy to follow steps that will help you:
-
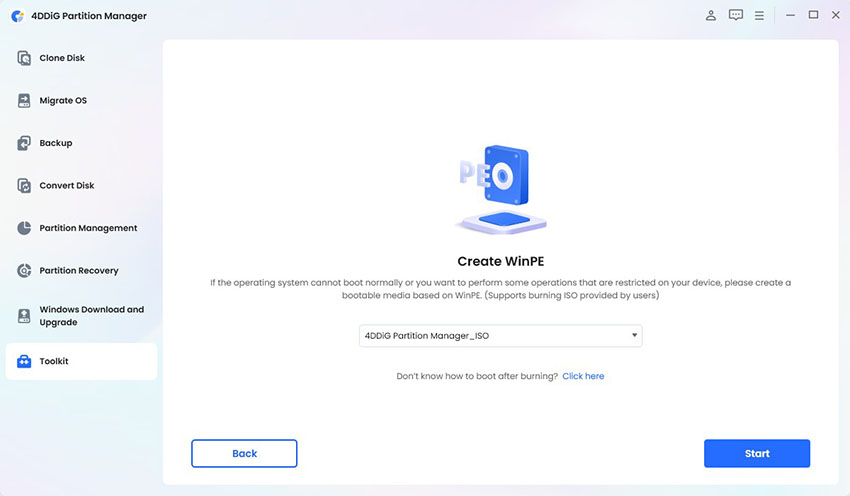
Download and install 4DDiG Partition Manager on your computer and launch it. Now connect your USB Flash Drive to computer and press the Toolkit button. After that, go to Create WinPE option.
FREE DOWNLOADSecure Download

-
Now you will have to select the ISO file to create the WinPE bootable media based on your needs. After that, click on "Start" button to proceed.

-
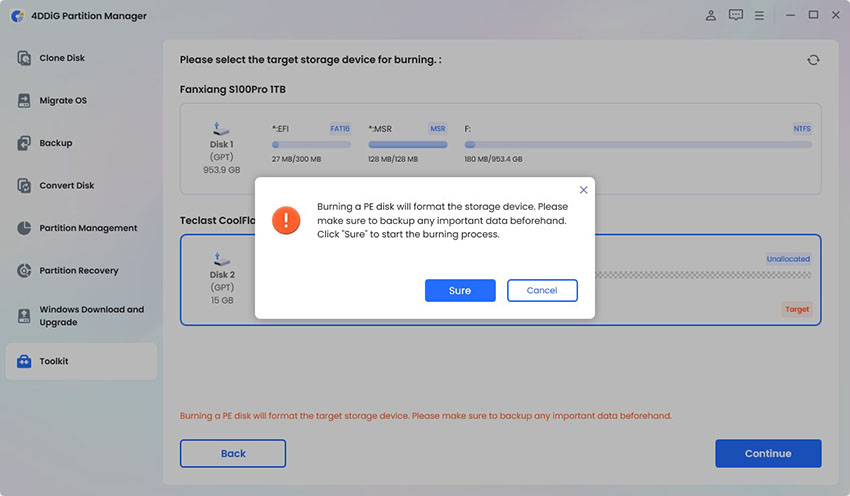
Once you select the connected USB as the target disk, you will have to hit the Continue button and a pop-up message will appear to remind you that the USB flash drive will be formatted. So confirm that you have backed up the important data inside, and then click the "Sure" button.

-
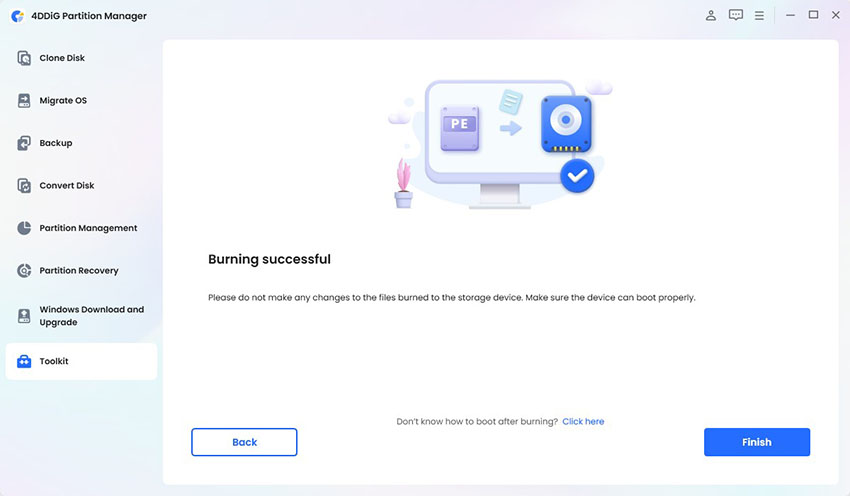
The bootable USB creation process will be started now. It may take a few minutes to create a WinPE bootable USB drive, so be patient. Once it is complete, click "Finish".

Get 1 Month License Instantly!
In order to use this bootable USB on a new computer, first you will have to restart that computer and press F2/F8/Del key to enter BIOS, and set this bootable Flash Drive as the first boot disk.
Final Words
In conclusion, knowing how to access boot menu on Asus laptop is really important. Whether you are new to tech stuff or you have been around computers for a while, understanding how to access Asus boot menu key can save you a lot of trouble, especially when you need to fix things or start up from a USB.
We have also shown you another way to access boot menu Asus laptop with USB flash drive, using 4DDiG Partition Manager. This handy tool not only helps you make a bootable USB flash drive easily but also does other useful stuff like moving your operating system to a new disk or recovering lost partitions.
We hope this guide has helped you with all this and now you are able to make changes to BIOS settings according to your needs.
Secure Download
💡 Summarize with AI:
You May Also Like
- Home >>
- Windows Fix >>
- How to Access Asus Boot Menu with Asus Boot Menu Key Easily


 ChatGPT
 Perplexity
 Google AI Mode
 Grok
Grok

