How to Change Legacy to UEFI without Reinstalling Windows 10?
How to change Legacy to UEFI without reinstalling Windows 10? Just download 4DDiG Partition Manager to help you do this job!
The transition from legacy BIOS (Basic Input/Output System) to UEFI (Unified Extensible Firmware Interface) has become vital to improving system performance, security, and functionality. UEFI offers advanced features and capabilities, an alternative to the traditional BIOS. However, learning how to change Legacy to UEFI often raises concerns about potential data loss and the need for a complete Windows 10 reinstall. Fortunately, some methods allow users to make this transition seamlessly without the hassle of reinstalling the operating system. This article will explain how to change Legacy to UEFI in Windows 10 to ensure a smooth transition while preserving your data and applications.
Part 1: Can I Change My BIOS from Legacy to UEFI?
Yes, you can switch your BIOS from Legacy to UEFI. The process has multiple steps, but it can be completed without reinstalling Windows 10. During this transition, your current data and apps are preserved, and you can benefit from UEFI's enhanced performance and contemporary features. The key is to proceed methodically; this guide will walk you through the steps required to make the switch successfully.
Part 2: How to Change Legacy to UEFI?
As we all know, UEFI boot has more advantages compared to traditional BIOS boot. Many features offered in UEFI are not supported in traditional BIOS. With the release of Windows 11, UEFI boot mode has become a requirement for computers. To upgrade your system to Windows 11, you need to change the boot mode from Legacy to UEFI. For newer motherboards, UEFI is usually enabled by default, so there is no need to manually change the boot mode. However, for older motherboards, you may need to take some steps to change the boot mode from Legacy to UEFI.
Here's how to do it:
-
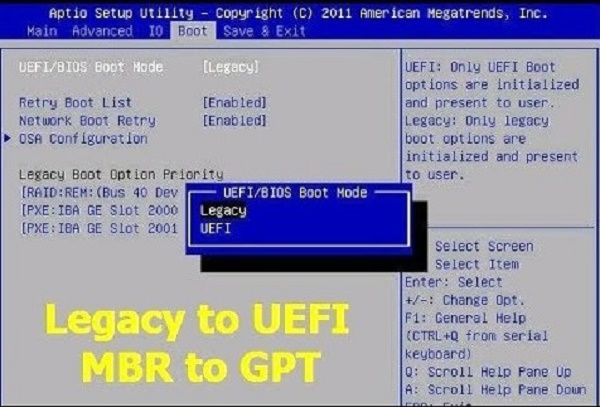
When prompted to enter the BIOS menu, press Del, F2, or another shortcut. From the main BIOS menu screen, select Boot.
Note:
Different computers use different keys to do this. It is usually the Del key or F2 key. Press this key repeatedly immediately after booting up until you see the BIOS/UEFI screen.
-
In the Boot screen, select UEFI/BIOS boot mode, and press Enter. Then the UEFI/BIOS boot mode prompt will appear.

- Use the up and down arrow keys to select Traditional BIOS boot mode or UEFI boot mode, and then press Enter.
- To save the changes and exit the screen, press F10.
Part 3: How to Change Legacy to UEFI without Reinstalling Windows 10?
The traditional conversion method from MBR to GPT typically involves reinstalling the operating system (OS). These users need clarification on preserving their data while transitioning from Legacy to UEFI on Windows 11 or 10. Fortunately, reliable solutions like 4DDiG Partition Manager allow you to convert the disk without deleting partitions or risking data loss. By utilizing this professional and secure tool, users can seamlessly convert MBR to GPT, facilitating the switch to UEFI boot mode without reinstalling Windows or all programs.
Here are the key features of 4DDiG Partition Manager:
- Easy MBR to GPT Conversion: 4DDiG Partition Manager streamlines the complex process of converting a disk from MBR to GPT. This feature mainly benefits users who want a straightforward solution for transitioning to the modern GPT partitioning style.
- Preservation of Data and Partitions: 4DDiG Partition Manager can help to perform MBR to GPT conversion without deleting partitions or compromising existing data.
- Compatibility Across Windows Versions: 4DDiG Partition Manager offers compatibility for various Windows operating systems.
- Time and Effort Savings: 4DDiG Partition Manager can reduce the time and effort traditionally associated with MBR to GPT conversion. By eliminating the need for a complete Windows reinstallation or the reconfiguration of applications, users can experience a quick and efficient transition.
Follow the below steps that can help how to use 4DDiG Partition Manager to Convert MBR to GPT without data loss:
-
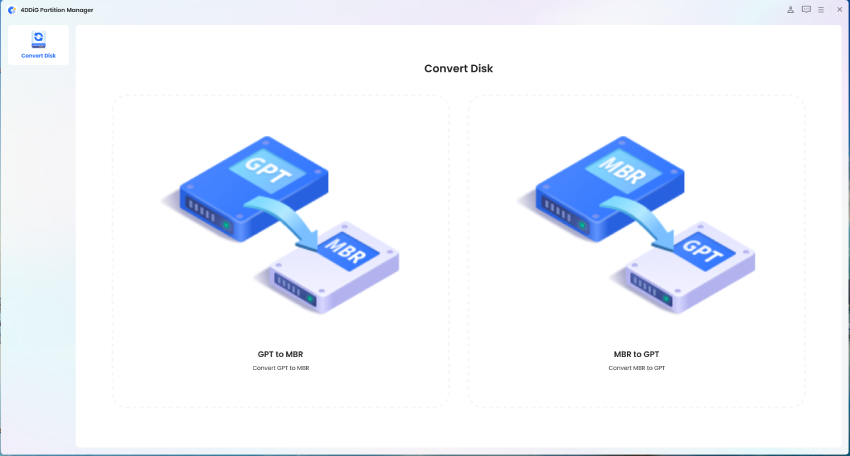
Download and install the 4DDiG Partition Manager on your PC. Next, open this tool, choose "Convert Disk" from the menu on the left, and then click "Convert MBR to GPT" to continue.
FREE DOWNLOADSecure Download

-
After choosing the disk you wish to convert and clicking "Continue," the execution interface will appear.

The program will download the PE component if the selected disk is the system disk. Once the download has been successful, a prompt window will open. Make sure to prevent power outages and save any unsaved files. Click "Sure" after making sure everything is correct. Upon restarting, the computer will automatically boot up into the PE environment.

-
In the PE environment, once the program has launched, choose "Convert MBR to GPT" to continue.

-
After choosing the disk to convert, click "Continue."
-
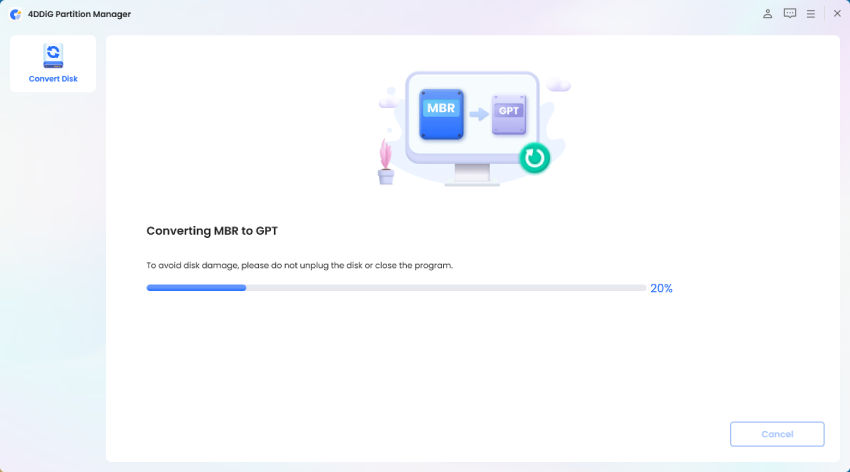
4DDiG Partition Manager is converting MBR to GPT. The number of partitions on the disk determines the speed of disk conversion.

-
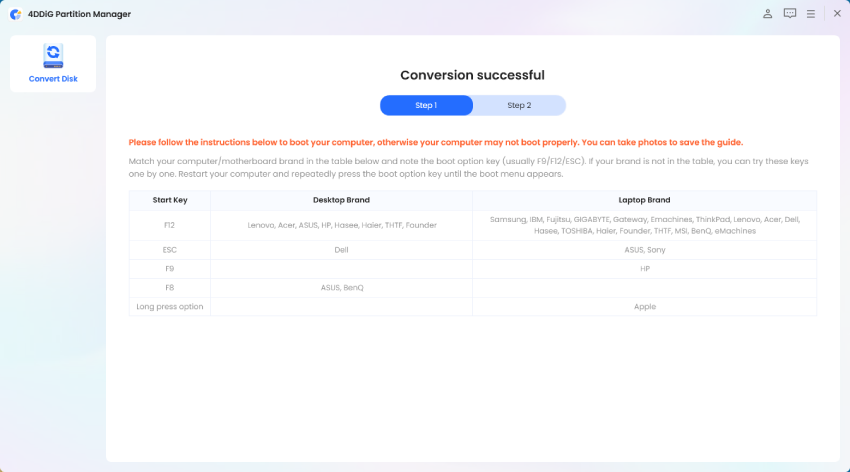
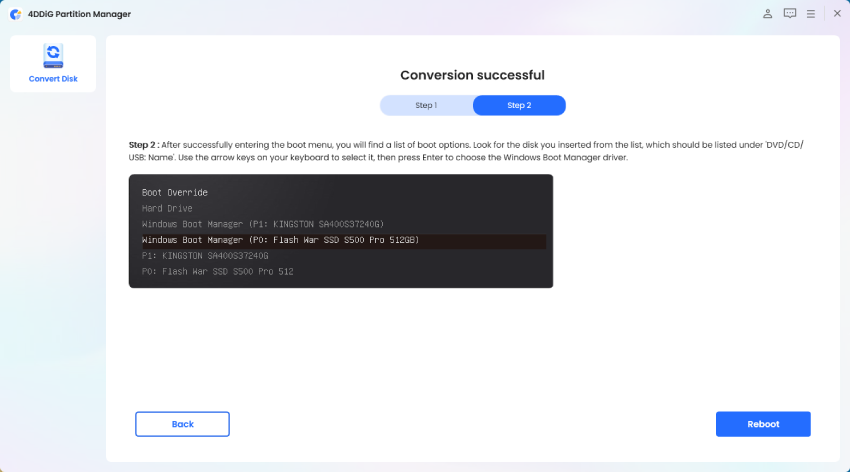
For a successful conversion, you must follow the instructions below to boot your computer; otherwise, your computer may not boot properly.


FAQs about How to Change Legacy to UEFI
1. Is UEFI faster than Legacy?
Yes, UEFI is faster than Legacy BIOS. It provides a more modern and efficient boot process, faster initialization and better hardware support. Unlike Legacy BIOS, which is text-based, UEFI's graphical interface and optimized code contribute to faster startup times. Furthermore, UEFI supports faster data transfers via protocols such as NVMe, contributing to overall system speed. The switch to UEFI is an essential step toward improving system performance and taking advantage of advanced features provided by modern computing architectures.
2. How do I boot into UEFI mode?
To enter UEFI mode, first access your computer's BIOS or UEFI firmware settings during startup. The method varies depending on the manufacturer, but it usually involves pressing a specific key, such as Esc, Del, F2, F10, or F12, as your system boots. Navigate to the boot options or boot order settings once in the BIOS/UEFI menu. Look for a boot mode or boot list order option and select UEFI instead of Legacy/CSM. Save your modifications and exit the BIOS/UEFI. When you restart your system, it should now boot into UEFI mode.
Conclusion
In short, transitioning from Legacy BIOS to UEFI brings numerous advantages in system performance, security, and functionality. The process traditionally posed challenges, often requiring a full OS reinstallation. However, we have explained steps that can help how to change Legacy to UEFI in Windows 10. Indeed, we recommend utilizing efficient solutions like 4DDiG Partition Manager, which has emerged as a valuable tool that allows users to learn how to change Legacy to UEFI without reinstalling Windows 10.
With features like an intuitive interface, data preservation, compatibility across Windows versions, and support for server environments, 4DDiG Partition Manager can be a reliable solution for users seeking a smooth and efficient MBR to GPT conversion without the complexities of a full system reinstall. It's easier than ever to embrace UEFI, permitting users to enjoy the advantages of a contemporary computing environment.
💡 Summarize with AI:
You May Also Like
- Home >>
- Windows Fix >>
- How to Change Legacy to UEFI without Reinstalling Windows 10?


 ChatGPT
 Perplexity
 Google AI Mode
 Grok
Grok

