How to Delete Healthy OEM Partition in Windows 11/10/8/7 [For Beginners]
How to delete healthy OEM partition on your Windows system? Download 4DDiG Partition Manager to help you do this task easily and safely.
Are you stuck with a seemingly unmovable healthy OEM partition on your Windows system, unsure how to delete healthy OEM partition? You are not alone. Many users encounter this problem, scratching their heads over how to reclaim that valuable disk space.
Fear not, as we are here to guide you through the process step by step. In this article, we will tackle the issue head-on, providing you with the know-how to delete that stubborn OEM partition with confidence.
By the time you're done reading, you will have the tools and understanding to reclaim control of your disk space and optimize your Windows system to your liking.
So, let's get started.
Part 1: What is a Healthy OEM Partition?
Before getting straight to how to delete an OEM partition, it's better to first understand what is a healthy OEM partition.
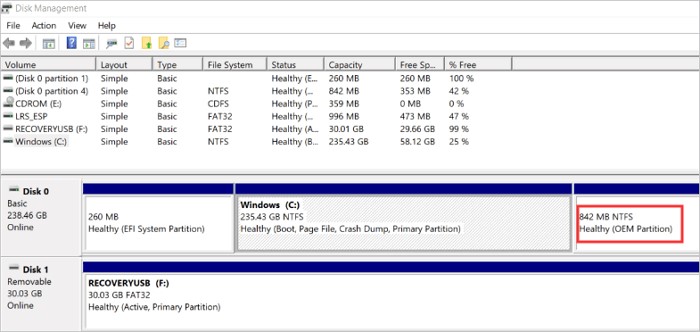
So you are scanning through your disk partitions, and you notice a section labeled "Healthy OEM Partition." You might wonder what it is and why it's there. Well, this partition is essentially a designated area on your hard drive, packed with crucial system files and data installed by the computer manufacturer.
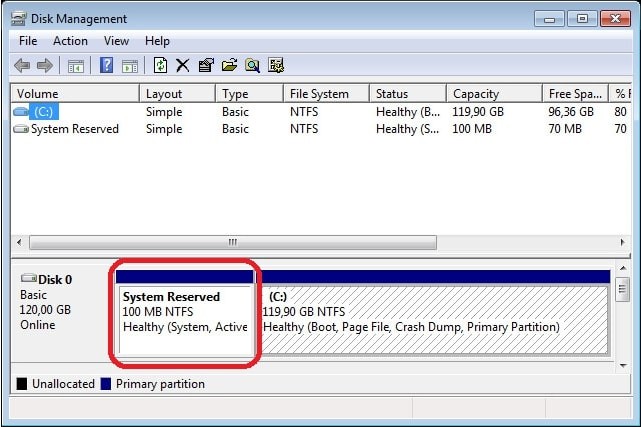
But how does it look? Typically, when you view your disk partitions in Windows Disk Management or similar tools, you'll spot the OEM partition as a small, hidden section with the "Healthy" status tag. It might not be readily accessible or visible through regular file explorer views.
Now, while these OEM partitions are meant to assist in system recovery and maintenance tasks, they can sometimes pose issues.
For example, if you are running out of disk space and need to reclaim some, that OEM partition might seem like a tempting target for deletion.
So now you must be wondering can I delete this partition? Let's discuss this in detail.
Part 2: Can I Delete Healthy OEM Partition?
In short, yes, it is possible to delete the OEM partition. However, before proceeding, it's crucial to consider a few key factors:
- Functionality: OEM partitions often contain essential system files and data necessary for system recovery and maintenance. Deleting this partition could potentially affect the functionality of your computer, especially if you ever need to perform a system recovery or troubleshoot issues.
- Manufacturer Guidelines: Some computer manufacturers may recommend against deleting the OEM partition, as it's an integral part of the system setup they provide. Altering or removing it could void warranty agreements or lead to unsupported system configurations.
- Backup: Before deleting the OEM partition, ensure you have a complete backup of your system, including important files and data. This ensures that if any unforeseen issues arise during or after the deletion process, you can restore your system to its previous state.
Overall, while deleting the OEM partition is technically possible, it's essential to weigh the potential risks and benefits carefully.
Now let's learn how to delete OEM partition.
Part 3: How to Delete Healthy OEM Partition in Windows 11/10/8/7? The Simplest Way
Before we delve into the step-by-step process of deleting the OEM partition on your Windows system, let's introduce you to a reliable tool that can simplify this task. If you're seeking an efficient and user-friendly solution, look no further than 4DDiG Partition Manager.
4DDiG Partition Manager is a comprehensive Windows partition management software designed to streamline disk partitioning tasks with ease. With its intuitive interface and powerful features, it offers a hassle-free solution for managing disk partitions effectively.
Whether you're resizing, creating, or deleting partitions, 4DDiG Partition Manager simplifies the process, making it accessible to users of all levels.
Key Features:
- OEM Partition Deletion: Highlighting one of its key features, 4DDiG Partition Manager enables users to delete OEM partitions within a few clicks, ensuring a straightforward process.
- Simplified Partition Management: With just a few clicks, you can resize, create, format, or delete partitions effortlessly.
- Streamlined User Interface: The intuitive interface makes it easy to navigate and perform partitioning tasks without any technical expertise.
- Partition Recovery: Recover lost or deleted partitions and their data with powerful recovery features, ensuring data integrity and minimizing data loss risks.
- Bootable Media Creation: Create bootable USB drives or CDs/DVDs to perform partition management tasks on systems with boot issues or no operating system installed.
Now let's learn how to delete OEM partition Windows 7/8/10/11 using 4DDiG Partition Manager.
-
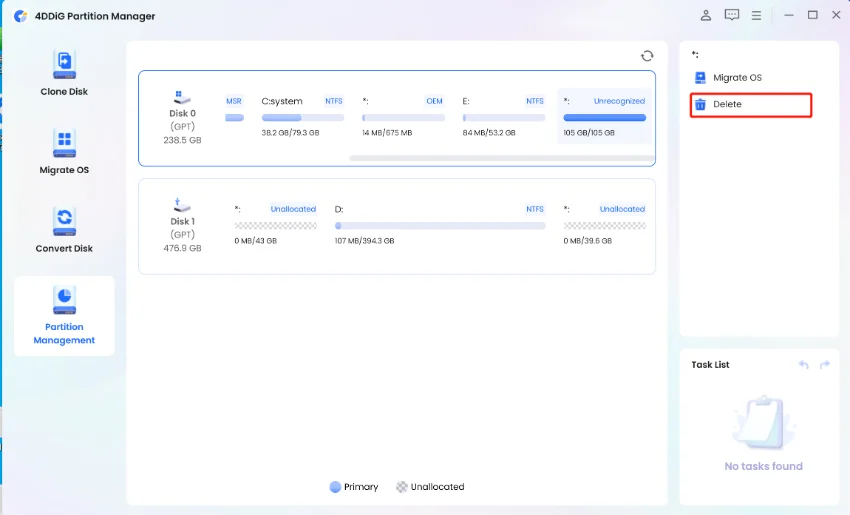
First download and install 4DDiG Partition Manager on your computer and launch it. Now click on Partition Management and right-click on the OEM Partition you want to delete and hit the Delete button.
FREE DOWNLOADSecure Download

-
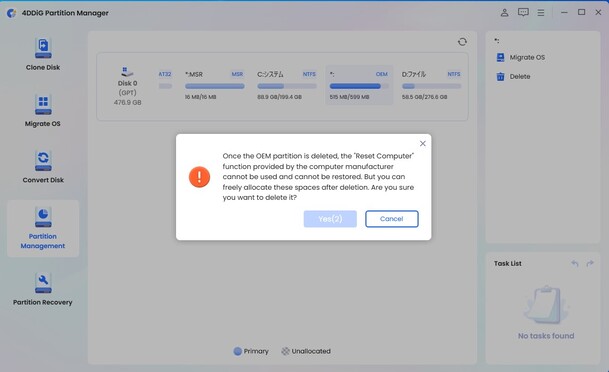
Now a warning message will be shown to you. Read it and hit the Yes button.

-
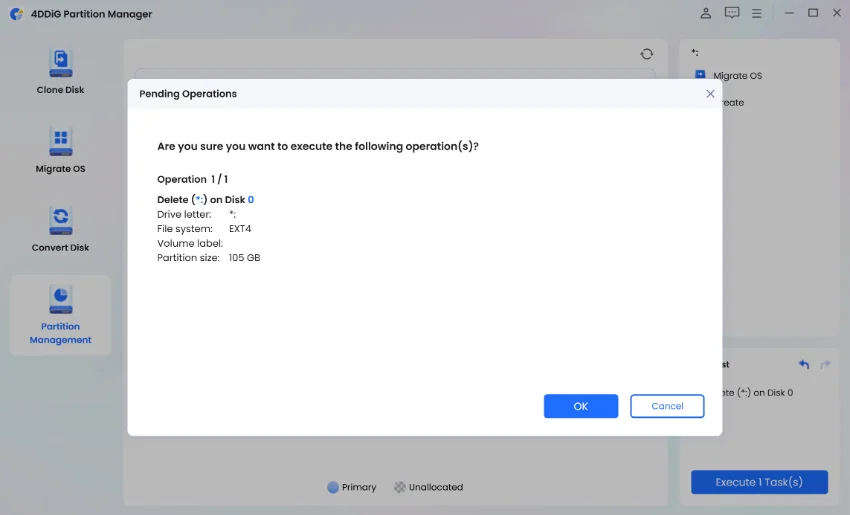
After that, a preview of the operation will be shown to you. So check everything and if it's everything is fine, hit the Execute 1 Task(s) button and then OK button.

-
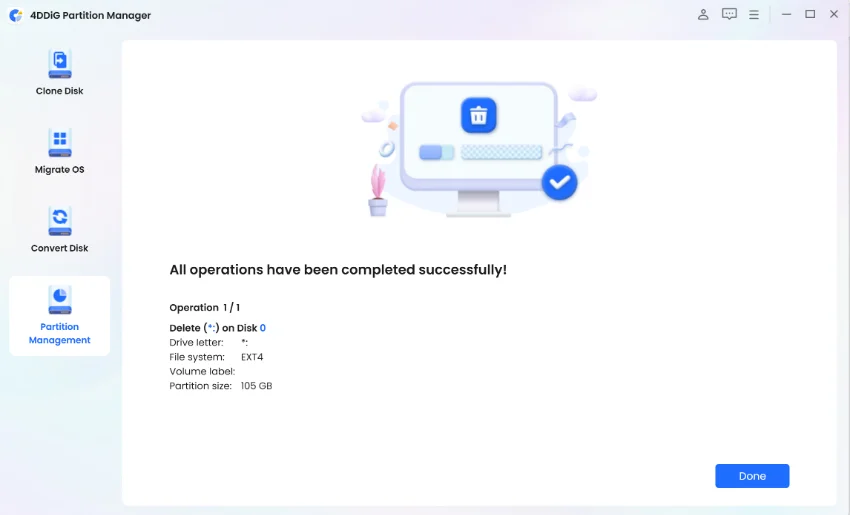
The OEM Partition process will be started and you will have to wait for a few seconds. Once the process is finished, hit the Done button.

So, that's how you can easily delete OEM partition using 4DDiG Partition Manager.
Get 1 Month License Instantly!
Part 4: How to Delete OEM Partition with Diskpart?
While 4DDiG Partition Manager offers a user-friendly solution, you can also delete the OEM partition using Diskpart, a command-line disk partitioning utility in Windows.
Here is how to delete OEM partition with Diskpart:
- Press Win + X keys and select "Command Prompt (Admin)" from the menu.
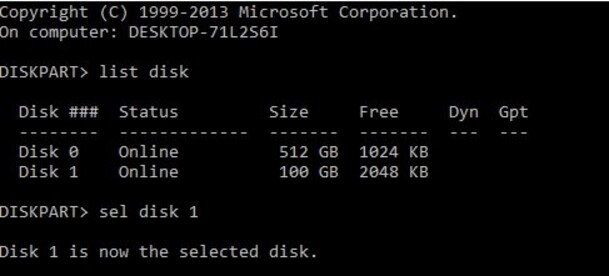
- In the Command Prompt window, type "diskpart" and press Enter.
-
Type "list disk" and press Enter to display all disks connected to your system.

- Identify the disk containing the OEM partition by its size and note its disk number.
- Type "select disk X" (replace X with the disk number) and press Enter. After that, type "list partition" and press Enter to view all partitions on the selected disk.
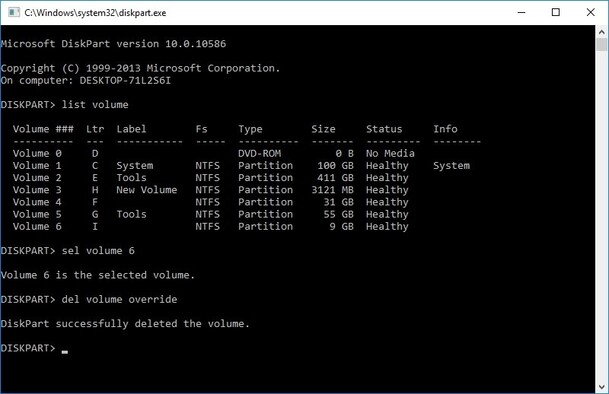
- After that, you will have to type "select partition Y" (replace Y with the partition number) and press Enter.
-
Finally, type "delete partition override" and press Enter to delete the OEM partition.

- After deletion, type "exit" to exit Diskpart and Command Prompt.
After that, you can open Disk Management to ensure that the OEM partition has been successfully deleted.
Accidentally Deleted Recovery Partition? Learn How to Fix it!
Summary
In conclusion, navigating the process of how to delete healthy OEM partition on your Windows system requires careful consideration and the right tools.
While manual methods like Diskpart offer a viable option, utilizing 4DDiG Partition Manager emerges as a more user-friendly and efficient solution.
With its intuitive interface and powerful features, including the ability to delete OEM partitions within a few clicks, 4DDiG Partition Manager streamlines the task, ensuring a hassle-free experience.
Secure Download
💡 Summarize with AI:
You May Also Like
- Home >>
- Windows Fix >>
- How to Delete Healthy OEM Partition in Windows 11/10/8/7 [For Beginners]

 ChatGPT
 Perplexity
 Google AI Mode
 Grok
Grok

