How to Factory Reset Lenovo Laptop [Best 5 Ways]
Are you frustrated because your Lenovo laptop is running slowly, freezing up frequently, or having software problems? Or you plan to sell or give away your laptop and want to ensure all your personal data and settings are completely erased. Well, you can solve these issues by resetting your Lenovo laptop to factory settings. But, how to factory reset Lenovo laptop?
Now, you are at the right place because here we are going to teach you everything. We will discuss 5 easy ways to reset your Lenovo laptop on Windows 11, 10, 8, 7, or more in a detailed form with a step-by-step guide.
Part 1: What You Shopuld Do Before Factory Resetting Lenovo Laptop
So first of all before going to reset your Lenovo laptop, it's better to do some stuff. It will save you from potential data loss and other problems that might happen to your Lenovo laptop during a factory reset.
1️⃣ Back Up Important Data in Advance
Before you proceed with the factory reset, it's crucial to back up any important data on your Lenovo laptop. A factory reset will erase all data, including the operating system, so you want to ensure that your files are safely stored elsewhere.
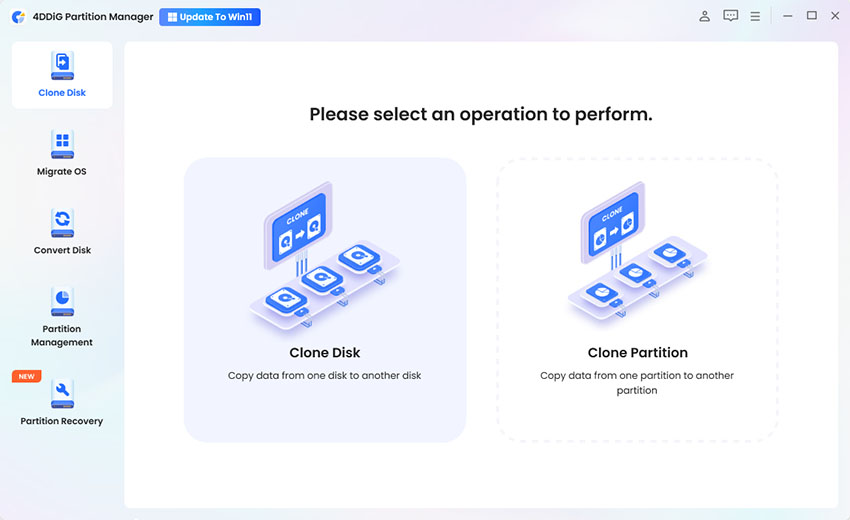
To make the backup process easier, we recommend using a reliable tool called 4DDiG Partition Manager. This tool offers a range of features to manage and safeguard your data. For example, it allows you to clone your entire disk, including the operating system, applications, and files, to another disk. This ensures that you have an exact copy of your data. Additionally, it enables you to create, resize, delete, and format partitions on your hard drive without the risk of data loss.
You can use 4DDiG Partition Manager to back up your important data in advance, here’s how:
-
First of all, connect an external hard drive or USB drive that you want to use to back up or clone your data. Then download and install the 4DDiG Partition Manager tool from the official website and launch it.
FREE DOWNLOADSecure Download

-
Now go to the Clone Disk option and select the external drive that you have inserted into your system. After that, hit the Continue button.

-
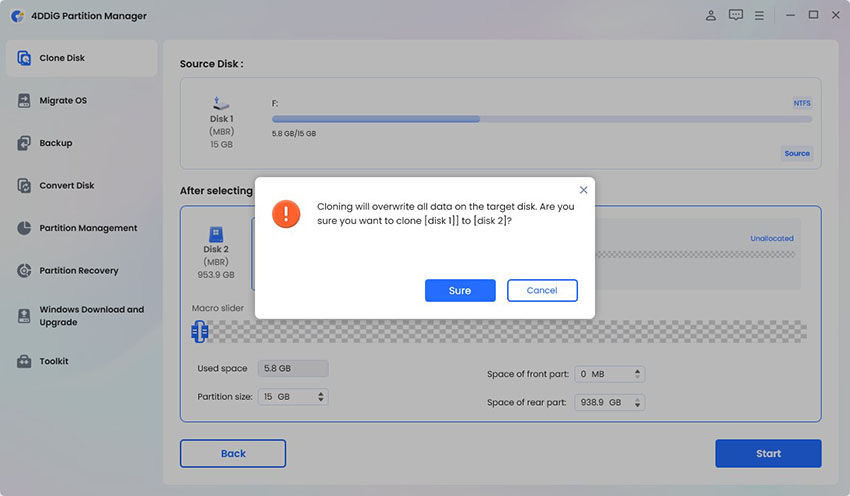
Here you will see a confirmation box, so you will have to confirm the process by hitting the Sure button after ensuring you have chosen the right external drive to make a clone or backup.

-
Now you will see a preview of the process. So again check everything and click on the Start button to start the process.

-
The whole process will take some time so be patient. Once the process is completed, you will see a Finish button on the screen. All you have to do is hit the Finish button and that's it.

You have successfully created a backup of your data on your Lenovo laptop using the 4DDiG Partition Manager tool.
2️⃣ Charge the Laptop or Connect It to Power
Before initiating the factory reset, it's essential to ensure that your Lenovo laptop has enough battery power or is connected to a power source. Performing a factory reset requires an uninterrupted power supply to avoid any potential issues or data corruption during the process. So, make sure your laptop is sufficiently charged or plugged into an outlet before proceeding.
3️⃣ Disconnect Any External Devices
To avoid any potential conflicts or data transfer issues, it's advisable to disconnect any external devices, such as USB drives, external hard drives, printers, or any other peripherals, from your Lenovo laptop before starting the factory reset. This will help ensure a smooth and uninterrupted reset process.
By following these preliminary steps, you'll be well-prepared to proceed with the factory reset of your Lenovo laptop.
Part 2: How to Factory Reset Lenovo Laptop with Novo Button Simply
So you have followed the above-given tips and it's time to reset your Lenovo laptop.
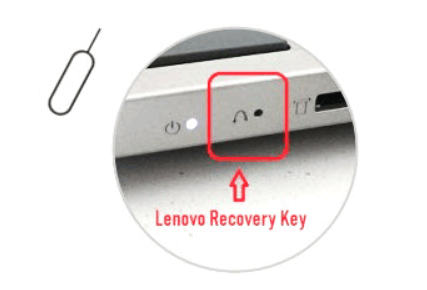
Well, the easiest method to reset your Lenovo laptop is using Novo Key. The Novo key is a small button usually located near the power button or on the side of your laptop. Lenovo has given the Novo button in most of the updated laptop models in order to provide a convenient way to access the system recovery options.
Here's a step-by-step guide on how to factory reset your Lenovo laptop using the Novo button:
First of all, shut down your Lenovo laptop and wait for a few minutes to let the system shut it down completely.
-
Now locate the Novo Key on the side of your laptop. Usually, you can find it near the power button. You can see the Novo Key as shown in the picture below.

Once you have spotted the Novo button, get a paper pin and insert it to press and hold the Novo button for a few seconds until your laptop is turned ON.
-
Now you see a Novo Button Menu on the screen with different options. All you have to do is go for the System Recovery option and then choose Reset this PC as shown in the Picture.

-
Here you will see 2 options: Keep My Files and Remove Everything. If you are going to sell your laptop and remove all the data, you can go for the Remove Everything option. On the other hand, if you are resetting your Lenovo laptop because of slow performance or freezing issues, you can go for the Keep My Files option.

-
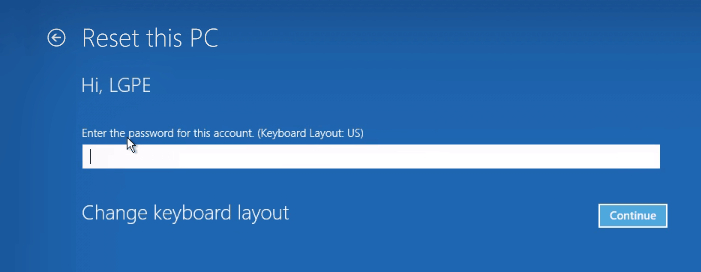
Once you choose any of the options, you will be asked for the Password of your laptop. So, write the password and hit Continue.

-
Now you will see the preview of the process according to the options that you have chosen. So check everything and hit the Reset button.

-
If you have chosen the option to remove everything, you will see 2 options: Cloud Download and Local Reinstall. You can choose Local Reinstall and hit the Reset button.

So, that's how to factory reset a Lenovo laptop with the Novo button. But if your Lenovo laptop doesn't have a Novo button, then how you can perform a factory reset? Let's find out.
Part 3: How to Factory Reset Lenovo Laptop Without Novo Button?
If you are using a Lenovo laptop that doesn't come with a Novo button, you must be wondering how to factory reset Lenovo laptop without Novo button.
Here are the methods you can follow.
Method 1. Reset Lenovo Laptop to Factory Settings Using Windows Settings
The first method to factory reset your Lenovo laptop without Novo Button is using Windows settings.
Here are the steps you can follow to factory reset your laptop.
Click on the "Start" menu in the bottom left corner of your screen and select the "Settings" gear icon.
-
In the Settings menu, select "Update & Security."

From the left-hand sidebar, choose the "Recovery" option.
-
Under the "Reset this PC" section, click on the "Get started" button.

-
You will be presented with two options: "Keep my files" and "Remove everything." Choose the option that suits your needs. Selecting "Remove everything" will erase all files and settings on your laptop.

-
Read the warning message and click on the "Reset" button to start the factory reset process.

Wait for the process to complete. Your laptop may restart multiple times during the reset. Once the reset process is completed, your Lenovo laptop will be turned ON and you will be able to use it.
Method 2. Factory Reset for Lenovo Laptop Using Lenovo USB Recovery Drive
Another method to factory reset Lenovo laptop without Novo button is by using a Lenovo USB Recovery Drive.
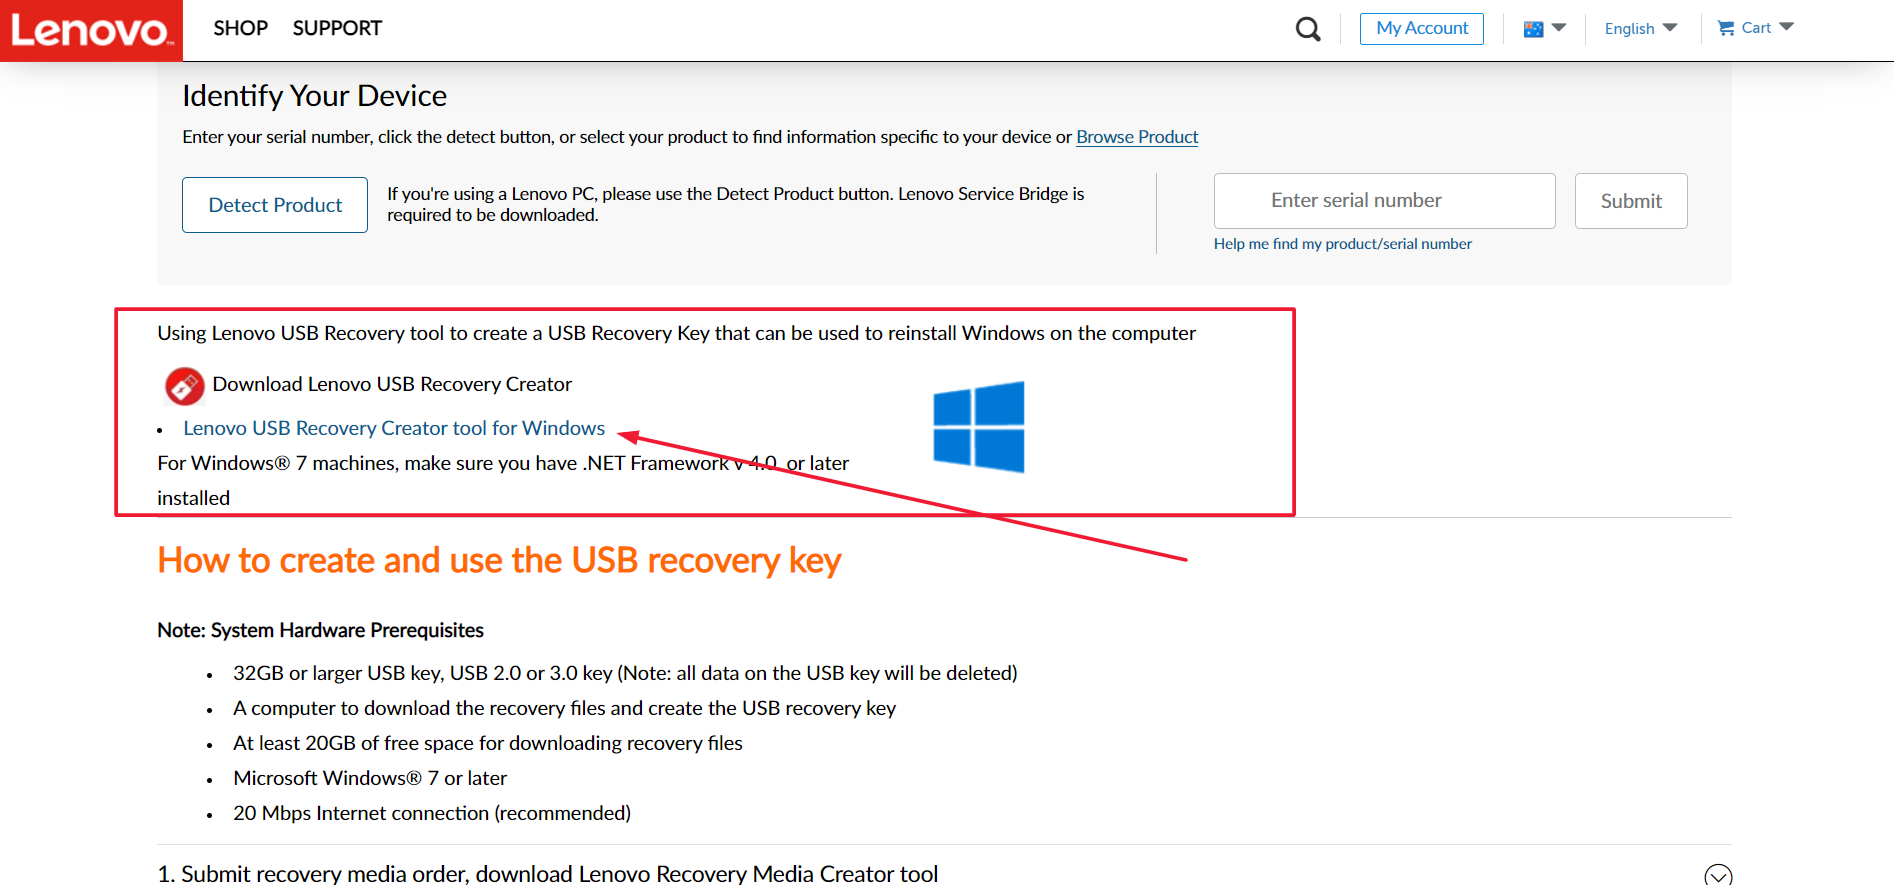
This involves creating a USB recovery drive using the Lenovo USB Recovery Creator tool and then booting your laptop from the USB drive to access the recovery options.
With this method, you can initiate the factory reset process and restore your laptop to its original settings. It provides an alternative way to perform a reset when the Novo button is not available.
Now let's discuss the steps for this method.
-
Visit the official Lenovo support website and download the Lenovo USB Recovery Creator tool. After that connect a USB drive with sufficient storage capacity to your Lenovo laptop.

-
Launch the Lenovo USB Recovery Creator tool and follow the on-screen instructions to create a USB recovery drive. Once the USB recovery drive is created, shut down your laptop completely.

-
Connect the USB recovery drive to your laptop and power on your laptop, press the appropriate key (usually F12 or F11) to enter the boot menu. Select the USB drive as the boot device.

Follow the on-screen instructions to access the recovery options.
Confirm your choice between Keep My Files and Remove Everything. After that hit the reset option and wait for the process to complete.
Method 3. Factory Reset a Lenovo Laptop without Password Using Onekey Recovery
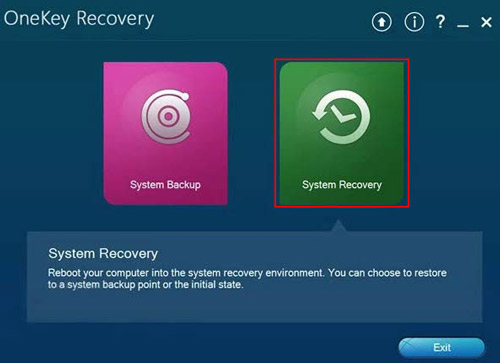
OneKey Recovery is a system recovery tool on Lenovo laptops. It allows users to quickly restore to factory settings or a backup state when encountering system problems. It allows you to reset your laptop from boot menu, especially when you forget your password. However, please note that the Onekey Recovery option is only available on certain Lenovo models.
How to Factory Reset Lenovo Laptop from Boot
Double-click on the Onekey Recovery option, which can launch the Lenovo Onekey Recovery system.
On the new screen, select "System Recovery". Then you can pick either "Restore from initial backup" or "Restore from user's backup".

Once selected, press "Start" and then "Yes" to kick off the factory resetting process.
Method 4. Factory Reset on Lenovo Laptop from BIOS
Factory resetting a Lenovo laptop from the BIOS can be a useful option if you're unable to access the operating system or if you want to restore the laptop to its original settings.
When you start your laptop, immediately press a specific key (usually F1, F2, or Delete) to enter the BIOS setup.
-
In the BIOS interface, select "Restart" > "Load Factory Defaults" or "Load Setup Defaults".

Finally, click "Yes" to reset the settings configuration to "Setup Defaults".
Part 4: People Also Ask about Lenovo Laptop Factory Reset
Q1: Where is the reset button on Lenovo laptop?
On most Lenovo laptops, the reset button is usually located in one of the following locations:
Bottom panel: Some models have a small hole on the bottom that may be labeled "RESET" or similar. You can use a thin object (such as a paper clip) to gently press it.
Key combination on the keyboard: Some models may perform a reset operation with a specific key combination, usually holding down the "Fn" key and a function key (such as F1-F12).
Power button: Long pressing the power button (usually 10 seconds) can also force a restart.
Q2: How do I factory reset my Lenovo laptop without the start menu?
That's simple. You can turn to the Novo button to emter the Recovery mode.
Q3: How do I unlock my Lenovo laptop if I forgot the password?
If you forget the password of your Lenovo laptop, you can try the following methods to unlock it:
Use a password reset disk: If you have created a password reset disk before, you can insert the disk on the login screen and follow the prompts to reset the password.
Use safe mode: Restart the laptop and press "F8" key during startup to enter the advanced startup options. Then select "Safe Mode" and try to log in with an administrator account (if set up).
Use a Microsoft account to reset the password: If you use a Microsoft account, you can visit the Microsoft account recovery page on another device to reset the password.
Use recovery options: If none of the above methods work, you can consider using the recovery options to reset the system. Please note that this may delete all data.
Contact Lenovo Support: If you still cannot unlock the computer, it is recommended to contact Lenovo Customer Support for help.
Final Thoughts
So that's how to factory reset Lenovo laptop by following the different methods above. All the methods mentioned above are legit and you can use any of them according to your situation. However, it's important to follow the proper steps and take precautions to protect your data. Before initiating the reset, remember to back up your important files using a reliable tool like 4DDiG Partition Manager.
Secure Download










 ChatGPT
 Perplexity
 Google AI Mode
 Grok
Grok

