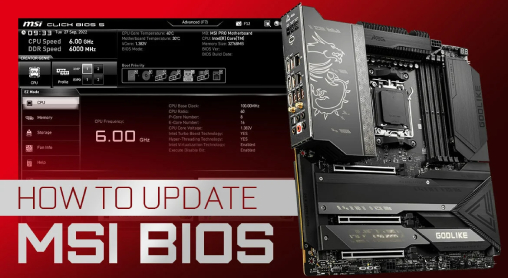
How to Update BIOS MSI? Step-By-Step Guide
Are you an MSI motherboard user looking to unlock your system's full potential? Updating MSI BIOS (Basic Input/Output System) on your motherboard can be a crucial step toward improving performance, compatibility, and even security. In this comprehensive guide, we will explore how to update BIOS MSI on your motherboard, providing you with a step-by-step process that ensures a smooth and successful update.
Whether you're a seasoned PC enthusiast or a newcomer to the world of MSI BIOS update, this guide will equip you with the knowledge and tools you need to navigate the process with confidence. So, let's dive in and discover the MSI motherboard BIOS update and acquire the power of the latest firmware for an optimized computing experience.
Part 1: Should I Update My MSI BIOS?
Deciding whether to update your MSI BIOS is a matter of weighing the risks and benefits. If your system is functioning smoothly and you haven't encountered any critical issues, it's generally advisable to avoid unnecessary updates. While BIOS updates can address certain problems, there is always a small inherent risk involved. A failed BIOS update can potentially lead to system instability or even require costly repairs.
Therefore, it's recommended to proceed with an update only if you're experiencing a specific issue that necessitates it. Careful consideration of the potential risks and benefits will help you make an informed decision regarding your MSI BIOS update.
Before proceeding with any MSI BIOS update, it is essential to have a stable power supply and ensure you have a backup of your critical data. Also, different MSI motherboard models may have slight variations in the MSI BIOS update process, so it's always recommended to refer to the specific documentation for your motherboard model.
Part 2: Preparing For MSI BIOS Update
1. Check the Current BIOS Version
2. Download the Latest BIOS Version From the MSI Website
Another crucial step is to download the latest BIOS version from the official MSI website. This ensures that you have the most up-to-date and stable firmware for your MSI motherboard. To begin, visit the MSI website and navigate to the Support section. Locate your specific motherboard model and find the BIOS section. Here, you'll find a list of available BIOS versions. Carefully select the latest version compatible with your motherboard and click on the download link. Once the download is complete, follow the provided instructions from MSI to safely install the new BIOS version. Remember to exercise caution and only update your BIOS if necessary, as there is always a slight risk involved.
3. Format a USB Flash Drive
Here's a simplified guide on how to format a USB flash drive in File Explorer:
- Connect your USB flash drive to the computer. Once it's connected, you can open the File Explorer by pressing the Windows key and the letter "E" together. Then, on the left-hand side of the File Explorer window, locate and click on "This PC" to view your connected devices.
-
To format your USB flash drive, simply perform a right-click on its icon, and then choose the "Format" option from the menu.

-
Open the drop-down menu and choose either the FAT32 or NTFS file system. Once you've made your selection, click the "Start" button to initiate the formatting process.

Following these steps, you can easily format your USB flash drive using File Explorer. Remember to ensure you have a backup of any important data before proceeding with the formatting process.
4. Back Up Your Data
To prevent the risk of data loss or system damage, it is highly advised to back up your critical data, including the operating system, prior to updating MSI BIOS. Taking this crucial step helps ensure the safety and integrity of your valuable information. We recommend you use a reliable disk cloning software 4DDiG Partition Manager for a seamless and efficient data backup process.
4DDiG Partition Manager stands as the ultimate solution for secure and efficient disk cloning. It empowers you to effortlessly clone data from a source disk or partition to a new target disk or partition. With its robust cloning capabilities, upgrading, replacing, or backing up your hard disk becomes a breeze.
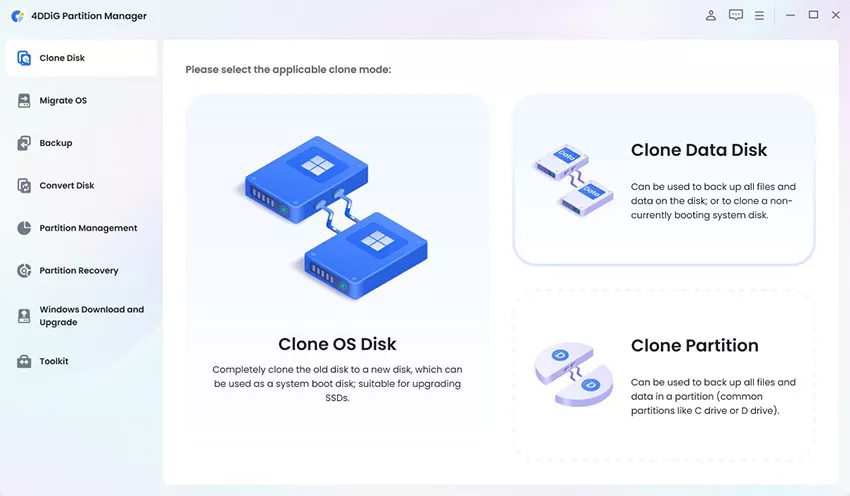
How To Use 4DDiG Partition Manager for Disk Partition Cloning?
-
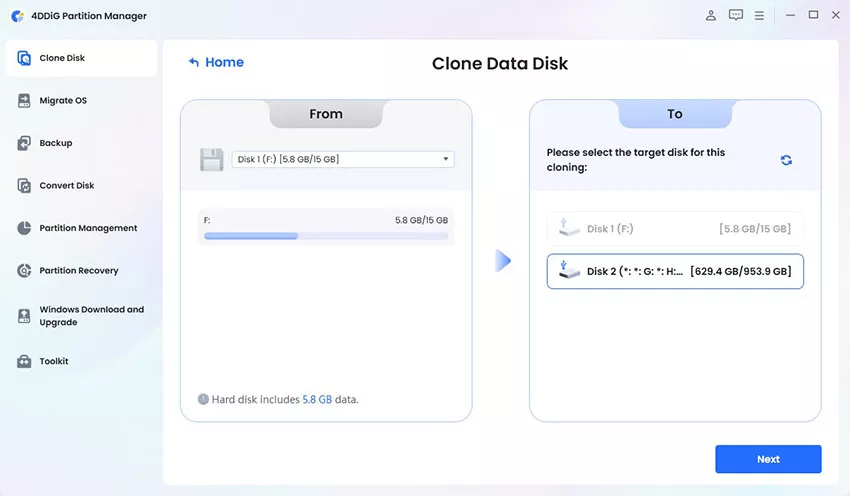
After installing 4DDiG Partition Manager, connect an external disk to your computer. Launch the application and choose "Clone Disk".
FREE DOWNLOADSecure Download

-
Select the target disk where the cloned data will be transferred. The default target disk is the one connected to your computer. Click "Continue".

-
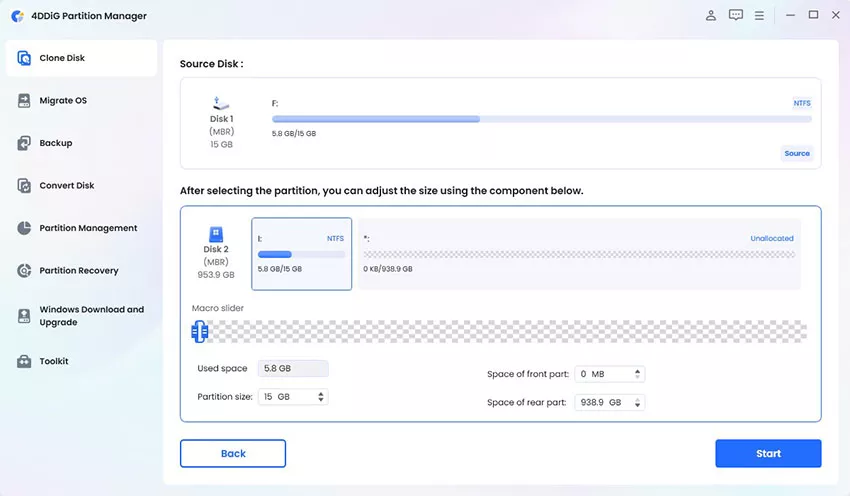
Take note that the cloning process will overwrite all data on the target disk. Once you have confirmed the accuracy, click "Sure" to proceed.

-
Once you've reviewed the preview interface and confirmed its accuracy, initiate the disk cloning process by clicking the Start button.

-
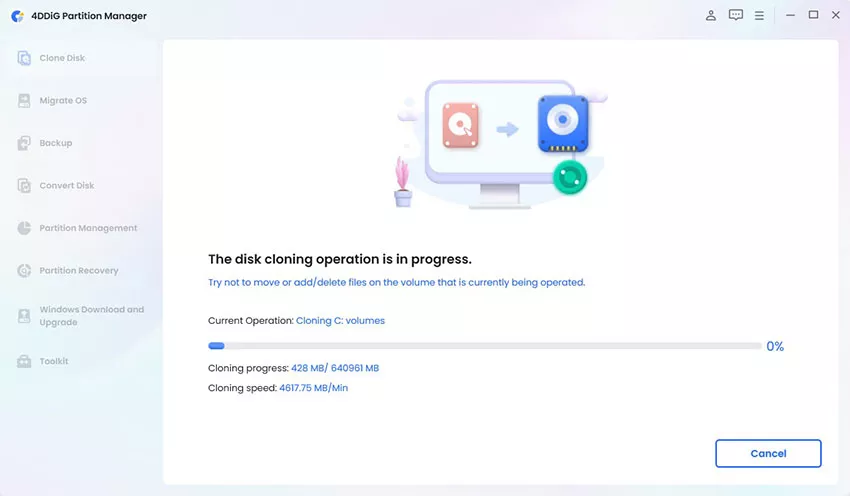
Allow the disk cloning operation to complete. The duration of the process depends on the size of the source disk. Remain patient and refrain from performing other tasks or interrupting the ongoing operation.

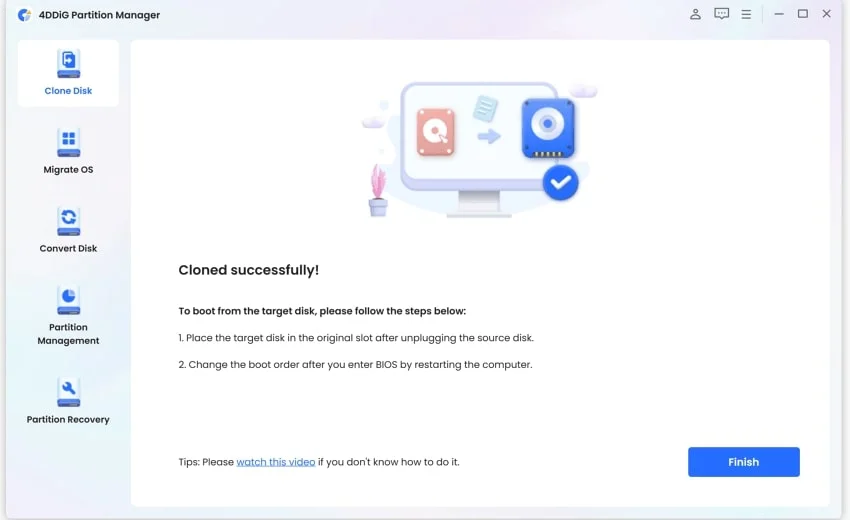
Now, you have successfully cloned from your source disk to your target disk.

Part 3: How to Update BIOS MSI?
1. Create a Bootable USB Drive
- Start by acquiring a USB drive with sufficient storage capacity, typically 8GB or higher, ensuring it is formatted and empty.
- Visit the official MSI website and locate the BIOS update file suitable for your motherboard model. Download the latest BIOS version and save it to your computer.
- Insert the USB drive into your computer and ensure that it is recognized. Open the USB drive folder and format it using the FAT32 file system.
-
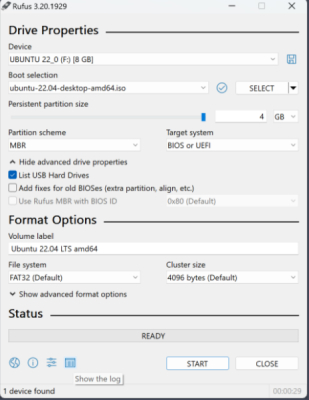
To create a bootable USB drive, you have several options. You can use dedicated software like Rufus or use the built-in Windows utility. If using Rufus, launch the software, select the USB drive, choose the "ISO Image" option, and browse for the downloaded BIOS update file. Click "Start" to begin the process.

- Once the bootable USB drive is created, open the USB drive folder and copy the downloaded BIOS update files onto it. Ensure that you copy all necessary files provided in the BIOS update package.
Your bootable USB drive is now prepared and ready for updating your MSI BIOS. Remember to refer to the manufacturer's instructions specific to your motherboard model for the exact procedure to update the BIOS using the bootable USB drive.
2. Update MSI BIOS
- Connect the bootable BIOS USB drive to your computer.
- To access the BIOS menu on your computer, start by turning it on and then press the Delete key during the boot-up process.
-
Once you're in the BIOS menu, navigate to the M-FLASH section and select it to enter the BIOS update environment. From there, you'll be prompted to confirm by clicking "Yes" in order to access the M-FLASH interface.

-
After entering the M-FLASH interface, choose the USB drive that contains the BIOS booting files you created earlier. Then, select the BIOS update file that you wish to install.

- Once you've selected the BIOS update file, click "Yes" to initiate the MSI BIOS update process.
FAQs Related to MSI BIOS Update
1. What is the latest MSI BIOS version?
The latest MSI BIOS version differs based on the motherboard model and its release date. To determine the most recent version, visit the official MSI website and navigate to the support page for your specific motherboard model. There, you'll find the latest BIOS version available for download, ensuring optimal performance and compatibility with your MSI motherboard.
2. How long should an MSI BIOS update take?
The time required for an MSI BIOS update can vary depending on various factors, including the specific motherboard model, the size of the BIOS update, and the overall system configuration. Typically, the update process takes a few minutes to complete. However, it's essential to allow sufficient time and avoid interrupting the update process to ensure a successful and error-free BIOS update. Patience is key during this crucial procedure to prevent any potential complications or data loss.
3. Can I update MSI BIOS without a USB?
While updating MSI BIOS using a USB drive is the most common method, it is possible to update without a USB drive through alternative approaches. One option is updating through the BIOS interface itself, commonly known as BIOS Flashback or BIOS Update from within the BIOS settings. Additionally, MSI provides the Live Update utility, which enables BIOS updates directly from the operating system. However, it's important to note that not all MSI motherboards support these alternative methods, so it's advisable to consult the specific motherboard's documentation or MSI's official website for compatibility and instructions on updating without a USB drive.
Final Thoughts
This comprehensive guide serves MSI motherboard users seeking to enhance their system's performance and compatibility. By providing step-by-step instructions and essential considerations, we empower you to make informed decisions regarding MSI BIOS update. It emphasizes the importance of cautious decision-making, thorough preparation, and data backup to mitigate potential risks.
Furthermore, the guide introduces a reliable tool 4DDiG Partition Manager as a seamless solution for disk cloning. Whether you're a seasoned PC enthusiast or a newcomer, this guide equips you with the necessary knowledge and tools to navigate the MSI BIOS update process confidently. By staying up-to-date with the latest firmware, users can unlock their system's full potential for an optimized computing experience.





 ChatGPT
 Perplexity
 Google AI Mode
 Grok
Grok

