If you are a Windows 10 or 11 user, you might be facing the blue screen memory management error suddenly while doing your work. It is a frustrating situation because this error comes out of nowhere and interrupts your workflow. The Memory Management blue screen error is a common problem that occurs when the operating system encounters issues related to memory allocation and management.
So, if you are looking for a permanent solution for memory management blue screen error, you are at the right place. In this article, we are going to provide you with 7 effective methods to fix this error. Let's get started.
Part 1: Overview of Memory Management Blue Screen
Before getting straight to the solution, it's better to first understand what does memory management blue screen error mean and why it occurs.
What is Memory Management Blue Screen?
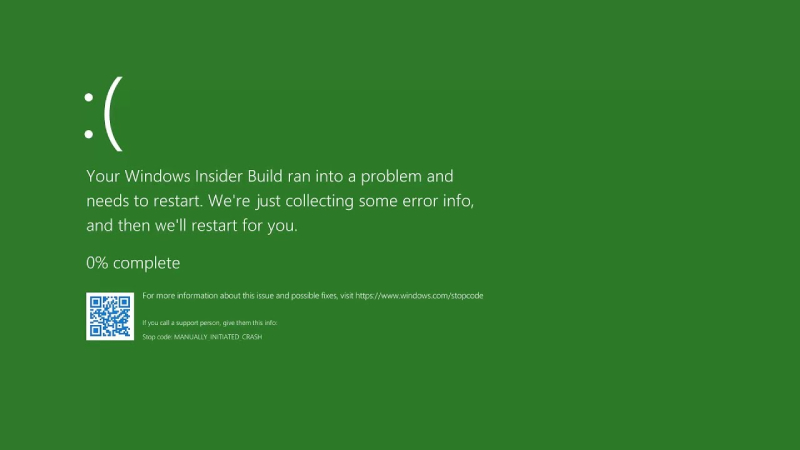
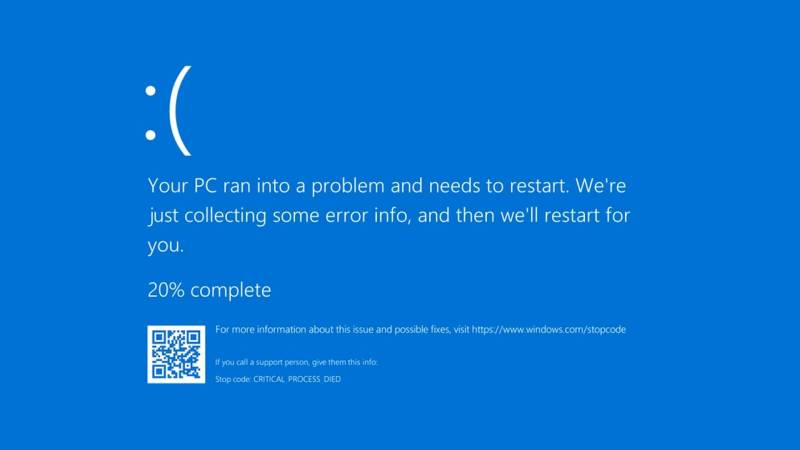
The Memory Management blue screen error is a common problem that Windows users may encounter. It occurs when your computer suddenly crashes and displays a blue screen with an error message related to memory management. This error happens when your computer has trouble organizing and handling its memory resources.
Usually, you receive an error message on the blue screen that says your computer will restart in a few minutes and after the restart, there is no error. But over time, you start facing this error frequently and this makes the situation worse.
Possible Reasons Behind Blue Screen Memory Management
There are different reasons behind memory management blue screen error, and understanding them will help you quickly solve the issue.
- Faulty RAM: Issues with your computer's RAM modules, such as defective or incompatible RAM sticks, can trigger a Memory Management error.
- Outdated or Incompatible Drivers: When drivers, especially those related to your motherboard, graphics card, or network adapters, are outdated or incompatible with your operating system, they can lead to memory management problems.
- Corrupt System Files: System files that have become corrupted due to software conflicts, malware infections, or sudden power outages can result in a Memory Management error.
- Malware Infections: Viruses, malware, or other malicious software can disrupt memory management processes and trigger Memory Management errors.
Now let's discuss how to fix the Windows blue screen memory management error.
Part 2: How to Fix Blue Screen Memory Management Windows 10/11?
Similar to the different reasons behind the blue screen memory management error, there are different fixes that you can try.
Method 1. Restart Your PC
The most common reason behind the blue screen memory management error is faulty RAM. To address this issue, the first step is to restart your PC.
Restarting your computer can often resolve temporary glitches and provide a fresh start. It's like hitting the reset button, which may help eliminate the Memory Management error.
Method 2. Update Windows 10/11
If restarting your PC doesn't fix the issue, then you should try updating your Windows 10/11. Keeping your operating system up to date is like giving it a shot of adrenaline. This will bring in the latest bug fixes and improvements, waving goodbye to any memory management gremlins.
Here are the steps to update your Windows 10/11.
- Press the Windows key + I to open the Settings app.
- Go to "Update & Security" and select "Windows Update."
Click on "Check for updates" and install any available updates.

- Restart your computer if prompted.
Method 3. Use 4DDiG Windows Boot Genius
4DDiG Windows Boot Genius is a multi-functional Windows boot recovery utility. It can boot up Windows computers from various situations, such as computers stuck on blue screen, black screen, loading screen, restarting screen and more. So, this tool can quickly help you fix blue screen memory management error. Here’s how:
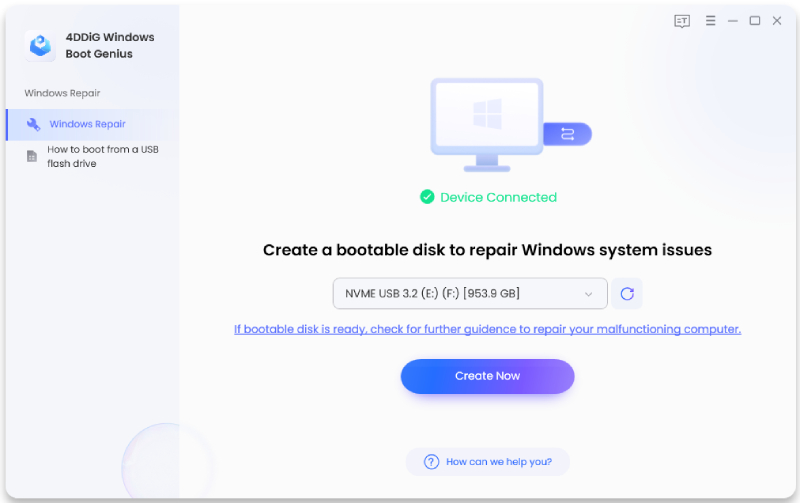
Run the program and insert a prepared CD/DVD into the CD-ROM drive or connect a USB flash drive to a USB port on the computer. Click "Create boot disk now" to start burning the repair disk.
Important: The computer here refers to another computer that is working normallyFREE DOWNLOADFor PC
Secure Download

- Insert the successfully burned repair disk into the computer that is displaying a blue screen and is unable to start.
Continuously press "F12" or "ESC" while rebooting the computer in order to enter the Boot menu.

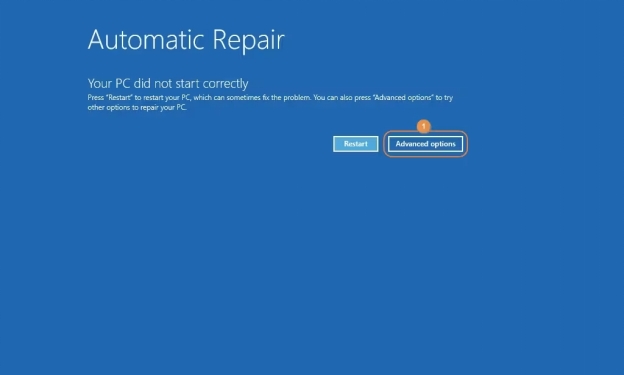
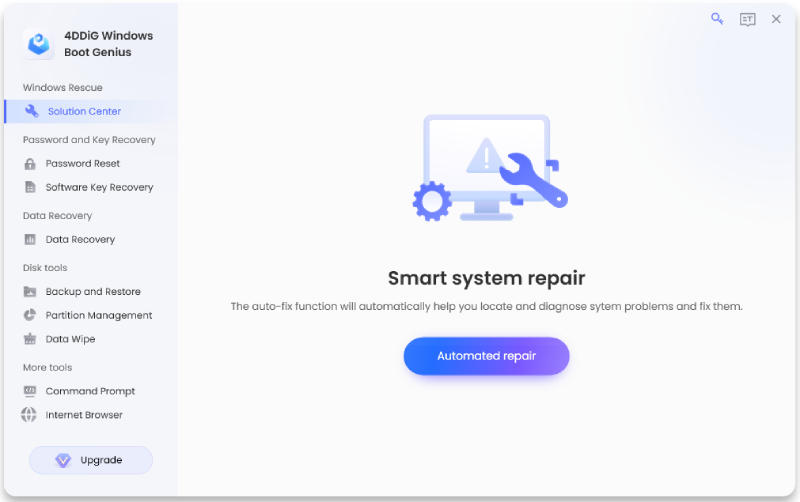
Now click "Automated repair" to proceed.

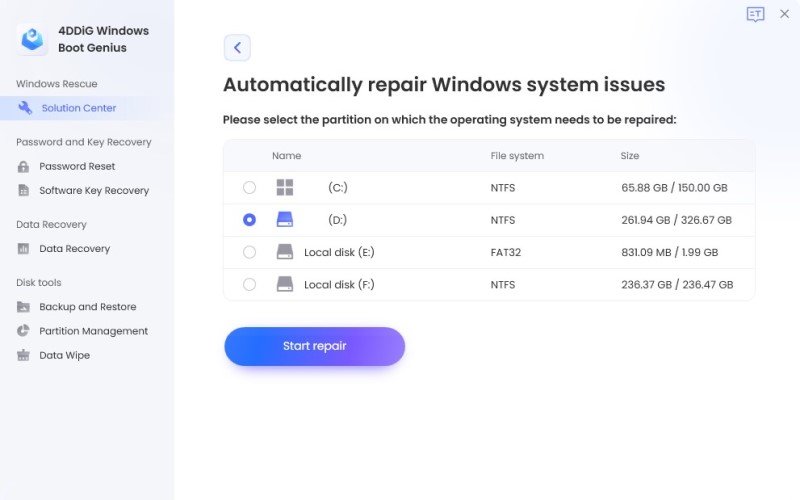
Choose the partition that requires fixing, and then click on the "Start repair" button.

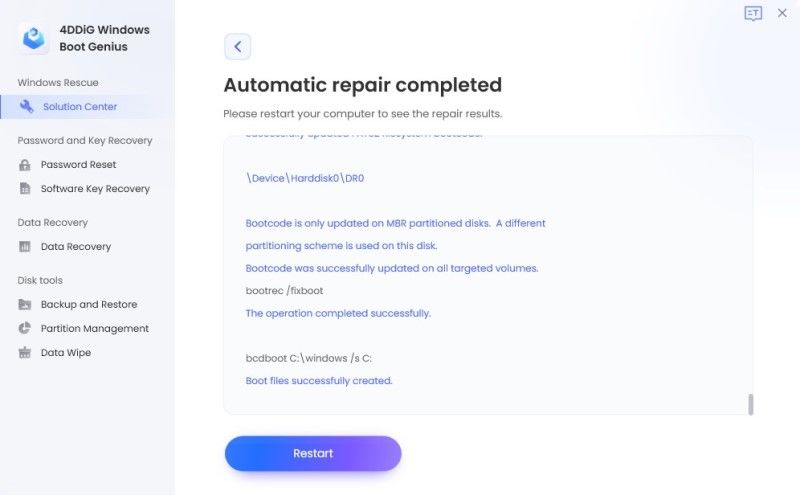
Once the repair process is complete, click on the "Restart" button to check if the problem has been resolved.

Method 4. Run the Windows Memory Diagnostic Tool
Another fix you can try to solve the blue screen memory management error is Windows Memory Diagnostic Tool. This is an ultimate tool developed by Microsoft to get rid of memory management errors.
All you have to do is follow the steps given below.
Press the Windows key and type "Windows Memory Diagnostic." You will see the tool on top of the list, so launch it.

Now you will see 2 options, you have to go to Restart now and check for problems. This will immediately restart your Windows and start diagnosing the issue.

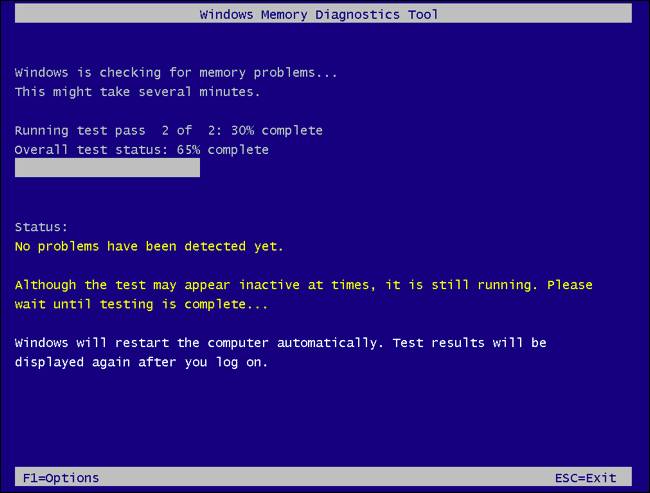
During the memory diagnostic, a blue screen with a progress indicator will appear.

- After the diagnostic completes, your computer will automatically restart.
- Once your computer restarts, it will display the results of the memory diagnostic. If any issues are detected, the tool will provide recommendations on how to resolve them.
Method 5. Run SFC Scanner
Run SFC Scanner is another effective way to fix memory management blue screen error. Here is how you can do it.
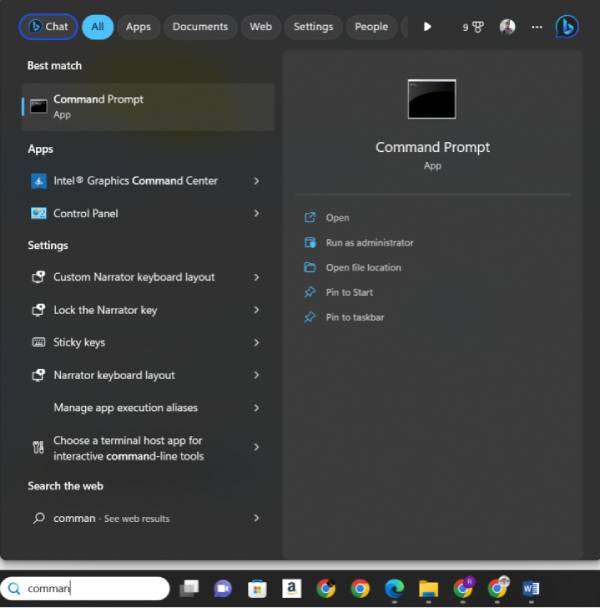
Press the Windows button and on the search bar, type "Command Prompt." On the top of the list, you will see the Command Prompt tool and you will have to right-click on it and go for Run as Administrator.

Now type "sfc /scannow" and press Enter.

- Wait for the scan to complete, and the utility will automatically fix any detected issues.
Method 6. Scan for a Virus Infection
If running SFC Scanner also didn't fix the blue screen memory management error, this means the problem might be some malware or viruses in your hard drive.
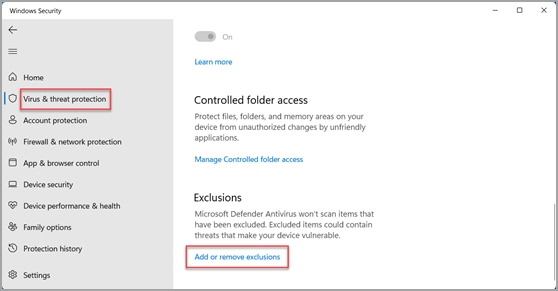
For this, you will have to scan for a virus infection using Windows Security. Here are the steps you can follow:
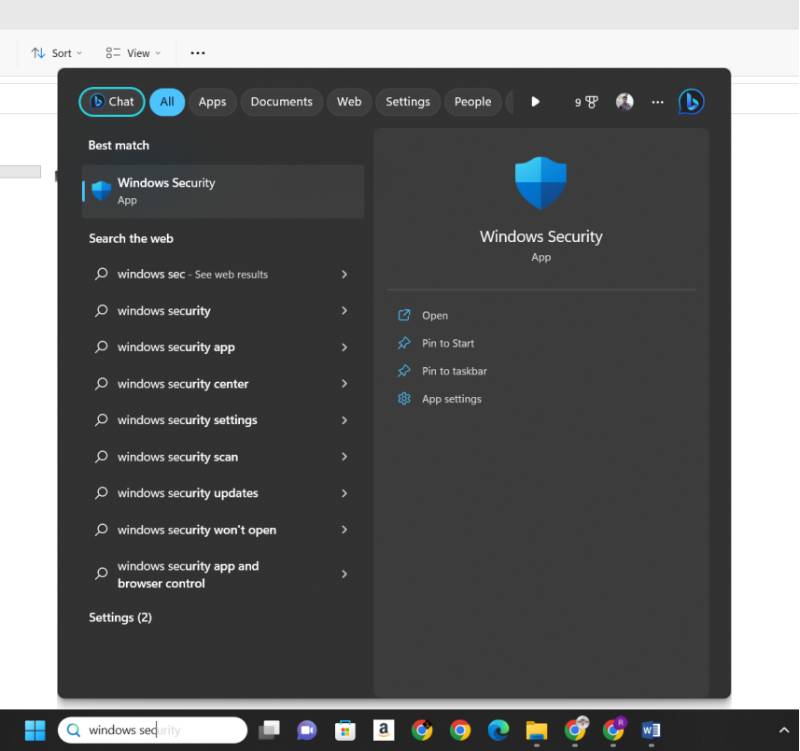
Press the Windows button, write Windows Security, and launch the first app you see on the list.

On your left panel side, click on Virus & Threat Protection.

- Now hit the Quick Scan button on the right side.
This will scan your computer for any virus infections and if it founds any malware or virus, it will ask you to remove them.
Method 7. Reset Windows 10/11 (Last Option)
If all else fails, you can consider resetting your Windows system. This should be your last resort, so make sure to back up your important files before taking the plunge.
Here is how you can reset your Windows 10/11.
- Press the Windows button and hit the Settings icon on the left side.
Now go to Windows Update & Security and from the left-hand sidebar, choose the "Recovery" option.

Under the "Reset this PC" section, click on the "Get started" button.

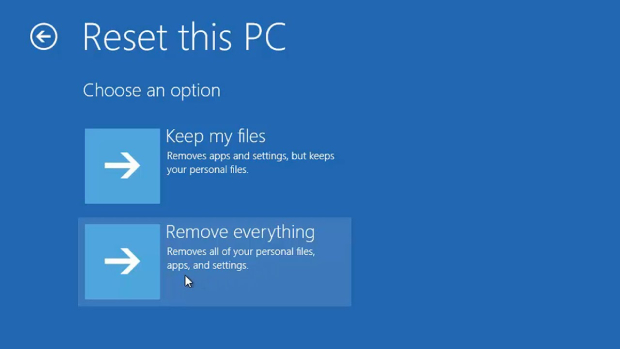
Now you will have 2 options, Keep my Files and Remove Everything. You can choose to Remove Everything to solve the blue screen memory management error.

- Now hit the Reset button and wait for the process to be completed.
Once the process is completed, your Windows will be reset and the memory management blue screen error will be solved.
Final Thoughts
So that's how you can get rid of memory management blue screen error on Windows 10 or 11. All you have to do is carefully follow the steps given above and fix the issue within a few minutes. If you think other methods are too complicated to operate, then we suggest you try 4DDiG Windows Boot Genius first. Its user-friendly interface allows you to get started quickly to fix memory management blue screen error. Don't hesitate to try it out!







 ChatGPT
 Perplexity
 Google AI Mode
 Grok
Grok
