[Tutorial] How to Fix Bitlocker Recovery Screen
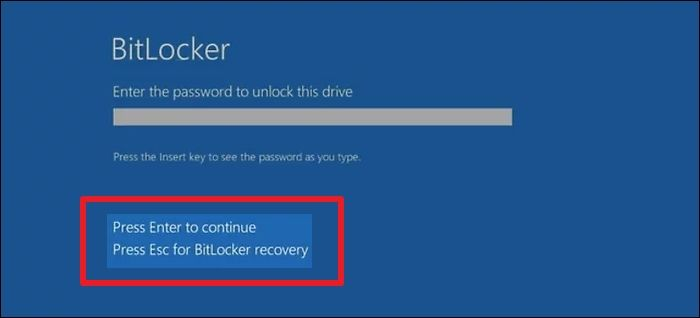
If you’re experiencing a Bitlocker Recovery Screen on the computer startup, it means the HDD/SSD installed inside it is encrypted, and you need to enter a 48-digit PIN to unlock it. This security feature comes shipped with many modern devices and is triggered when you change inside computer components or anything in the BIOS settings. If you aren’t familiar with the BitLocker recovery screen on Windows, this is an expert guide to help you get out of it. This page provides a guide for unlocking the BitLocker recovery screen using a PIN and without a PIN.
Part 1: The Overview of Bitlocker Recovery Screen
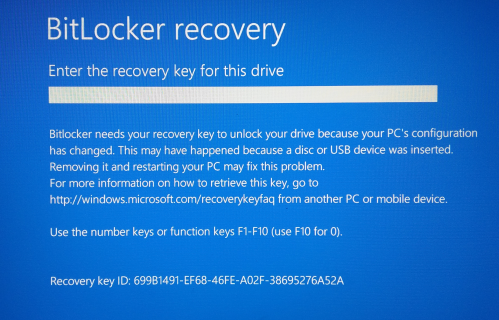
The BitLocker recovery screen prompts when Windows finds any changes in the BiOS settings or due to hardware replacement/change of computer components. This prevents normal startup and encrypts the HDD/SSD. The Bitlocker Recovery Screen prompts you to enter the 48-digit PIN to unlock it and access your encrypted data. The screen also provides guidance on where to find the recovery key, such as a printout, a USB drive, or your account to get the Microsoft BitLocker recovery key.
It provides ultimate security for your drive data from unauthorized access. Bitlocker became part of Microsoft Windows in 2007 but has been extensively developed in Windows 10. It’s enabled on the user's behalf when setting up the device. The Bitlocker recovery screen can be triggered for various reasons. The following are the causes that might trigger the lockouts and show the BitLocker recovery screen:
-
Changing the hardware components, such as a new hard drive.
-
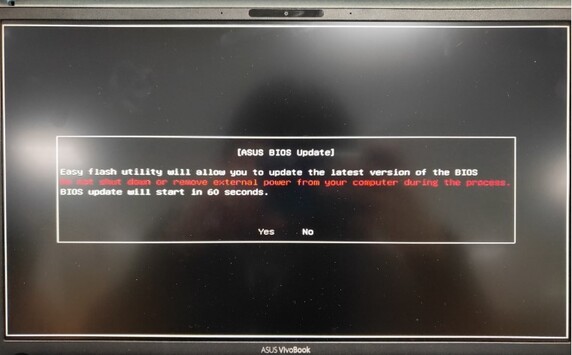
BIOS updates or modifications to the BIOS UEFI settings.
-
Operating system updates which involve changes to the system files or security files.
-
The problem with the TPM or its firmware update.
-
A suspicious activity with the computer’s system settings.
BitLocker Drive Encryption provides the ultimate security for your hard drive. However, experiencing the Bitlocker recovery screen on your computer due to disk errors or for unknown reasons can prevent you from accessing your computer. You’ll find solutions to the Bitlocker recovery screen in the next section of this guide.
Part 2: How to Recover Data from BitLocker Drive Encryption?
Bitlocker is a powerful data security feature that encrypts the whole drive to prevent illegal or unauthorized access. This can be beneficial when you have extremely valuable data on the hard drive. However, recovering the data from a drive encrypted with Bitlocker can be difficult if you mistakenly format it or delete anything.Fortunately, the 4DDiG Data Recovery Tool can recover such data. This tool lets you recover deleted/lost, formatted, corrupted, and encrypted data with a one-click operation. Its advanced algorithm is specifically designed to handle complex encryption of BitLocker drives.
In addition to the BitLocker Drive Encryption, it can recover data from various storage devices such as external/internal hard drives, SSD, SD cards, and USB flash drives. Thanks to its user-friendly interface, running the scanning process and recovering the required data takes only three steps. Here’s how to recover data from Bitlocker Drive encryption using the 4DDiG Windows Data Recovery tool:
Secure
Download
Secure
Download
-
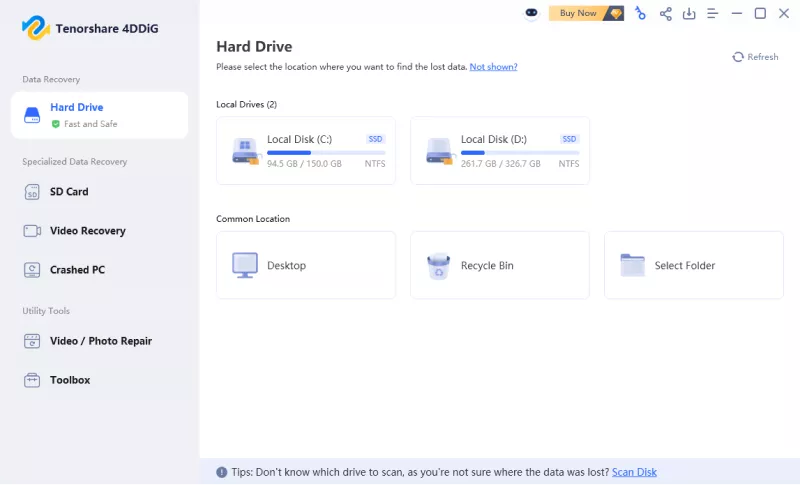
After installing 4DDiG Windows Data Recovery on your computer, launch it. Select the local disk drive from which you want to recover the deleted/lost data, and hit the Start button to initiate the scanning process.

-
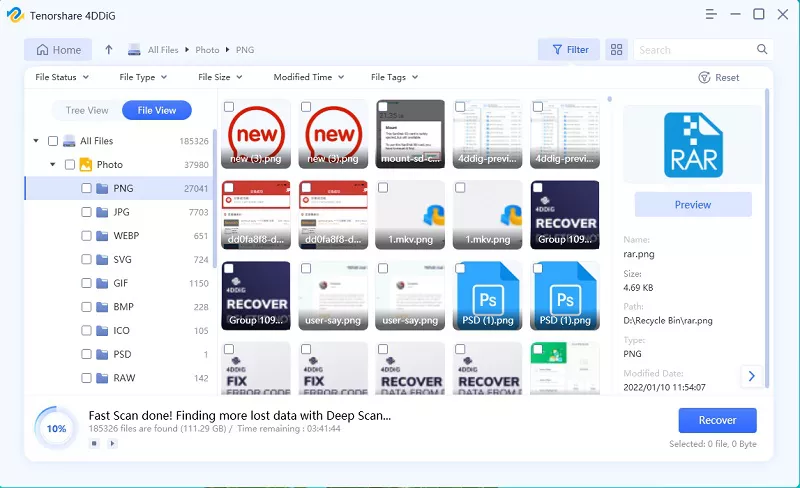
It’ll start the scanning process instantly, and you can track the progress on the bottom left side of the screen. You can pause or stop it when the desired files are identified. There’s a filter option that you can use to narrow down your search for the targeted files only.

-
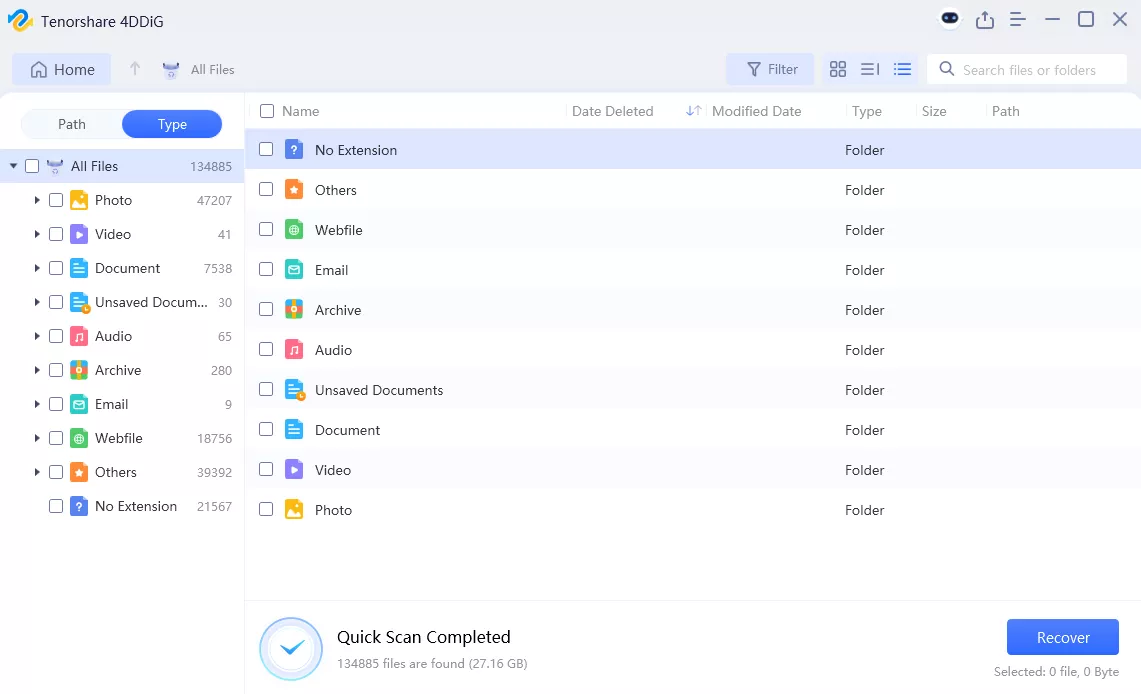
Once the scanning process is completed, you can preview the files available for recovery. When you’re ready to recover them, select them and hit the Recover button.

Part 3: How to Exit from the Bitlocker Recovery Screen?
Method 1. Turn off the Bitlocker Recovery Screen via 'Suspend Protection'
If you're getting the Bitlocker recovery screen frequently after booting up your system and want to avoid it, you can prevent this by suspending the Bitlocker protection. It can be done from the Windows Settings and requires only a few simple steps.
Follow the steps below to turn off the Bitlocker recovery screen via suspend protection:
-
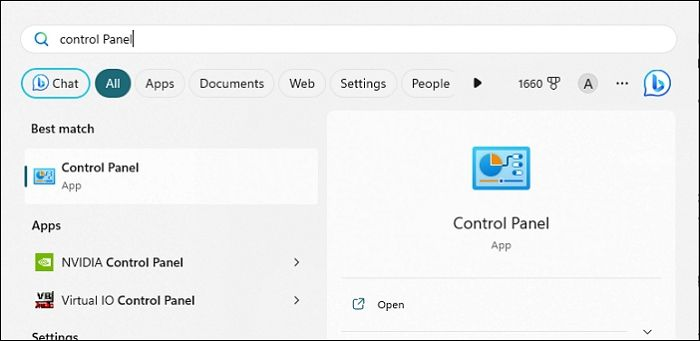
Launch the Control Panel by searching it from the Start menu.

-
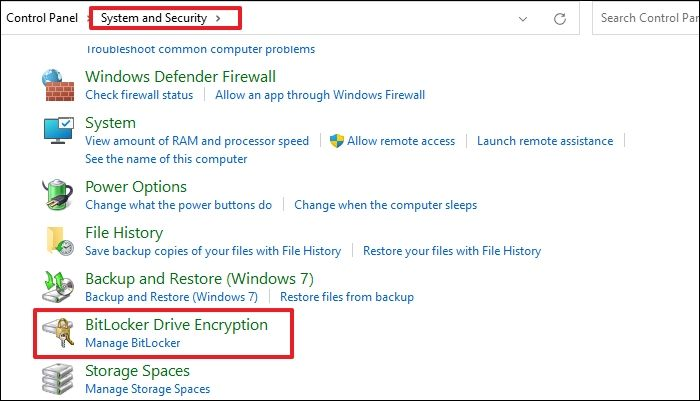
Go to System and Security and select BitLocker Drive Encryption.

-
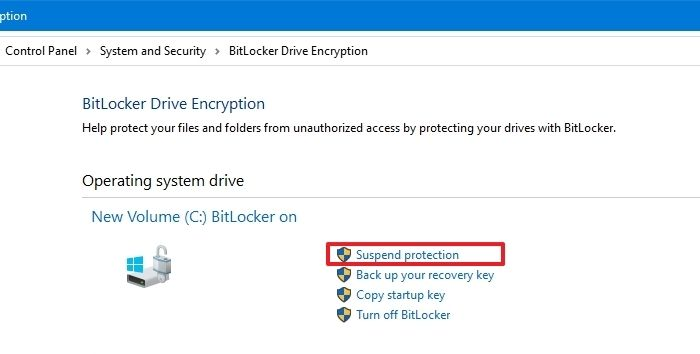
Click on Suspend Protection to turn off the BitLocker.

-
After this, you won’t see the Bitlocker Recovery Screen anymore.
Method 2. Use the Recovery Key
The simplest way to bypass the BitLocker recovery screen is to enter the required key. Most users save the BitLocker key on their USB drive. Plus, when setting up BitLocker protection, you can save the recovery key in your Microsoft account. You may also check your Microsoft account linked to your computer to get the recovery key.
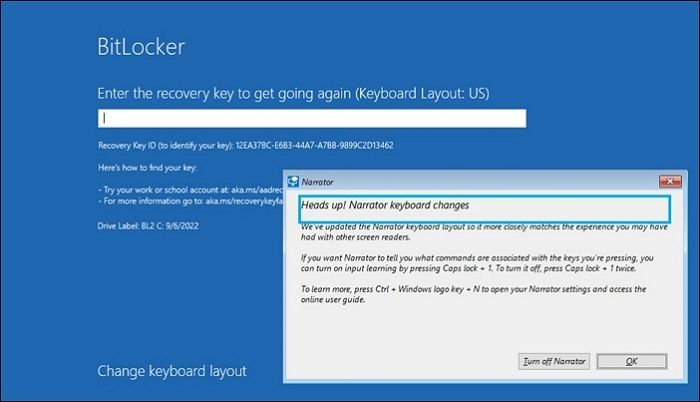
If you can’t find the recovery key for the BitLocker recovery screen, don’t despair. There are various ways to bypass it without the actual recovery key. Move to the next solution to bypass it.
Method 3. Use the CMD Utility to Exit from the Bitlocker Recovery Screen
If you can't unlock the BitLocker recovery screen using the recovery key, try exiting the Bitlocker recovery screen using the command prompt. You can access the command prompt on the BitLocker recovery screen and exit it by entering the required commands. Here’s how:
-
Press the Esc key to launch the recovery option, and select Skip this drive option.
-
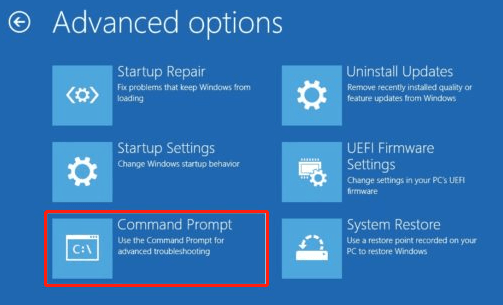
Navigate to the Troubleshoot, select Advanced options, and launch the Command Prompt.

-
Type the following command in the command prompt to unlock the BitLocker drive.
manage-bde -unlock C: -rp
-
Now, type the following command to suspend the protection shield from the drive. Once done, you can exit the command prompt and boot the system.
manage-bde -protectors -disable C:
Method 4. Change Windows System's BIOS Mode to Legacy
You can also get rid of the BitLocker recovery screen by switching the BIOS from the legacy UEFI mode. Follow the steps below and implement them as they are on your system to bypass the Bitlocker recovery screen. Here’s how:
-
Navigate to the Command Prompt, right-click, and select Run as Administrator.
-
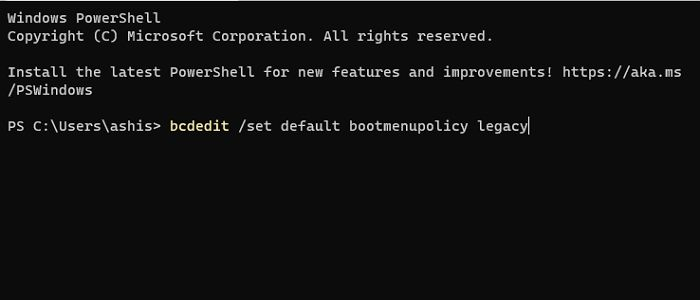
Type the following command in the CMD and execute it by hitting the enter key.
“bcdedit /set {default} bootmenupolicy legacy”

-
Once the command is executed, restart your computer and see if the BitLocker recovery screen has succeeded.
Method 5. Reset Your BitLocker Pin
It’s quite easy to bypass the BitLocker recovery screen on the organization account. If you’re using an organization account, you can reset the BitLocker pin and bypass it completely. Here’s how to bypass the BitLocker password screen:
-
Press the Esc key on the keyword on the Bitlocker Recovery screen, and note down the BitLocker recovery key ID. It’ll be visible on the screen for a short time, so be attentive and note it down quickly.

-
Contact your system administrator and provide him with the BitLocker recovery key ID. Your system administrator can then reset your BitLocker pin using the given BitLocker recovery key ID.

Method 6. Disable Windows Auto-Unlock
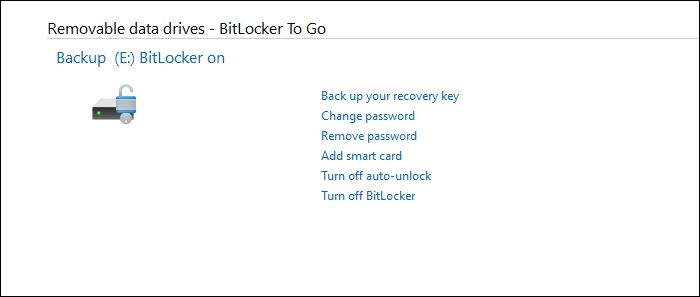
If none of the above methods bypassed the BitLocker recovery screen, consider turning off the Windows Auto-Unlock option. Windows offers Auto-unlocked options, which are enabled by default. Leaving them enabled will cause the BitLocker recovery screen.
We suggest disabling the Windows Auto-Unlock option to prevent the BitLocker recovery screen. Following are the steps to disable Windows Auto-Unlock with simple methods:
-
Go to the Control Panel > System and Security, and select BitLocker Drive Encryption.

-
Now, turn off the Auto-Unlock option, and Windows won’t show the BitLocker recovery screen after booting up.
✅ You May Also Like: Windows BitLocker to Go: All about It
Part 4: The FAQs about Bitlocker Recovery Screen
Q 1: How do I fix BitLocker recovery?
Ans:If you’re locked out of Windows due to the BitLocker recovery screen, you’ll need to use the recovery key to bypass it. If you don’t remember the BitLocker recovery screen key, check your Microsoft account linked with the computer and see if you can find it there.
Q 2: What happens if I don't have a BitLocker recovery key?
Ans:If you forget the BitLocker recovery key, you won’t be able to access the hard drive protected by BitLocker encryption. You’ll need to use alternative methods to bypass the BitLocker recovery screen, such as resetting the key, exiting the Bitlocker screen, and performing a clean OS installation.
Q 3: How do I unlock my computer without BitLocker recovery key?
Ans:If you’re locked out of the computer due to the BitLocker recovery screen, various methods have proven to bypass it. You can try resetting the key from the system administrator account, performing a cleaning boot of the OS, and exiting the BitLocker screen via using CMD.
Final Words:
BitLocker provides an exception protection shield for your valuable data on the hard drive. It locks it if there’s any modification to the system BIOS or change of hard components, such as a new hard drive. However, sometimes, it can become frustrating when you don’t have the recovery key. This guide provides the ultimate ways to bypass the BitLocker recovery screen. If you’ve accidentally formatted the drive or mistakenly deleted your data with BitLocker Drive Encryption, refer to the 4DDiG Data Recovery 4DDiG Data Recovery which offers a one-click solution to retrieve the lost data.

 ChatGPT
 Perplexity
 Google AI Mode
 Grok
Grok

