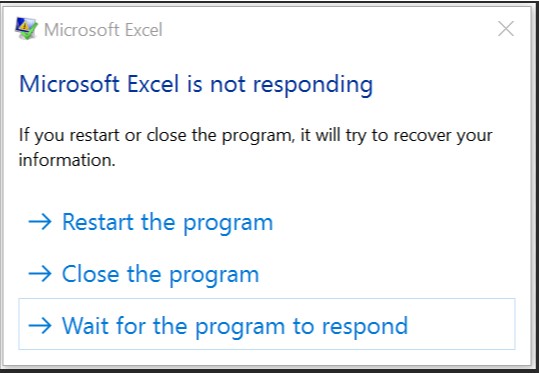
How to Fix Windows Explorer Keeps Crashing?
Experiencing frequent crashes with Windows Explorer can be incredibly frustrating, significantly when it disrupts your workflow and productivity. It hints at underlying issues that require timely troubleshooting to restore your system's stability.
This guide explores seven effective strategies to tackle the persistent problem of Windows Explorer crashes, ensuring you can return to a seamless computing experience quickly and efficiently. From easy-to-apply quick fixes to more comprehensive solutions, we'll walk you through each step with the goal of achieving a crash-free environment.
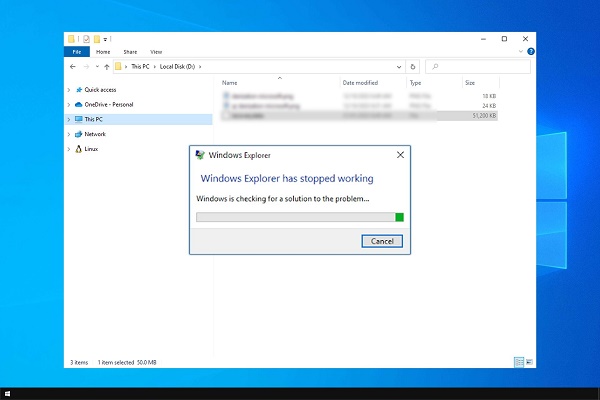
Part 1: Why Does Windows Explorer Keep Crashing?
Windows Explorer, also known as File Explorer, may crash due to various factors that can be broadly categorized into software conflicts, outdated drivers, insufficient system updates, corrupted system files, or even the presence of malware or viruses.
In some cases, the crashes can be attributed to the use of outdated or incompatible third-party software extensions that integrate with Explorer, leading to compatibility issues and instability. Additionally, hardware-related issues such as failing hard drives or insufficient RAM can contribute to system instability, affecting the performance of Explorer.
To address these underlying causes and ensure an optimal operating system environment, it is important to update software and drivers regularly, perform system updates, and scan for malware or viruses. Resolving any conflicts with third-party software extensions and addressing hardware issues, such as upgrading failing hard drives or adding more RAM, can also help prevent Explorer crashes and maintain system stability.
By taking these proactive steps, users can mitigate the risk of Explorer crashes and enjoy a smoother and more reliable file browsing experience.
Part 2: Recover Files while Windows Explorer Keep Crashing?
If Windows Explorer crashes consistently, not only does it impede your workflow, but it may also cause a risk of data loss. 4DDiG Windows Data Recovery stands out as a premier choice to safely and effectively recover your important files without the need for a functioning Windows Explorer. What makes 4DDiG an optimal recovery solution is its user-friendly interface, high recovery success rate, and the ability to restore various file types from different loss scenarios.
Secure Download
Secure Download
To begin the file recovery process with 4DDiG Windows Data Recovery, you can follow these steps:
-
Download and Install 4DDiG
Obtain the latest version from the official website and install it on your computer. Open the application once the installation is complete.
-
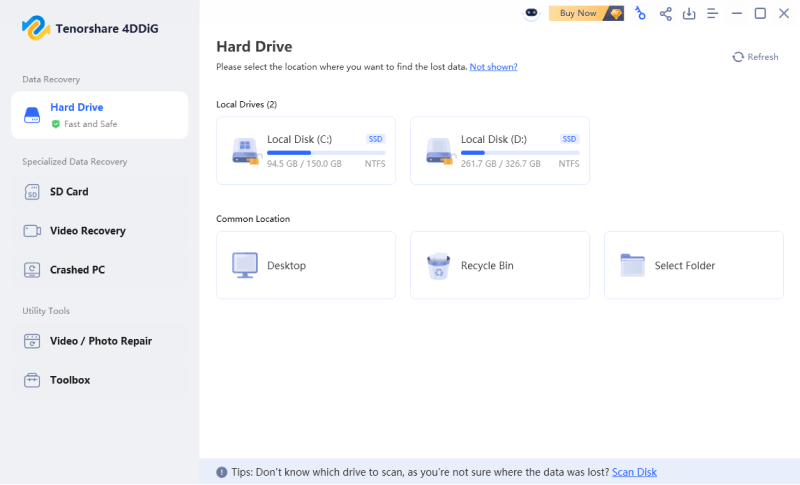
Select a Location to Start Recovery
Identify and choose the disk or location where you lost your data.4DDiG quickly scans the chosen drive, locating missing data. Pause or stop the scan anytime. The intuitive interface categorizes files for easy identification, and File View provides a detailed look at specific file types.

-
Scan Your Selected Location
Click on the 'Scan' button to thoroughly search for lost data. 4DDiG provides quick scan and deep scan options to locate your files. After the scanning process is finished, you can preview the recoverable files. Choose the files you need and press 'Recover' to save them to a safe location.
By utilizing 4DDiG, you are employing a recovery solution that simplifies the data restoration process, significantly reducing the stress and potential lost productivity that can come from dealing with Windows Explorer crashes. Make sure to save the recovered files to a different drive to prevent overwriting.
Part 3: How to Fix Windows Explorer Keep Crashing?
Before diving into the practical solutions that can help resolve Windows Explorer crashes, it’s important to approach the problem methodically. Understanding that the fixes range from simple to complex, you should initiate the troubleshooting process using the least invasive methods first. This not only saves time but also reduces the risk of unintended system changes.
Let's move on to explore a series of step-by-step methods that will assist you in fixing the crashes and regaining a stable and efficient system.
Way 1: Restart Windows Explorer
Sometimes, when the Windows Explorer process crashes, a simple restart can quickly resolve the issue. This method offers a convenient way to refresh the Explorer without the need for a full system reboot, effectively clearing temporary glitches. To restart Windows Explorer, follow these steps:
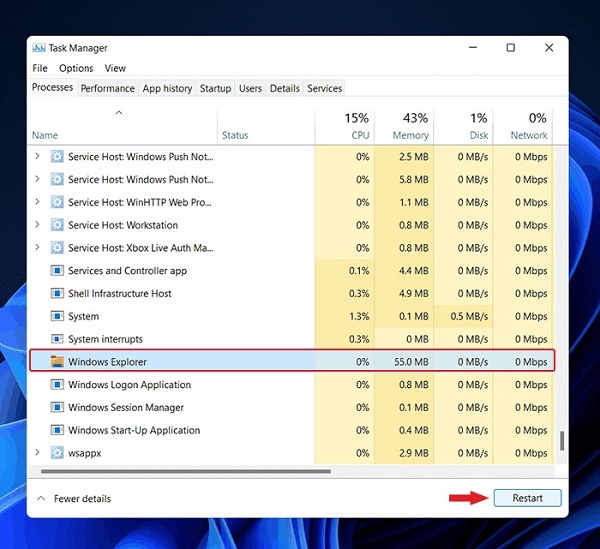
- Open Task Manager: You can either press `Ctrl + Shift + Esc` or right-click the Taskbar and select "Task Manager."
- Find Windows Explorer: Once in the Task Manager, navigate to the Process tab and scroll down until you locate "Windows Explorer."
-
Restart the Process: Right-click on "Windows Explorer" and choose the "Restart" option. Windows Explorer will close momentarily and automatically restart in a few moments.

By following this straightforward process, you can often find quick relief from frequent crashes. However, if the crashes persist, additional troubleshooting methods may be required to address the underlying cause.
Way 2: Change File Explorer Options
Altering the File Explorer options is another strategy that can help prevent crashes. By adjusting certain settings, you can eliminate factors that cause instability. Here's how you can modify these options:
- Open File Explorer Options: Press the `Windows key + S,` type in `File Explorer Options,` and hit Enter.
- Navigate to the View Tab: In the File Explorer Options window, click on the `View` tab to access advanced settings.
- Adjust the Settings: Consider disabling options such as "Launch folder windows in a separate process" or "Show preview handlers in the preview pane," which might be contributing to the crashes.
-
Apply and OK: After making the necessary changes, click `Apply` followed by `OK` to save your settings.

Tweaking these settings may vary from one scenario to another, depending on what's causing the crash. It's worth checking if simplifying these options reduces the frequency of crashes, thus ensuring a more stable File Explorer performance.
Way 3: Use System File Checker to Fix Windows Explorer Keeps Crashing
Corrupted or missing system files can often be the culprit behind the instability of Windows Explorer. The System File Checker (SFC) is an invaluable built-in Windows utility for repairing these files. Running an SFC scan can restore the integrity of system files and, thus, correct the Explorer crashing issue. Here is how to run the SFC scan:
- Open Command Prompt as Administrator: Press `Windows key + X` and select “Command Prompt (Admin)” or “Windows PowerShell (Admin)” from the menu.
- Run the SFC Command: Type `sfc /scannow` into the command line and hit Enter. This process will scan all protected system files and replace corrupted files with a cached copy.
- Wait for the Scanning Process to Complete: The scan can take some time, depending on your system. Wait to close the Command Prompt window until you see a message indicating the scan is finished.
- Evaluate the Scan Results: Once completed, the SFC tool will provide details regarding any issues found and the actions taken to fix them.
-
Restart Your Computer: After the scan and repair processes are complete, reboot your computer to allow the changes to take effect.

Running the System File Checker may resolve issues with Windows Explorer crashes by repairing any integrity violations found within the system. If the problem persists even after using the SFC tool, further troubleshooting may involve more advanced Windows recovery options.
Way 4: Run DISM Commands Using Command Prompt
When the System File Checker is not enough to resolve the crashes, Deployment Image Service and Management Tool (DISM) can be the next line of defense. DISM addresses potential corruption within the Windows system image. Here's how to use DISM to try and fix Windows Explorer crashes:
- Access Command Prompt with Elevated Privileges: Press `Windows key + X` and select “Command Prompt (Admin)” or “Windows PowerShell (Admin)” from the pop-up menu.
- Type the DISM Command: Enter the command `DISM /Online /Cleanup-Image /RestoreHealth` into the Command Prompt and press Enter.
- Allow DISM to Run: This process can take several minutes as DISM attempts to find and correct problems. It's important to maintain an uninterrupted internet connection since DISM may need to download fresh copies of corrupted files.
- Observe the Command's Progress: DISM will display its progress within the Command Prompt window. Wait until the operation is completed, which can take from a few minutes to an hour, depending on the level of corruption and your system's performance.
- Reboot Your System: After the DISM operation completes, restart your computer to allow the changes to take effect and potentially fix any issues that were causing Windows Explorer to crash.
Utilizing the DISM tool can help repair Windows component store corruption and is often a more powerful solution compared to SFC. It’s a recommended step to take before considering more drastic measures such as system restoration or Windows reinstallation.
Part 4: How to Fix Windows Explorer Keeps Crashing in Other Ways
While the aforementioned software-based methods can rectify many of the issues that lead to Windows Explorer crashes, sometimes the problem may persist, indicating a deeper issue. In such cases, it's advisable to look beyond system files and consider other culprits that might contribute to Explorer's instability.
The next segment will explore additional solutions to tackle Windows Explorer crashes, including checking for hardware issues, updating drivers, and scanning for malware, providing a comprehensive troubleshooting approach.
Way 1: Clear Cache to Fix Windows Explorer Keeps Crashing
One effective method to alleviate recurring crashes in Windows Explorer is by clearing the cache. Over time, the cache can build up with outdated or corrupted temporary files that may impede Windows Explorer's functionality. Clearing the cache can restore efficiency and stability. Follow these steps to accomplish this:
- Open the Run Dialog Box: Press `Windows key + R` to open the Run box.
- Enter the Clear Cache Command: Type `cleanmgr` into the box and press Enter. This launches the Disk Cleanup tool.
- Select the System Drive: Typically, it’s the C drive. Click `OK` to initiate the scan.
- Choose Files to Delete: From the Disk Cleanup window, select 'Temporary files' and any other file types you wish to remove.
- Confirm the Deletion: Click `OK` and then choose 'Delete Files' to confirm the action.
- Wait for the Cleanup to Complete: The tool will clear the selected files, which may take a few moments.
-
Restart Your Computer: After the cleanup process, restart your computer to ensure the changes take effect.

By regularly performing this simple maintenance task, you can reduce the likelihood of Explorer crashes due to cache-related issues and keep your system running more smoothly.
Way 2: Update Windows OS to Fix Windows Explorer Keeps Crashing
Keeping Windows up to date is crucial for system stability, and this includes preventing Windows Explorer crashes. Microsoft frequently releases updates that not only introduce new features but also provide bug fixes and performance improvements that can solve existing issues. Here is how to check for and install Windows updates:
- Access the Settings App: Press the Windows key + I'm to open Settings.
- Navigate to Update & Security: Click on 'Update & Security' to access the Windows Update section.
- Check for Updates: Click the 'Check for updates' button. Windows will then search for any available updates.
- Install Available Updates: If updates are found, click 'Install now' or 'Download and install' to begin the process.
- Restart if Necessary: Depending on the update, your computer may need to restart to complete the installation process. Save any work and close all applications before proceeding with the restart.
-
Check for Additional Updates: Sometimes, updates are rolled out in phases or require previous updates before new ones can be installed. Repeat the check for updates process until no more are available.

By ensuring that your Windows OS is up to date, you may resolve the issues causing Windows Explorer to crash and improve overall system stability and security.
Way 3: Update GPU Driver to Fix Windows Explorer Keeps Crashing
An outdated or corrupt graphics driver can often lead to system stability issues, including Windows Explorer crashes. By keeping your GPU (Graphics Processing Unit) driver up-to-date, you ensure that all visual tasks are handled efficiently, reducing the strain on your system. Here is the process to update your GPU driver:
- Open Device Manager: Right-click on the `Start` button and choose `Device Manager` from the context menu.
- Expand Display Adapters: Locate and click on 'Display Adapters' to reveal the list of graphics devices.
- Update Driver Software: Right-click on your graphics card and select 'Update driver'. Choose 'Search automatically for updated driver software' to allow Windows to find the most recent driver.
- Install the Driver: Follow the on-screen instructions to install the driver if an update is available.
- Restart Your Computer: After the driver installation is complete, restart your computer to ensure that the changes are implemented.
If Windows doesn't find a new driver, you can visit the manufacturer's website for your graphics card to download and install the driver manually. Keep in mind that applying the correct driver version is critical to avoiding compatibility issues.
Part 5: FAQ
Q 1: How do I stop Windows Explorer from crashing?
To stop Windows Explorer from crashing, start by performing the basic maintenance tasks such as running a system file check using the `sfc /scannow` command in the Command Prompt, clearing the cache with the Disk Cleanup tool, and updating your Windows OS and GPU driver. Also, check for malware with a reputable antivirus program and ensure there are no conflicting applications or corrupted files on your system.
Q 2: How do I fix the Windows Explorer crash loop?
If you are experiencing a crash loop with Windows Explorer, try booting your computer in Safe Mode and running a system file check. You should also turn off any recently added shell extensions. If the issue persists, conducting a clean boot to determine if background programs are causing the crash can be helpful. As a last resort, consider performing a system restore or a reset to get your system back to a stable state.
Q 3: Is it safe to restart Windows Explorer?
Yes, restarting Windows Explorer is generally safe and can often resolve minor operational glitches such as freezes or crashes. To do this, you can open Task Manager, find the Windows Explorer process, right-click on it, and select "Restart." Your desktop icons, taskbar, and Start menu will disappear momentarily as Windows Explorer restarts, but this should not affect your open applications or data.
Conclusion
Persistent crashes in Windows Explorer can often be mitigated through a series of troubleshooting methods, such as performing system file checks, clearing the cache, ensuring the OS is up to date, and updating GPU drivers. Each of these solutions targets a specific cause of instability within the system, ensuring that you can maintain optimal performance and minimize disruptions in your workflow. And we introduced the bonus tip of 4DDiG Windows Data Recovery . Remember, regular maintenance and updates are key to preventing these issues. If you've found these tips helpful, consider sharing this guide with others who may also benefit from a more stable computing experience. Do not hesitate to reach out for further assistance or share your success stories in the comments below. Keep your system running smoothly; start applying these fixes today!




 ChatGPT
 Perplexity
 Google AI Mode
 Grok
Grok

