How to Use Flyby11 to Bypass Windows 11 Requirements?
With the release of Windows 11, Microsoft introduced stringent hardware requirements like TPM 2.0, Secure Boot, and a supported CPU generation. This blocked many users from upgrading their PCs to the latest Windows version even if they wanted to. Flyby11 is a useful free tool by Belim that can help you bypass these upgrade restrictions to install Windows 11 on unsupported hardware. In this comprehensive guide, we will cover everything about using Flyby11 - what it is, how safe it is, step-by-step installation instructions, and even an extra tip on upgrading with the 4DDiG Partition Manager.
What is Flyby11?
Flyby11 is a free Windows customization tool designed by Belim, the creator of several handy utilities for tweaking and enhancing Windows. It is built specifically to remove the annoying restrictions that prevent you from installing Windows 11 version 24H2 on hardware that Microsoft deems incompatible.
The Windows maker introduced strict requirements starting with Windows 11, meaning that the operating system would only work on newer processors and devices with TPM 2.0 and Secure Boot enabled. This instantly made a huge number of working PCs ineligible for the upgrade.
Flyby11 helps bypass Windows 11 requirements for TPM, Secure Boot, CPU generation, and other factors. It kicks off a customized Windows Server installation that skips these requirements, allowing for an in-place upgrade to Windows 11 on unsupported client systems.
In a nutshell, Flyby11 lets you upgrade even older PCs, laptops, and devices to Windows 11 regardless of CPU generation, TPM status, Secure Boot settings, or other limitations. It essentially fools the system into thinking you are installing Windows Server instead of Windows 11, dodging the restrictive policies in the process.
✅ You May Also Like: Why Isn't My PC Eligible for Windows 11: Reasons Explain & Safe Solutions
Is Flyby11 Safe to Use?
With utilities that modify core Windows functions, safety is often a concern. In the case of Flyby11, there was some initial doubt about its security impact. When Flyby11 version 1.1 debuted, Microsoft Windows Defender flagged it as potentially unwanted software.
Specifically, Defender marked it as HackTool/PUA:Win32/Patcher. PUA here stands for Potentially Unwanted Application. This blocking of Flyby11 made it challenging to run on systems with Windows security protections enabled.
However, Belim contacted Microsoft regarding the flagging issue. The company then cleared Flyby11 version 1.2, certifying it as safe for use. The old “HackTool” classification applied only to the obsolete 1.1 release. The latest Flyby11 1.2 update remains clean with no threats detected.
The newer Flyby11 release incorporates adjustments to work properly with the updated CPU and TPM policies from Microsoft updates. It also refines some scripts for stability. Independent testing found no malware payloads or suspicious activity.
As long as you download Flyby11 only from the official source, use the latest verified 1.2 version, and enable any disabled security protections afterward, it poses no risks. With over 25,000 downloads so far, plenty of people are already using it with no worries.
✅ You May Also Like: How to Use Flyoobe to Bypass Windows 11 25h2 Requirements
How to Use Flyby11 to Install Windows 11
With those basics covered, let us dive into the step-by-step process for harnessing the strength of Flyby11 to bypass Windows 11 requirements on unsupported hardware.
1. Download the Windows 11 ISO
Flyby11 offers the provision of downloading the necessary Windows 11 ISO file automatically for you. However, I faced a Microsoft error when attempting this which blocked the download.
The error message indicated that using anonymous or location-hiding tools is prohibited, referring to Flyby11's method of fetching the file. So instead, it is better to grab the ISO manually in advance before starting.
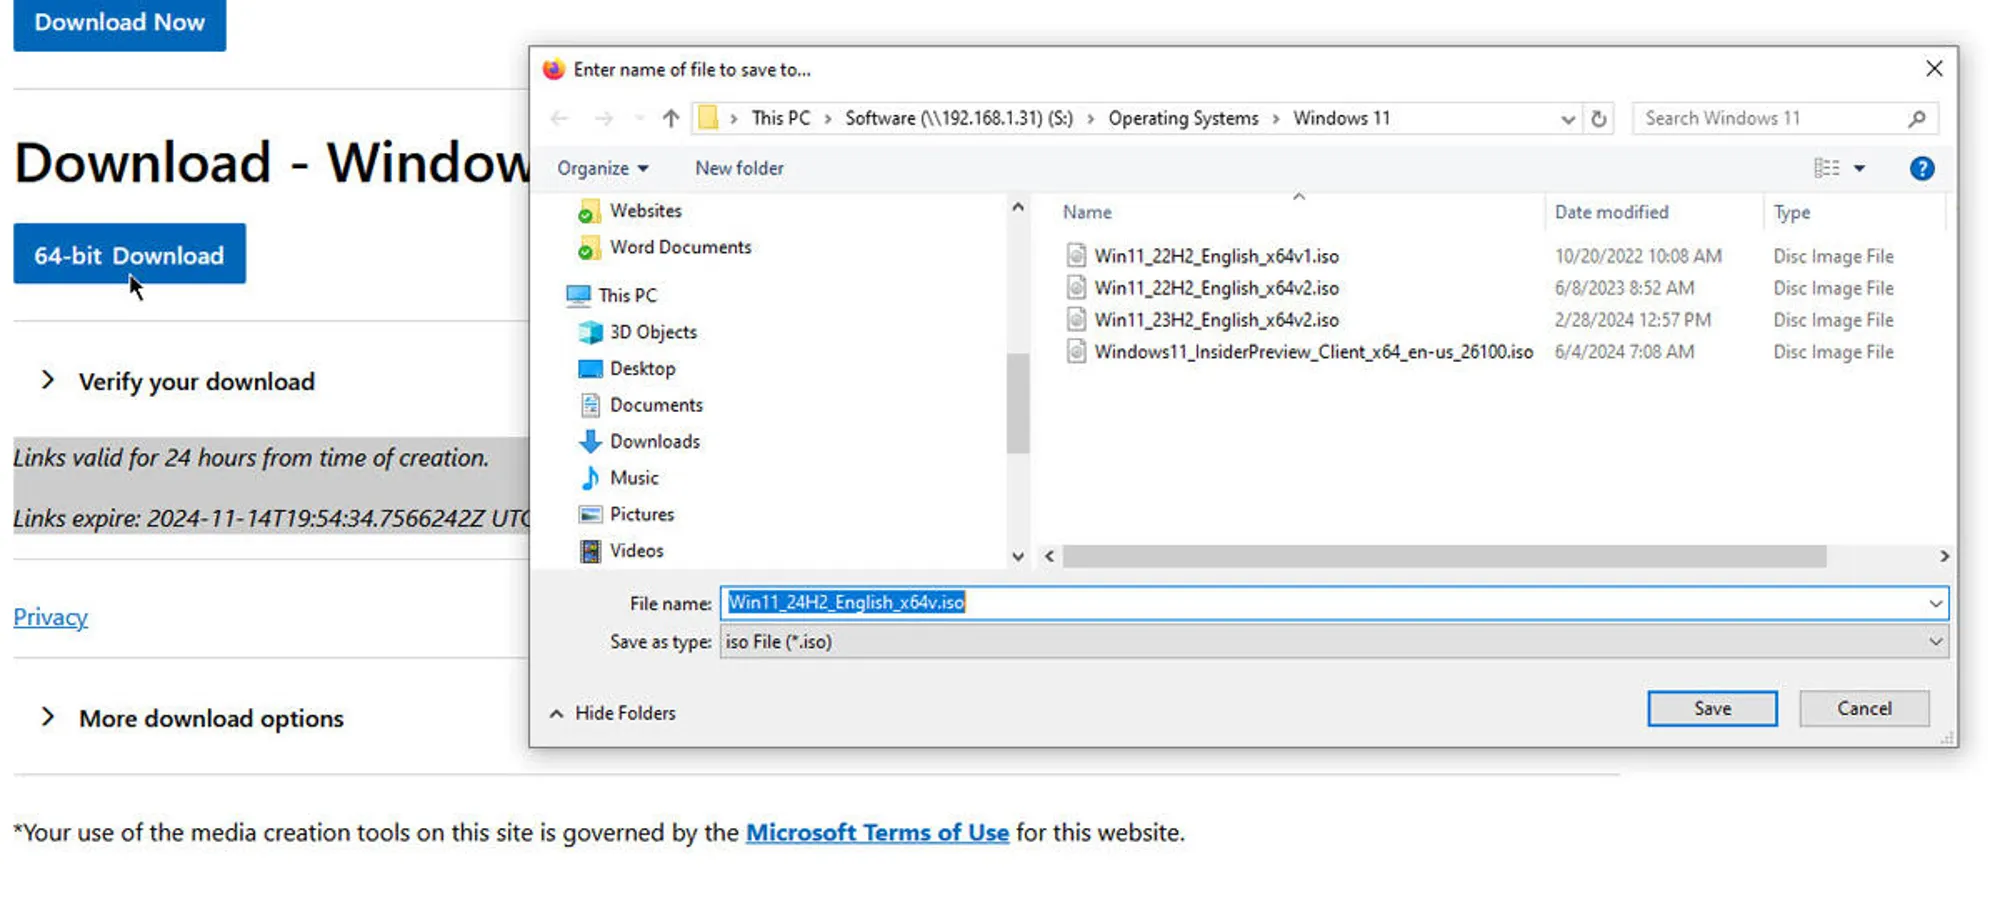
Navigate to Microsoft's Windows 11 download page on your browser. Scroll down the page section for the Download Windows 11 Disk Image (ISO) option for 64-bit devices. Click the drop-down menu for Select Download and pick Windows 11 (multi-edition ISO for x64 PCs).
Next, click the prominent Download Now button. Click the language drop-down and choose your desired language (and regional variant if needed). Click the Confirm button after selection.
2. Download and Install Flyby11
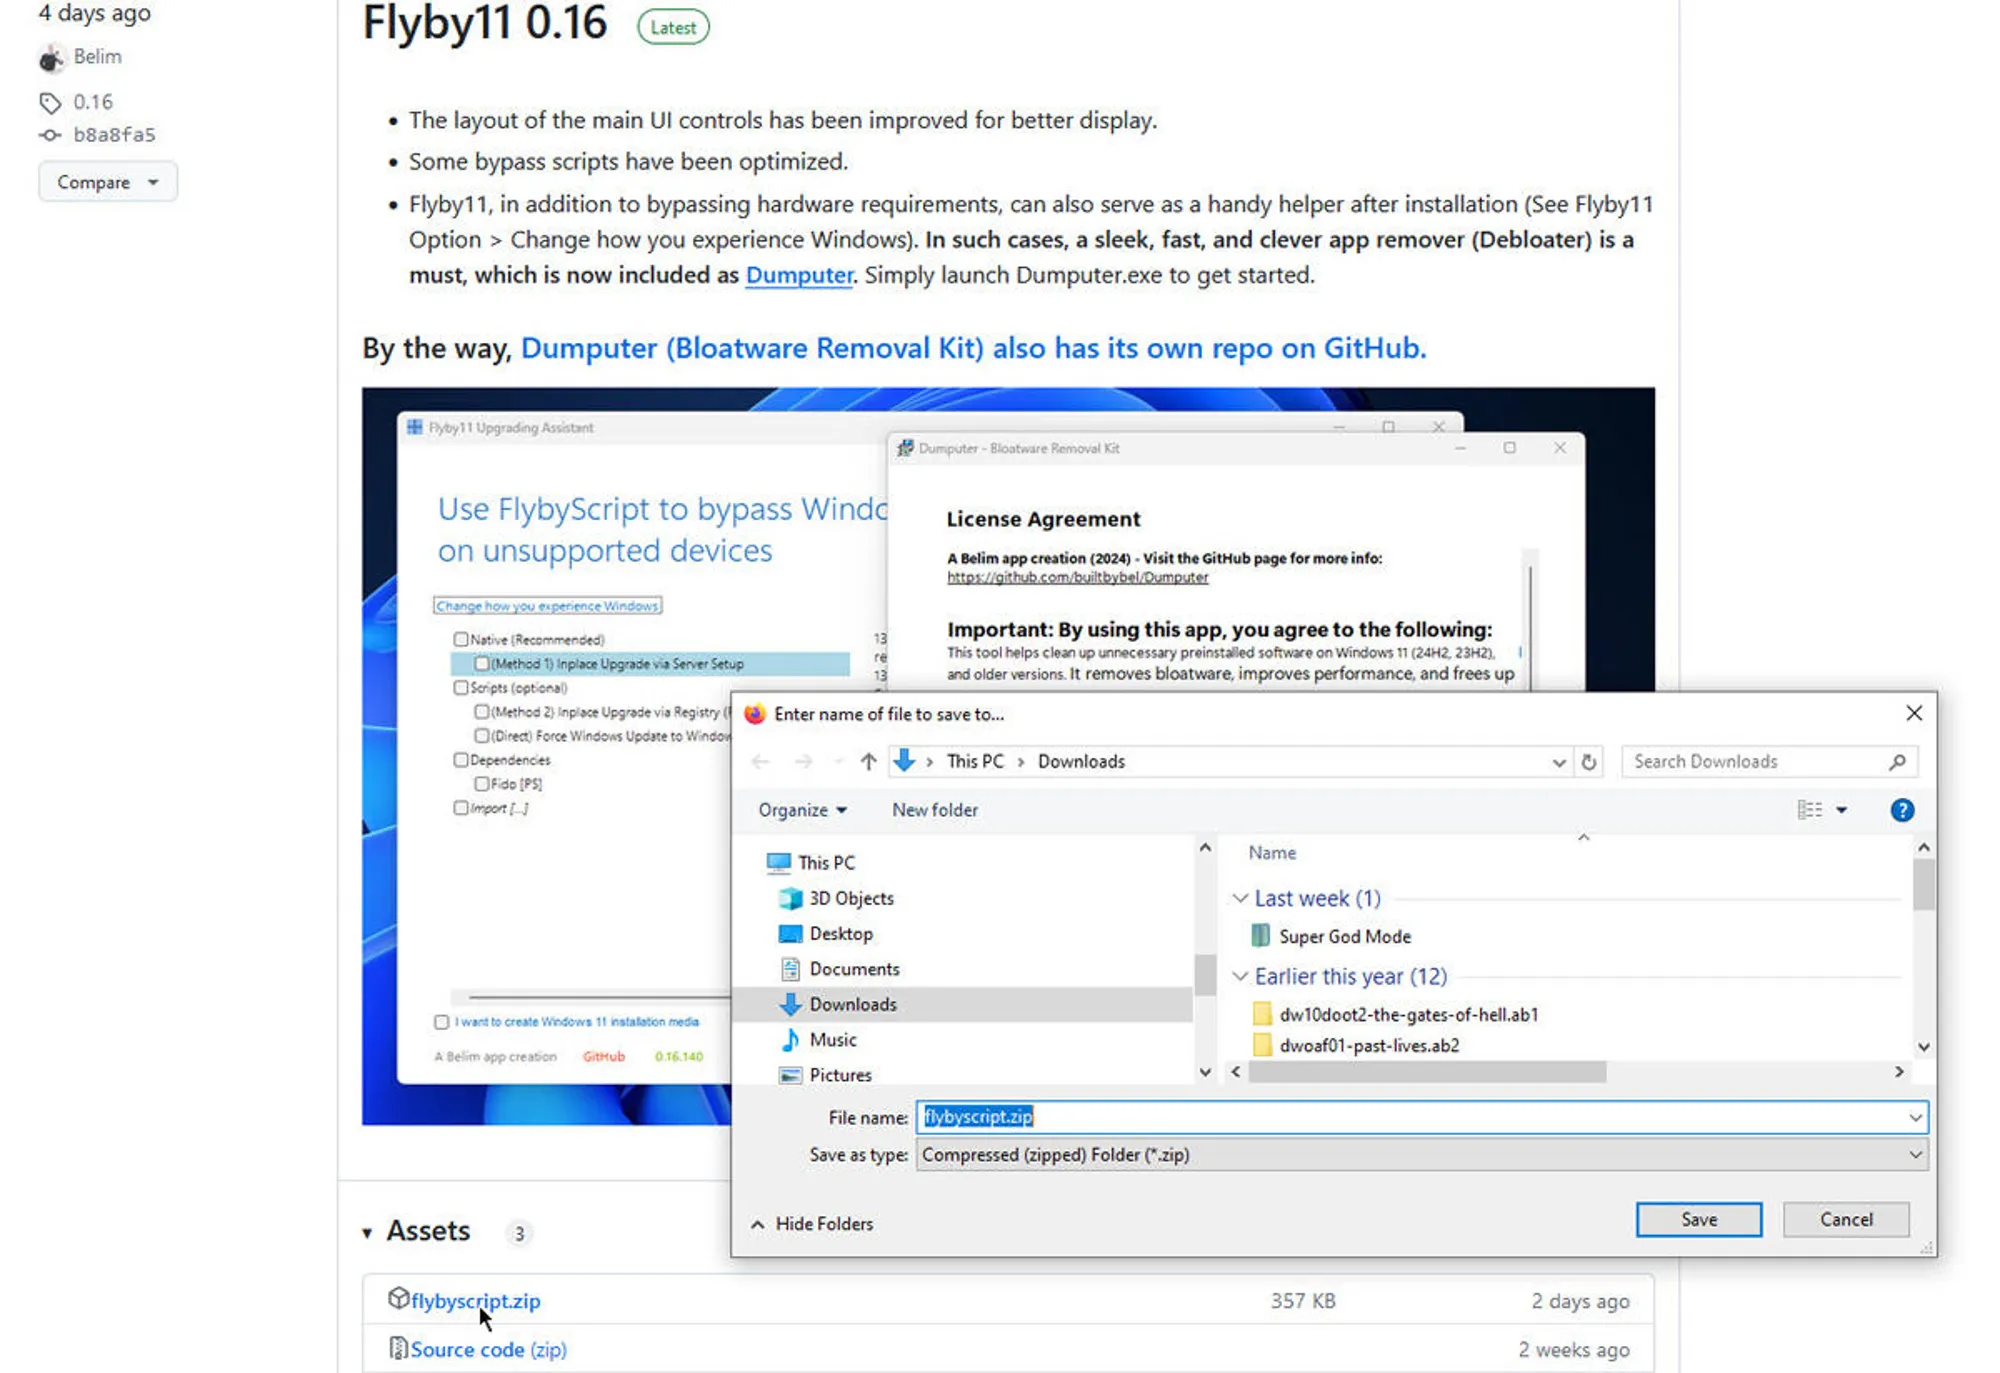
With Windows 11 media ready, visit the Flyby11 GitHub page. Here you can view details about the utility, including the capabilities and latest changes.
Click the link near the top for the flybyscript.zip file to download the archive containing Flyby11 system files. Extract this ZIP folder using an archive manager like 7-Zip or WinRAR.
Inside is a file named Flyby11.exe. Double click to launch it. A SmartScreen warning may appear from Windows Defender - just click to run the file anyway.
3. Choose Windows 11 Installation Method
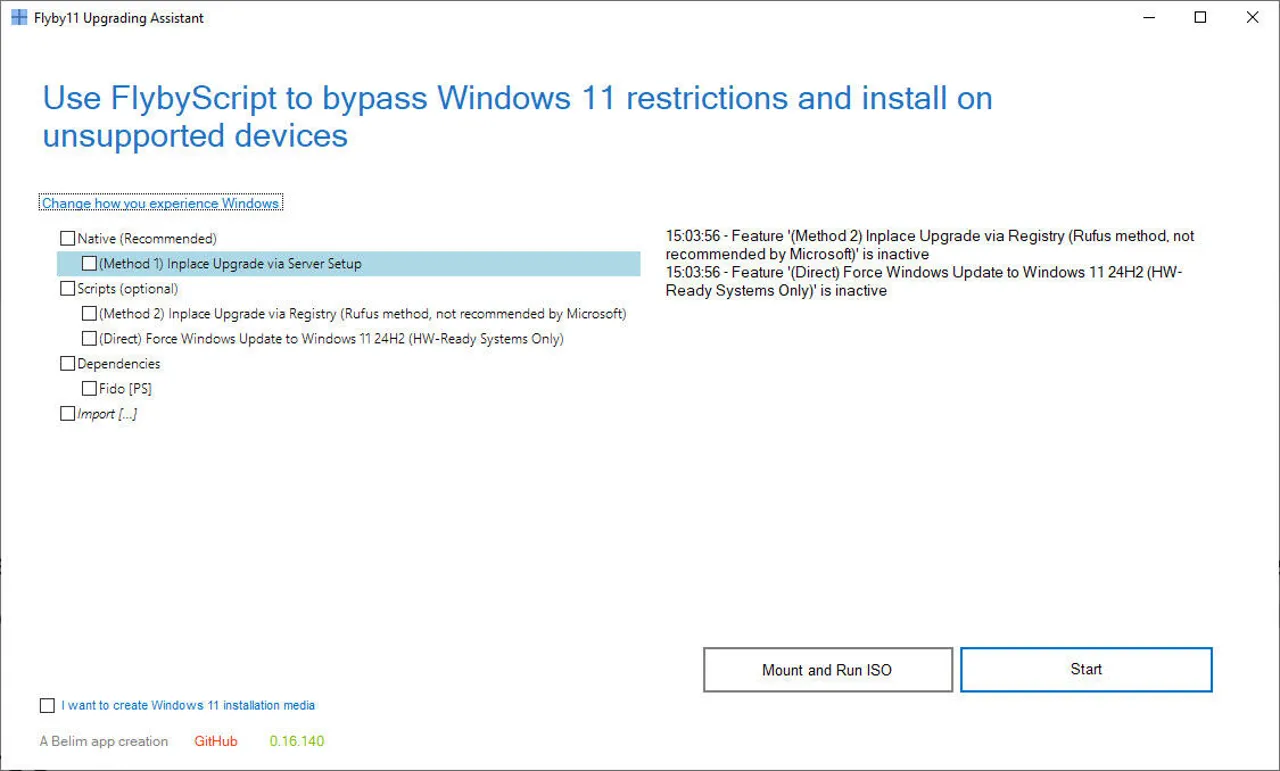
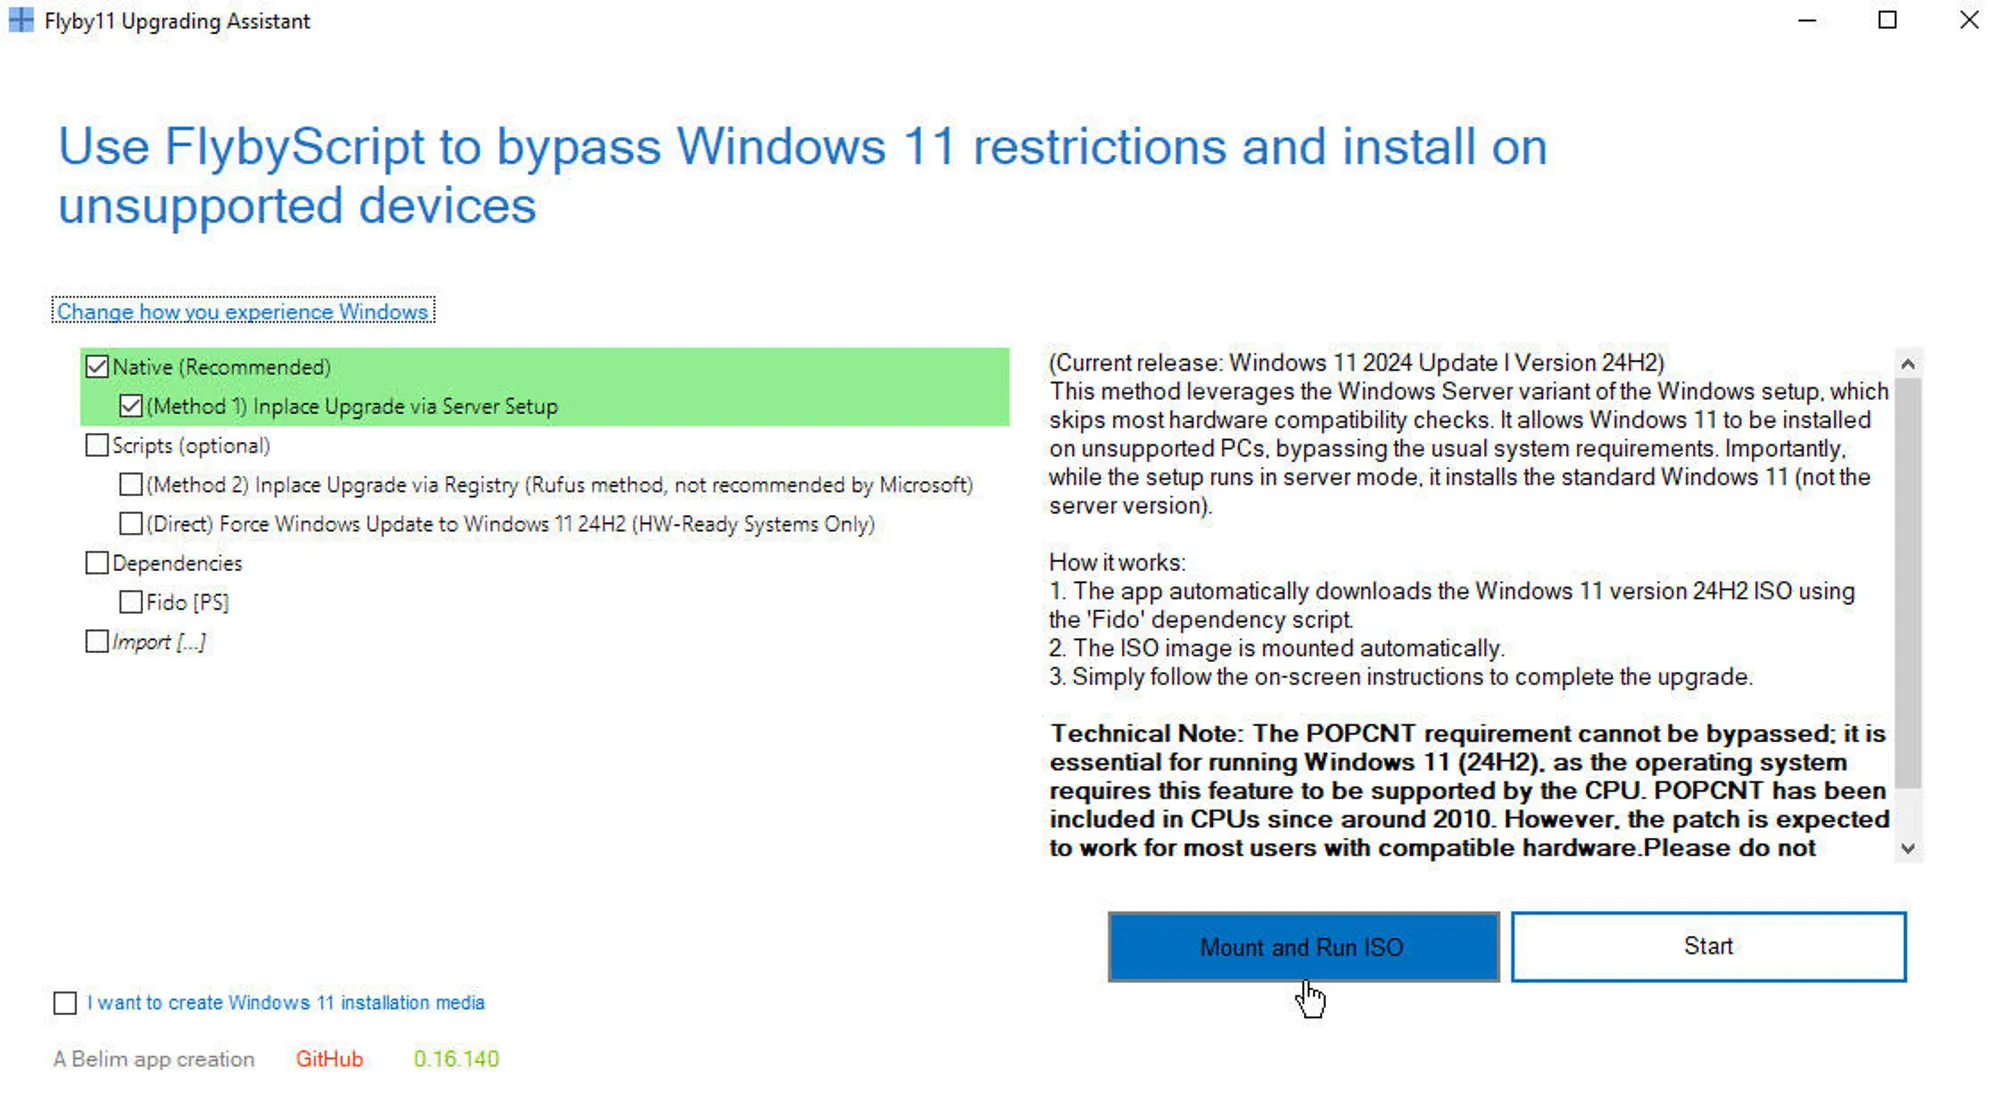
The Flyby11 interface is straightforward. It lists all the available methods to install or upgrade to Windows 11 using the tool.
If your objective is to update an existing Windows 10 or 11 system to the latest Windows 11 2022 Update (24H2), check the box for the first option:
Perform an in-place upgrade via the server setup
This will initiate a customized Windows Server installation that skips checks, then switches to performing a full Windows 11 upgrade keeping your apps and data.
Assuming you have already downloaded the official Windows 11 ISO separately, click the button at the bottom to Mount and Run ISO.
4. Start the Windows 11 Installation
A file selection dialog pops up for choosing your Windows 11 ISO image. Select the 24H2 ISO you downloaded previously from Microsoft.
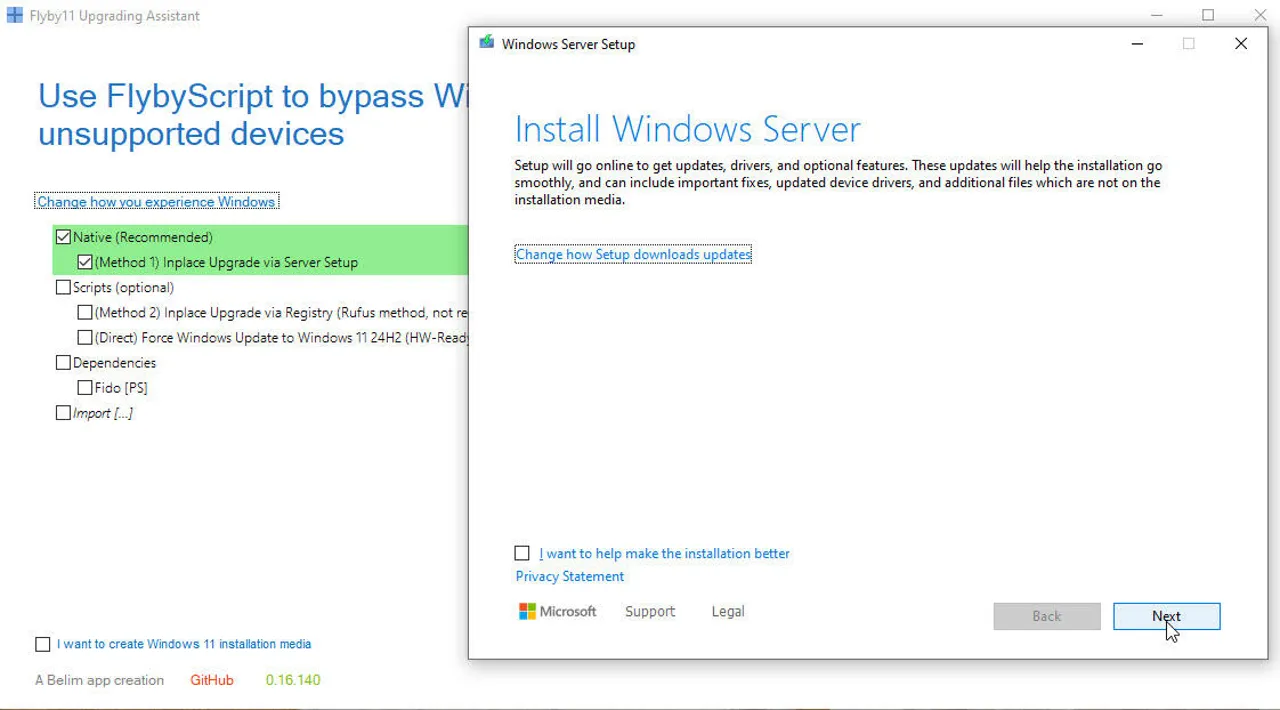
Shortly after, a Windows Server setup window appears stating that Flyby11 has triggered the specialized Server installation flow for upgrading Windows 11 on this device. Click Next to continue.
5. Complete the Upgrade Process
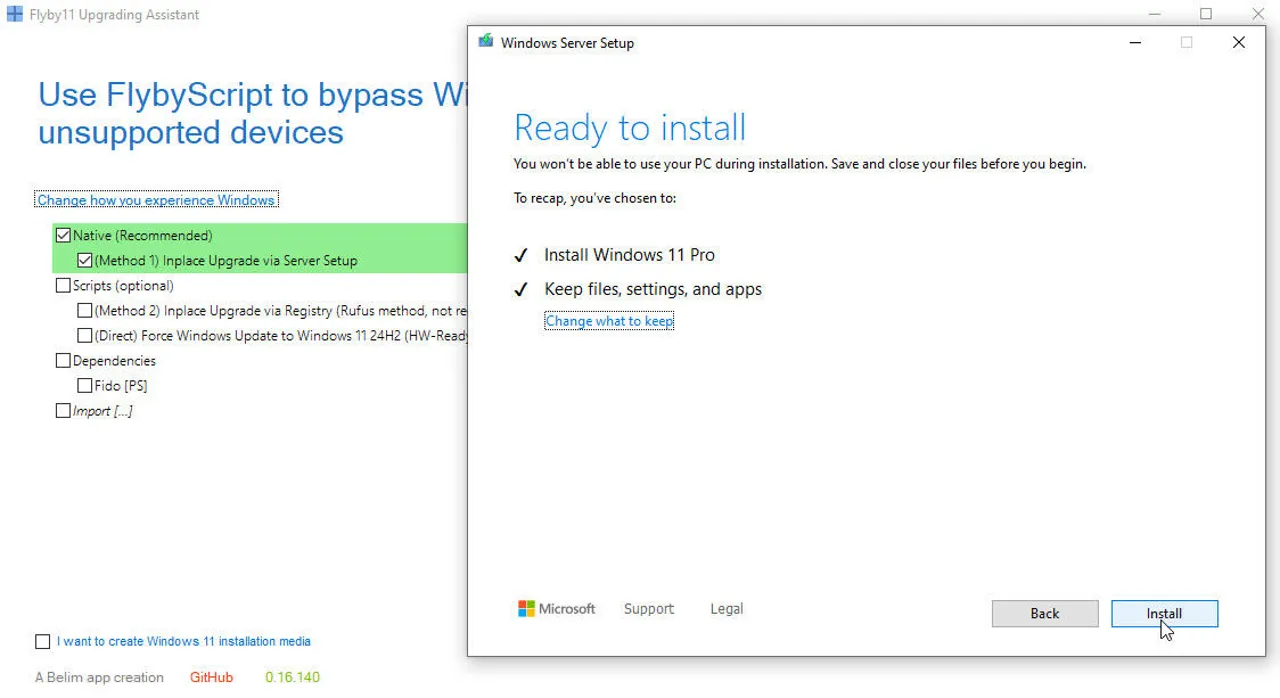
Accept the license terms in the Server setup process to proceed. On the next screen, ensure you select the option to Keep personal files and apps.
This preserves your user profiles, documents, installed programs, and all customizations during the in-place upgrade. The Server setup then checks for updates to integrate.
When you reach the Ready to Install screen, click the Install button to commence the upgrade. The system performs some preparatory work before kicking off the main upgrade.
6. Sign Back In to the Upgraded Windows 11
Once the upgrade completes after an hour or so, your device automatically restarts. You can sign back into Windows like normal. Give the system 5-10 minutes for first-run post-update tasks.
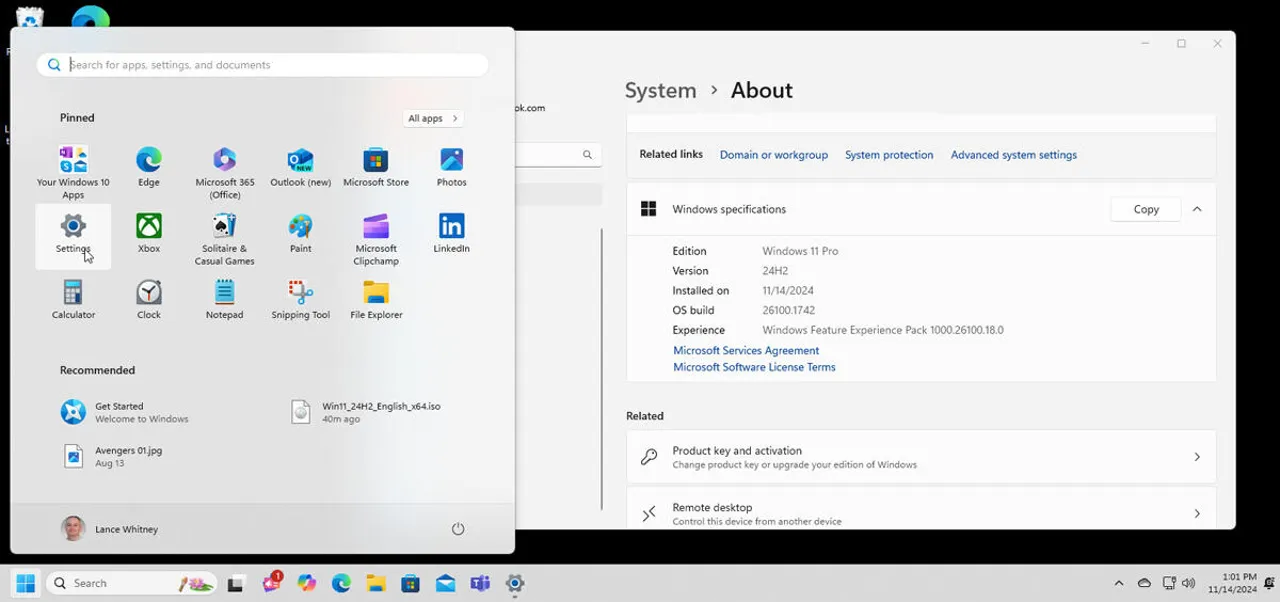
To validate successful upgrade to Windows 11 version 22H2 (build 24H2), head to Settings > System > About. The Windows Specifications section here should state Version 22H2 (Build 22621.xxxx).
And you've successfully upgraded your unsupported system to the latest Windows 11 2022 Update with Flyby11!
Extra Tip: Upgrade Windows 10 to Windows 11 with 4DDiG Partition Manager
Alongside Flyby11, another easy way to dodge Windows 11 requirements is by leveraging the capabilities of 4DDiG Partition Manager. Let's discuss how it can help upgrade ineligible Windows 10 devices.
4DDiG Partition Manager is a popular disk utility for managing partitions alongside handy Windows upgrade tools.
Features
Here are some of its key capabilities:
- Bypass “This PC can’t run Windows 11” issue in a few clicks. The upgrade helper built into 4DDiG can override the restrictive policies and upgrade checks.
- Verify Windows 11 upgrade eligibility and convert MBR to GPT when needed. It scans your hardware and guides you on meeting requirements like TPM 2.0 and Secure Boot.
- Transfer Windows OS partitions to an SSD without reinstalling. Using the copy wizard, you can migrate Windows to a faster solid-state drive.
- Resize, split, create, delete, or format volumes as required. The advanced partition editor lets you modify partitions however you wish to accommodate upgrades.
- Repair, recover, or restore partitions and remove unwanted recovery volumes. Fix boot issues, retrieve lost partitions, and regain disk space.
With 4DDiG Partition Manager handy, upgrading to Windows 11 is straightforward:
-
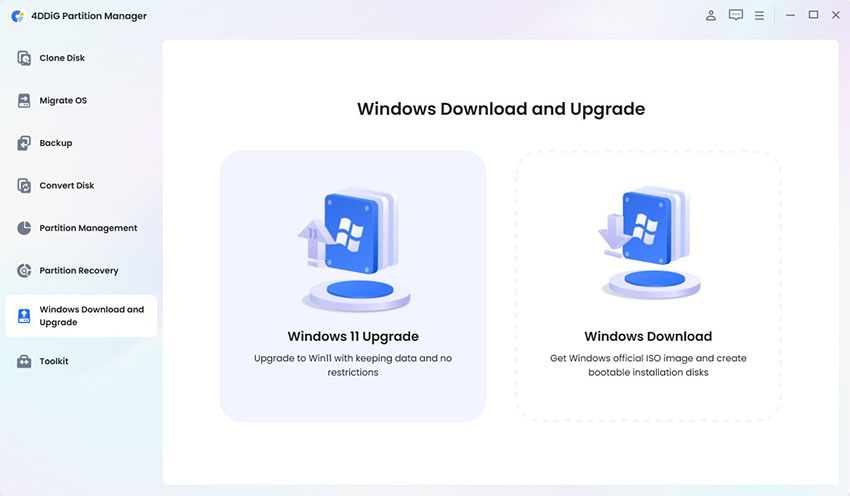
Download and install 4DDiG Partition Manager from the official site. Launch the program when ready.
FREE DOWNLOADSecure Download
-
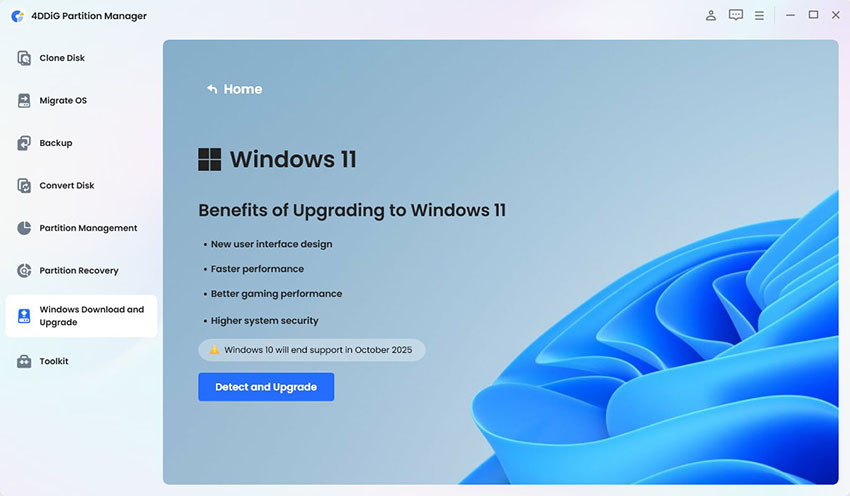
Select the option for Upgrading to Windows 11. Click Detect and Upgrade to scan your hardware.

-
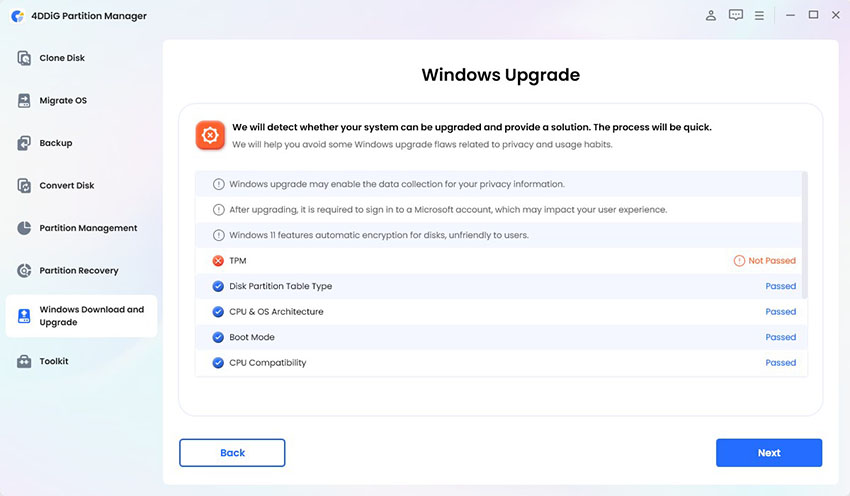
Click "Detect and Upgrade". You receive a report of requirements to be addressed.

-
Click Next to start bypassing these restrictions automatically.

-
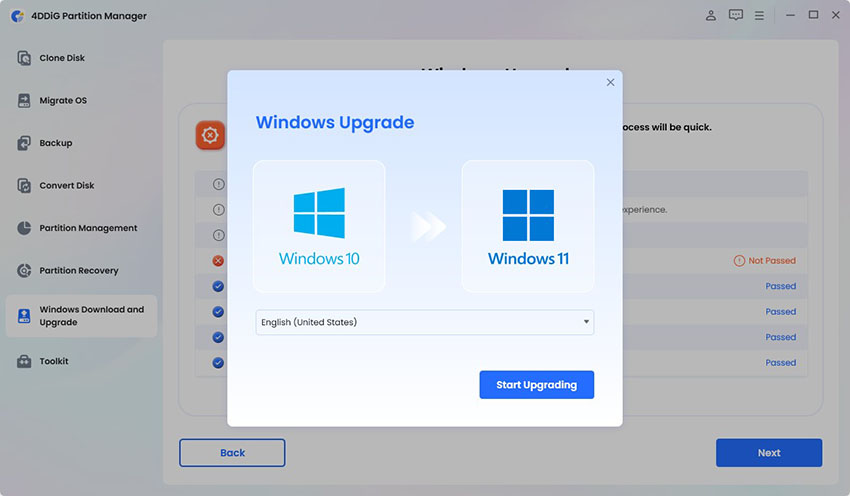
Pick your Windows language on the next screen. Click Start Upgrading to commence the bypass process. Approve any confirmation prompts if asked.

-
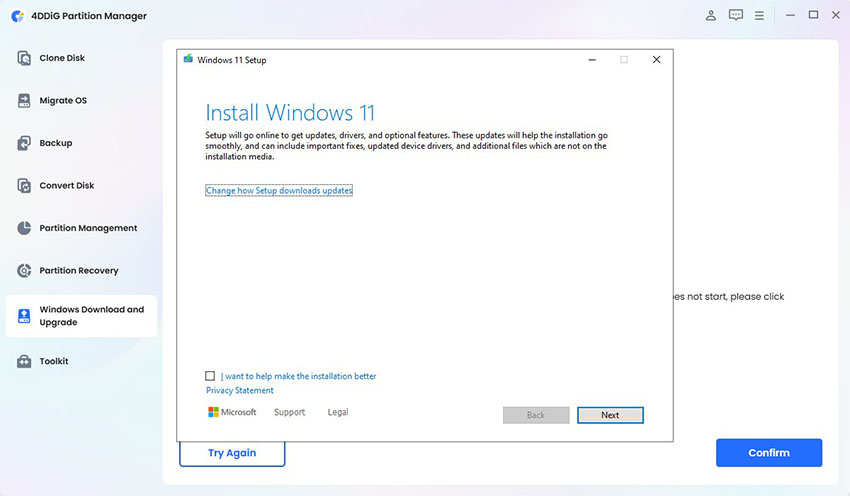
After bypass completes successfully, you can directly install the Windows 11 update on this system just like on fully compatible hardware, without blockers.

Conclusion
Tools like the Flyby11 bypass script and 4DDiG Partition Manager make getting Windows 11 running on your current PC far easier. When Microsoft enforces stringent and unreasonable hardware requirements that render perfectly capable machines obsolete, helpful utilities like these are essential. Bypass Windows 11 requirements using 4DDiG Partition Manager easily.
 ChatGPT
 Perplexity
 Google AI Mode
 Grok
Grok

