How to Fix the Exception Breakpoint Has Been Reached on Windows 11
Encountering the error message "Exception Breakpoint Has Been Reached" on your Windows system can cause concern, as it may disrupt your workflow and potentially lead to data loss. However, fear not, as there are quick and effective ways to address this issue. This comprehensive guide will delve into the root causes of the ciscocollabhost exe the exception breakpoint error, explore methods to recover lost data, and provide step-by-step solutions to fix the problem.

Part 1: What is the exception breakthrough that has been reached?
This error typically occurs when a program encounters an unexpected exception during its execution. It indicates that an application has hit a predefined breakpoint, a designated point in the program's code where the execution is paused for debugging purposes. This error signals an abnormal interruption in the program's flow, demanding attention to diagnose and resolve the issue.
Part 2: How to Recover Lost Data When Exception Breakpoint Has Been Reached
Data loss can be a severe concern when faced with the "Exception Breakpoint Has Been Reached" error. To address this issue, a reliable data recovery tool is essential. One such tool that stands out is 4DDiG Windows Data Recovery. This powerful software is designed to recover lost or deleted files efficiently. Why Choose 4DDiG Windows Data Recovery?
4DDiG Windows Data Recovery is a preferred choice for several reasons. It boasts an intuitive user interface, making it accessible for novice and experienced users. The software supports a wide range of file types and storage devices, ensuring versatility in data recovery. Its advanced scanning algorithms can also retrieve data lost due to various scenarios, including the "Exception Breakpoint Has Been Reached" error.
Secure Download
Secure Download
To illustrate the user-friendly approach of 4DDiG, below is a brief overview of the steps involved in using the software: Now, let's walk through the steps to recover files using 4DDiG Windows Data Recovery:
-
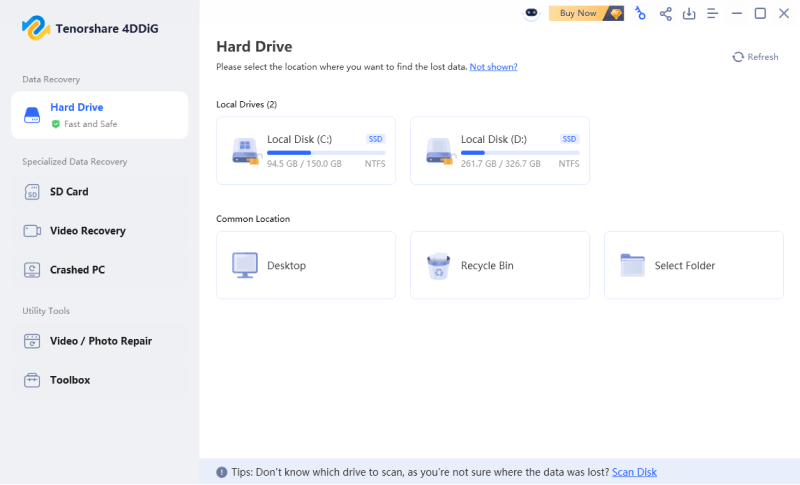
Choose a Local Disk
Install and launch the 4DDiG Data Recovery software on your computer. Once the program opens, you'll see a menu on the main screen. Locate the disk where the data was originally stored. Click the "Start" button to initiate the scanning process. This will search for recoverable files on the chosen disk.
-
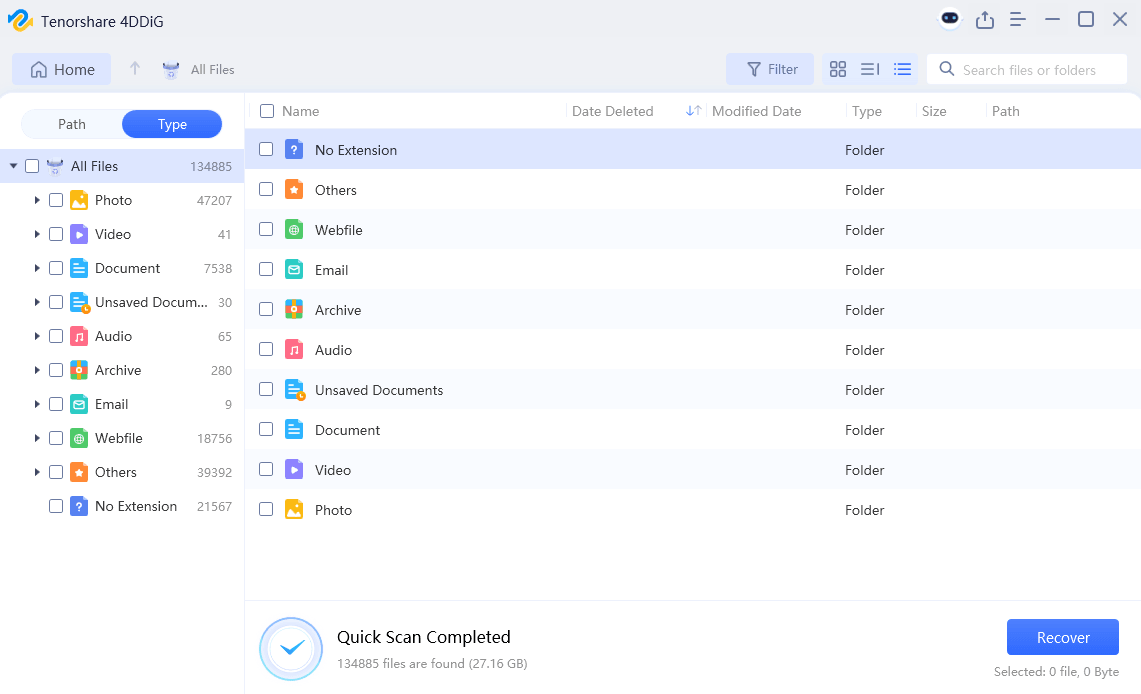
Perform a Scan on the Local Disk
4DDiG scans the chosen drive quickly and comprehensively, searching for any lost data. You can even pause or stop the scan if you find the files you need sooner. The program displays the results in two ways, Tree View and File View. Additionally, you can search for specific files by name or use filters to narrow down the results, making it easier to find what you're looking for.
-
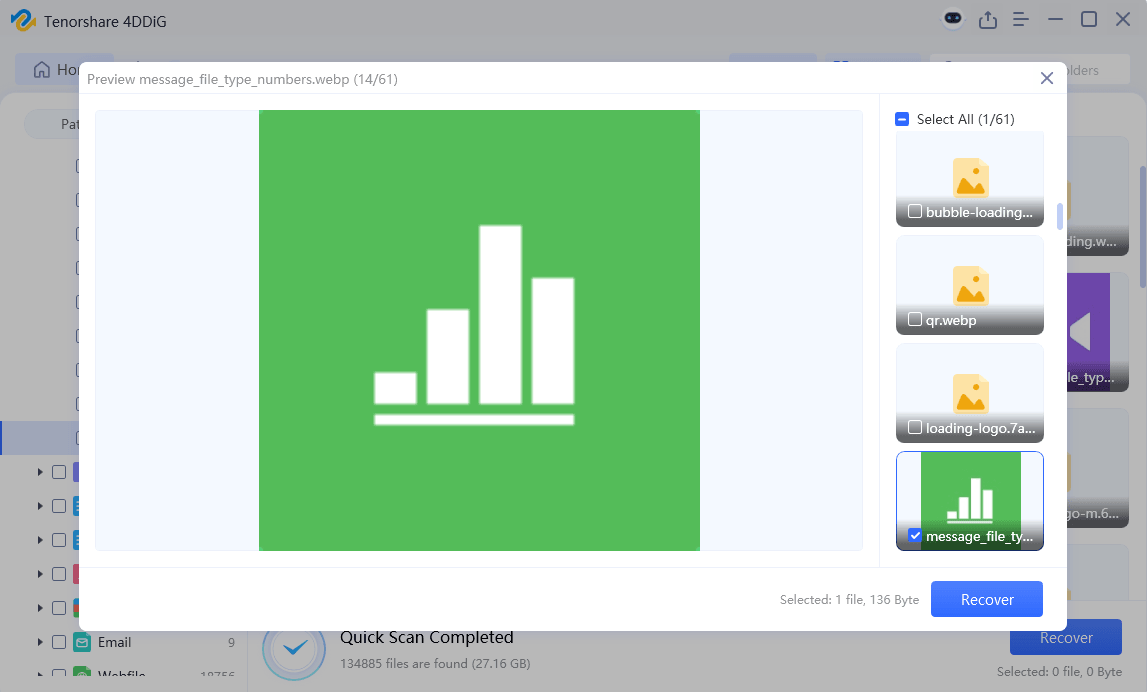
Preview and Recover Files from the Local Disk
Before restoring your files, you can take a peek at them using the preview function. This helps you confirm you've found the right ones. Remember
Part 3: How to Fix the Exception Breakpoint Has Been Reached
While data recovery is essential, resolving the root cause of the "Exception Breakpoint Has Been Reached" error is equally important. Here are several methods to fix the issue and ensure smooth operation of your Windows system.
Way 1: Disable Startup Apps on Windows 11
One of the common culprits behind the "Exception Breakpoint Has Been Reached" error is the interference caused by unnecessary applications launching during startup. These applications can conflict with system processes and contribute to the error message. Disabling startup apps is a straightforward and effective method to address this issue on Windows 11. Follow these steps to manage your startup apps:
- Press Ctrl + Shift + Esc to open Task Manager. Alternatively, right-click the taskbar and select "Task Manager" from the menu.
- In Task Manager, click on the "Startup" tab. This section lists all the applications that launch when your computer starts.
- Review the list of startup apps. Identify applications that you don't need to start with Windows. These are often background processes or applications that automatically launch on boot.
- Right-click on the unnecessary apps and select "Disable." Turning off an app ensures it won't run during startup.
- After turning off the selected apps, close Task Manager and restart your computer. This step is crucial to apply the changes you've made.
-
Once your computer has restarted, observe whether the "Exception Breakpoint Has Been Reached" error persists. You've successfully identified a conflicting startup app if the issue is resolved.

Way 2: Reset or Repair the App
If the exception breakpoint a breakpoint has been reached 0x80000003 error is specific to a particular application, it might be due to corruption or misconfiguration. Resetting or repairing the app can often resolve these issues. Here's a step-by-step guide on how to reset or repair an app on Windows 11:
- Click on the "Start" menu, and then select the gear icon or press Win + I to open the Settings menu.
- Select "Apps" or "Apps & Features" in the Settings menu from the left sidebar. It will display a list of all installed applications on your system.
- Scroll through the list of installed apps to find the one causing the "Exception Breakpoint Has Been Reached" error.
- Click on the problematic app, and a set of options will appear. Choose "Advanced options."
- In the Advanced options, look for the "Reset" button. It will reset the app to its default settings, resolving configuration issues.
- If the app has a "Repair" option, click on it. It will attempt to fix any corrupted files associated with the application.
-
After resetting or repairing the app, it's advisable to restart your computer. It ensures that any changes made to the application settings take effect.

Way 3: Run CHKDSK to Detect and Repair Drive Errors
Disk errors can contribute to the "Exception Breakpoint Has Been Reached" error on your Windows 11 system. Running the Check Disk utility (CHKDSK) is a built-in tool that can help identify and repair issues within your drives. Follow these steps to run CHKDSK:
- Right-click on the Start menu, and select "Command Prompt (Admin)" or "Windows PowerShell (Admin)." If using PowerShell, run it as an administrator.
- In the Command Prompt or PowerShell window, type the following command and press Enter:
- chkdsk /f
- If the drive you want to check is the system drive (usually C:), you may be prompted to schedule the check for the next system restart. Type 'Y' and press Enter.
- Close all open applications and restart your computer. The CHKDSK utility will check and repair your disk during the boot process.
-
CHKDSK will run before the Windows operating system loads. The process may take some time, depending on the size and health of your disk.

Way 4: Create a New Local Administrator Account
Corrupted user profiles can sometimes lead to the "the exception breakpoint 0x80000003" error on Windows 11. Creating a new local administrator account can help circumvent issues associated with the existing user profile. Follow these steps to create a new account:
- Click on the "Start" menu, and then select the gear icon or press Win + I to open the Settings menu.
- In the Settings menu, select "Accounts" from the left sidebar.
- Click on "Family & other users" in the left sidebar.
- Under the "Other users" section, click on "Add account."
- Choose "I don't have this person's sign-in information" if creating an account for someone else. Select "Add a user without a Microsoft account if making an account yourself."
- Fill in the required information for the new user, including a username and password. Click "Next."
- On the next screen, choose "Administrator" as the account type to ensure the new account has administrative privileges. Click "Finish."
-
Sign out of your current account and enter the newly created one. This change may require a system restart.

Way 5: Run the Memory Diagnostic Tool
Memory-related issues can contribute to the "Exception Breakpoint Has Been Reached" error on Windows 11. Running the Windows Memory Diagnostic Tool can help identify and address problems with your computer's RAM. Follow these steps to run the Memory Diagnostic Tool:
- Press the Win + R keys to open the Run dialog box.
- Type "mdsched.exe" and press Enter. It will launch the Windows Memory Diagnostic tool.
- The tool will prompt you to choose between two options:
- "Restart now and check for problems": This option will restart your computer immediately and initiate the memory test.
- "Check for problems the next time I start my computer": This option allows you to schedule the test for the next system restart. Choose the option that suits your preference.
- If you restart immediately, your computer will continue, and the Memory Diagnostic Tool will begin testing your RAM. This process may take some time, so be patient.
- After the memory test is complete, your computer will boot into Windows. Open the Event Viewer to review the results:
- Press Win + X and select "Event Viewer."
- In the left sidebar, navigate to "Windows Logs" > "System."
-
Look for an event source named "MemoryDiagnostics-Results." Check for any reported issues.

Part 4: FAQ
Q 1: Why does my Outlook say a breakpoint has been reached?
The "Exception Breakpoint Has Been Reached" error in Outlook can occur due to conflicts with add-ins, corrupted profiles, or issues with the Outlook installation. Try turning off add-ins, repairing the Outlook installation, or creating a new profile.
Q 2: Does exception mean error?
Yes, in the context of programming and software development, an exception refers to an error or unexpected event that disrupts the normal flow of a program. The "Exception Breakpoint Has Been Reached" error signals the detection of such an exception during program execution.
Q 3: Why was the breakpoint reached when shutting down the PC?
This issue may arise due to problematic startup programs, corrupted system files, or issues with the Windows registry. Following the earlier mentioned solutions, such as disabling startup apps or running CHKDSK, can help resolve this problem.
Conclusion
Encountering the the exception breakpoint a breakpoint has been reached error on your Windows system can be challenging. Still, you can swiftly address the issue with the right tools and methods. Utilizing 4DDiG Windows Data Recovery provides a reliable solution for recovering lost data, ensuring that valuable information is not permanently compromised. Combine this with the recommended troubleshooting steps, and you'll be on your way to a seamlessly functioning Windows system. Remember, proactive measures and swift action are crucial to maintaining the health and performance of your computer.
💡 Summarize with AI:
You May Also Like
- Home >>
- Windows Fix >>
- How to Fix the Exception Breakpoint Has Been Reached on Windows 11


 ChatGPT
 Perplexity
 Google AI Mode
 Grok
Grok

