How to Fix 0xc1900101 Error on Windows 11/10?
Struggling with the 0xc1900101 error on Windows 11 or 10? This common upgrade issue can be a roadblock to updating your system. No worries! Read this article. We will show you 7 easy solutions to resolve this error and ensure a smooth upgrade to the latest Windows version.

Part 1: What Is Windows Update Error 0xc1900101?
If you encounter the error 0xc1900101 while installing important updates for Windows 10 or 11, it could potentially leave your computer vulnerable or cause issues.
Basically, it means something has gone wrong while trying to install the Windows update. The confusing string of numbers tells you there is an issue that makes the update not work right.
This error can show up in different ways:
- 0xC1900101 - 0x2000c
- 0xC1900101 - 0x20004
- 0xC1900101 - 0x20017
- 0xC1900101 - 0x40017
- 0xC1900101 - 0x30018
- 0xC1900101 - 0x40021
The issue is usually a program or driver on your computer that does not work with the newest Windows versions. Old software and hardware that has not been updated can cause the 0xc1900101 error.
It also pops up if you have unfinished installations or corrupted temporary files. With some technical troubleshooting, you can find what program or background process is causing the error.
Part 2: How to Fix 0xc1900101 Error?
We've put together seven easy ways to get rid of this problem for good. Our guide is super easy to follow, even if you're not a computer expert. We'll show you step-by-step how to make your computer work smoothly again. Now let's look at these 7 fixes one by one!
Way 1: Free up Disk Space via 4DDiG Duplicate File Deleter
One hidden reason for the annoying 0xc1900101 error might be too much unwanted stuff on your hard drive. When your computer's storage gets filled with duplicate files, temporary files, and other unnecessary things, it can cause problems during major Windows updates.
Cleaning out this digital cruft with 4DDiG Duplicate File Deleter can help fix the update issues. It quickly finds and deletes duplicate files on Windows devices.But why choose 4DDiG?
- Fast scanning to find all duplicate files, like photos, videos, music files and documents
- Supports internal hard drives as well as external USB drives and memory cards
- Smart filtering options to customize what file types or folders to scan
- Preview files before deletion to make sure you don't lose anything important
- One-click deletion of all duplicate files to quickly free up space
The main benefit of using 4DDiG is that it thoroughly cleans out copies of files that you don't really need. All those duplicates take up space but don't help your computer run any better. Removing them helps "declutter" your hard drive.
With more available space after duplicate deletion, Windows updates can install smoothly without storage errors getting in the way. Plus, your computer generally runs faster when there is less clutter slowing things down.
In short, 4DDiG makes it really easy to find and delete file copies, wasting precious gigabytes. And keeping your storage tidy is a key way to avoid frustrating 0xc1900101 errors. Here are the steps to use 4DDiG Duplicate File Deleter to fix the 0xc1900101 error:
![]() Secure
Download
Secure
Download
![]() Secure
Download
Secure
Download
-
Download and Install 4DDiG:
Get the latest version of 4DDiG Duplicate File Deleter and complete the quick installation wizard on your Windows PC.
-
Run a Deep Scan:
Select your Windows drive and choose file types to target. Exclude protected Windows folders then click "Scan" to search every corner for space-wasting copies.
-
Delete Duplicates and Update:
Once the scan completes, preview and permanently delete duplicate files with one click. Freed up storage allows Windows updates to install without failures or errors. With just these 3 simple actions you can troubleshoot the update-blocking 0xc1900101 issue once and for all. Reclaim gigabytes of wasted drive space in minutes!
Way 2: Run the Windows Update Troubleshooter
Running the built-in Windows Update Troubleshooter can identify and fix hardware or driver issues causing 0xc1900101 errors. This diagnostic tool scans your system and reports on problems blocking updates.
- Open the Start Menu and click on Settings.
- In Settings, click on Update & Security.
- On the Update & Security page, scroll down and click on Troubleshoot.
-
In the right pane of the Troubleshooter, locate and click on the option for Hardware and Devices.
-
On the Hardware and Devices page, click on the button that says "Run the troubleshooter."
- Wait for the troubleshooter to scan your system and detect any issues behind failed updates.
- Review the troubleshooter report for insights on the problem and how to resolve it.
- Address any hardware or driver conflicts accordingly so Windows Updates can run smoothly.
Way 3: Run SFC to Fix 0xC1900101 Error
Corrupted system files often prevent Windows updates from installing correctly, triggering the 0xc1900101 error code. Run the integrated System File Checker (SFC) tool to scan for and repair damaged operating system files causing issues.
- Open an admin Command Prompt window.
-
Type "sfc /scannow" and hit Enter to start the scan.
- SFC checks all protected Windows files for integrity problems and replaces corrupted copies from a cache.
- This can restore missing or broken files essential for a smooth update experience.
Way 4: Update Hard Driver to Fix 0xC1900101
Since 0xc1900101 is linked to driver conflicts, updating your outdated or faulty drivers can get Windows Update working properly again.
- Right-click This PC and select Manage > Device Manager on the left.
- Expand the Disk drives category and right-click your hard drive.
-
Select Update driver > Search automatically for updated driver software.
- Wait for your system to install the latest driver version available for your hardware.
- With fresh drivers powering your storage, attempt the Windows Update again that was previously failing.
Way 5: Use DISM to Fix 0xC1900101 Error
The DISM command is a handy built-in tool for repairing system image problems behind Windows Update errors like 0xc1900101.
- Open an admin Command Prompt/PowerShell window.
-
Type "DISM.exe /Online /Cleanup-image /Restorehealth" and press Enter.
- DISM scans and fixes issues with your Windows image, recovery tools, features, and critical OS components.
- Let the scan run to completion. This can resolve embedded corruption issues or missing files causing problems.
- Restart your computer when finished for changes to take full effect.
Way 6: Solve 0xc1900101 Error via PC Reset
If nothing else works in fixing the persistent 0xc1900101 error, performing a full system reset often does the trick. This refresh restores Windows to a clean, stable state.
-
Go to Settings > Update & Security > Recovery and select Get started.
-
Choose either "Keep my files" or "Remove everything" reset option.
- Wait for your apps to close and the device to restart into the recovery tool.
- Follow the prompts to reinstall Windows, preserving your files if you selected that option.
Way 7: Fix 0xC1900101 Error via Upgrade BIOS
An outdated BIOS can also prevent Windows updates from installing smoothly, leading to 0xc1900101 crashing the process. Flashing your BIOS modernizes this firmware to support newer OS capabilities.
- Go to your motherboard manufacturer's website and find the latest BIOS version for your model.
- Download the update file to a USB flash drive.
- Enter your computer's BIOS menu on bootup and select the flash tool.
- In the flashing utility, locate the update file on your inserted USB.
- Hit "Flash" and wait for the BIOS overhaul to complete before restarting.
Part 3: Frequently Asked Questions
Q: What Causes the 0xC1900101 Error on Windows 11?
Ans: The 0xC1900101 error commonly occurs because of an incompatible app or driver, corrupted system files, or hardware problems that prevent Windows 11 from installing updates properly.
Q: How to Fix Windows Installation Error 0xC1900101 – 0x20017?
Ans: Error code 0xC1900101 - 0x20017 relates to driver issues, so updating your drivers, running SFC scan, or performing a clean install of Windows should resolve this specific 0xC1900101 error.
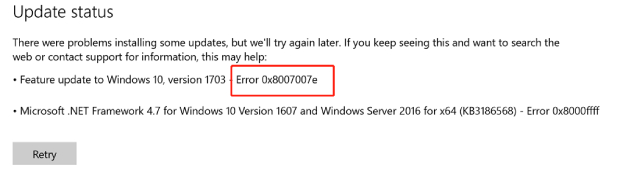
Q: Why Windows 10 22H2 Failed to Install 0xC1900101?
Ans: Windows 10 22H2 may fail to install due to this error if you have outdated or corrupted drivers, faulty or insecure system files, not enough storage space, or hardware that lacks proper firmware or compatibility with the latest Windows 10 version.
Final Thoughts
Dealing with Windows update errors like 0xc1900101 can be very annoying. Many people have issues installing new Windows versions because of this problem. But there are a few easy ways to fix it, like 4DDiG Duplicate File Deleter and other ways we talked about in this article. With these tips, you now have a toolbox to solve error 0xc1900101 when you see it. Scan your computer to figure out what is causing the problem. Then use the right solution to get rid of the issue. You'll be able to keep Windows secure and updated with the newest features. No more struggling with confusing error codes or blocked updates!