How to Fix Generic Audio Driver Detected in Windows 10/11
No sound on your PC and face with the ‘Generic audio driver detected’ issue during troubleshooting? Get four solutions for this issue and improve your audio experience with 4DDiG Audio Repair.
“How do i fix generic audio driver detected?”
“I encountered audio issues with external devices, followed by a “generic audio driver detected” message during troubleshooting in Windows 10. While audio is generally okay now, I still get this message, with minor delays and a ‘base’ effect at times. I couldn’t find a clear solution online. Is this something to worry about?”
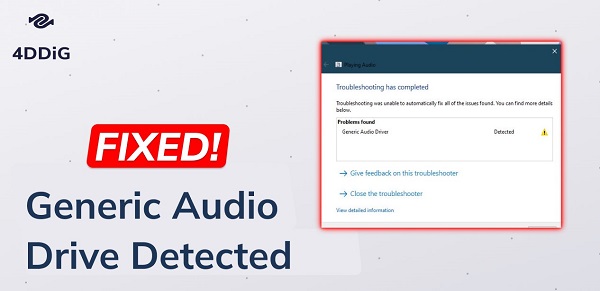
While Windows has a built-in troubleshooter to identify and fix common bugs and errors, including those related to audio, it may not always be able to resolve all issues, especially if they are more complex or if the issue lies with specific drivers. If you are getting the message that says “Generic audio driver detected" when you try the sound troubleshooter, there's no need to fret. In this article, we’ve shared four tried-and-true fixes to eliminate that message for good. Plus, if your audio file isn’t working at all, we also have a solution for that. Let’s get your sound back on track!
Part 1. What Does Generic Audio Driver Detected Mean?
Generic audio driver problem detected means your computer has a major issue with its audio system. This happens when your sound devices aren’t working properly and can’t follow your PC’s commands. The main reasons for this error include issues with Windows services, software conflicts, problems with Windows updates, and faulty audio devices or drivers.
The message “Generic Audio Driver Detected” sent by the Windows Audio Troubleshooter indicates that your computer system has identified and is currently using a generic audio driver for your sound hardware. Generic drivers can enable basic audio playback, but they may not fully utilize the advanced features specific to your audio hardware. That’s why you may have sound or audio problems. When you see this message, consider updating your audio drive or installing a dedicate one for your hardware, etc.
Part 2. How to Fix Generic Audio Driver Detected in Windows 10/11
To troubleshoot generic audio driver detected error in Windows 10/11, try the four fixes given below:
Secure
Download
Secure
Download
Fix 1. Restart Windows Audio Services
Windows Audio Service controls and manages all sound devices on your computer. When you come across the “problem found generic audio driver” error, the first thing to do is restarting audio services, which will help to fix audio issues. Here’s how you can do it:
- Type “services” in Windows search bar and select the Services app from the results.
- In the pop up windows, move down to the “Windows Audio” and “Windows Audio Endpoint Builder” services.
-
Right-click on each service and hit Restart.

- Afterwards, double click on the same services to launch the Properties window.
-
Set the Startup Type to “Automatic” to ensure that Windows Audio starts when you turn on the computer.

Restart your computer and check if the sound problem has been resolved.
Fix 2. Update Your Audio Driver
The second generic audio driver detected fix is to update your audio driver, as outdated or missing drivers on your Windows can also cause this issue. Here’s what to do:
- Press the “Windows + X” keys. Select Device Manager from the result.
-
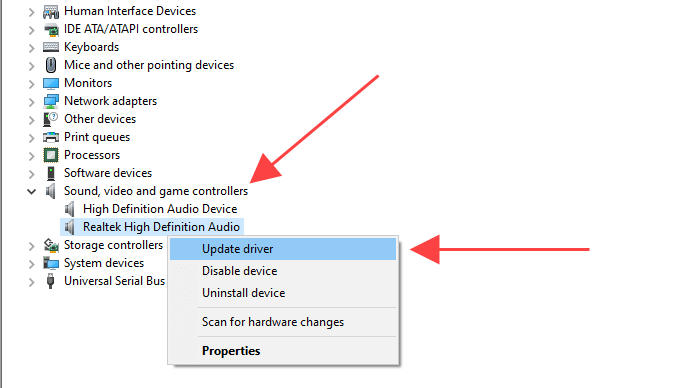
Expand the “Sound, Video, and Game Controllers” section, right-click on the outdated driver, and select “Update driver.”

-
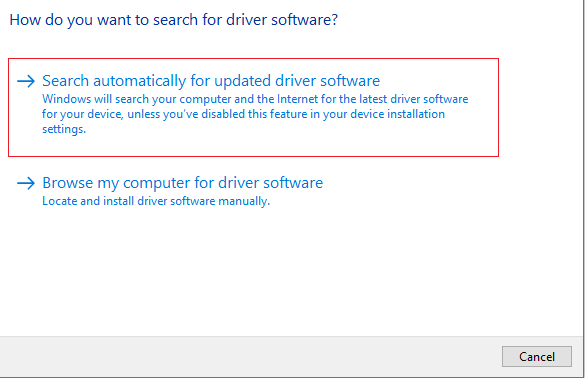
Choose your preferred method to search for drivers and follow the on-screen instructions to complete the update.

- Finally, restart your PC to check if the error is gone.
Fix 3. Uninstall and Reinstall Audio Driver
If updating the drivers did not work and the Windows Troubleshooter continues to give you the “Generic audio driver detected” message, try reinstalling the audio drivers. This will ensure that all the necessary files are configured properly.
- Press the “Windows + X” keys. Select and open “Device Manager.”
- Double click on the “Sound, video, game controllers” section to expand it.
-
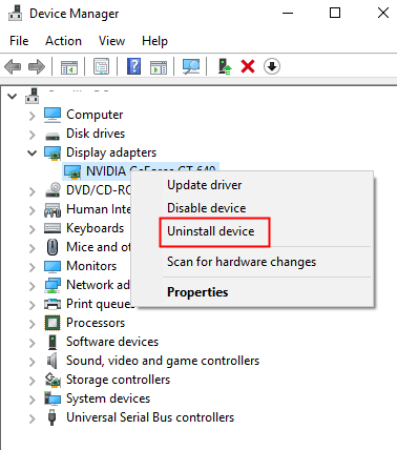
3. Right-click on the driver, and choose “Uninstall Device.” Confirm by clicking “Uninstall.”

-
Restart your PC, reopen “Device Manager,” and right-click on your PC’s name. Select “Scan for hardware changes,” and it will automatically complete the reinstallation.

Fix 4. Disable Audio Enhancements
Audio enhancements are supposed to make sound cards work better, but they can sometimes cause problems with audio and sound. If you are still encounter generic audio driver problem in Windows 10/11, try disabling audio enhancements.
Here’s how:
- Right-click on the Sound icon at the task bar and select Sounds.
-
Click the Playback tab, right-click on the default sound device and choose “Properties.”

-
Head to the “Enhancements” tab and tick the “Disable all Sound effects” box. Click “OK.”

Once enhancements have been disabled, run the Windows Troubleshooter again and check if this method works for you.
Part 3. How to Fix Windows 10/11 Audio Not Working
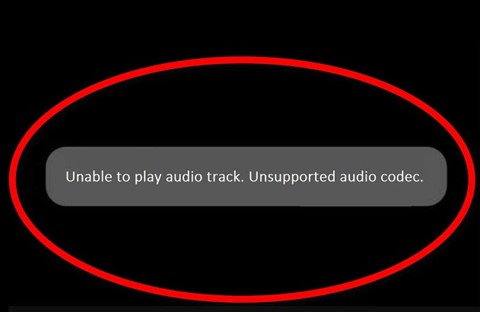
Above, we discussed how to fix the generic audio driver detected issue. But what if the error is bone but you are still having some issues in playing audio files? Then, that could be because of file corruption or damage.
If your corrupted audio files are one of a kind and can’t be downloaded again, consider using 4DDiG Audio Repair tool. It can fix various audio issues, like out-of-sync audio, background noises, scratches, etc. Here’s what more this tool offers:
- Repair damaged or unplayable audio and video files.
- Remove noise, audio dropouts, sound distortion and pops, and improve audio quality effortlessly.
- Batch repair multiple audio files of different formats without manual intervention.
- Works with different recording devices and downloaded sources.
- Compatible with various audio formats like M4A, MP3, FLAC, AAC, and WAV.
- Preview recovered audio files before saving.
Follow the instructions below to fix Windows 10/11 audio not working with this tool:
-
Add Unplayable Audio Files
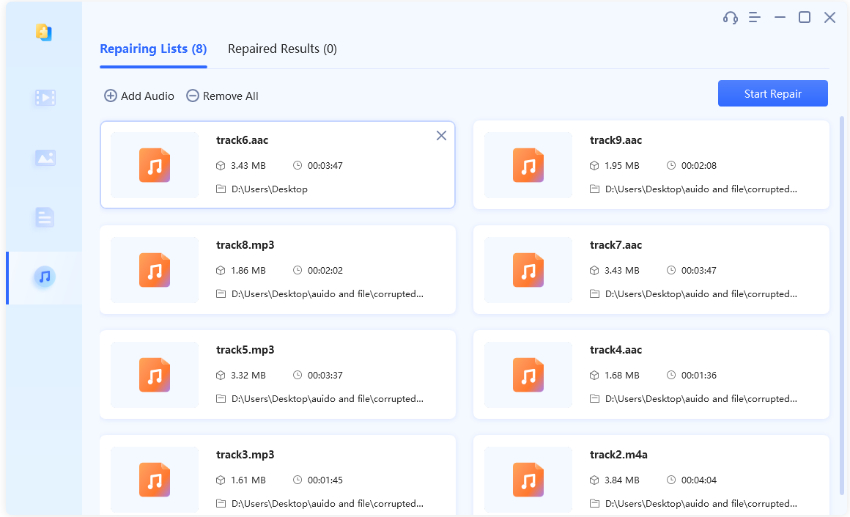
Download and open 4DDiG File Repair on your PC. Choose “Audio Repair” and click “Add Audio” to add your unplayable audio files.
FREE DOWNLOADSecure Download
FREE DOWNLOADSecure Download

-
Repair Unplayable Audio Files
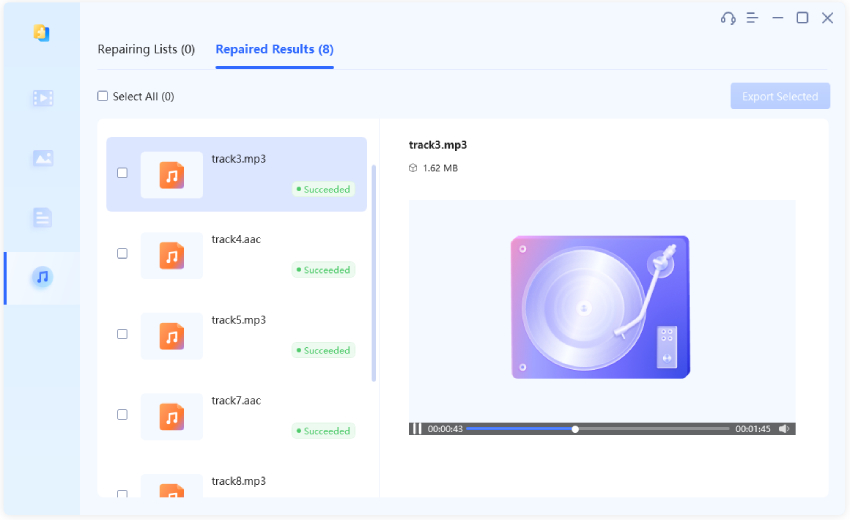
Hit “Start Repair,” and the tool will use smart algorithms to fix any sound problems in your audio files. Once done, click “View Results” to see repaired audio files. Play them to ensure it worked.

-
Save Repaired Audio Files
Select the fixed sound files, click “Export Selected,” and pick where to save them on your PC.

Generic Audio Driver FAQs
Q1: What is the problem of generic audio driver?
A generic audio driver error can cause problems like audio glitches, crackling, static, or poorer sound quality because it doesn’t reproduce sound accurately. On Windows 10/11, this error can even make your sound and related components suddenly stop working.
Q2: Is it safe to uninstall audio drivers?
It’s usually okay to uninstall the audio drivers. But remember a couple of things. If you uninstall them before unplugging your device, your operating system might rediscover and reinstall drivers during that time. Moreover, the audio device will stop working unless you install its audio drivers.
Q3: Does audio driver affect sound quality?
Yes, a good audio driver delivers accurate and efficient sound, minimizes delays, and supports advanced audio features. Conversely, a bad audio driver can lead to problems like glitches, crackling, static, or lower sound quality due to inaccurate sound reproduction.
Wrap Up
We’ve shared four effective fixes to tackle the persistent “Generic audio driver detected” issue in Windows 10/11. Try them one by one until you find the fix that works. However, if you’re facing sound problems in your saved audio files, we recommend using 4DDiG Audio Repair to resolve a variety of audio glitches and errors and restore the sound quality.
You May Also Like
- Home >>
- Audio Repair Solutions >>
- How to Fix Generic Audio Driver Detected in Windows 10/11


