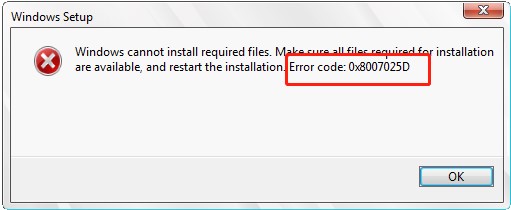
Best Windows 11 Media Creation Tool to Create Windows 11 Installation Disk FREE DOWNLOAD BUY NOW BUY NOW William Bollson 5 mins read Updated on 2026-07-22 15:55:19 to Hard Drive You May Also Like How to Recover Deleted RAF Photos from Fujifilm Camera 2026 How to Clone Disk Windows 11 2026 How to Fix Error Code 0X8007025D When Installing Windows? How to Fix Insert Your Windows Installation or Recovery Media Fix PC Turns On But No Display Or Power To Keyboard Home >> Hard Drive >> Best Windows 11 Media Creation Tool to Create Windows 11 Installation Disk