How to Upgrade Hard Drive to SSD without Reinstalling Windows?
How to upgrade hard drive to SSD? Just download 4DDiG Partition Manager to ensure the smooth upgrades!
Upgrading your computer's hard drive to a solid-state drive (SSD) can give faster speed and performance to your system. However, learning how to upgrade hard drive to SSD can be complex. Fortunately, we provide streamlined solutions that can help how to upgrade a hard drive to SSD. This article will explore a step-by-step guide on how to upgrade hard drive to SSD without reinstalling Windows. If you're a beginner looking to optimize your system, this guide will help make the transition smooth and efficient.
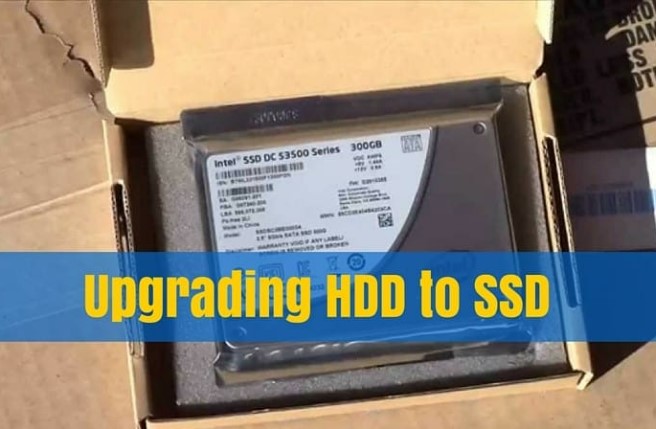
Part 1: Is SSD Better than HDD?
When considering upgrading your computer's storage, understanding the fundamental differences between solid-state drives (SSDs) and hard disk drives (HDDs) is crucial. SSDs are significantly faster than HDDs. Unlike HDDs, which rely on spinning magnetic disks and mechanical read/write heads, SSDs utilize flash memory technology. This allows SSDs to access data almost instantly, resulting in faster boot times, quicker application launches, and smoother overall system performance.
Moreover, SSDs are more durable and reliable than HDDs. Since SSDs have no moving parts, they are less susceptible to mechanical failures caused by shock, vibration, or wear and tear over time. This makes SSDs ideal for laptops and other portable devices. Unlike bulky HDDs, which require spinning disks and moving components, SSDs are slim and lightweight. This allows for more efficient use of space within a computer and opens up the possibility of upgrading to larger SSDs without sacrificing valuable real estate inside your system. If you want to learn how to upgrade laptop hard drive to SSD, follow the below practical steps to make the transition smooth.
Part 2: Can I Upgrade from HDD to SSD?
You can upgrade your computer's storage from a traditional hard disk drive (HDD) to a solid-state drive (SSD). It is a relatively straightforward process. Thankfully, most modern computers are equipped to support SSDs. You can install an SSD without issues if your system has an available SATA or NVMe port. Moreover, SSDs come in various form factors, including the standard 2.5-inch size for laptops and smaller M.2 or PCIe options for desktops.
Part 3: How to Upgrade Hard Drive to SSD without Reinstalling Windows?
Preparations before Upgrading the Hard Drive to SSD:
Before learning how to upgrade hard drive to SSD Windows, making accurate preparations is essential. Follow the below checklist before learning how to upgrade a hard drive to SSD:
- A new SSD: Ensure you've chosen the suitable SSD for your needs, considering factors such as capacity, performance, and form.
- Small Phillips screwdriver: Since you'll be physically installing the SSD into your computer, you'll need a small Phillips screwdriver to open your computer's case and securely fasten the SSD into place.
- Reliable disk cloning software: To transfer the data of your existing hard drive to the new SSD, you'll need disk cloning software Look for reputable software offering sector-by-sector cloning, partition resizing, and bootable media creation to ensure a smooth and successful migration process.
Step 1: Initialize the SSD If It Is a New One
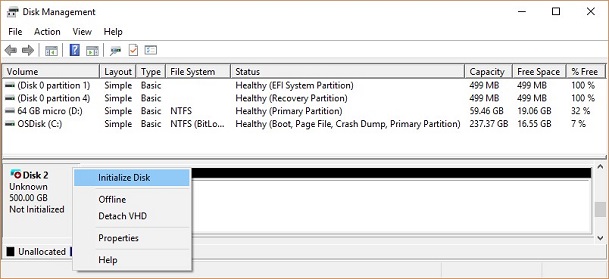
If your SSD is brand new and has yet to be initialized, connect it to your computer. In Windows, right-click the Start button and select "Disk Management" from the context menu. This will open the Disk Management utility, which allows you to manage disk drives and partitions. After that, select "Create and format hard disk partitions." You should be able to see the SSD in Disk Management as a new drive underneath your existing one. If you see the message “Not initialized," perform right-click on the drive and select "Initialize disk."
Step 2: Clone Hard Drive to Upgrade SSD
Once you've initialized the SSD, the next step is to clone your existing hard drive onto the SSD. This process involves transferring all data, including the operating system, files, and applications, to ensure a seamless transition without reinstalling Windows or any other software.
For this purpose, we recommend utilizing 4DDiG Partition Manager, a versatile and user-friendly tool that can help clone your disk. Here are some of the main features of 4DDiG Partition Manager:
- Disk Cloning: 4DDiG Partition Manager offers a straightforward disk cloning feature that allows you to clone an entire hard drive to another disk, including SSDs.
- Partition Management: You can resize, move, merge, split, and format partitions on your disks, allowing you to optimize the storage layout according to your preferences and requirements.
- Bootable Media Creation: To ensure a smooth and hassle-free cloning process, 4DDiG Partition Manager allows you to create bootable media, which can be used to boot your computer and perform disk operations outside of the Windows environment. This is particularly useful when cloning the system drive, as it eliminates the risk of data corruption or loss during the cloning process.
- Intuitive Interface: 4DDiG Partition Manager offers an intuitive and user-friendly interface that makes it easy for users of all skill levels to perform disk management tasks.
Follow the below steps that can help how to use 4DDiG Partition Manager to clone a disk:
-
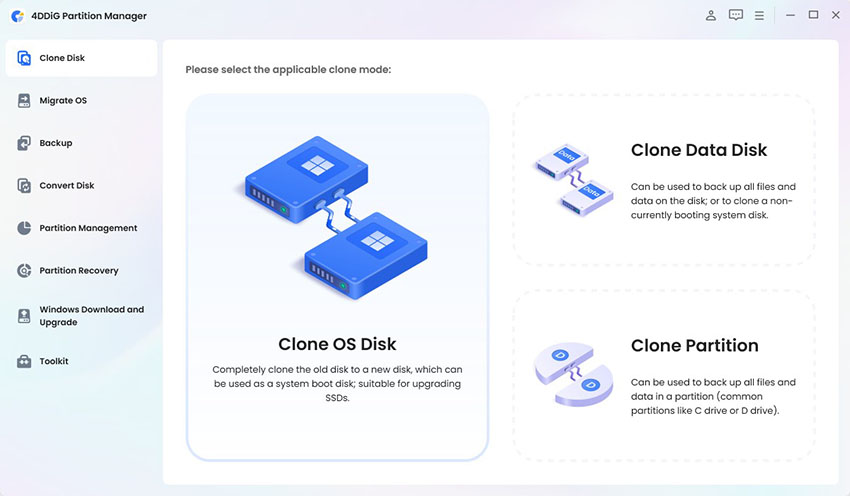
Connect the new SSD to your computer after downloading and installing 4DDiG Partition Manager. Next, open the application and choose "Clone OS Disk."
FREE DOWNLOADSecure Download

-
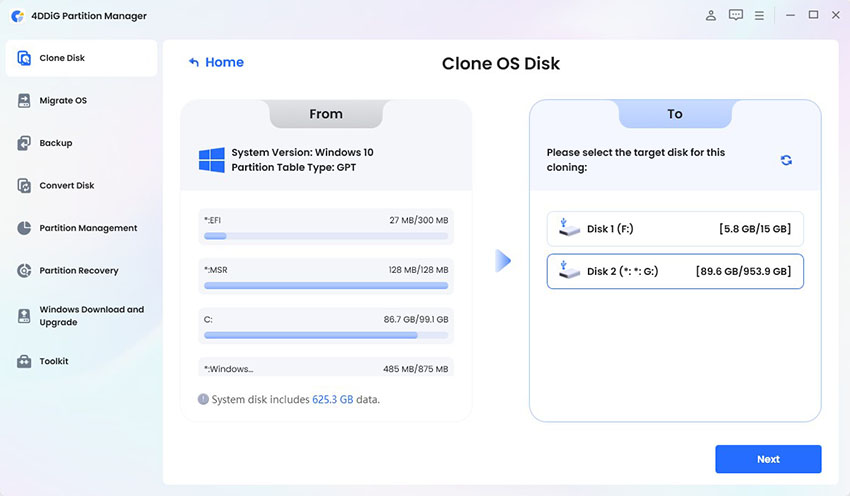
After choosing the target disk (the new SSD) to receive the cloned data from the source disk, click the Next button.

-
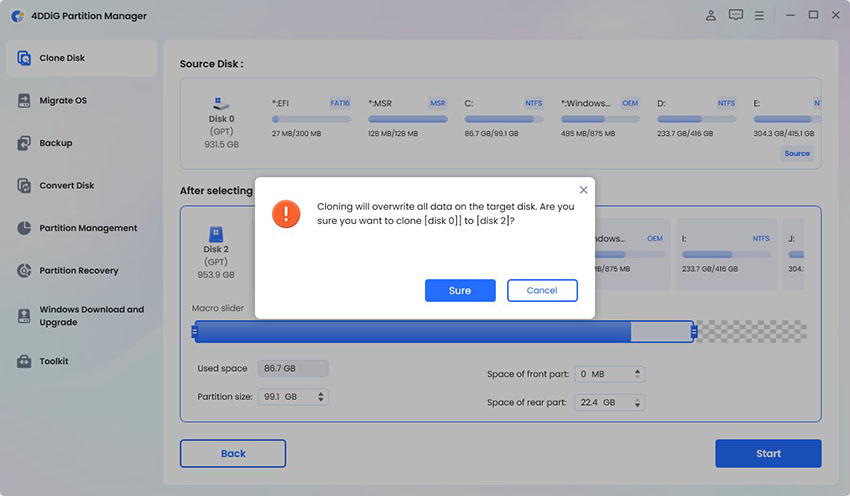
Please click the Sure button only after you are certain everything is correct, as cloning will overwrite all data on the target disk.

-
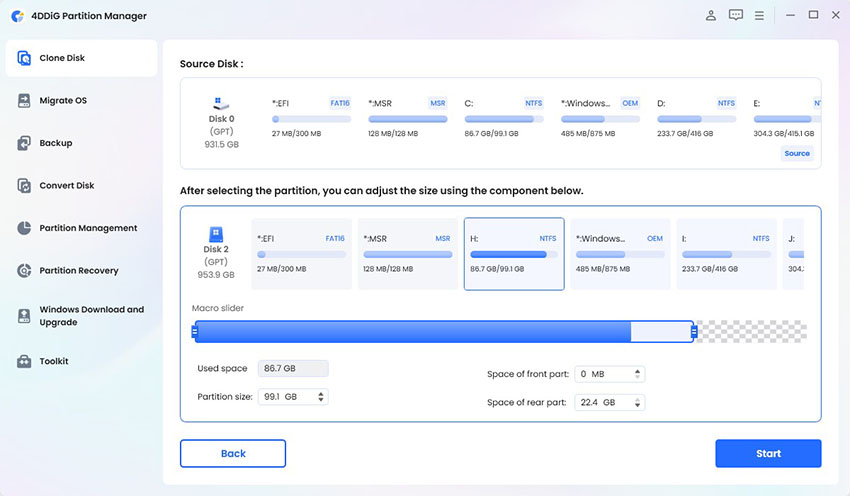
After that, a preview interface displaying the cloned disk's effects will appear. After ensuring the preview is accurate, click the Start button to begin cloning.

-
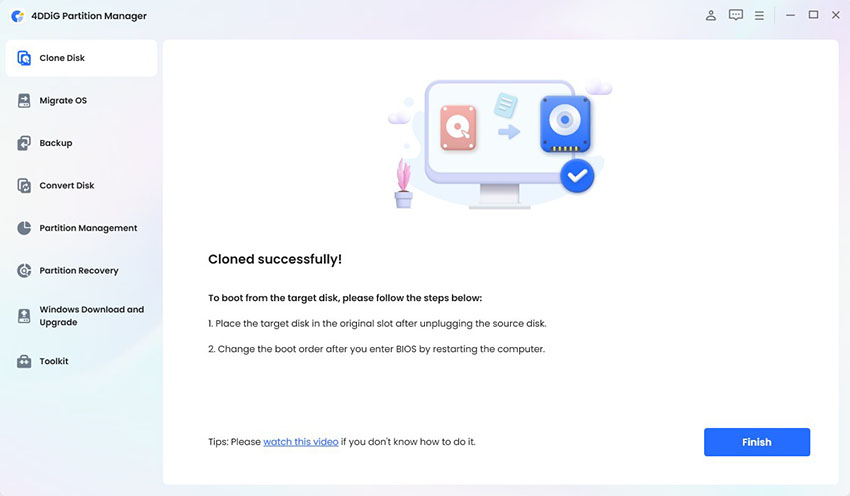
Wait until the disk cloning is finished. The size of the source disk affects how quickly a copy is made. Please be patient and refrain from running other processes or interrupting the current tasks. Now, you have successfully completed the data cloning process from the source to the target disk.

Get 1 Month License Instantly!
Step 3: Install the New SSD
You can install the SSD into your computer with your hard drive cloned onto the SSD using 4DDiG Partition Manager or a similar tool. Follow these steps to complete the installation
- Shut down your computer and disconnect all cables.
-
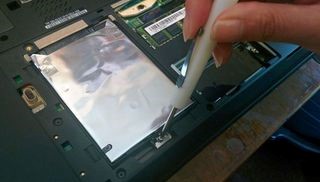
Open your computer case and use a small Phillips screwdriver to remove the screws securing the side panels of the case.

- Remove the old drive and pull it out.
- If installing an internal SSD, locate an available SATA port on the motherboard and connect one end of a SATA data cable to the port. Then, connect the other end of the cable to the SATA interface on the SSD.
- Next, a SATA power cable from the power supply unit (PSU) is connected to the power connector on the SSD. This provides the necessary power for the SSD to operate.
- Finally, close your computer case and turn on your system.
Step 4: Boot Computer from the New SSD
After installing the new SSD into your computer, the final step is configuring your system to boot from the SSD instead of the old hard drive. Follow the below steps
- Turn on your computer and immediately press the appropriate key to access the BIOS/UEFI settings.
- Go to the boot order or boot priority settings. This section controls the sequence in which your computer searches for bootable devices during startup.
- In the boot order settings, locate the entry corresponding to your new SSD. Use the arrow keys to move the SSD to the top of the boot priority list, ensuring it is set as the first boot device.
- Save your changes and exit the BIOS/UEFI settings. Follow the on-screen prompts to confirm and exit, typically by pressing a key such as F10 or selecting "Save and Exit."
Final Words
In short, upgrading your computer's hard drive to a solid-state drive (SSD) without reinstalling Windows is a straightforward process to enhance your system’s life. We've explored the step-by-step process about how to upgrade hard drive to SSD, covering everything from initializing the SSD and cloning your hard drive to installing the new SSD and configuring your system to boot from it.
By following the above instructions and utilizing tools like 4DDiG Partition Manager, you can seamlessly transition to an SSD and enjoy the numerous benefits, including faster boot times, quicker application launches, improved system responsiveness, and enhanced reliability. So, don't hesitate to try out the above four practical steps that can help how to upgrade hard drive to SSD Windows 10.
Secure Download
💡 Summarize with AI:
You May Also Like
- Home >>
- Hard Drive >>
- How to Upgrade Hard Drive to SSD without Reinstalling Windows?

 ChatGPT
 Perplexity
 Google AI Mode
 Grok
Grok

