How to Install a Second SSD Easily in 2026
How to install a second M.2 SSD - are you struggling with this question? We understand many users find their PCs and laptops out of the space, especially if they are gamers, digital marketers, or programmers.
The best solution to deal with this issue is adding an extra SSD.
An additional SSD expands storage capacity, increases PC performance, and provides flexibility for various configurations and workloads
Now the question is how to install a second SSD drive.
Well, this is not a big task, if you understand the right method. This article includes a detailed guide on how to install a second SSD. So, read it and make your process easy and safe!
Part 1: What You Need to Know Before Installing a Second SSD?
Properly preparing your system is key when adding a second SSD. You can begin by removing your old drive, making sure to disconnect all attached cables and brackets. Handle everything gently to prevent any damage to your components.
When adding the new SSD, be gentle with the connection; it should slot in effortlessly and snugly.
If it's for extra storage and not the primary boot drive, use a SATA cable to connect it. Attach one end securely to the motherboard's SATA connector to ensure reliable data transfer.
Part 2: How to Install a Second SSD?
Here is a guide on how to install a second SSD drive.
Step 1. Buy a New SSD
If you don't know how to install a second SSD drive - begin the process by purchasing a new SSD from a renown retailer or online shop Ensure that the SSD is compatible to your system's needs regarding size, interface (SATA, NVMe), and storage capacity.
Step 2. How to Install a Second SSD on Your Computer
-
Detach your PC and open the case.

-
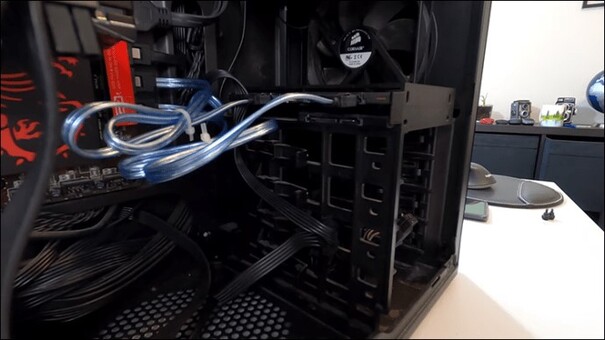
Locate a vacant drive bay.

- First, take out the drive caddy. Next, install the new SSD, then replace the caddy.
-
If your computer lacks a drive caddy, securely place the SSD into the bay using screws or fasteners.

-
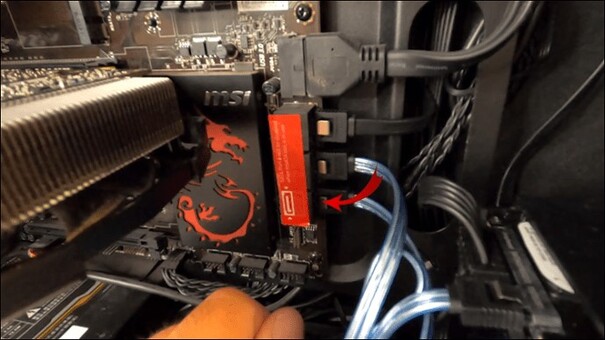
Locate an available SATA data cable port on your motherboard, then connect the SATA data cable to it.

-
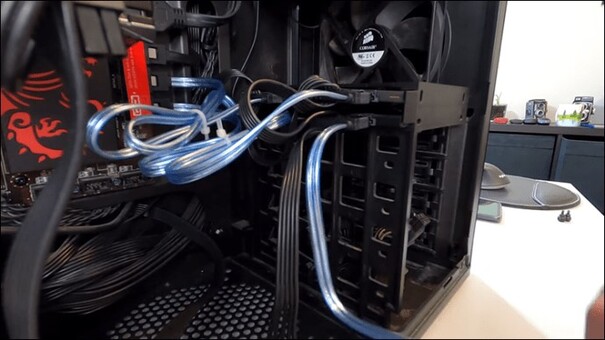
Find an unused SATA power connector, then attach both the SATA power and data cables to your new drive, ensuring correct orientation by aligning the longer connector on the SSD with the power connector.

- Verify that all connections are firmly attached and no other components are disconnected or loose.
-
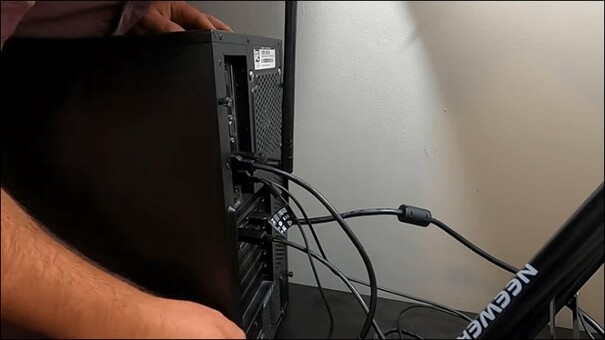
Then, close the case, reconnect all components, and power on your PC.

- After ensuring everything functions properly, proceed to initialize your SSD. Although Windows will detect your second SSD, it won't be utilized until initialized and formatted. Once formatted, you can start saving files and transferring old ones from your primary drive to free up space.
Step 3. Initialize and Format the Second SSD with Disk Management
Here's how to begin using your SSD:
-
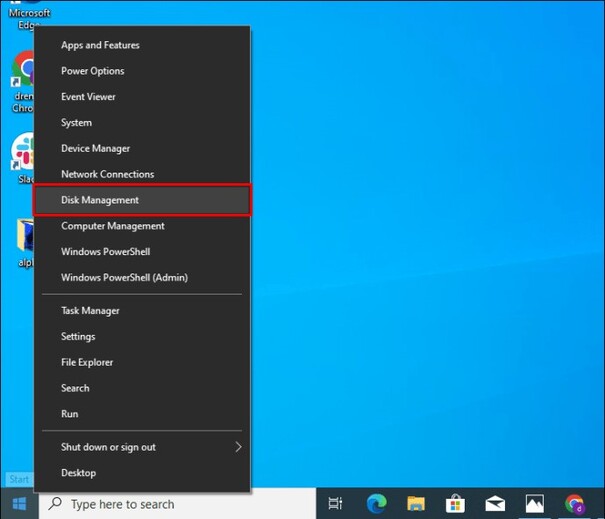
Right-click on the Windows icon to access Disk Management. Otherwise, you can press the Windows key + X from the menu that appears.

-
If you're asked to initialize the disk, opt for "GPT (GUID Partition Table)" and click "OK."

-
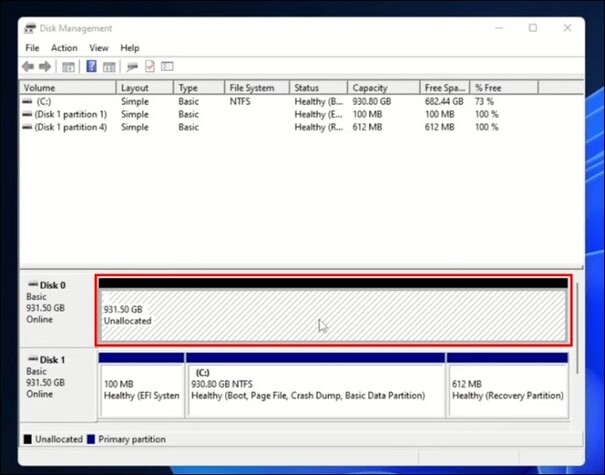
If the setup wizard doesn't open, find your new SSD in the "Disk Management" window; it will show up as "unallocated."

-
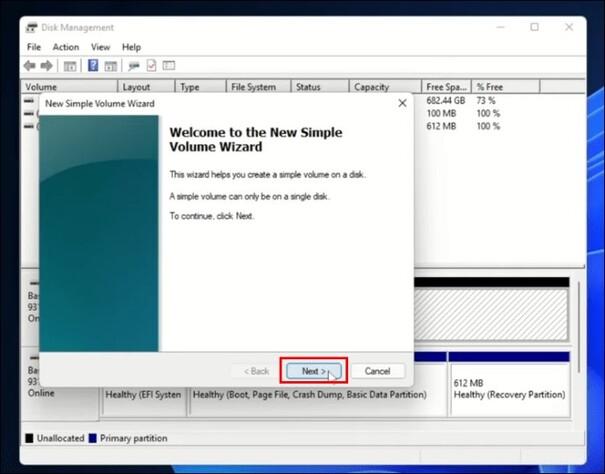
Right-click and choose "New Simple Volume," then proceed by clicking "Next."

-
Ensure the two numbers match, then click “Next.”

-
Choose a drive letter or retain the default one, then proceed by clicking "Next."
-
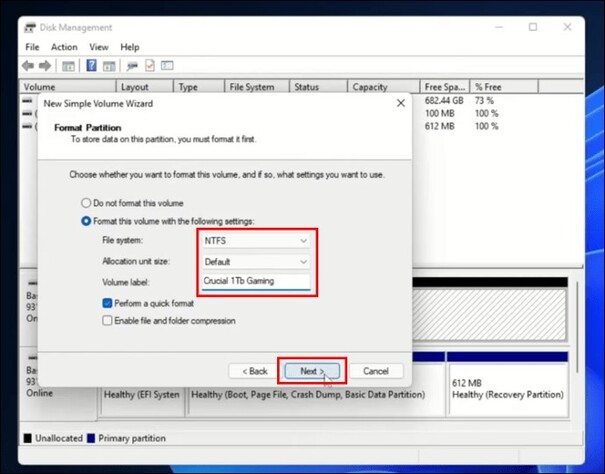
Select the "NTFS" file system, leave the allocation unit size as it is, and optionally add a volume label. Then, click "Next."

-
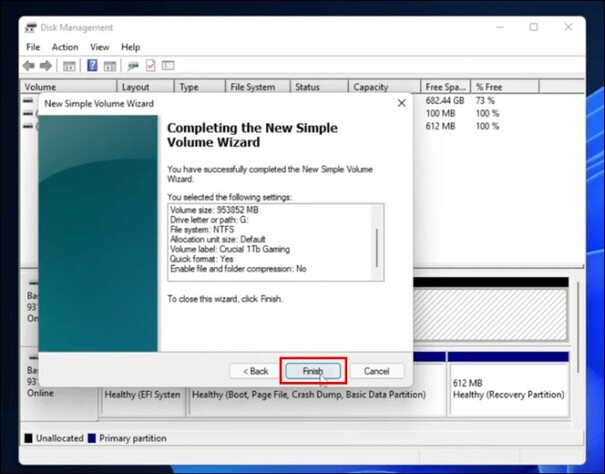
Review the information and click "Finish" to confirm.

- Your new SSD is now prepared for use.
Step 4. Migrate Data from Current Disk to the New SSD
Migrating data from your current disk to a new SSD is a crucial step in installing a second SSD and ensuring a seamless transition of your files and operating system. For this, a reliable tool, 4DDiG Partition Manager is an amazing option.
Here are the features of 4DDiG Partition Manager; after getting into them, you will learn why it is worth considering.
The 4DDiG Partition Manager help you to:
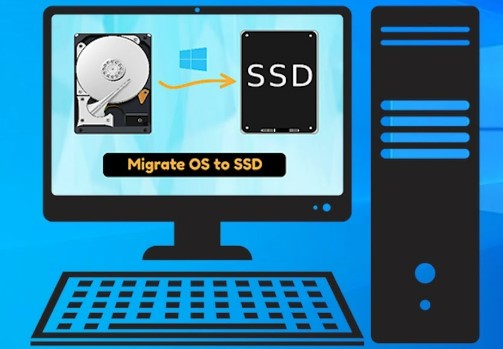
- Migrate your Windows OS to an SSD with just one click and eliminate the need for a system reinstallation.
- Efficiently clone your entire hard drive to create a reliable backup of your valuable data.
- Effortlessly repair, recover, and restore partitions from your computer or other storage devices, simplifying data maintenance.
- Smoothly convert MBR to GPT to prepare for a Windows 11 upgrade without risking any data loss.
- Flexible resize, split, create, delete, or format partitions to optimize disk space usage, now with added support for removing recovery partitions.
- Upgrade to a bigger hard drive worry-free with full data transfer capabilities, ensuring no data loss.
Here are the steps to clone the data using 4DDiG Partition Manager:
-
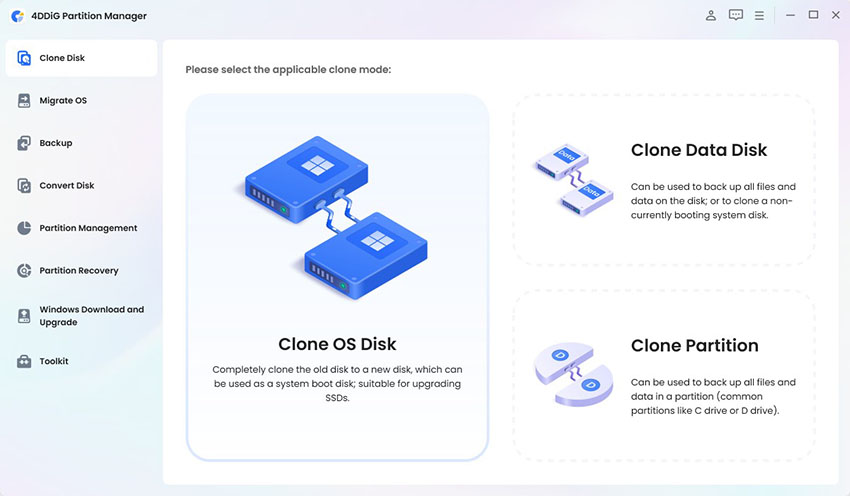
The first step is to download 4DDiG Partition Manager on your computer; once it is done, connect an external disk. Launch the application, then choose Clone OS Disk.
FREE DOWNLOADSecure Download

-
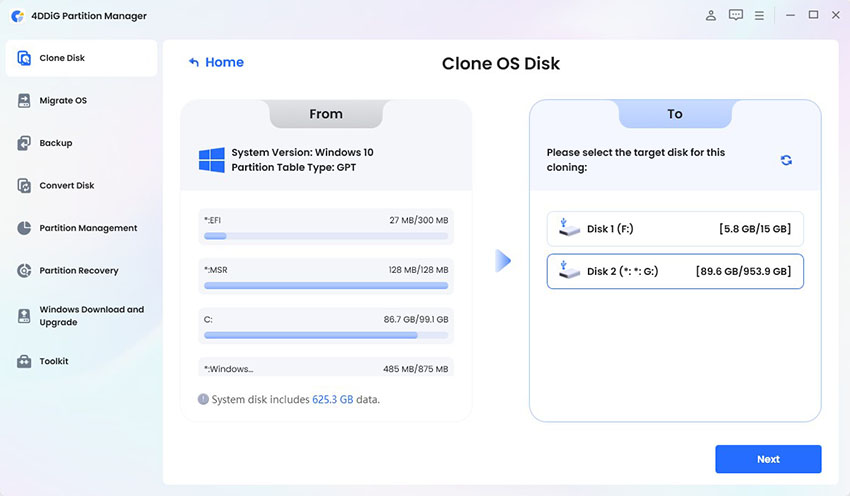
Choose a target disk to receive cloned data from the source disk, then proceed by clicking the Next button. (The target disk defaults to the disk connected to the computer).

-
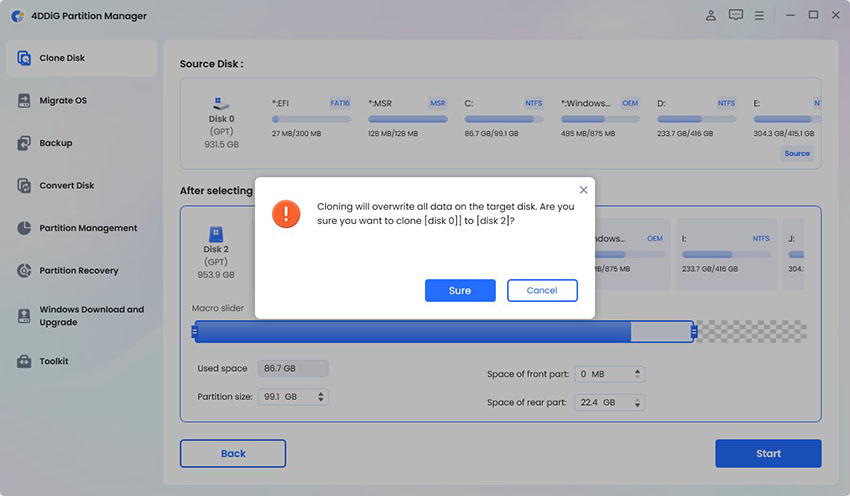
Remember that cloning will overwrite all data on the target disk. Once you've confirmed that everything is correct, click the "Sure" button.

-
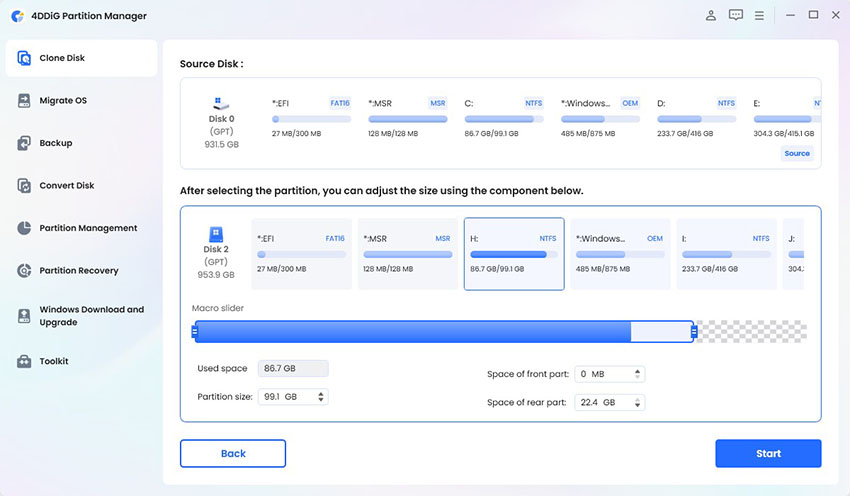
Next, you'll encounter a preview interface displaying the effects of the cloned disk. After verifying the preview is accurate, click the Start button to initiate the cloning process.

-
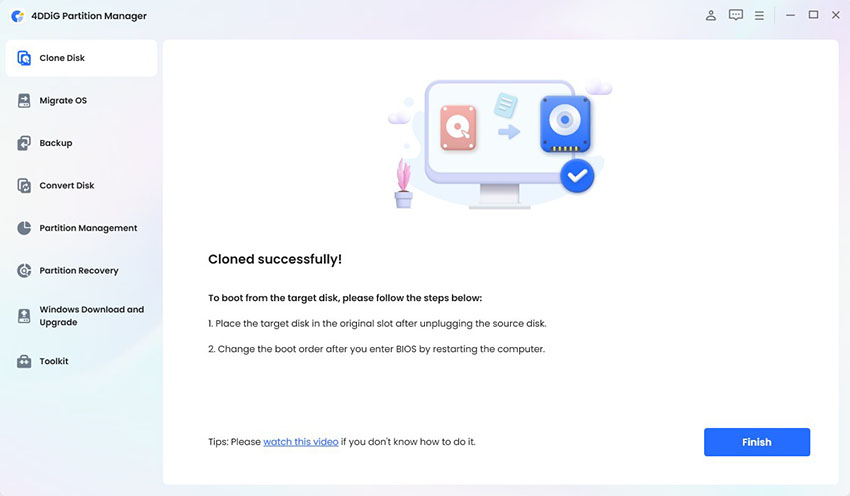
Allow the disk cloning process to finish. The speed of cloning varies based on the size of the source disk. Please be patient and avoid performing other operations or interrupting the ongoing process. Congratulations! You've now completed the successful cloning of data from the source disk to the target disk.

Get 1 Month License Instantly!
Part 3: Points to Note After Installing a New SSD
After successfully installing your new SSD and migrating your data, it's crucial to keep a few key points in mind. Remember to regularly back up your data to keep it safe.
Additionally, you should regularly check the health and performance of your SSD. Don’t forget to update the operating system and drivers to maintain compatibility and security.
Finally, enhance your system's performance by deactivating unnecessary startup programs and performing routine disk maintenance tasks like cleanup and defragmentation. This optimization ensures smoother operation and longevity of your system.
Final Thought
It is a straightforward task to add a second SSD to your PC because it enhances your system's storage capacity and performance. This guide includes a complete solution on how to install a second SSD Windows 11.
When installing a second SSD, opting for 4DDiG Partition Manager is a smart choice. This tool streamlines the migration process with its intuitive interface and one-click OS migration feature. It ensures data integrity through efficient disk cloning and comprehensive partition management options.
With 4DDiG, you can effortlessly expand your PC's storage capacity while improving performance and maintaining data security.
So, feel free to install it and make your installation of the second SSD process easy.
Secure Download




 ChatGPT
 Perplexity
 Google AI Mode
 Grok
Grok

