How to Install Windows 10 on a New Hard Drive
To install Windows 10 on a new hard drive, you can use 4DDiG Partition Manager tool to clone Windows 10 to the new drive.
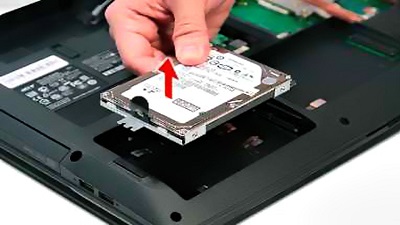
Installing a new hard drive is a great way to speed up your computer, as the older one slows the system processing speed when you’ve too many big programs installed. However, when installing a new hard drive on the computer, the best practice is to install a clean new Windows.
Installing Windows 10 is a straightforward idea, but many users find it too technical to do, as it requires downloading the IOS file and burning it to the flash drive or DVD drive. If you don’t know how to install Windows on a new hard drive, here’s a complete guide in 3 ways.
Part 1: Why Should I Install Windows 10 on a New Hard Drive?
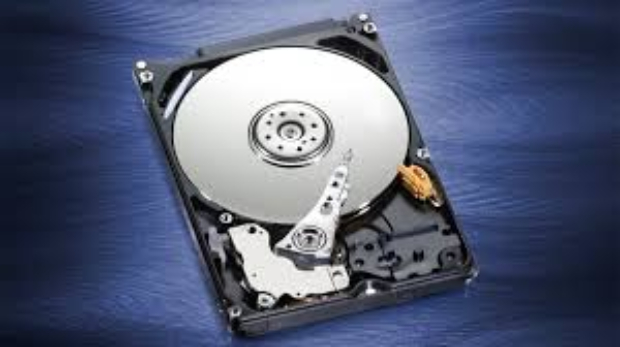
If you’ve upgraded the hard drive on your computer with a new one, it’ll come as blank. You’ll need to install the windows from scratch. Even if it comes with the pre-installed Windows 10, installing a new one yourself is a good practice to kill the potential risks.
The pre-install windows might be cluttered with unnecessary files and caches, killing the computer's performance and overall data transfer speed. A fresh Windows 10 will delete all these files, and you can set up everything according to your own preference.
Moreover, installing Windows 10 on the new hard drive will eliminate the viruses and malware that the previously installed Windows had. So, it’s always the best idea to install Windows from scratch if you’ve upgraded to a new hard drive.
Part 2: How to Install Windows 10 on a New Hard Drive?
There are various ways to install Windows 10 on a new hard drive. Starting from installing Windows media creation tools to smart 4DDiG Partition Manager and many others. However, whether you’re a novice user or advanced, we’ve outlined the top 3 ways to install Windows 10 on a new hard drive.
Way 1: Install Windows 10 on a New Hard Drive via 4DDiG Partition Manager
If you’ve upgraded to a new hard drive and don’t want to lose the previous Windows data, settings and preferences, you can move the already installed Windows to your new hard drive via 4DDiG Partition Manager. It’ll prevent you from the hassle of installing new Windows from scratch and moving all of the data manually.
4DDiG Partition Manager is a robust solution for disk management operation on Windows. It allows users to create, resize, delete and move partitions. Using this software tool, you can create a clone partition or migrate to another partition with a one-click process.
Moreover, its smart security system will also diagnose and fix the potential issues in the hard drive. All you need to do is install the 4DDiG Partition Manager on the computer and start with the on-screen instructions.
Secure Download
-
After downloading and installing 4DDiG Partition Manager, attach your new drive. Open the application, go to "Clone OS Disk", choose the new drive as the target, and click "Start" to proceed. The source disk is already chosen by default.

-
Start the migration, a pop-up window will show up, notifying you that system migration will overwrite partitions and files on the target disk. To continue, click "Sure" to initiate the migration.

-
Wait a few seconds, and you can successfully migrate your Windows to the target new drive.

Way 2: Use Windows Media Creation Tool
Usually, when Windows users need to install a new window, they download the ISO file and burn it to the DVD or USB flash. However, Microsoft has made things much easier by developing the Media Creation Tool. Now you can install it on the computer and get started with the seamless Windows installation process. Here’s how:
- Download the Windows Media Creation tool on your computer, and install it. Launch the Windows Media Creation tool, accept all the terms and conditions if asked, and choose the second option from the below interface.
- On the next screen, a wizard will ask you to select the language, windows edition and other things. You can use the recommended ones, or you can go with your own choice.
- Now, it’ll ask whether you want to use the USB flash or extract the ISO file. If you have the USB option, choose the USB flash option, and make sure its storage size is at least 8GB. If you choose the ISO option, you must manually burn it to the DVD.
- Select the removable drive (USB flash drive) you want for the Windows installation. Ensure there’s no important data on the USB drive, as it’ll be formatted during the process.
- Soon after, the Windows Media Creation tool will download the Windows 10 file and other files to make the USB bootable.
-
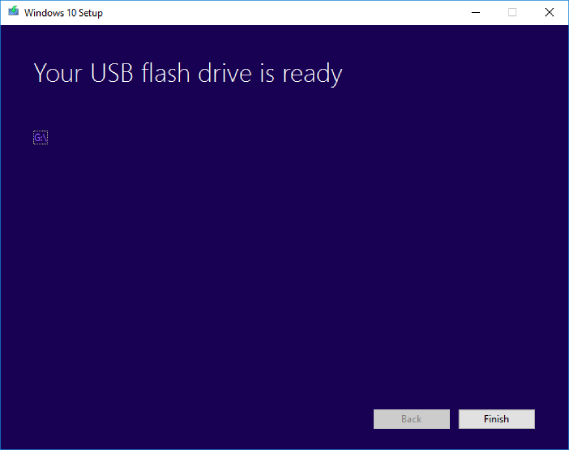
Once the downloading process is completed, you’ll see a message that the USB Drive is ready. Indicating now you can proceed with the installation process. Click on the Finish option.

Once you’re done installing the Windows Media Creation tool, here’s how to install Windows 10:
- Insert the bootable drive into the computer and ensure it boots from the bootable drive you’ve inserted. Otherwise, launch the BIOS, and select the settings to boot from the USB flash drive.
- When the computer boots from the USB flash drive, you’ll see many options, such as select language, time, currency, etc. Select these, and hit on the Next button.
- Now click on the Install button to initiate the Windows Installation.
-
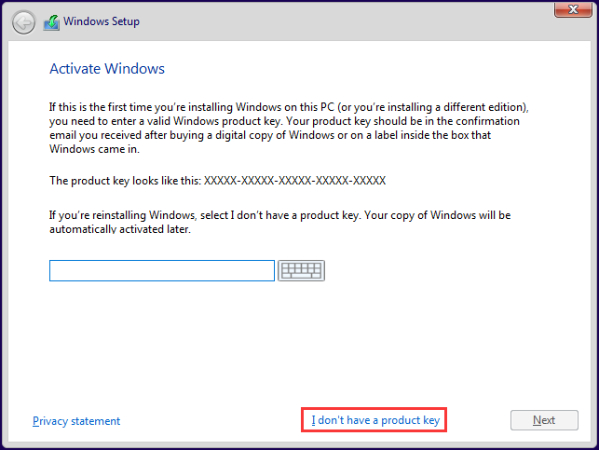
It’ll ask you to enter the product key. Enter the product key if you’ve, else select the option; I don’t have a product key.

-
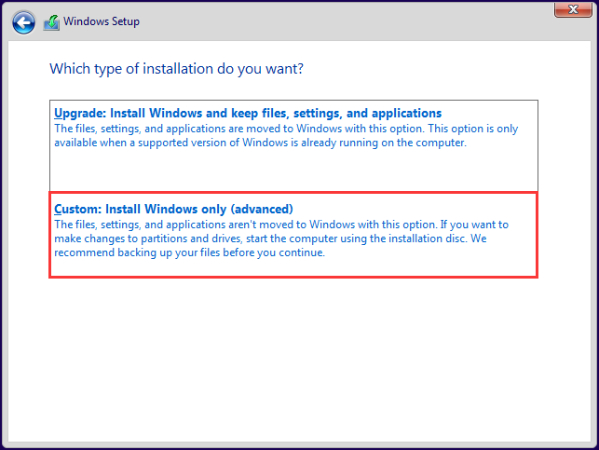
In this step, you need to make a choice out of two options.
Upgrade: Install Windows and Keep files: This option will keep all the files, settings and applications in the system partitions. However, it’ll work if the supported operating system is already installed on the system.
Custom: Install Windows only (advanced): this option will delete settings, data and preferences from the drive. It’ll wipe up everything on the drive and install Windows from scratch. Prefer this option if you have a new hard drive.

- Select the drive you want to install Windows 10 in the next step. If you’ve only one drive connected to the computer, it’ll be shown as Drive 0. Select Drive 0, and hit on Next.
- Now the Windows installation will take place and will take a few minutes to complete. Keep an eye on the screen if it asks any questions during installation.
-
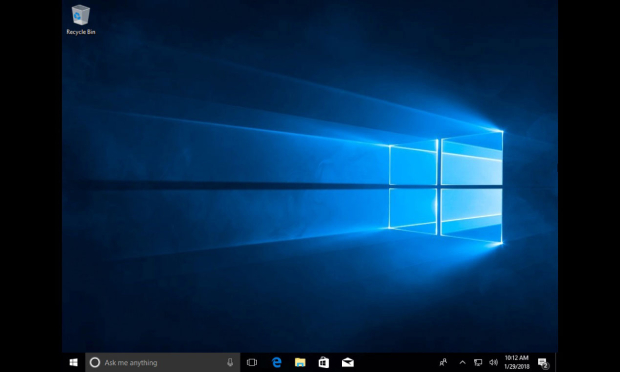
Once the installation is done, it’ll directly boot to the desktop. That’s it.

Way 3: Create an Installation Disc or USB Drive
How to install Windows 10 on a new hard drive via USB or Disc? Here's the step-by-step guide if you plan to install Windows 10 via Disc or USB drive.
Before proceeding further, ensure you have a bootable USB or the installation Disc for Windows 10. You’ll need it to burn the Windows installation file on the USB, so it can be bootable on your system. Let’s get started:
Format the USB Flash Drive
- The first step for installing Windows 10 is to make the USB bootable. For this, you’ll need to format it using the disk management tool on Windows.
- Insert the USB flash drive into the computer, and launch the disk management tool on the computer. Press Windows + R to open up the run, then enter diskmgmt.msc command and hit enter.
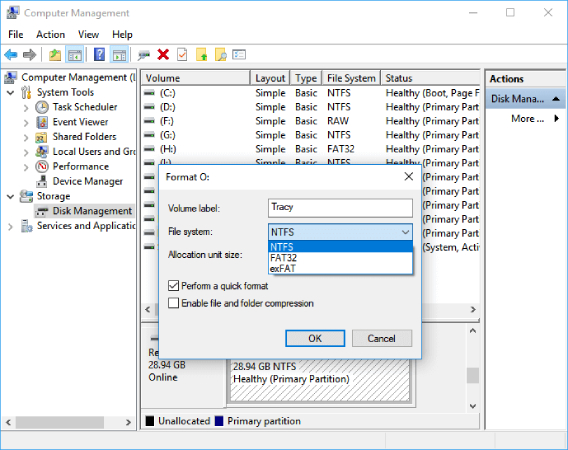
- Locate the USB drive in the disk management tool, right-click on it and choose the format. Select the FAT32 to make it bootable for the computer from the BIOS.
-
Lastly, right-click on the USB partition, and click Markt Partition as Active option.

Prepare the USB for Windows 10 Installation
In order to prepare the USB for installation, you’ll need to burn the ISO file. You can do it using the UltraISO software. Here are the steps to do so:
- Insert the USB into the computer, and launch the UltraISO.
- Import the Windows 10 installation file into the tool by clicking the File option.
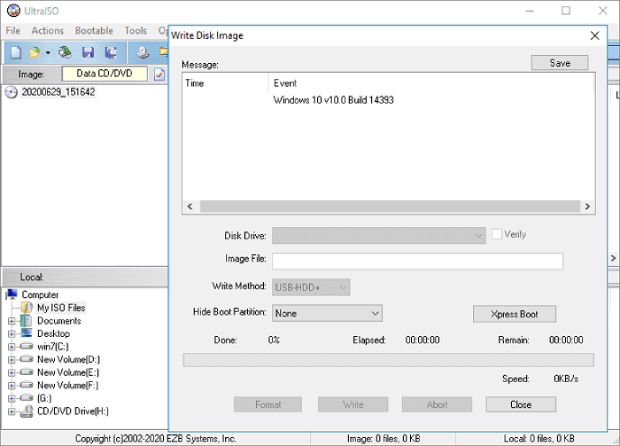
- Once the file is imported, click the Bootable option on the top bar, then select the Write Disc Image from the drop-down menu.
-
In the next pop-up window, verify you’ve selected the right file, then click the Write option to burn it on the USB.

Install the Windows 10 Via USB Flash Drive
Once you’ve burnt the Windows 10 installation file to the USB, follow the steps below to install Windows 10 on the computer:
- Plug the USB drive into the computer, and make sure you’ve selected the Boot from media option from the BIOS to boot your computer from the USB.
- Once the USB is booted, follow the onscreen instruction to install Windows 10 on your computer.
Part 3: People Also Ask
Q 1: What to Do when I meet the error Can't install Windows 10 on SSD
It can happen due to various reasons. First, make sure the SSD is properly connected to the computer. If you’re still getting this error, it can be due to the MBR partition table. Convert the SSD into the GPT drive, as Windows can only be installed on GPT disks.
Q 2: How to Install Windows 10 on new hard drive without USB?
You can easily install Windows 10 on a new hard drive without USB using the Windows Media Creation tool. All you need to do is download the Windows 10 ISO file from Microsoft, then use the Windows Media Creation tool to install Windows 10.
Q 3: Why SSD won't boot after Windows 10 installation
SSD won’t boot after Windows 10 installation due to the wrong boot settings in the BIOS. Navigate to the BIOS on the computer, and set the boot to EFI/UEFI to Change the Boot Priority. Then make sure you've set the SSD as the first boot device in Boot Priority.
Concluding Thoughts
In this guide, we discussed the top 3 ways to install Windows 10 on new hard drive. We discussed how you can install Windows 10 with and without the USB. You can use the 4DDiG Partition Manager smart tool to install/clone or migrate Windows 10 to the new drive.


 ChatGPT
 Perplexity
 Google AI Mode
 Grok
Grok

