How to Split Partition in Windows 11/10/8/7 without Losing Data
Looking to split a partition in Windows 11/10/8/7 without risking your valuable data?
Learning how to split in Windows 10/11/8/7 without risking data loss is essential for efficient storage management. No matter, if you're aiming to expand the storage organization, accommodate new software installations, or streamline your backup strategy, learning the art of how to split disk partition in Windows 10, 11, 8, and 7 is crucial. By prioritizing data integrity throughout the process, you can carry out a smooth transition without any loss of important files.
This comprehensive guide will walk you through the process step-by-step to show you how to split a partition in Windows 10 and other versions.
Part 1: Reasons to Split a Partition in Windows 11/10/8/7
First, let’s explore why you need to split the partition.
- Dividing your hard drive into multiple partitions allows for better organization of files, separating system files from personal data or applications.
- By distributing data across different partitions, you can prevent fragmentation and improve system performance.
- Splitting partitions enables you to isolate backups, reducing the risk of data loss in case of a system failure.
- Partitioning facilitates dual-boot setups, letting you run multiple operating systems on the same machine without interference.
- Improve overall partition layout by creating a more reasonable number and size of partitions, optimizing system efficiency and data management.
Part 2: How to Split Partition in Windows 11/10/8/7 without Data Loss?
Method 1. Use Professional Partition Manager (The Easiest Way!)
The easiest way to split partition is using a professional Partition Manager like 4DDiG Partition Manager. When compared to Disk Management tools, 4DDiG Partition Manager offers a more efficient and secure partitioning solution. Unlike Disk Management, there's no need to shrink partitions beforehand, saving you valuable time and reducing the risk of data loss.
What 4DDiG Partition Manager has to offer:
- Seamlessly transfer your Windows OS to an SSD with just one click, no need for a system reinstall.
- Easily clone or restore disks from a non-bootable computer with simplicity.
- Convert MBR to GPT effortlessly, ensuring compatibility with Windows 11 upgrade, all without risking data loss.
- Flexibly adjust, split, create, delete, or format partitions to optimize disk space, now with added support for removing recovery partitions.
Here is how you can use 4DDiG Partition Manager:
-
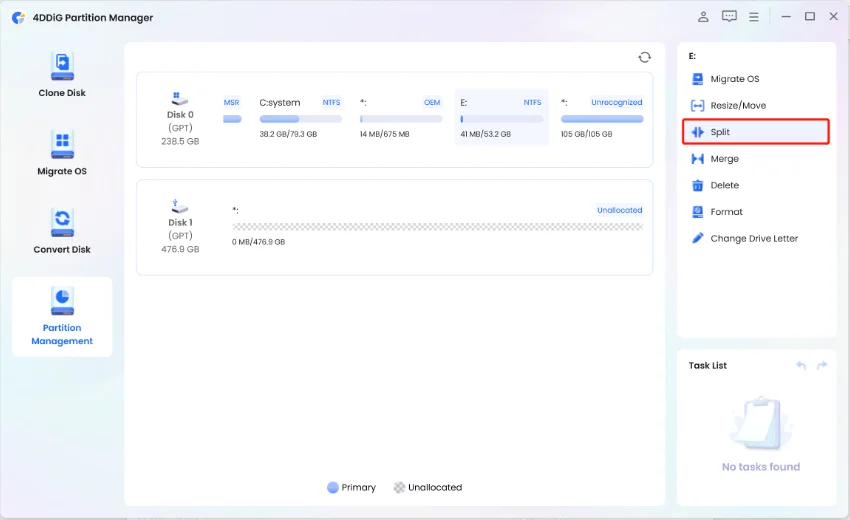
After downloading and opening 4DDiG Partition Manager, navigate to "Partition Management" on the left sidebar. Next, locate the partition you wish to split, right-click on it, and choose "Split" from the menu options.
FREE DOWNLOADSecure Download

-
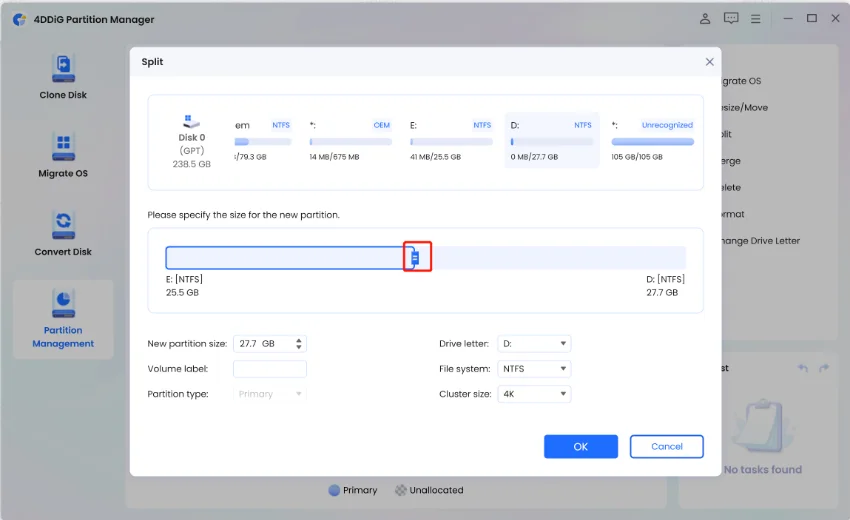
You can adjust the size of the new partition by dragging the handle left or right, or input an exact size manually. Then, customize additional settings such as drive letter, file system (NTFS, exFAT, FAT16, or FAT32), and cluster size for the new partition.

-
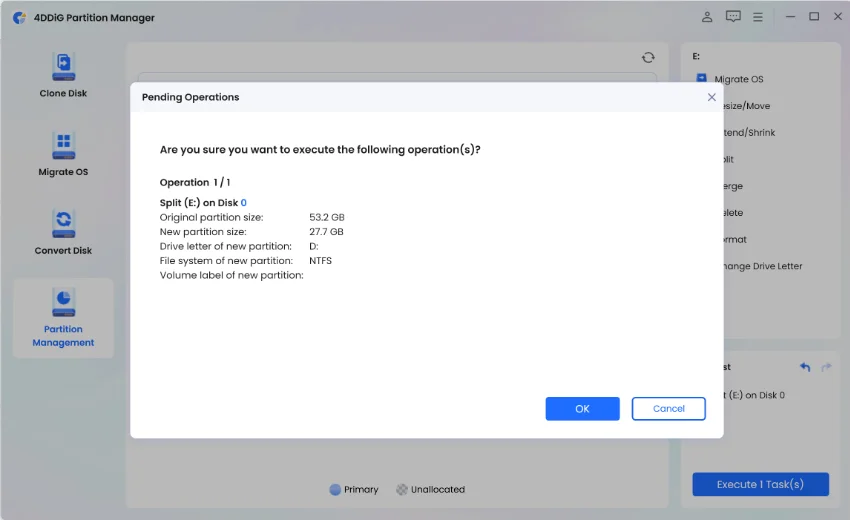
Once you've initiated the split, you'll find the operation pending in the Task List. Simply click "Execute 1 Task(s)" and confirm by selecting "OK" when prompted by the program to proceed with the operations.

-
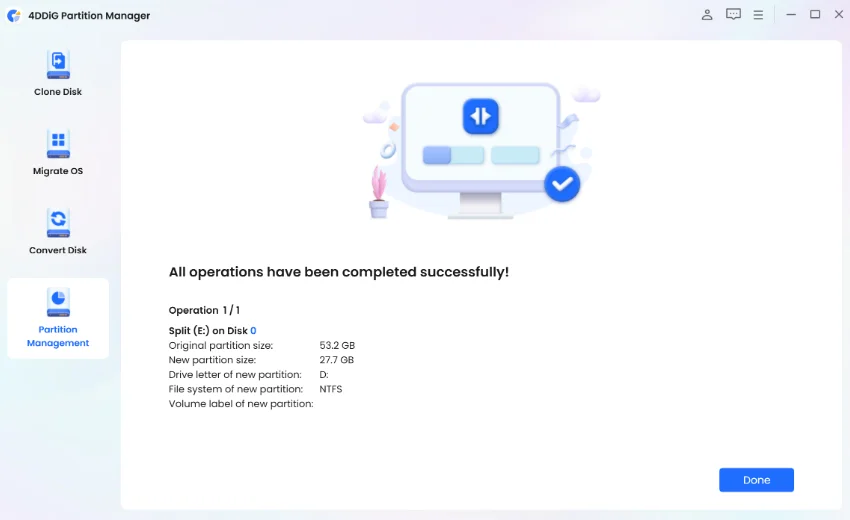
The splitting process might require some time, so please be patient and refrain from closing the program until it is completed.

Get 1 Month License Instantly!
At present, the split partition function is compatible with NTFS and FAT32 partitions. However, it's important to note that only the unused space within a partition can be split to create a new partition. If a partition is entirely utilized or already unallocated, it cannot be split.
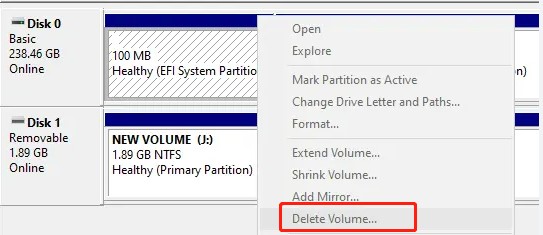
Method 2. Use Disk Management to Split NTFS Partition
If you opt to utilize Disk Management for partitioning, the process involves several steps and can be time-consuming. Additionally, there's a risk of potential data loss.
Here's a brief overview:
- To begin, access Disk Management by pressing "Windows+R" and entering "diskmgmt.msc" in the Run dialog box.
-
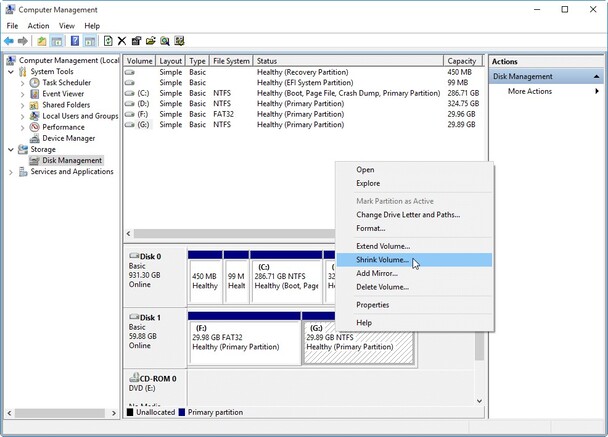
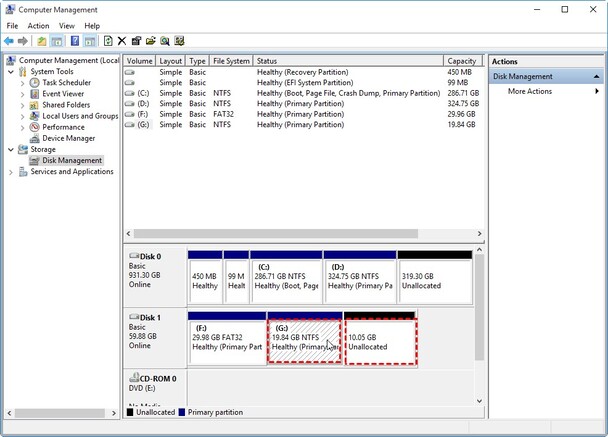
Next, right-click on the large partition you wish to shrink and select "Shrink Volume".

-
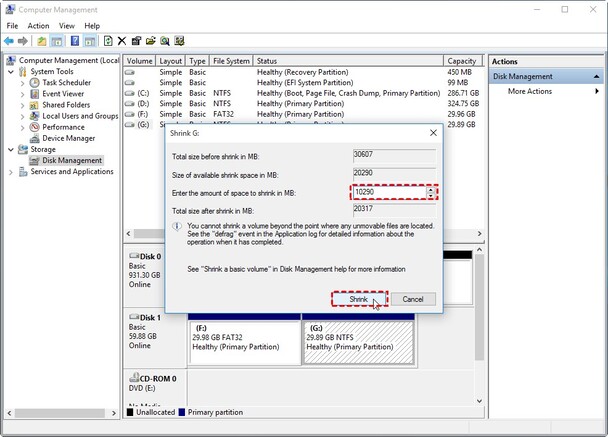
After calculating the available space, input the desired size and proceed by clicking "Shrink".

-
Once the partition has been shrunk, you'll notice unallocated space. Right-click on it and select "New Simple Volume" to initiate the partition creation wizard.

It's essential to note that Disk Management can only shrink NTFS partitions and cannot split FAT32 partitions.
Conclusion
After reading through this guide, you should know how to split a partition in Windows 10/11/8/7. We made a super-easy guide, thanks to 4DDiG Partition Manager for being a top partition manager for Windows and making the cloning process a breeze.
4DDiG Partition Manager serves as dependable partition recovery software, enabling you to effortlessly and securely recover deleted partitions, restore formatted partitions, and repair raw partitions. It supports all file types while copying the data and the process is simple for even a non-technical individual can do it.
Secure Download
💡 Summarize with AI:
You May Also Like
- Home >>
- Hard Drive >>
- How to Split Partition in Windows 11/10/8/7 without Losing Data

 ChatGPT
 Perplexity
 Google AI Mode
 Grok
Grok

