How to Move Partition to End of Disk?
When managing disk space on your computer, rearranging partitions to optimize performance or make room for new data is often necessary. One common task is to move a partition to the end of the disk. This can be particularly useful when creating a new partition in the unallocated space at the beginning of the disk. If you're working with a single hard drive, understanding how to move recovery partition to end of disk is crucial. This article will explain how to move partition to end of disk, providing you with the knowledge to confidently perform this task. Let's learn how to move partition to end of disk Diskpart!
Part 1: Why Move Partition to End of Disk?
Diskpart move partition to end of disk is necessary for several reasons. Here are some common scenarios where this action proves beneficial:
- Creating Space for New Partitions: Moving an existing partition to the end can free up the necessary space if you need to create a new partition at the beginning of the disk.
- Optimizing Disk Performance:Organizing partitions differently can lead to performance gains. For instance, having a system or frequently accessed data at the beginning of the disk can improve overall performance.
- Resizing and Extending Partitions: When you need to extend an existing partition but the adjacent space is occupied, move EFI partition to end of disk can consolidate free space and make resizing easier.
- Backup and Recovery: Moving partitions can also be part of a backup or recovery strategy. By reorganizing partitions, you can better align with your backup plan or recover lost space more efficiently.
- Disk Cleanup and Reorganization: Disk usage patterns change, and reorganization may be necessary to keep the system running smoothly. Moving partitions to the end can be part of a broader disk cleanup and optimization.
Part 2: Can You Move Partition to End of Disk?
Yes, you can move partition to end of the disk, but it requires careful planning and the right tools. This process involves resizing and shifting existing partitions, which can be complex and, if not done correctly, carry some risk of data loss. Modern partition management software, such as 4DDiG Partition Manager, offers functionalities for moving partitions. This tool simplifies the process and guides you through resizing, moving, and applying changes.
Part 3: The Best Tool to Move Partition to End of Disk
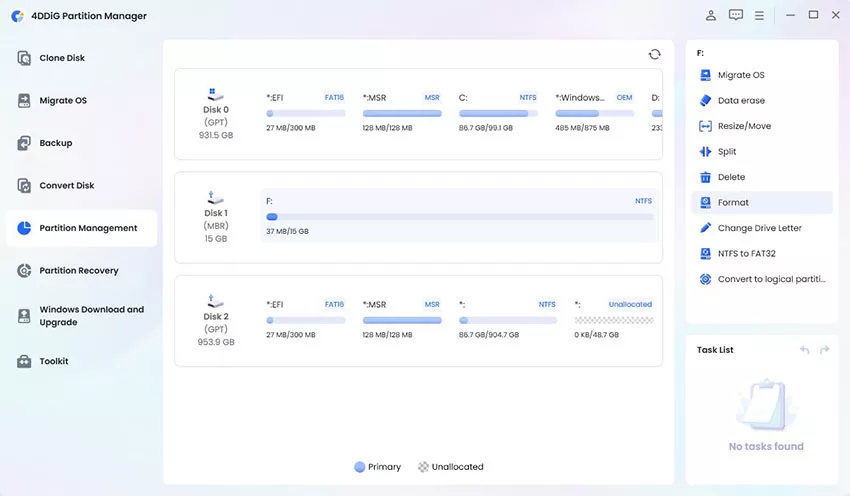
If you want to move partition to end of disk, 4DDiG Partition Manager is an excellent choice. This powerful tool offers a user-friendly interface and robust features that simplify disk management tasks.
Here are the key features of 4DDiG Partition Manager:
- User-friendly Interface: 4DDiG Partition Manager provides an intuitive interface that makes complex disk operations easy. Its step-by-step guides ensure that you can move partitions without confusion or error.
- Partition Resizing and Moving: This software can resize and move partition to end of disk with precision. It handles both shrinking and expanding partitions easily to create the necessary space.
- Data Protection: 4DDiG can help to protect your data. It provides advanced data protection mechanisms to minimize the risk of data loss or corruption during the moving process.
- Comprehensive Disk Management: 4DDiG Partition Manager offers a full suite of disk management tools, including creating, deleting, formatting, and merging partitions.
- Support for Various File Systems: This tool supports many file systems, including NTFS, FAT32, exFAT, and more.
Follow the below steps that can help how to use 4DDiG Partition Manager to Move Partition:
-
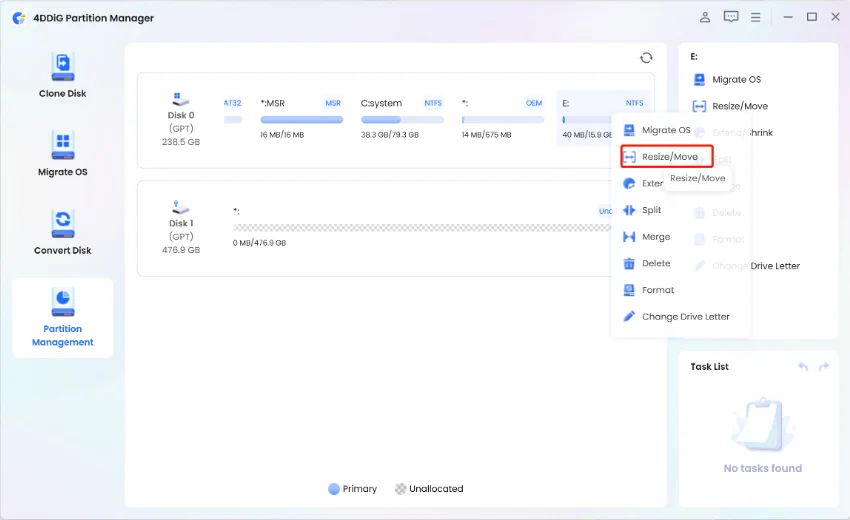
You need to download and install 4DDiG Partition Manager. From the navigation bar on the left, choose "Partition Management." Next, to resize a partition, right-click on it and select "Resize/Move" from the drop-down menu.
FREE DOWNLOADSecure Download

-
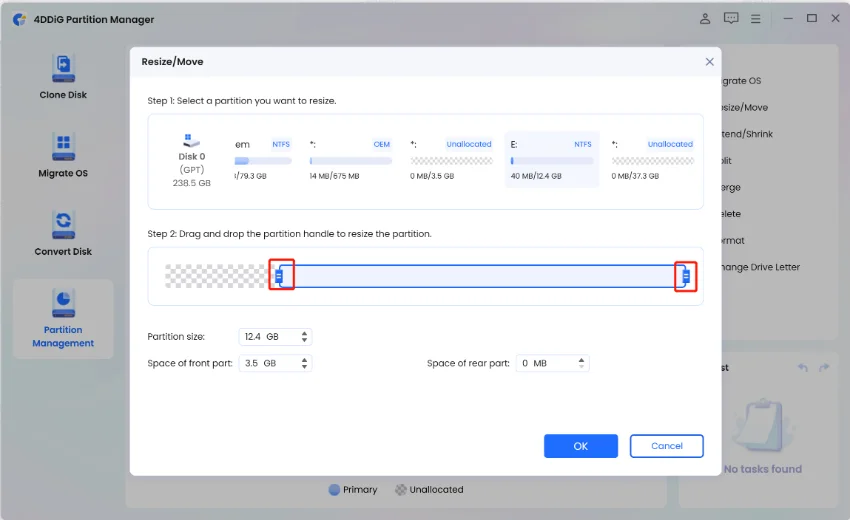
You can change the size of the selected partition by dragging and dropping its borders in the pop-up box. Alternatively, you can type in a partition size in gigabytes. After setting the partition size, you can preview the modifications you made. To queue the operation, click OK.

-
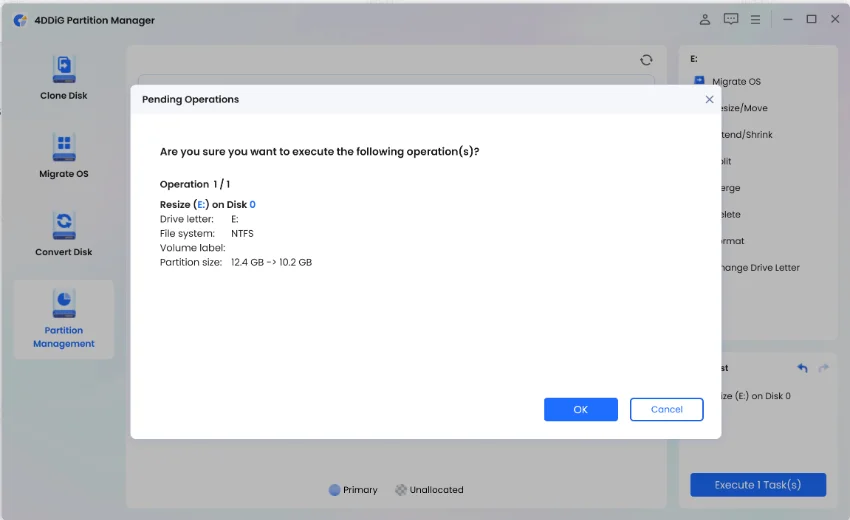
The Task List displays the queued resizing operation. To commit the operation, click Execute 1 Task(s) and then click OK.

-
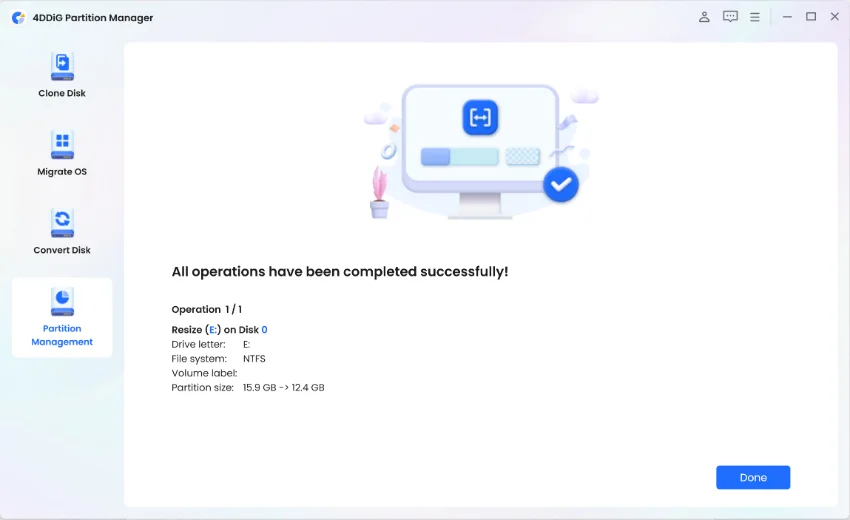
The partition resizing process will begin immediately and take some time to complete. Once the partition size has been adjusted as anticipated, click Done.

FAQs about Move Partition to End of Disk
1.How do I create a partition at the end of a disk?
To create a partition at the end of a disk, first ensure there is unallocated space available. Use a partition management tool like 4DDiG Partition Manager to select the unallocated space, then choose to create a new partition. Follow the prompts to specify the partition size, file system, and other settings, and then apply the changes.
2.How do I change the position of a partition?
If you want to change the position of a partition, you should use a partition management tool such as 4DDiG Partition Manager. Select the partition you want to move, choose to move or resize it, and then drag it to the desired position on the disk.
3.How to move healthy recovery partition to end of disk?
To move a healthy recovery partition to the end of the disk, first use a partition management tool like 4DDiG Partition Manager. Select the recovery partition, choose the move/resize option, and drag the partition to the end of the disk. Confirm and apply the changes.
Conclusion
In short, we have explained how to move partition to end of disk and covered the reasons why you might need to do this. If you want to create new partitions and optimize disk performance, move a partition that can enhance your system’s efficiency and flexibility. With the user-friendly and powerful features of 4DDiG Partition Manager you can confidently tackle this task to ensure your data remains safe.
Secure Download
 ChatGPT
 Perplexity
 Google AI Mode
 Grok
Grok

