How to Clone M.2 SSD to Larger M.2 SSD? [New Tutorial]

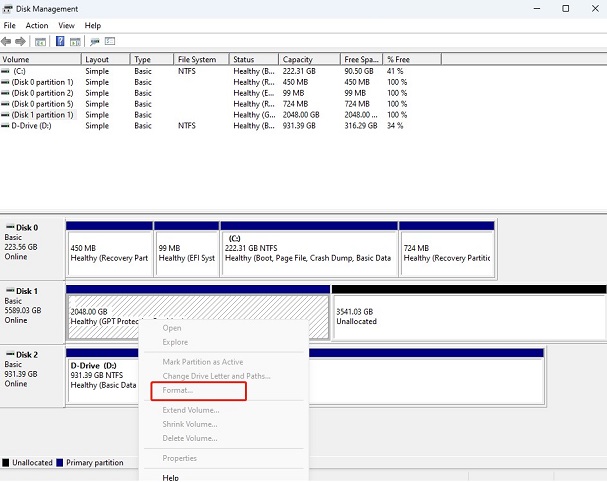
Upgrade smoothly: Discover how to clone M.2 SSD to larger M.2 SSD effortlessly with our comprehensive step-by-step guide with 4DDiG partition manager.

5 mins read

Updated on 2024-05-05 12:20:37 to Hard Drive

To learn how to clone M.2 SSD to larger M.2 SSD, you need to follow certain steps, which can be confusing. Luckily, we’ve compiled an article to help you find the answer to your problem.

This guide will take you through the step-by-step guide to clone M.2 SSD to larger M.2 SSD, starting from the preparatory actions of readying your computer for the cloning, moving on to the cloning process itself with the 4DDiG partition manager and then ending with booting the computer and a few FAQs.

After all, upgrading your SSD is an important task since it can improve both your storage capacity and overall system performance. You can prevent data loss or OS errors by learning to clone your SSD correctly!

clone m.2 ssd to larger m.2 ssd

Part 1: To-Do Lists for Clone M.2 SSD to Larger M.2 SSD

To clone M.2 SSD to larger M.2 SSD, you need first to complete the preparatory actions to ensure minimal errors and a smooth transition while doing the actual cloning process. Here’s how you’ll want to do that:

Action 1. Check the Number of SSD Slots on Your Computer

  • Open the computer or laptop casing with a screwdriver.

    to-do list action 1
  • There, you’ll see long rectangular strips. Check those to confirm how many slots are there.

    to-do list action 1

You can always buy an M.2 SSD adaptor online if you don’t have an extra slot.

Action 2. Purchase a Larger M.2 SSD

Know how many slots you have or have an adapter? Then it’s time to buy your M.2 SSD - if you don’t already have one, that is. You'll need to keep two things in mind while choosing it; that it’s the same length as the SSD slot in your computer (if you have one), and that the storage capacity of the new one is bigger than the original. To be safe, make sure it’s twice or thrice the capacity.

Action 3. Install the Larger M.2 SSD to Your Computer

It’s time to install the M.2 SSD to your computer. If you do have an extra slot, that would be great. If you don’t, you’ll have to connect the new SSD to the computer via the adapter.

To install on a laptop, follow the given steps:

  • Open the casing of the laptop with a screwdriver.

    to-do list action 2.1 step 1
  • Open the M.2 slot and place the SSD inside.

    to-do list action 2.1 step 2
  • Screw in the drive, confirm the placement, and cover it up again.

    to-do list action 2.1 step 3

To install on a laptop, follow the given steps:

  • Open the casing, find the M.2 connector (labelled “PCIe”), and just slide the M.2 SSD inside the slot.

    to-do list action 2.2 step 1
  • Secure the drive with the mounting screw and cover.

    to-do list action 2.2 step 2

Action 4. Initialize the New M.2 SSD via Disk Management

Before you clone M.2 SSD to larger M.2 SSD, you must initialize the SSD drive to work during cloning. Here’s how you can do so through Disk Management:

  • Open Disk Management and find the original M.2 SSD on the list. There, right-click on the SSD indicator.

    M.2 preparatory step action 4 step 1
  • Go to ‘Properties’ on the drop-down list, and from there, check the partition style for reference.

    M.2 preparatory step action 4 step 2
  • Go back to the list and right-click on the new M.2 SSD. There, select ‘Initialize Disk’.

    M.2 preparatory step action 4 step 3
  • Set the partition style to the same as that of the original disk (see step 2), and then click ‘OK’ to confirm and initialize.

    M.2 preparatory step action 4 step 4

Part 2: How to Clone M.2 SSD to Larger M.2 SSD?

Once the preparatory steps are complete, it’s time to move into the detailed process of how to clone M.2 SSD to larger M.2 SSD. For this task, we recommend using the 4DDiG Partition Manager, which reliably helps you through cloning and is designed for efficient disk management.

To give you a little overview of the tool itself, here are a few of the benefits you gain from choosing to use it:

  • You only need one click to migrate the Windows OS to an SSD - no reinstallation required!
  • You can clone your hard drive to any SSD or HDD to back up your data. Plus, you can also upgrade to a larger hard drive without data loss!
  • For a Windows 11 upgrade without losing data, you can convert MBR to GPT
  • If you have errors and problems with partitions, you can repair, recover, and restore them from your storage devices.
  • You can also manipulate the partitions beyond creating and deleting them to optimize disk space, which includes resizing, splitting, and formatting.

Here is the step-by-step process of cloning the M.2 SSD to larger M.2 SSD using 4DDiG Partition Manager:

  • Download and install the 4DDiG Partition Manager. Once that’s done, confirm your new M.2 SSD is attached to your computer (see the preparatory steps) and launch 4DDiG. From the options, select ‘Clone Disk’.

    FREE DOWNLOAD

    Secure Download

    ext: clone M.2 SSD to larger M.2 SSD with 4DDiG step 1
  • From there, you’ll have to select the target disk (the new M.2 SSD) that will receive the cloned data , then press ‘Continue’.

    ext: clone M.2 SSD to larger M.2 SSD with 4DDiG step 2
  • Make sure there’s no data on the new SSD (in case you’re using an old one) because the process will overwrite the data. If you’re okay with that, press ‘Sure’.

    ext: clone M.2 SSD to larger M.2 SSD with 4DDiG step 3
  • A preview will show up with the final result. If everything looks okay, press ‘Start’.

    ext: clone M.2 SSD to larger M.2 SSD with 4DDiG step 4
  • At this point, you only need to wait for the process to complete (which depends on the size of the SSD to be cloned). Once done, you will see a screen showing that the cloning has been completed successfully!

    ext: clone M.2 SSD to larger M.2 SSD with 4DDiG step 5
Note

Get 1 Month License Instantly!

Part 3: How to Boot Your Computer from Cloned Larger M.2 SSD?

The next portion of the process is learning to boot your PC from the cloned drive. Here’s how you can do that:

  • Install your computer’s new drive (the cloned version). If your computer only has one SSD slot, replace the old SSD, but if not, add the new one into the empty slot. Then, restart your computer and then go to BIOS (through the keyboard’s F2, F8, F11, or Del buttons).

    how to clone M.2 SSD to larger M.2 SSD booting process step 1
  • You’ll find the boot menu there, and you can set the new SSD as your boot drive.

    how to clone M.2 SSD to larger M.2 SSD booting process step 2
  • Save the changes with F10, F8, F2, or otherwise, and restart the computer.

    how to clone M.2 SSD to larger M.2 SSD booting process step 3

Frequently Asked Questions

1. How to Clone M.2 SSD with Only One Slot?

If your computer only has one M.2 SSD slot, you can still clone your SSD to a larger one using an adapter. First, buy the adapter and connect it to your computer. Then attach the new M.2 SSD to the computer through it, and follow the cloning process outlined above.

2. What is the best cloning software for M.2 SSD?

There are quite a few cloning software options available. Still, the one which stands out is the 4DDiG Partition Manager tool, which facilitates the user with an intuitive interface, user-friendly features, and incredibly efficient cloning while retaining the integrity of the data.

Conclusion

In short, learning to clone M.2 SSD to larger M.2 SSD successfully is a straightforward process - but only if approached systematically. By following the guide outlined above, you can seamlessly upgrade your storage capacity and improve the performance of your system without data loss or reinstallation.

For the best process, we recommend using the 4DDiG Partition Manager, an advanced software that streamlines the cloning process and makes it accessible to users of different skill levels.

Learn how to clone M.2 SSD to larger M.2 SSD and enjoy the benefits!

FREE DOWNLOAD

Secure Download

William Bollson (senior editor)

William Bollson, the editor-in-chief of 4DDiG, devotes to providing the best solutions for Windows and Mac related issues, including data recovery, repair, error fixes.

(Click to rate this post)

You rated 4.5 ( participated)