How to Fix FAT32 Format Not Showing Up?
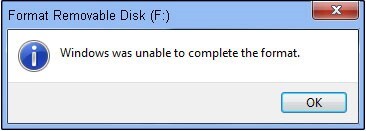
Is your FAT32 format not showing up when you need it most? It can be frustrating when your computer suddenly fails to recognize the FAT32 format, leaving you unable to access your files.
Don't worry as this article is here to guide you through troubleshooting and fixing this issue step-by-step. Whether you are using a USB drive, SD card, or external hard disk, we will cover common reasons why FAT32 might not be appearing, and practical solutions to get it back up and running.
So, let's get started.
Part 1: What Is FAT32?
Before getting straight to how to fix the FAT32 format not showing up, it's essential to first understand what is FAT32.
Well, FAT32 stands for File Allocation Table 32-bit. It's a file system format that's widely compatible with various devices like USB drives, SD cards, and external hard disks. FAT32 is known for its simplicity and compatibility across different operating systems, including Windows, macOS, and Linux.
It supports file sizes up to 4 GB and volumes up to 2 TB, making it suitable for many storage needs.
But what's the reason behind FAT32 format option not available on your computer? Let's discuss this in detail.
Part 2: Why FAT32 Format Not Showing?
When FAT32 format not showing on your computer, several common reasons could be behind it:
- Drive Letter Conflict: Sometimes, another drive or device may be using the same letter assigned to your FAT32-formatted drive, causing it to be hidden.
- Corrupted File System: If the FAT32 file system gets corrupted due to improper ejection or file errors, it may not show up on your computer.
- Outdated Drivers: Old or incompatible device drivers on your computer can prevent FAT32 drives from being recognized.
- Physical Connection Issues: Loose cables, damaged ports, or faulty adapters can also lead to the FAT32 format not appearing.
Now let's discuss how you can fix FAT32 format not showing up.
Part 3: The Best Way to Fix FAT32 Format Option Not Available?
The best way to fix FAT32 format not showing up error is by using a reliable partition management tool such as 4DDiG Partition Manager.
4DDiG Partition Manager is a top tool for managing disk partitions and formatting drives to FAT32 smoothly. It's easy to use, allowing you to resize, extend, create, and delete partitions without losing data.
It also offers features for cloning disks, moving systems, and recovering partitions, ensuring your data stays safe and your computer runs smoothly.
How to Use 4DDiG Partition Manager to Format the Drive to FAT32?
-
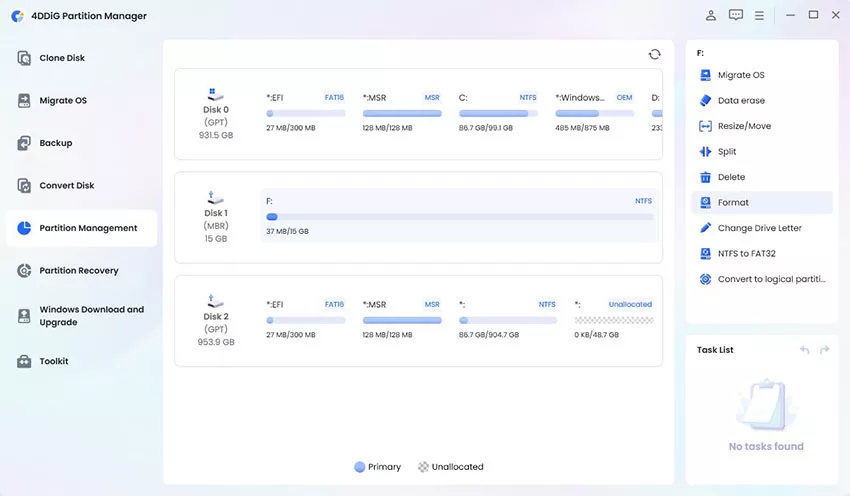
1. Install and launch 4DDiG Partition Manager on your computer and go to Partition Management. Now right click on the drive that you want to format on FAT32 and hit the Format button.
FREE DOWNLOADSecure Download

-
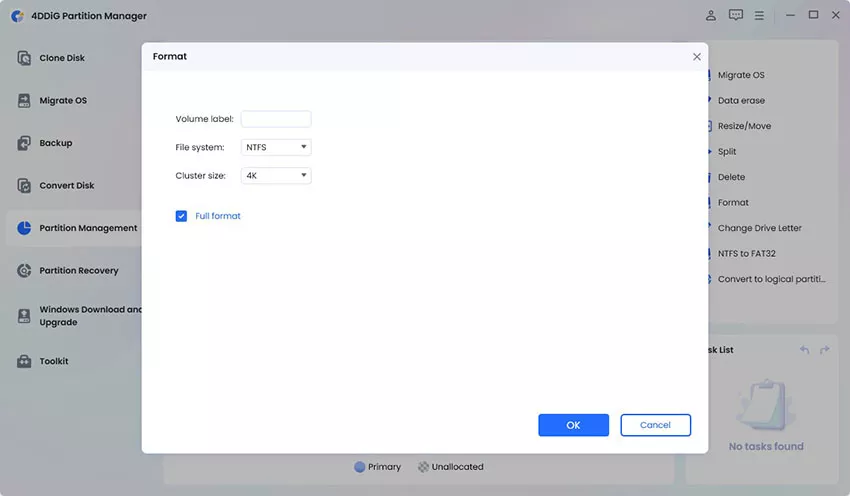
2. Now select the file system as FAT32, specify the volume label, and hit the OK button.

-
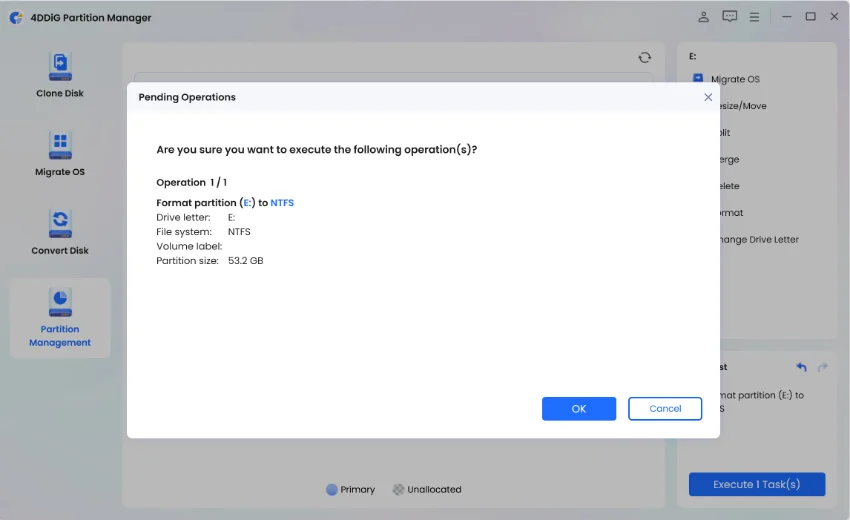
3. Now review the formatting settings and hit the Ok button to start the process.

-
4. Now the formatting process will be started and you will have to wait for a few minutes. Once the process is completed, hit the Done button.

Part 4: Other Alternative Ways to Fix FAT32 Format Not Showing
There are some other alternative ways to fix FAT32 format not showing issue on your computer:
Solution 1. Use PowerShell to Format USB to FAT32
PowerShell is a powerful command-line tool in Windows that can be used to format USB drives to FAT32. It offers more control over the formatting process compared to the traditional GUI methods.
PowerShell allows you to execute commands to format a USB drive to FAT32 directly from the command line. This method is useful if the FAT32 format option is not visible through the usual Windows interface
Solution 2. Use the Diskpart Tool to Fix FAT32 Format Not Showing
Diskpart is another command-line tool built into Windows that provides more advanced disk partitioning and formatting options compared to the Disk Management tool.
Diskpart allows for more precise control over disk partitioning and formatting tasks. It can be particularly useful if the FAT32 format option is not available or visible in Disk Management.
FAQs about FAT32 Format Not Showing
1. How do I enable FAT32 format?
You can enable FAT32 format by using Disk Management on Windows or Disk Utility on Mac. For an easy and reliable solution, consider using tools like 4DDiG Partition Manager.
2. Why is Rufus not showing FAT32?
If Rufus isn't displaying FAT32, it might be due to the selected drive or partition scheme not supporting FAT32 formatting. Ensure that Rufus is configured with a compatible scheme or try updating the software to the latest version for enhanced compatibility with different drives and systems.
3. Why is there no FAT32 option on my Mac?
On Mac systems, FAT32 is recognized as MS-DOS (FAT) in Disk Utility. To format a drive to FAT32, select the drive in Disk Utility, click "Erase," choose MS-DOS (FAT) as the format, and proceed with erasing.
This option provides compatibility with both Mac and Windows systems when transferring files between platforms.
Conclusion
Encountering the problem of FAT32 format not showing up can be frustrating, but it's manageable with the right tools and knowledge. For the best solution, using 4DDiG Partition Manager is highly recommended.
This tool makes managing disk partitions and formatting to FAT32 easy without losing data. Whether resizing partitions, recovering data, or formatting drives, 4DDiG Partition Manager is user-friendly and suits both beginners and experts.
Secure Download

 ChatGPT
 Perplexity
 Google AI Mode
 Grok
Grok

