How to Partition SSD? Step-by-Step Guide
How to partition SSD? Check our detailed guide and download 4DDiG Partition Manager to help you partition SSD or HDD in no time!
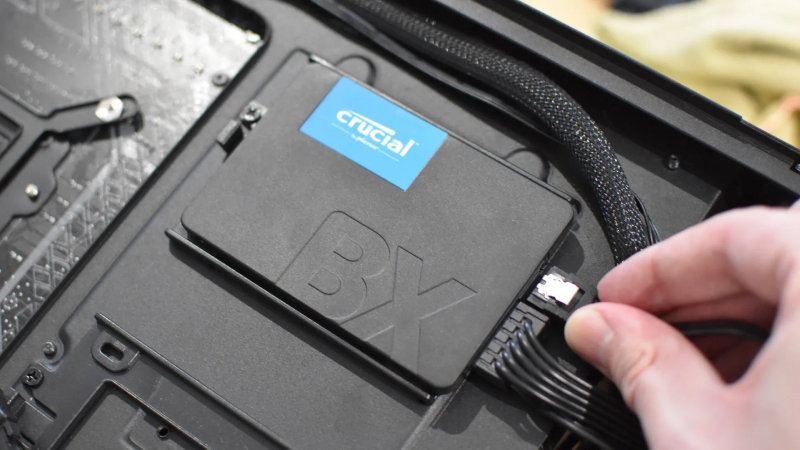
Digital storage is rapidly changing, evolving to fit a narrative you can’t see with a simple lens. In this landscape, learning how to partition SSD is absolutely necessary for optimizing performance and organizing data.
Therefore, whether you’re setting up a new SSD or reconfiguring an existing one, the process of figuring out the partition you’ll construct within it plays an essential role in enhancing that drive functionality.
That’s why this guide will delve into the detailed methods of facilitating this process, guiding you on the journey to learn how to partition a new SSD. We’ll also explore the simplicity and effectiveness of partition manager tools like 4DDiG Partition Manager and the step-by-step process of every included method.
Part 1: How to Partition SSD with Disk Management?
When it comes to understanding how to partition a new SSD, Windows users can leverage their system using the built-in Disk Management tool to help users seamlessly and effectively create a partition.
But before you begin, let’s consider a few basics about Disk Management - it’s a native Windows utility that allows the Windows user to manage storage devices, including hard drives and SSDs.
It offers a graphical interface for creating, formatting, resizing, and deleting partitions, which is exactly what you require for this method.
Speaking of which, let’s learn how to partition SSD drive with Disk Management:
-
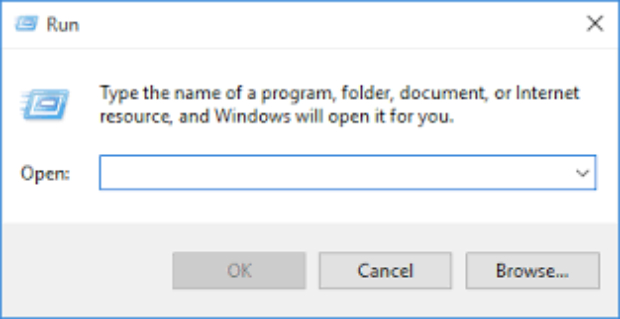
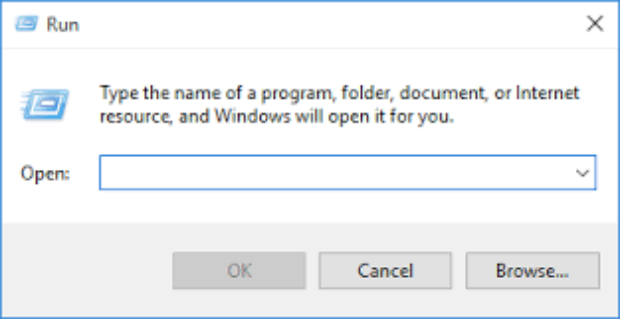
Press the ‘Windows’ and ‘R’ simultaneously, opening the ‘Run’ Dialogue.

-
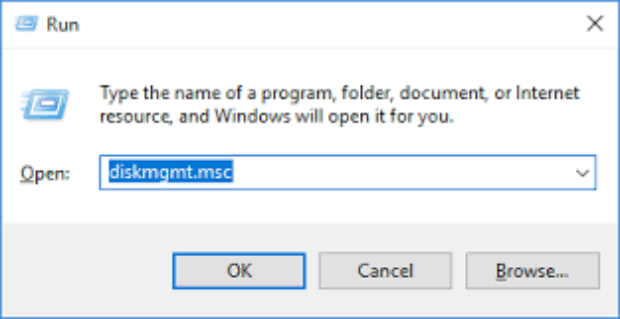
Type “diskmgmt.msc” and press ‘Enter’.

-
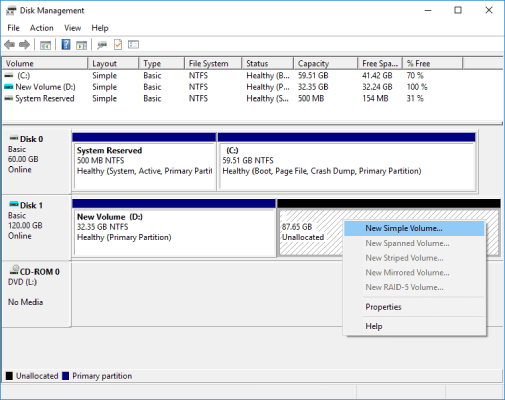
Find the SSD you’re looking for and the unallocated/empty space you want to partition. Remember that if there is no unallocated space on the SSD, you won’t be able to proceed with the step, so you’ll have to ensure there is. One method is shrinking existing partitions.
Regardless, once you’ve selected the unallocated space, right-click on it and select “New Simple Volume”.

-
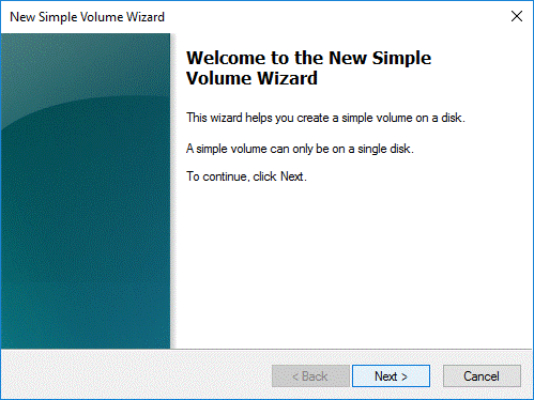
When the wizard opens, click “Next”.

-
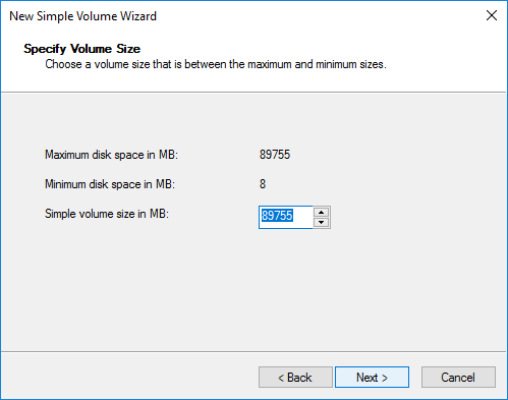
You’ll now see another window where you can specify the ‘size’. It will be calculated in MBs, so include a number depending on the free size if you want a smaller partition or use the default value, which is the largest amount of usable free space.

-
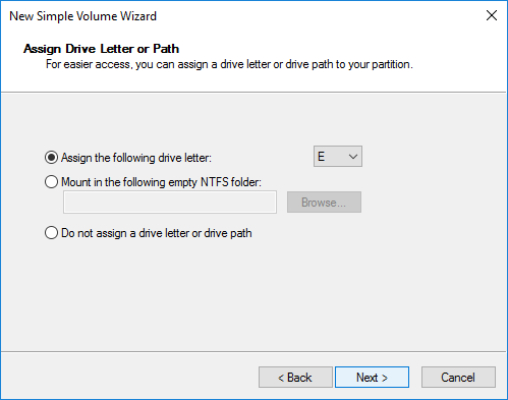
The next window will allow you to choose a Drive letter. Do that and hit “Next”.

-
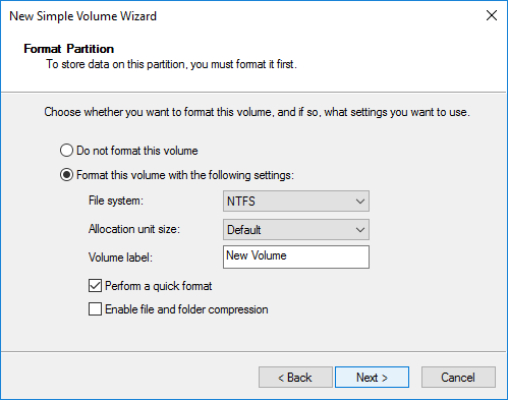
Finally, choose the file system type you must pick for your partition and press ‘Next’ and then ‘Finish’ when approved.

Part 2: How to Partition an SSD with DiskPart?
Another more complex option is utilizing DiskPart. This particular option is great for users who are well aware of computer concepts and experienced enough to use a command-line approach to learn how to partition an SSD, but do note that this method is also a little dangerous for the generic user.
DiskPart is, after all, a command line utility that controls advanced operations in creating, deleting, and formatting partitions, and the slightest wrong step may mean wiping your data or corrupting your drives.
However, it remains true that it offers far more flexibility and control over storage configurations when learning how to partition new SSD, which means it’s still a very efficient option.
Let’s go over the various steps included in creating a new partition with DiskPart:
-
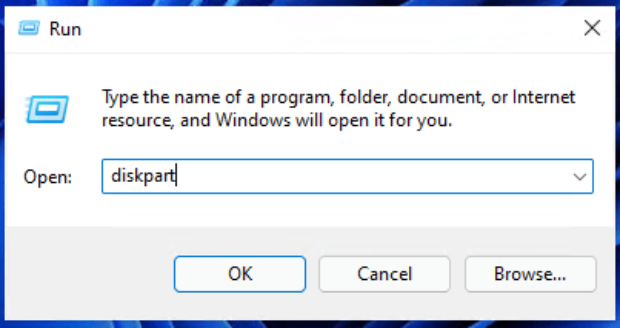
Press the ‘Windows’ and ‘R’ simultaneously, opening the ‘Run’ Dialogue.

-
Type “diskpart” and press ‘Enter’.

-
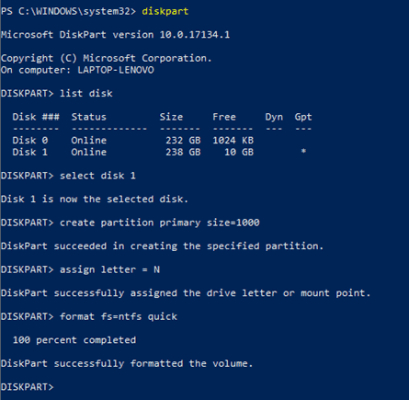
Add and press enter after each of the following commands:
- List disk: This will allow you to view the list of all available disks on your computer, giving you a comprehensive overview and allowing you to choose the SSD you need to pick.
- Select disk 1: ‘1’ refers to the disk/SSD you chose, and you can replace it depending on which drive you select.
- Create partition primary: The above command then creates a primary partition. If you also want to limit the size, write Create partition primary size=1000, where 1000 can be changed as per requirements.
- Assign letter=D: D is the driver letter. Choose the one which you want to apply to.
- format fs=NTFS quick: Finally, this section refers to formatting the new partitions - it depends, but you can replace NTFS with exFAT or other file systems.

Part 3: How to Partition SSD with 4DDiG Partition Manager? The Simplest Way
If either of the options above seems a little difficult - or isn’t working - then you should consider a professional partition manager tool. They are easy and quick to use and efficiently fix and solve any partition-related problems you have.
We recommend the 4DDiG Partition Manager, which is a user-friendly tool that simplifies the process of how to partition SSD by offering a graphical interface and intuitive controls.
And we’ve outlined a list of the key features this tool offers to help you understand the power of partition managers!
- Firstly and perhaps most importantly, 4DDiG Partition Manager offers a user-friendly interface.
-
The tool offers incredible partition manipulation capabilities;
- Removal
- Resizing
- Splitting
- Creating
- Deleting
- Formatting
- With repair, recovery, and restore partition options, 4DDiG Partition Manager also provides a safety net for its users.
- It also helps users create backups for data security.
- Moreover, 4DDiG Partition Manager is compatible with multiple systems and Windows OS.
Now, let’s consider the steps to learning how to create partition on SSD with 4DDiG Partition Manager:
-
Download and run the program, choosing “Partition Management” from the left bar. From there, choose the unallocated partition you intend to convert into a new one and right-click, pressing “Create.” Remember, as for the previous steps, this is not possible if there is no extra space on the SSD.
FREE DOWNLOADSecure Download

-
The new window will prompt you to select the parameters, and you’ll need to fill out the following elements:
- Partition size (for a more intuitive interface, you can also drag the partition to imply the size)
- Drive letter
- Volume label
- Files system (NTFS, exFAT, FAT16, or FAT32)
Press “OK”.

-
Preview the details in the main interface and then select “Execute 1 Task(s)” to confirm, and then “OK” on the window that pops up after that.

-
Finally, wait for the partition to be created. 4DDiG automatically formats it, so you won’t have to worry about that. Just click “Done” to complete.

Part 4: Benefits of Partitioning SSD
Beyond the technicalities of how to partition SSD drive, you must also note that there are benefits that this process brings to your system. Let’s cover some of those in this section.
Organization and Efficiency
Once you’ve partitioned your SSD, you’ll benefit from better organization. For example, since you can logically segregate different types of files (like documents and media), you can locate what you need quickly and with better system responsiveness.
Flexibility for Multiple Operating Systems
Another advantage of configuring how to partition a new SSD is its flexibility for running multiple operating systems on a single device. When distinct partitions are dedicated to each operating system, one can more seamlessly switch between them without the risk of data interference or corruption hanging over one’s head.
Protection Against Data Loss
Last but certainly not least, partitioning is yet another safeguard against data loss. When (or if) system errors impact the OS, the data loss is generally confined to the affected partition, reducing the larger risk of system corruption.
Conclusion
In short, if you’ve comprehended the intricacies of how to partition SSD, you’re on the right track to optimizing storage efficiency and performance.
Whether setting up a new SSD or reorganizing an existing one, strategic partitioning offers many benefits - from enhanced organization to flexible multi-OS setups and robust data protection.
So, using the methods we’ve outlined to learn how to create partition on SSD is the way to go, and the simplest of those is a one-stop method to success. Choose the 4DDiG Partition Manager tool to help you partition your SSD and choose simplicity in exploring the full potential of your SSD.


 ChatGPT
 Perplexity
 Google AI Mode
 Grok
Grok

