How to Format NVMe SSD Safely for Windows 11/10
Are you struggling to format NVMe SSD in Windows 10 or 11? Well, there are different ways you can use to format your NVMe SSD on the Windows operating system. In this article, we are going to discuss them in a detailed manner with step by step instructions.
So whether you are a beginner who doesn't know anything about disk partitions and disk formatting or you are an experienced Windows user, this guide will definitely help you.
Let's get started.
Part 1: Back Up Data Before You Format a NVMe SSD
Before getting straight to how to format new NVMe SSD, it's important to first back up your data.
As we all know, SSD formatting will remove all the older data from the drive so that you can be able to save the new data. But, how you can back up data from formatting NVME SSD?
Don't worry as 4DDiG Partition Manager is here to help you. This powerful tool not only assists in partition management but also offers the capability to clone your NVMe SSD.
Cloning your SSD ensures that all your data is safely duplicated onto another storage device, providing an extra layer of protection before you format your drive.
Part 2: How to Format NVMe SSD in Windows 11/10?
As said above, there are different ways when it comes to how to format a NVMe SSD. Let's discuss all of them in detail below:
Way 1. Use Free Disk Format Tool to Format NVMe SSD
The first and highly recommended method to format your NVMe SSD is using free disk format tools like 4DDiG Partition Manager.

This is a comprehensive software solution designed to simplify disk partition management tasks for users of all levels. With its intuitive interface and powerful features, 4DDiG Partition Manager allows users to resize, move, create, delete, format, and clone partitions with ease.
One of its standout features is its ability to handle various storage devices, including SSDs, HDDs, USB drives, and SD cards, making it a versatile tool for a wide range of needs.
How to Use 4DDiG Partition Manager to Format NVMe SSD?
-
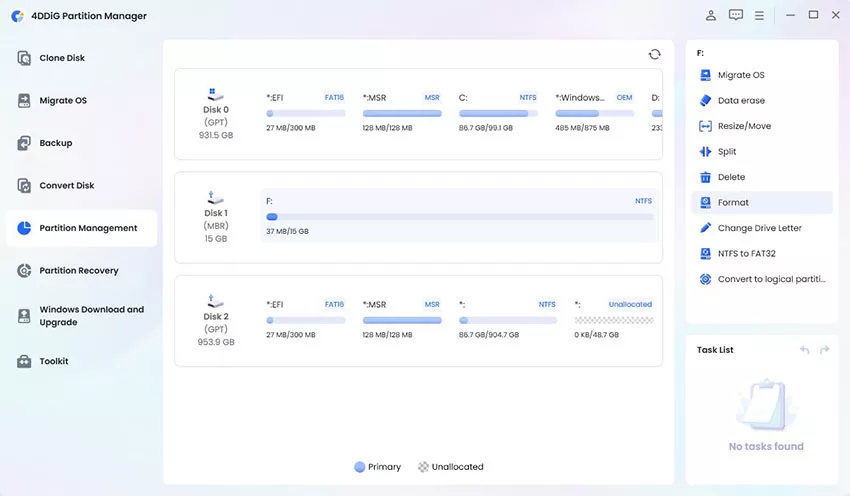
Install and launch 4DDiG Partition Manager on your computer. Go to Partition Management and then right-click on the NVMe SSD drive, and hit the Format button on the left panel.
FREE DOWNLOADSecure Download

-
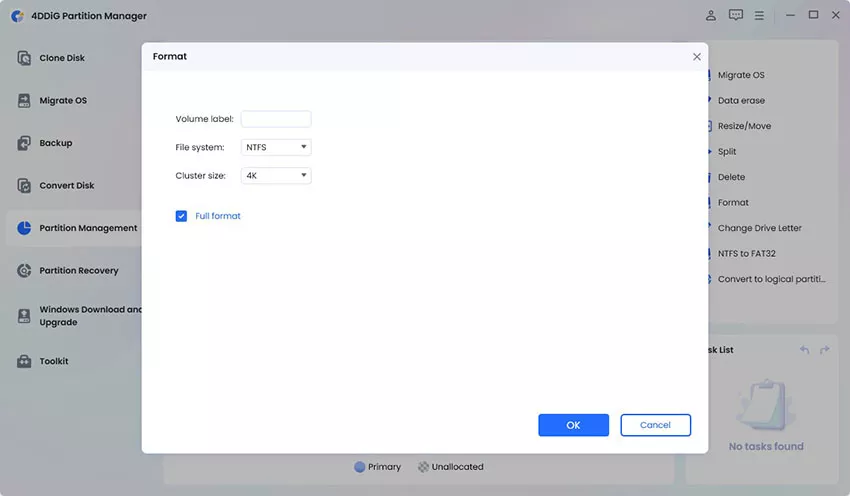
Here you will have to select the Volume Label, File System, and Cluster Size according to your SSD and hit the OK button.

-
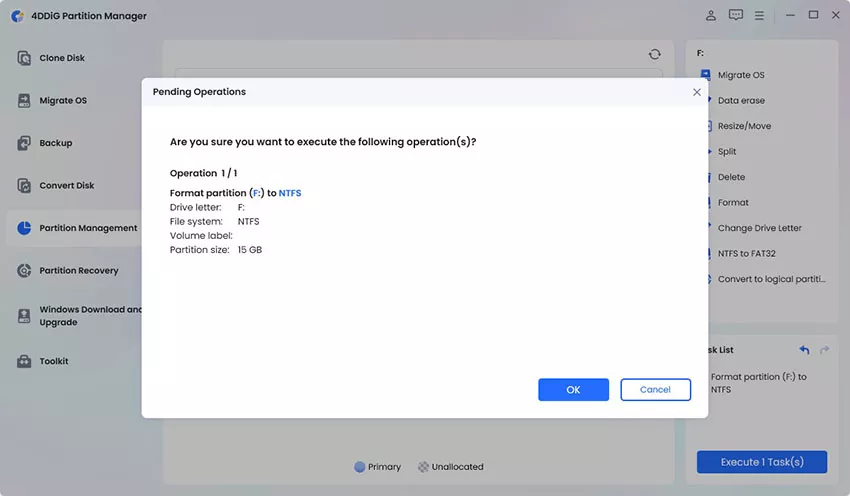
Now a preview of the process will be show to you. Carefully check everything and if it's fine, proceed further by hitting the OK button.

-
The formatting process will begin and you will have to wait for a few minutes depending on the size of the NVMe SSD. Once the process is completed, hit the Done button.

So that's how to format NVMe SSD Windows 11 or 10 using 4DDiG Partition Manager.
Way 2. Format NVMe SSD via Disk Management
Disk Management in Windows also allows you to format your NVMe SSDs. It is a built-in utility in Windows that allows users to manage disk partitions like formatting, resizing, etc.
Here's how you can use the Disk Management feature to format your NVMe SSD:
- Right-click on the Windows button and select "Disk Management."
- Locate your NVMe SSD in the list of available drives.
-
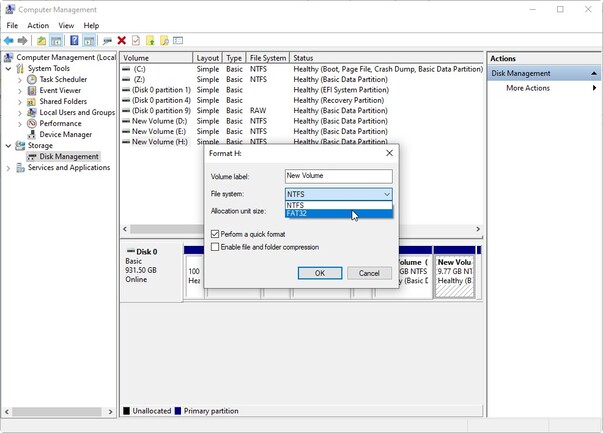
Right-click on the partition you want to format and select "Format."

-
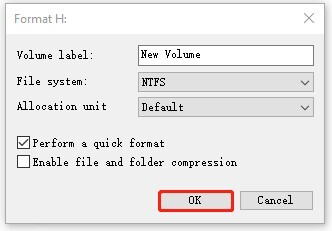
Choose the desired file system, allocation unit size, and volume label, then click "OK" to start the formatting process.

- Once the process is completed, close the Disk Management.
Way 3. Format NVMe SSD via Diskpart
Diskpart is a command-line disk partitioning utility in Windows that allows for more advanced disk management tasks like Formatting your SSDs, resizing, naming, etc.
So here's how you can use Diskpart on your Windows computer to format NVMe SSD:
- Hit the Windows button and type, Cmd. The top of the list will be Command Prompt. Right-click on it and run as an administrator.
- Type "diskpart" and press Enter.
-
Now execute below given commands one by one:

- list disk
- select disk x (Replace x with the disk number of the NVMe SSD you want to format)
- clean (This command clears all the data from the drive)
- create partition primary
- format fs=x (Change x to the file system that fits your computer, such as "ntfs" for Windows or "exfat" for compatibility with different devices)
- Once the process is completed, type Exit and that's it.
Conclusion
So now you know how to format NVMe SSD Windows 10 or 11. Whether you are a novice or an experienced user, there are various methods available to accomplish this task efficiently.
While tools like Disk Management and Diskpart offer built-in solutions, the standout performer is undoubtedly 4DDiG Partition Manager. Not only does it simplify the process with its intuitive interface, but it also offers advanced features like partition cloning for added data security.
So why wait? Start using 4DDiG Partition Manager for all your disk partitioning needs.
Secure Download


 ChatGPT
 Perplexity
 Google AI Mode
 Grok
Grok


