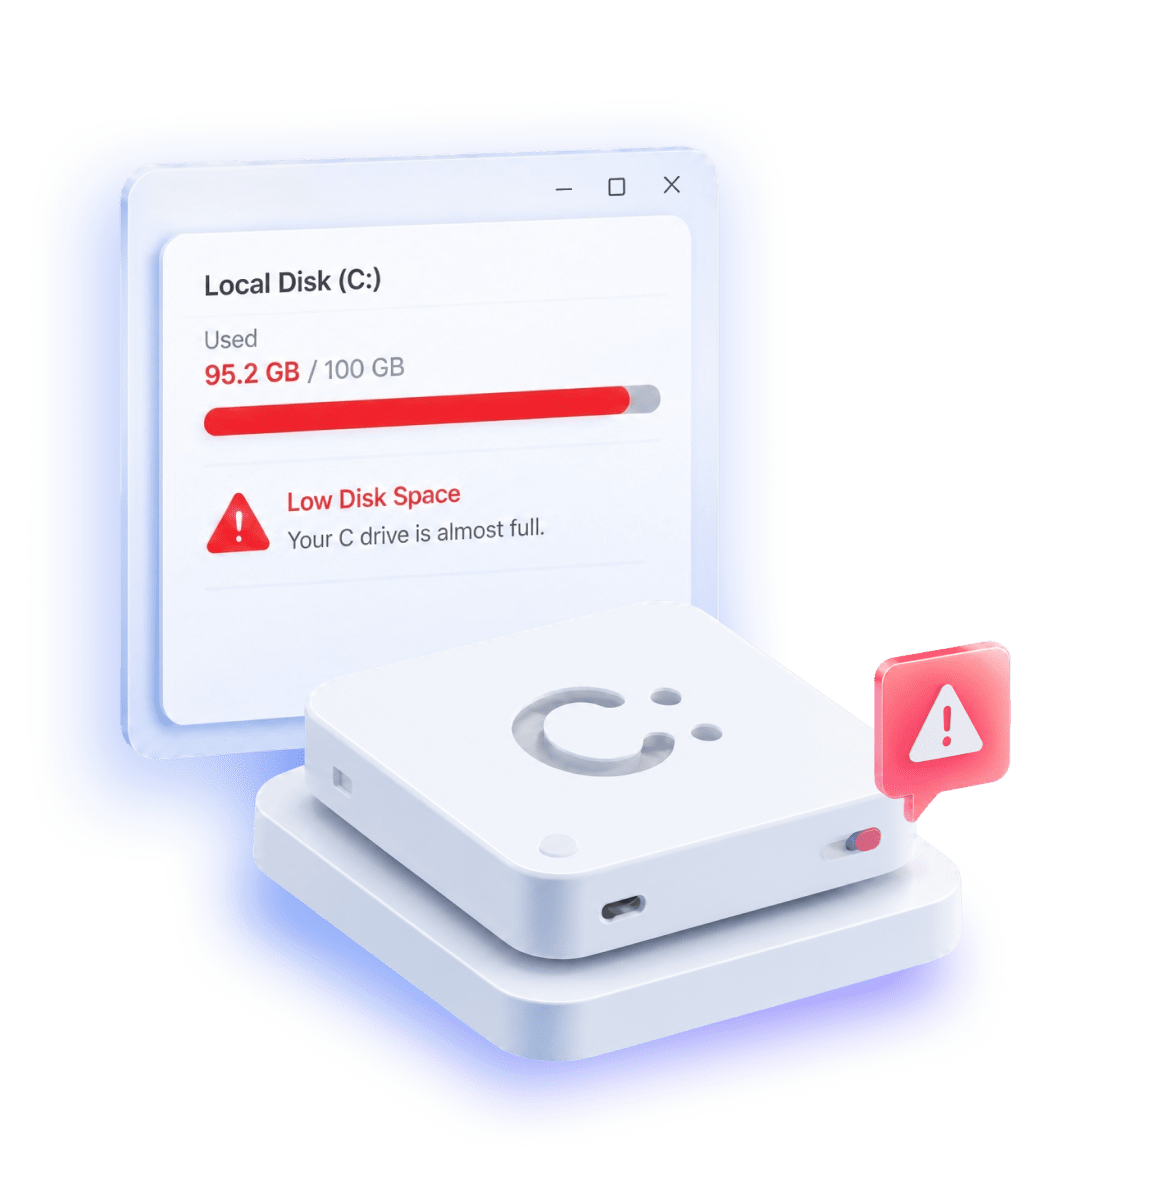
Insufficient C Drive Space
The C drive can become crowded over time due to accumulated files, programs, and temporary data, leading to frequent storage warnings.
Fix low disk space on your system drive using proven methods that won't affect your data

The C drive can become crowded over time due to accumulated files, programs, and temporary data, leading to frequent storage warnings.

The available space is not adjacent to the C drive, or another partition is blocking the extension, preventing Windows from expanding the C drive directly.

When the C drive is nearly full, system responsiveness drops, boot time increase, and applications run slower, affecting overall efficiency.

Low C drive space can block Windows updates or software installation causing errors and preventing new features from being applied successfully.


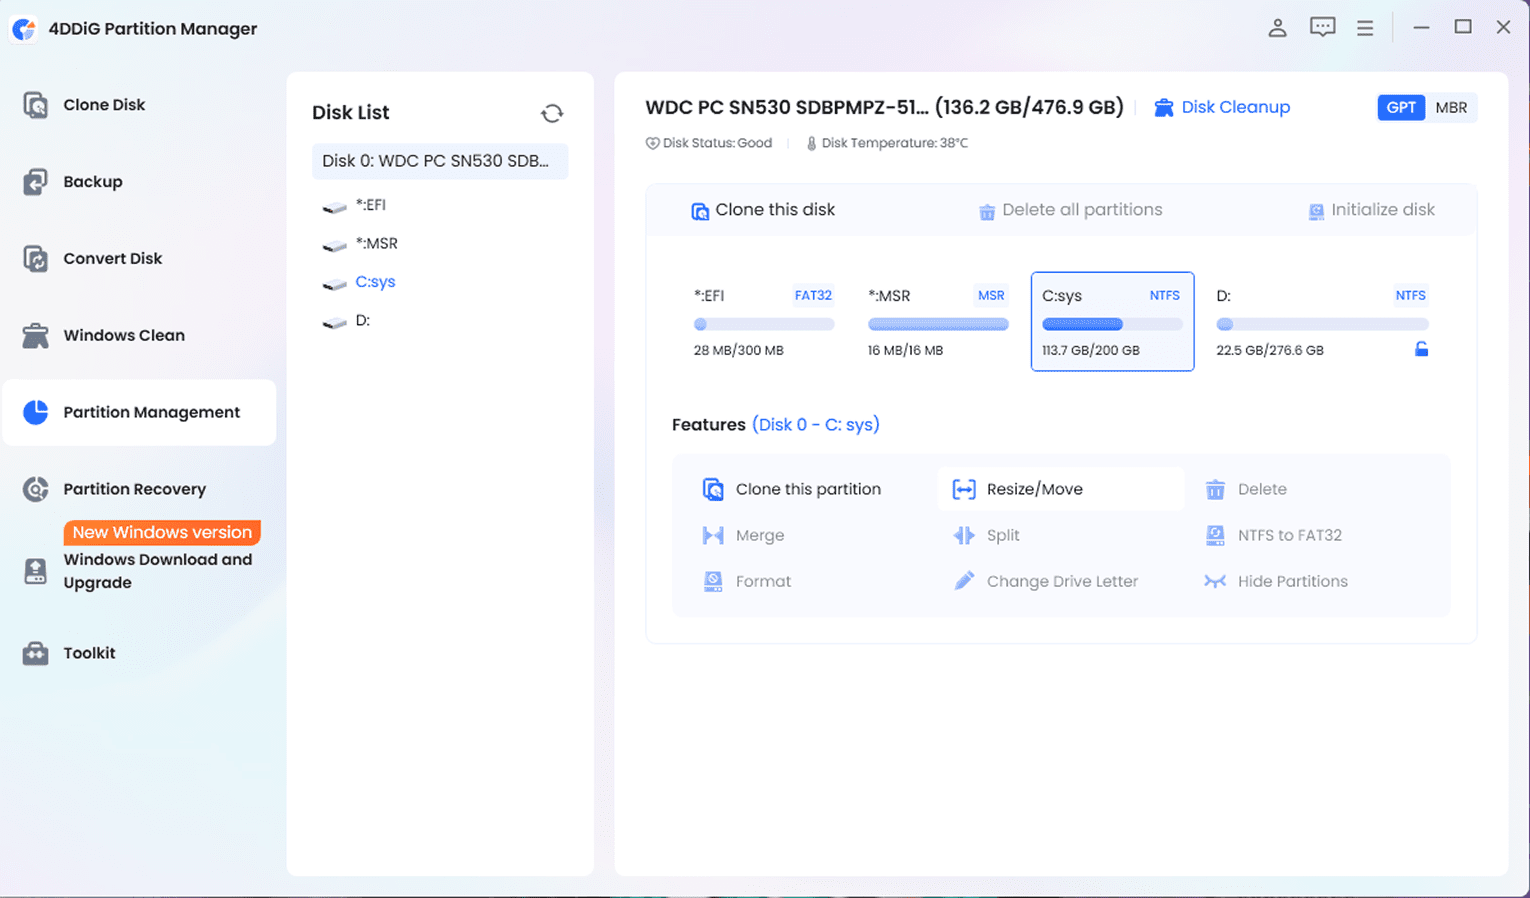
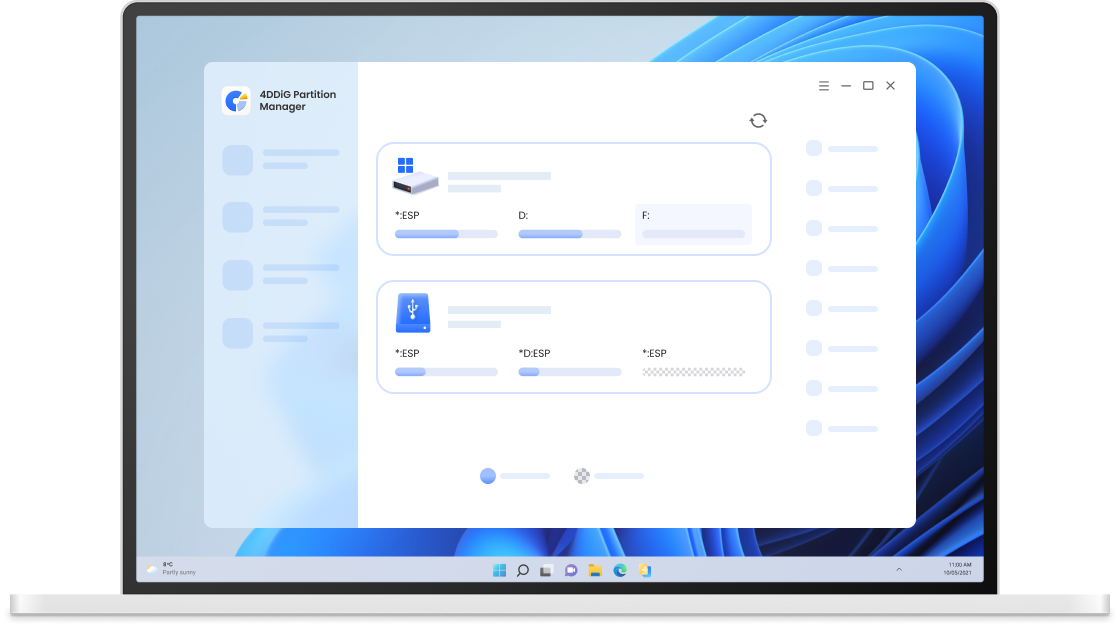
In the 4DDiG disk map, choose C drive. Click the Resize/Move button to open the resize dialog.
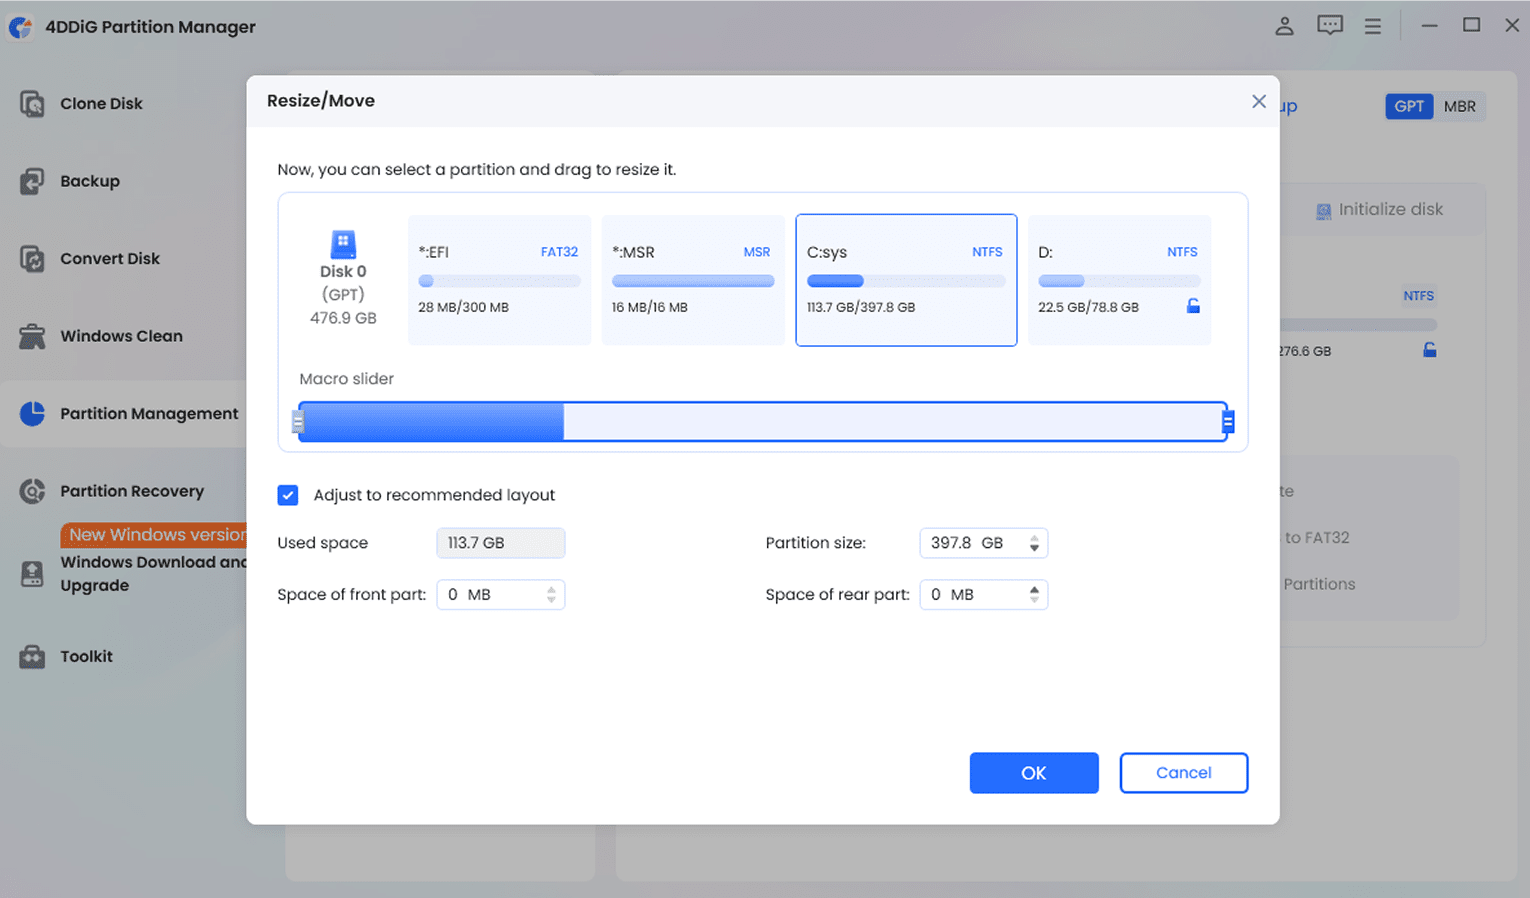
In the pop-up window, drag the partition bar to resize it. You can also check "Adjustment recommended layout" to let 4DDiG automatically optimize the partition layout.
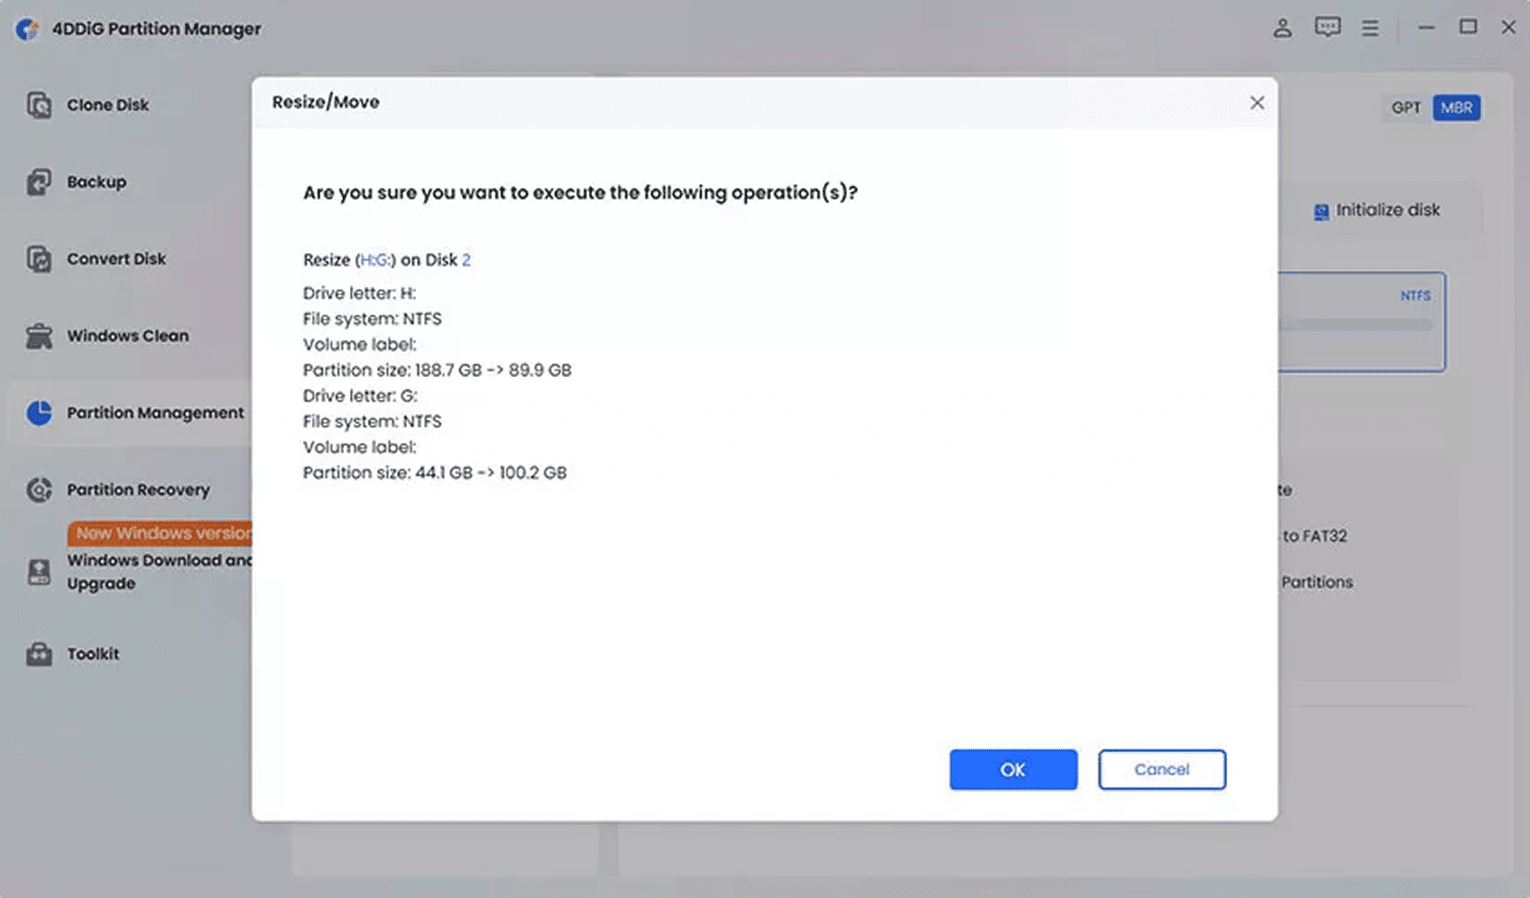
Once you've set the C drive size, preview the changes and click OK to execute the operation if you are satisfied with the changes.

Step 1: Go to Application Migration
Launch 4DDiG Partition Manager, then select "Application Migration" under the clone section in the left sidebar.

Step 2: Select Applications and Target Path
Check the large applications you want to move. Then click the “Target Path” folder icon below and select the destination drive.

Step 3: Start the Migration
Click the “Migrate” button, confirm your selection in the pop-up window, and wait for the process to complete. Once finished, you will see a success message.
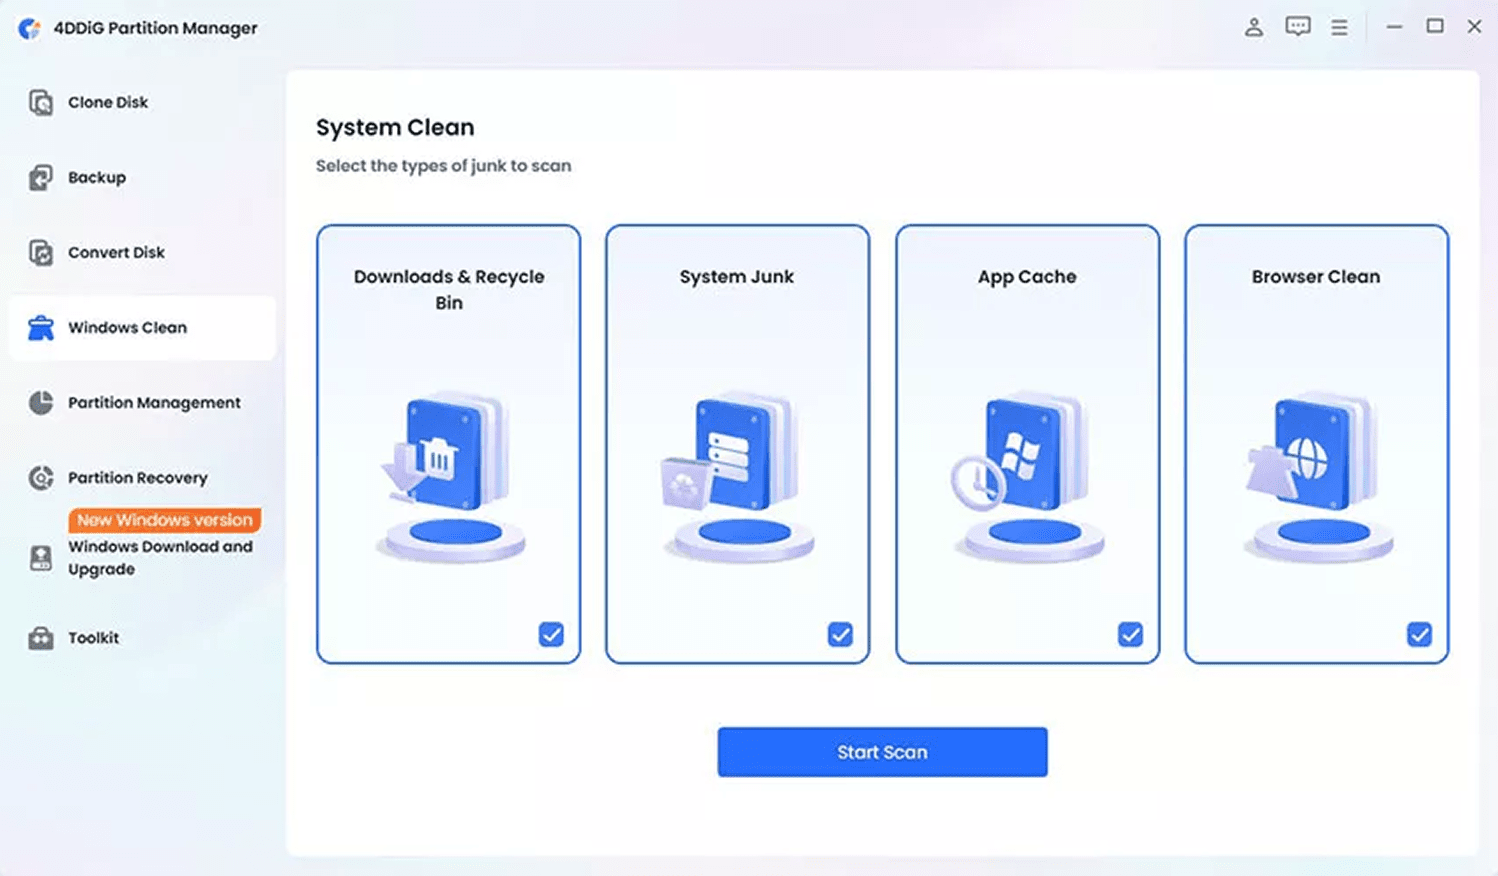
Step 1: Select Junk File Types and Start Scanning
Go to "Windows Clean" in the left navigation bar. Choose the types of junk files you want to target, then click "Start Scan" and wait for the results.

Step 2: Review and Confirm Files to Delete
Once the scan is complete, files safe for removal are pre-selected by default. Click the arrow next to each category to expand and review the items, then deselect anything you want to keep before proceeding.
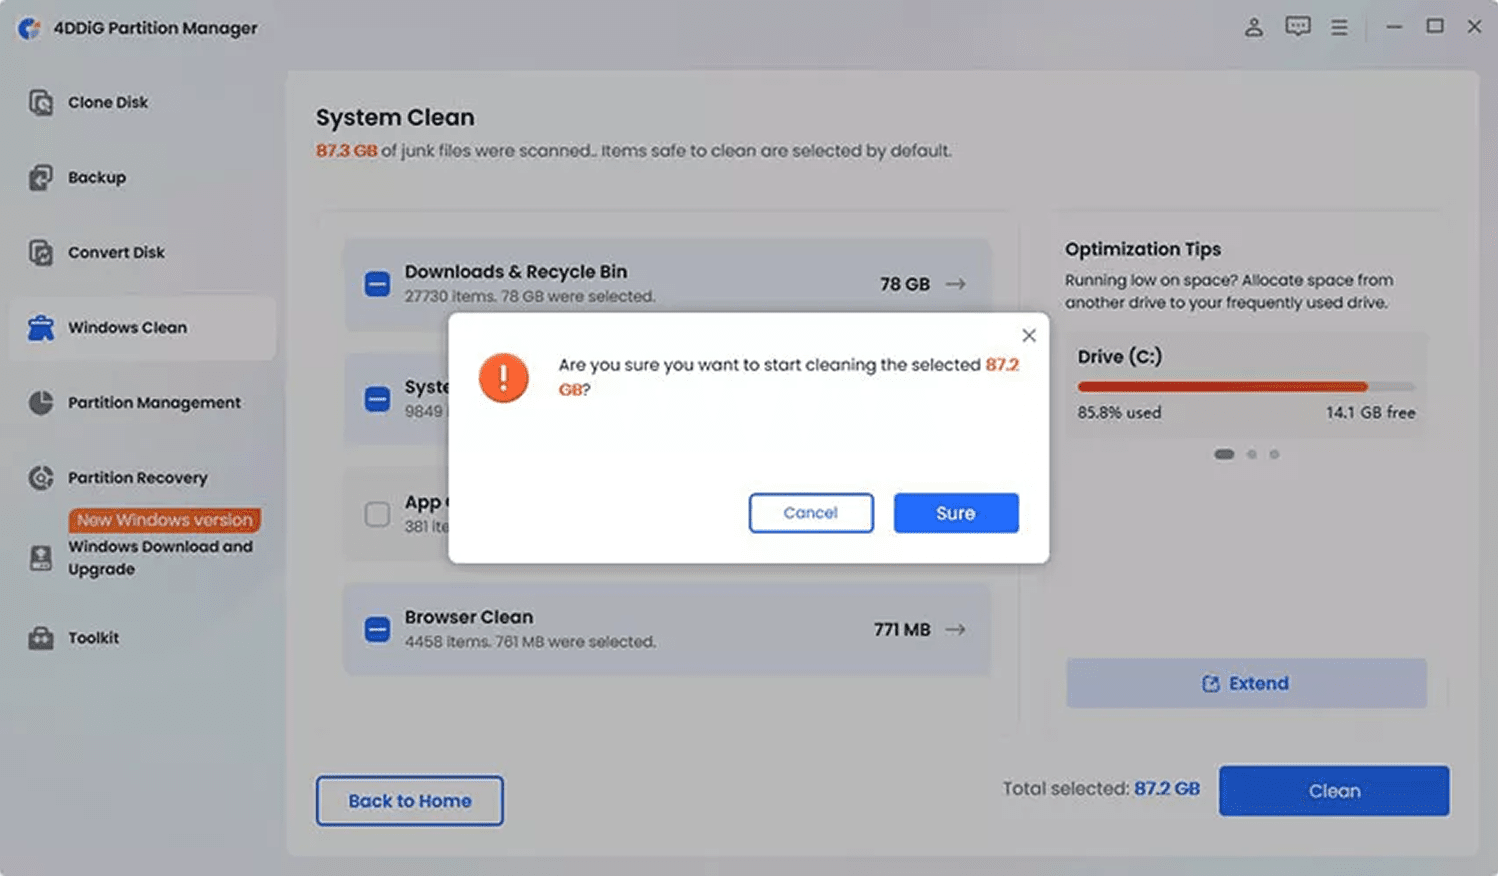
Step 3: Clean and Free Up Disk Space
Click "Clean" and confirm in the pop-up prompt to clean the selected files, and your disk space will be freed up immediately. This is a quick and effective way to reclaim storage on your C drive.

Step 1: Connect SSD and Select Clone Disk
Connect your larger SSD to the computer. Then, select “Clone Disk” in the left navigation panel, and choose “Clone OS Disk”.

Step 2: Select Source Partition and Target Disk
Choose the C drive as the source disk. Next, select your new larger SSD as the Target Disk. Carefully verify that your selections are correct and click “Next”.

Step 3: Start Cloning and Complete
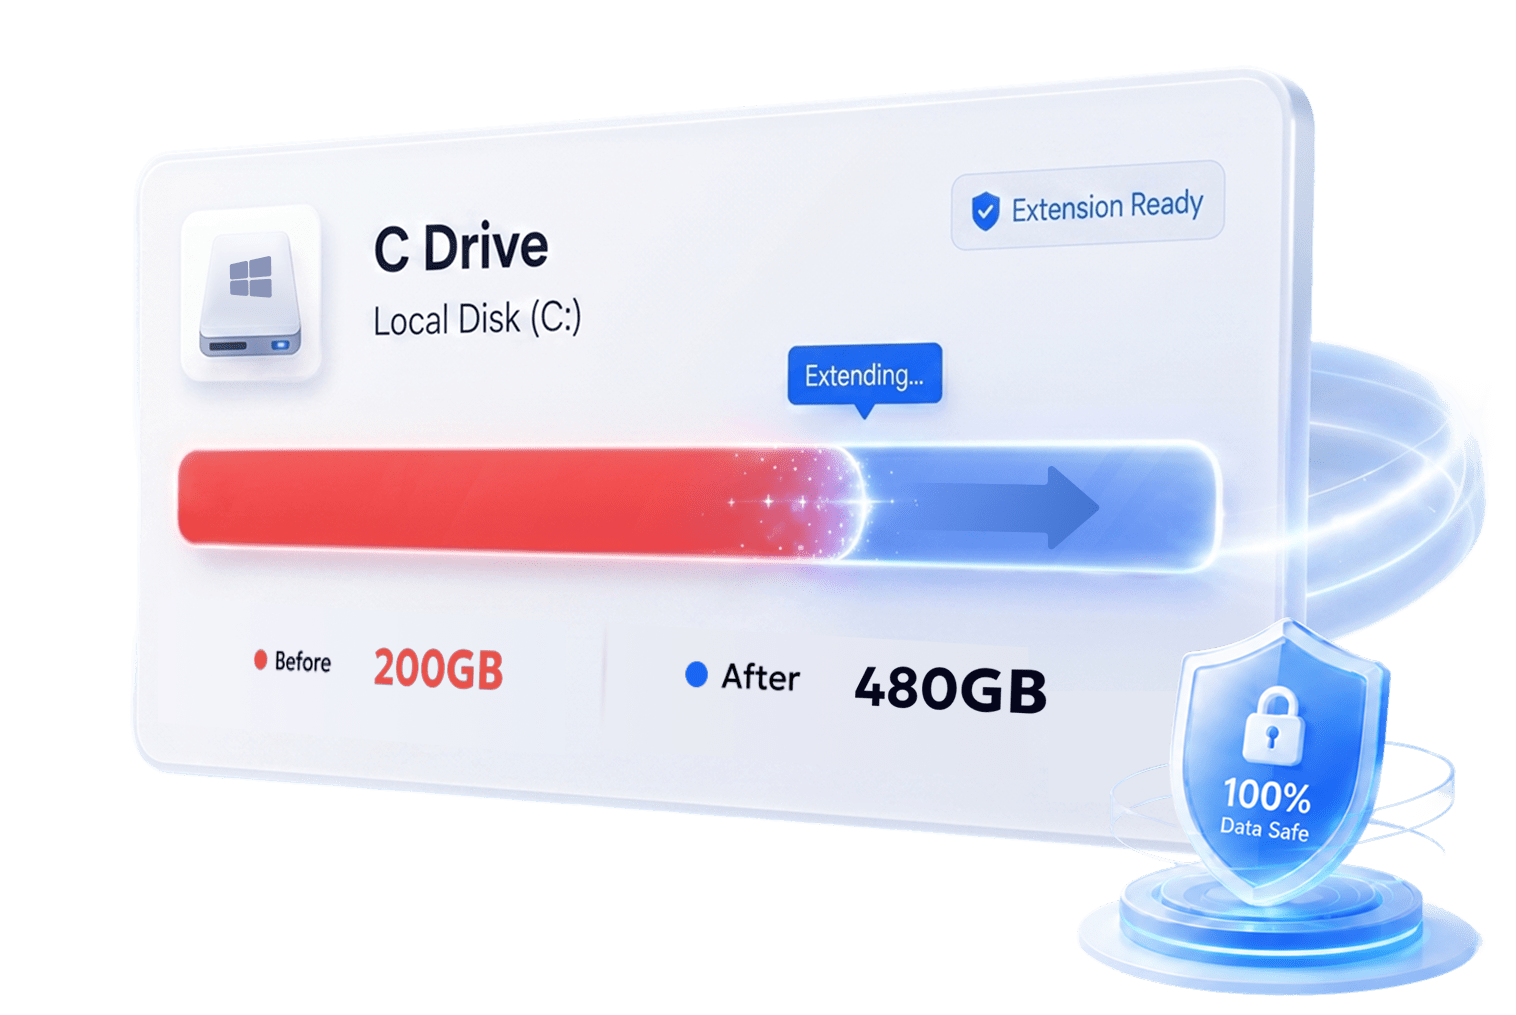
You’ll see a preview of the cloned disk. By default, source partitions fill the target disk, and you can drag the edges to resize them. Then, click “Start” and “Sure” to begin. Once completed, your C drive has been successfully cloned to the larger SSD, giving you more available storage space.
Note: This will overwrite all data on the target SSD. Make sure you have backed up any important files first.
Discover 5 advantages of this all-in-one disk tool


Expand Non-Adjacent Partitions
Easily extend your C drive even if the unallocated space is not next to it, overcoming Windows limitations.

Dynamic Disk & RAID Compatibility
Safely manage and expand partitions on dynamic disks or RAID setups without errors.

Smart System Partition Recognition
Automatically detects system and recovery partitions to safely extend your C drive without losing important data.

Visual & Beginner-Friendly Interface
Intuitive drag-and-drop interface makes partition adjustments simple and accessible for first-time users.

Comprehensive Disk Partition Tool
Resize, extend, and merge partitions efficiently with this reliable disk partition tool, simplifying C drive management.
Please swipe to view

Helped Me Extend My C Drive Easily
My C drive was running out of space even though I still had plenty of unallocated space on the same disk. I used the Extend Partition feature to expand the system partition in just a few minutes. The process was straightforward, and I didn't have to reinstall Windows or lose any files. Definitely saved me a lot of time.
Solved Low Disk Space Easily
After installing several large games, my system drive became almost full and Windows started showing low disk space warnings. The Extend Partition feature allowed me to add free space from another partition without formatting the drive. Everything worked perfectly, and all my programs stayed intact.
Freed Up Space Without the Guesswork
I usually worry about deleting the wrong files when cleaning my PC. 4DDiG Partition Manager made the process easier because it showed me what could be cleaned. I freed up several gigabytes of space without touching my personal files or installed apps.
Moved My Windows System to a New SSD
I upgraded from an old hard drive to a new SSD and used the clone feature to move everything over. Windows, my programs, and my files were all copied successfully, and the PC booted from the new SSD without problems. It saved me from reinstalling everything from scratch.
Beginner-Friendly Partition Management Tool
What impressed me most was that I could resize partitions without losing data. I've used other partition tools before, but this one felt much more beginner-friendly.
Fixed Low Storage When Windows Tools Failed
The Extend Partition feature solved a problem that Windows Disk Management couldn't handle. I was able to merge available space into my boot partition without deleting anything. Highly recommended for anyone running low on storage.
Windows Disk Management requires that the unallocated space be right after the C drive for the “Extend Volume” option to work. Other possible reasons include the C drive not using the NTFS file system, partition type incompatibility such as MBR and GPT issues, or BitLocker and other system protection features locking the volume and preventing modification.
Use a tool to make unallocated space adjacent to C. And ensure C is NTFS and the disk type is compatible.
You can safely extend the C drive without formatting as long as there is unallocated space available or you can shrink other partitions to create it, and the C drive uses the NTFS file system.
Open Command Prompt as an administrator and run the commands one by one in the following order: diskpart, list volume, select volume C, extend, exit. This method only works if the unallocated space is located immediately after the C drive, the file system is NTFS, and the partition is not locked by system protection or encryption.
Windows built-in Disk Management cannot move partitions. In this case, you should use a professional partition tool to move or resize the partition between C and the unallocated space.
An essential tool for system migration, partition management, disk/partition cloning, partition recovery, and MBR/GPT disk conversion
4,009,017 people have downloaded it