Acer Nitro 5 SSD Upgrade, How to Do It? [Teach]
Acer Nitro 5 SSD upgrade, how to do it? Don’t worry! Download 4DDiG Partition Manager to help you do this job in no time!
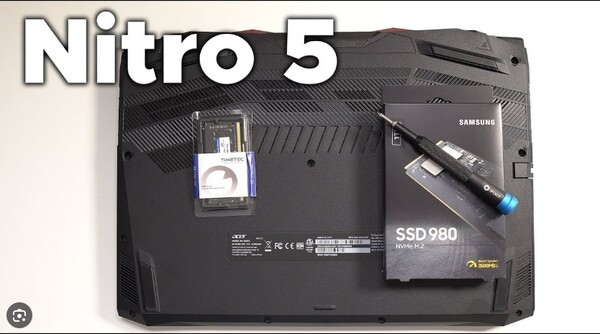
Staying ahead in the gaming industry often means upgrading your hardware to unlock the best performance. Among the many elements crucial to gaming prowess, storage speed plays a pivotal role in ensuring seamless gameplay and reduced loading times. Enter the Acer Nitro 5, a formidable gaming laptop renowned for its power-packed performance and affordability. However, many enthusiasts opt for Acer Nitro 5 an515-55 SSD upgrade to leverage its potential.
This comprehensive guide will explain the Acer Nitro 5 upgrade SSD process and provide step-by-step solutions to empower users with the knowledge and confidence needed to enhance their gaming experience. From selecting the suitable SSD to seamlessly integrating it into the system, each step is meticulously outlined to ensure a smooth transition towards optimized gaming performance. Let's explore the Acer Nitro 5 1tb SSD upgrade!

Part 1: Can I Upgrade SSD in Acer Nitro 5?
The Acer Nitro 5 is prominent for its gaming prowess, boasting impressive specifications that fulfill the demands of modern gaming. Among its notable features is the ability of the Acer Nitro 5 2.5 SSD upgrade. This flexibility allows users to enhance the laptop's performance and storage capacity according to their evolving needs.
Unlike laptops with components on the motherboard, the Acer Nitro 5 is designed with user upgradability in mind. This means that accessing and upgrading the SSD is feasible for most users, even those with limited technical expertise. Whether you're looking to replace the existing SSD with a higher-capacity model or upgrade to a faster NVMe SSD for improved performance, the Acer Nitro 5 provides the necessary accessibility to make such upgrades possible.
However, before starting the Acer Nitro 5 SSD upgrade process, ensuring compatibility with the chosen SSD is essential. The Acer Nitro 5 typically supports SATA III SSDs and faster NVMe PCIe SSDs. However, verifying compatibility with the laptop's specifications and form factor is crucial to avoid compatibility issues.
Part 2: What SSDs Fit in Acer Nitro 5?
When it comes to upgrading the SSD in your Acer Nitro 5, compatibility is key. Fortunately, Acer Nitro 5 laptops typically support M.2 solid-state drives (SSDs), making them versatile and accommodating to various SSD types. Here are the main types of SSDs that fit in the Acer Nitro 5:
- Samsung 970 EVO Plus NVMe PCIe SSD
- Crucial MX500 SATA III SSD
- Western Digital Blue SN550 NVMe PCIe SSD
- Kingston A2000 NVMe PCIe SSD
- ADATA XPG SX8200 Pro NVMe PCIe SSD
- SanDisk Ultra 3D NAND SATA III SSD
- Intel 660p NVMe PCIe SSD
- Seagate FireCuda 510 NVMe PCIe SSD
- Corsair Force Series MP510 NVMe PCIe SSD
- Toshiba XG5 NVMe PCIe SSD
These SSDs come in various capacities, ranging from 250GB to 2TB or more, which allows you to choose the storage capacity that best suits your needs and budget. Additionally, these SSDs offer different performance levels so that you can prioritize speed, reliability, or affordability based on your preferences.
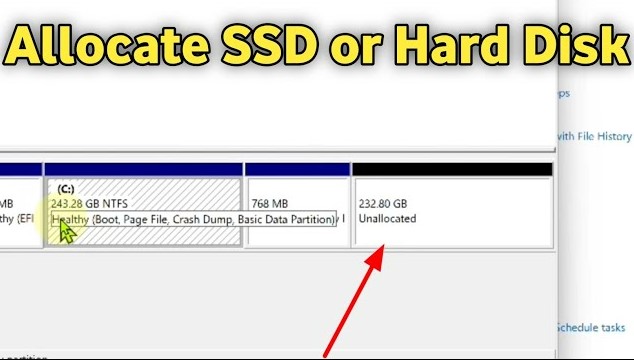
Part 3: Clone All Data, Including OS, from the Old SSD to the New SSD
Upgrading hardware components is often essential to keep up with evolving demands and technology advancements. When it comes to enhancing the performance of your system, upgrading the SSD (Solid State Drive) stands out as one of the most effective solutions. However, transferring all data, including the operating system (OS), from the old SSD to the new SSD can be daunting for many users. Fortunately, this process can be streamlined and hassle-free with the right tools and software.
One such powerful tool that simplifies the task of cloning data from one SSD to another is the 4DDiG Partition Manager. It is comprehensive disk management software that offers a range of powerful features for partition management, disk cloning and OS migration . Developed by the reputable software company Tenorshare, 4DDiG Partition Manager provides an intuitive user interface with advanced functionalities, making it suitable for novice users and experienced professionals.
Before explaining how to use 4DDiG Partition Manager to transfer your data, it's essential to understand the concept of disk cloning. Disk cloning involves creating an exact copy of one disk (the source disk) onto another disk (the target disk), including all partitions, files, and the operating system. This process ensures that the target disk is an identical replica of the source disk, allowing for a seamless transition without reinstalling the OS or applications.
Follow the below steps that can help how to use 4DDiG Partition Manager to clone a disk:
-
Connect the new SSD to your computer after downloading and installing 4DDiG Partition Manager. Next, open the application and choose "Clone OS Disk."
FREE DOWNLOADSecure Download

-
After choosing a target disk (the new SSD) to receive the data copied from the source disk, click the Continue button.

-
Please click the Sure button only after you know everything is correct, as cloning will overwrite all data on the target disk.

-
After that, a preview interface displaying the cloned disk's effects will appear. Click the Start button to begin the cloning process after ensuring the preview is accurate.

-
Wait until the disk cloning is finished. The size of the source disk affects how quickly a copy is made. Please be patient and refrain from running other processes or stopping the one in progress. Now, you have completed the data cloning process from the source to the target disk.

Here are the key features of 4DDiG Partition Manager:
- Disk Cloning: With just a few clicks, users can clone the entire contents of one disk to another, including the OS, applications, and data. This feature is invaluable for upgrading to a new SSD or replacing a failing disk while preserving all existing data and settings.
- Partition Management: 4DDiG Partition Manager offers comprehensive partition management tools, allowing users to easily create, resize, delete, format, and merge partitions.
- SSD Optimization: Users can align partitions to optimize SSD performance, migrate OS to SSD for faster boot times, and securely erase SSDs to maintain peak performance over time.
- User-Friendly Interface: 4DDiG Partition Manager has an intuitive and user-friendly interface, making it accessible to all skill levels.
- Data Protection: 4DDiG Partition Manager employs advanced algorithms to ensure the safety and security of your data during cloning, partitioning, and other operations, minimizing the risk of data loss or corruption.
Now, it is time for you to upgrade your Acer Nitro 5 SSD.
Part 4: Physical Steps for Acer Nitro 5 SSD Upgrade
Once you have completed the disk cloning steps successfully, you must follow the below steps for the Acer Nitro 5 2.5 SSD upgrade:
-
Turn your Acer laptop upside down, shut it down, and use a screwdriver to loosen the screws that hold the back cover open.

-
Locate the SSD slots on the motherboard by removing the back cover.

-
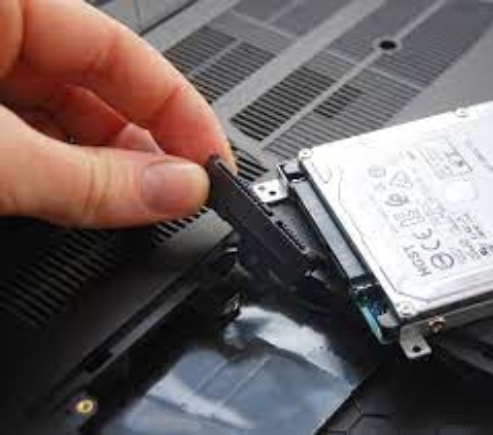
Remove the original SSD or HDD from the mounting hole. A screw holds the SSD in place on specific other models. To remove the 3 mm screw, you will need to use a Phillips screwdriver. Upon extracting the screw, the SSD will come out at an angle.

-
Ensure that the new SSD is correctly inserted into the slot. If a screw is present, use it to screw it.

-
Enter the BIOS settings and modify the boot order to see if your Acer Nitro 5 laptop can boot from the new SSD. After reinstalling the back cover, you can use your computer, provided everything goes as planned.

Conclusion
In short, the Acer Nitro 5 SSD upgrade is a worthwhile step that can significantly enhance your gaming laptop's overall performance and responsiveness. By replacing the existing SSD with a higher-capacity or faster SSD, you can enjoy faster boot times, reduced loading times, and improved multitasking capabilities, ultimately enhancing your gaming experience and productivity.
Indeed, we've explored the Acer Nitro 5 upgrade SSD process, from understanding compatibility and selecting the suitable SSD to transferring all data. With the help of tools like 4DDiG Partition Manager, you can clone data from old SSD to new SSD. So, upgrade your Acer Nitro 5 SSD to leverage the full potential of your laptop.


 ChatGPT
 Perplexity
 Google AI Mode
 Grok
Grok


