How to Free Up Hard Drive Space in Windows 10/11
If you’ve hit the storage limit on your Windows 10/11 computer, you’ll likely get a low storage error, which might also result in sluggish performance. You might not only need extra space on your computer disk, but Windows also needs it to operate properly. You should never use more than 80% of the storage space to avoid performance and system issues.
Windows 10/11 has tools that help manage and free up disk space efficiently and quickly. If your computer is running low on storage space, here’s the complete guide on how to free up disk space Windows 10.
Part 1: Why Is My Windows C Drive So Full?
It’s hard to tell what might be taking storage space on your computer disk just by glancing at installed programs and files stored in the drives. But generally, there are always temporary files, windows updates files, app data & cache files, junk, and duplicate files eating up space.
Luckily, windows provide a tool to manage your storage space and remove unnecessary files to free up disk space. Go to Settings >> System >> Storage and check what’s taking space on the storage disk and what’s unnecessary that you should delete.
Part 2: How to Free Up Disk Space in Windows 10/11
Now you know what must be taking a lot of space in the disk. Follow the methods below to free up disk space Windows 10.
Fix 1: Free up Disk Space via 4DDiG Duplicate File Deleter
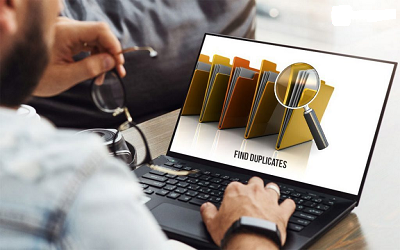
We all have duplicate files in our storage devices lying there for a reason and using free space. You can delete the duplicate files from the disk storage to free up some space. The trick part starts when you spot the duplicate files and remove them one by one out of thousands of files.
4DDiG Duplicate File Deleter is a smart tool that efficiently removes duplicate files from the storage disk with a one-click process. It’ll scan your computer disk for duplicate files by analyzing its contents and showing you the results. You can delete the duplicate files after previewing them, preventing the chances of deleting any important files from the disk.
Secure Download
Secure Download
- Scan and delete duplicate files from computer, internal & external drive, USB flash disk, and etc.
- Recover substantial storage space, enhancing drive performance to its fullest potential.
- Remove duplicate files including images, videos, audios, documents and more file types.
-
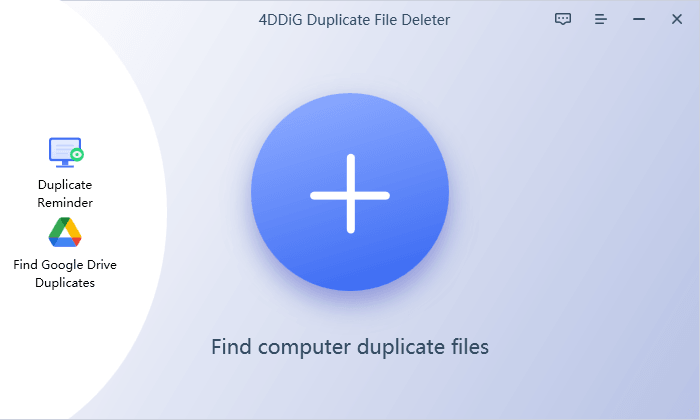
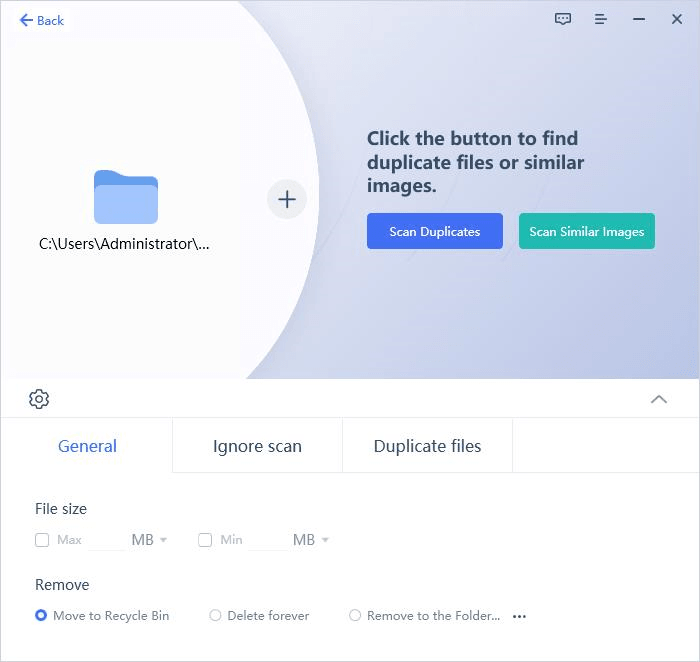
Select a Folder for Scanning Begin by downloading and installing 4DDiG Duplicate File Deleter on your Windows PC, then open the program. You can now choose a folder or partition to initiate the scan.

-
Locate the gear icon in the lower left corner, where you can tailor your file search settings. In the General section, specify the file size for scanning and choose whether to move duplicates to the recycle bin or delete them permanently.

-
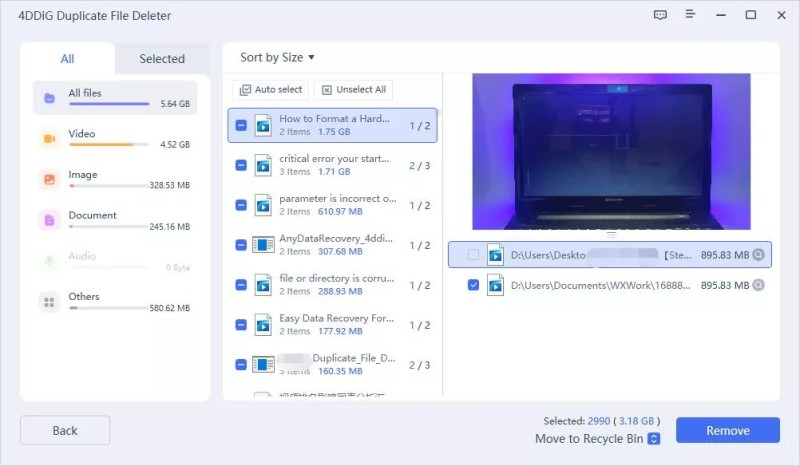
Following the scan, 4DDiG Duplicate File Deleter will present a list of duplicate files according to your search criteria. On the left panel, you'll see the quantity and size of each file type. Utilize the eye icon to preview files. Once you've chosen the duplicates you wish to remove (you can also use the Auto select option), click "Remove" to delete them.

How to Fix There is Not Enough Space on the Disk to Complete This Operation Windows 10?
Fix 2: Uninstall Apps to Free up Disk Space
If you have a lot of programs installed on the computer, you must have some of them that you barely use now. Programs usually take up a lot of space because of their cache files and apps data. You can uninstall the unwanted programs to free up disk space Windows 10. Here’s how:
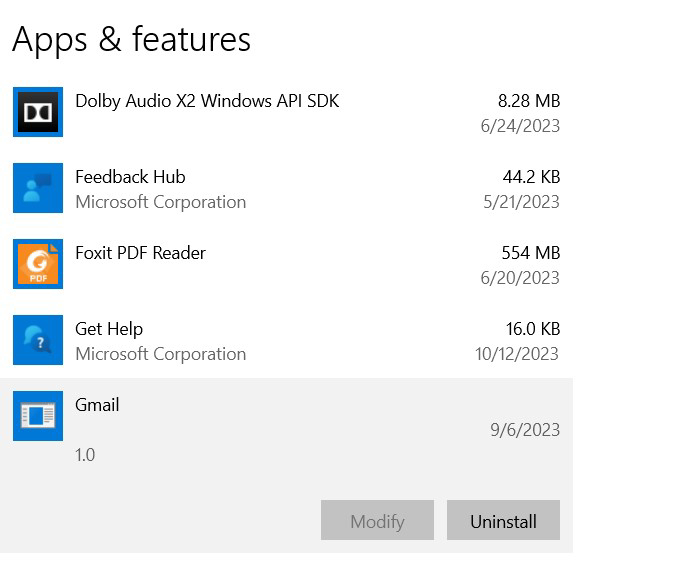
- Go to the Start menu and type Apps & Features.
- Select the first option, and locate the apps you want to uninstall.
- Click the app that you want to uninstall, and choose the Uninstall button beneath it.
-
Follow these steps to remove the unwanted programs from your computer one by one.

Fix 3: Delete Unnecessary Files
Apart from the unnecessary programs, there are also unnecessary files on the disk that take up a lot of space and have no use. Windows 10 and 11 have a Storage Sense tool, which automatically deletes temporary and unnecessary files to improve the system's performance.
Turn on the Storage Sense, and let the Windows Storage Sense take care of your storage problem. Here’s how:
- Go to the Settings >> System >> Storage.
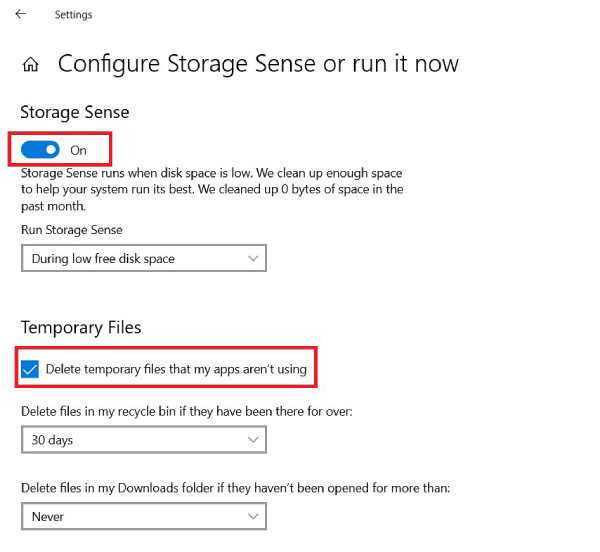
- Turn on the toggle for Storage Sense, click Configure Storage Sense, and run it now.
-
In the next window, choose what files you want the Storage Sense to delete automatically.

-
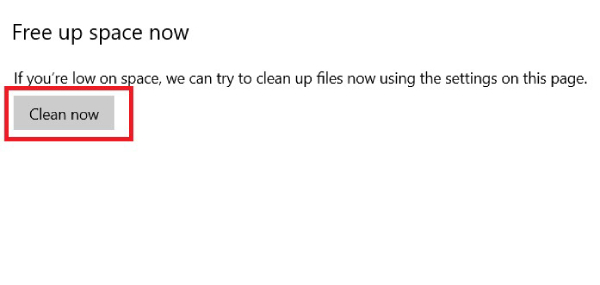
Make sure to check the Delete Temporary Files that my apps aren’t using, then click on the Clean button to clear them immediately.

Fix 4: Use Disk Cleanup to Free Disk Space
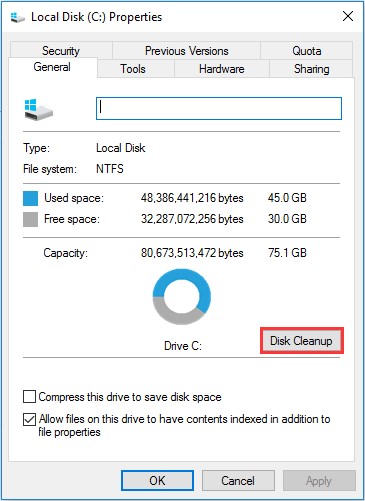
Windows has another helpful tool, Disk Cleanup, that can remove temporary and unnecessary files from the disk. To do so, you need to run a disk cleanup process on your disk. Here’s how:
- Go to This PC, right-click on the desired disk, go to Properties, and choose Disk Cleanup.
-
Choose what you want it to delete, and click OK.

Fix 5: Reduce the Size of WinSxS Folder
If the C drive on your computer keeps filling, you can deal with this by reducing the size of the folder WinSxS. The system files and other important operating system components are stored in this folder, which keeps growing with time.
You don’t need to delete this folder entirely, as it’ll cause severe damage to the windows installed on your computer. Instead, follow these steps to reduce its size:
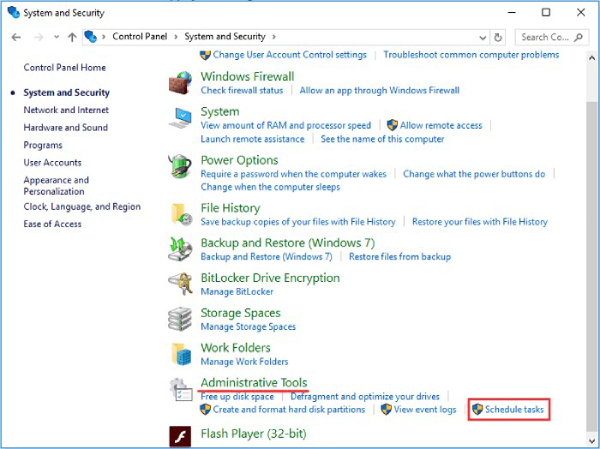
- Go to the Control Panel >> System Security.
-
Under the Administrative Tools, click Schedule Tasks.

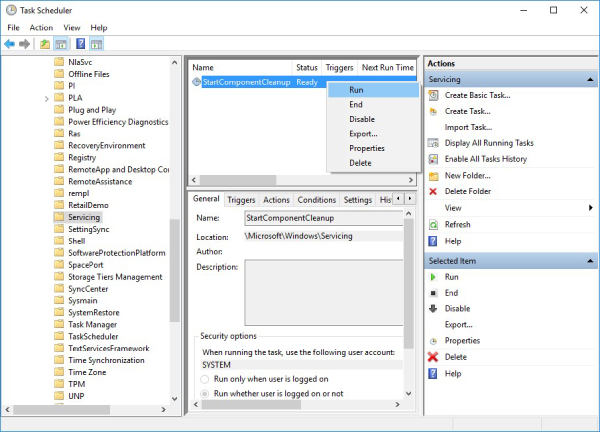
- Select Task Scheduler library from the side menu and navigate to >> Microsoft >> Windows >> Servicing.
-
Now move to the middle mini window, right-click on StartComponentCleanup, and select the Run option.

- This should delete the unnecessary and temporary files from the WinSxS folder, resulting in freeing up space in C Drive.
Fix 6: Enable the OneDrive Files On-Demand
If you’ve limited space on the disk storage and don’t want to extend the storage, you can enable the OneDrive files-demand feature. It lets you store the files on an online cloud and access them when needed by downloading them. With this feature enabled, all the selected folders and files will be uploaded to the OneDrive storage, freeing up space on the local drive.
Here’s how to enable the OneDrive Files on-demand feature:
- Launch the OneDrive program on your computer and log in with your account.
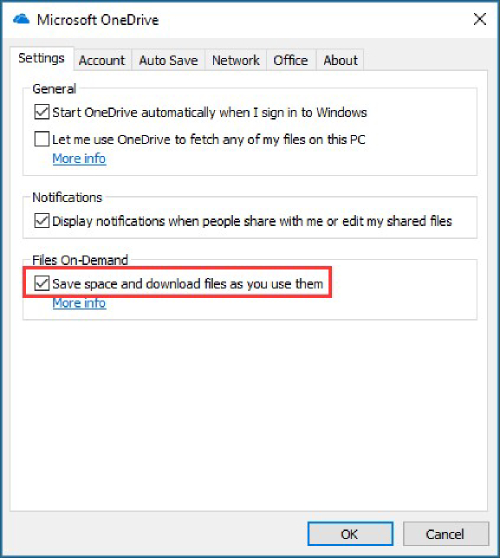
- Go to the Settings tab in OneDrive, checkmark the box for Save space, and download files as you use them.
-
Click on OK to apply the changes.

-
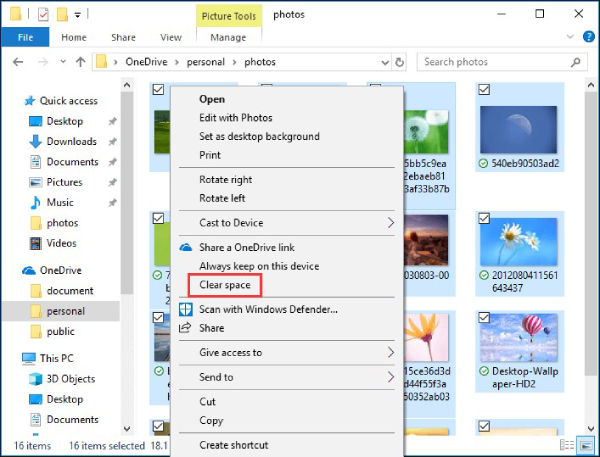
Navigate to the OneDrive folder, select the folders or files, right-click on an empty, and choose Clear Space.

Fix 7: Transfer Larger Files
Offload the files to another location via an external hard drive, USB flash drive, or SD card. Connect it to the computer, and follow the steps below:
- Go to the File Explorer, and navigate to the folder taking a lot of space.
- Right-click on it, and select the cut option.
- Go to the location where you want to move it. Right-click on a space, and select Paste.
Fix 8: Disable Hibernation Mode
Windows has a hibernation, which is quite useful when you want to save the session's current state for the next time you turn it on. The feature will save the data into the disk drive for use in the next session. This data is stored in the “hiberfil.sys” in the C drive, which might take gigabytes. Here’s what you can do to reduce its size:
- Launch Cmd on your Windows 10/11 PC, and run the following command.
powercfg /hibernate off

Fix 9: Enable Compact OS
Windows also has a compact OS feature to meet storage needs when running low. It’s designed for devices with limited storage options and frees up disk space in Windows 10. This feature will compress the Windows size and apps using a different technique.
If you’re using a device with a limited storage option, enable Compact OS. Follow the steps below:
- Go to the Start Menu, and search Cmd. Right-click on the first result, and select run as administrator.
- Enter the following command in the Cmd interface.
Compact.exe /CompactOS:always
Part 3: How Do You Find Out What Is Taking up Disk Space?
If you’ve applied all the above solutions but cannot clear the free-up disk space on Windows 10, it’s time to find what’s taking up the disk space. As mentioned earlier at the start of this guide, normally, the culprits are the temporary files, and Windows updates leftover files, junk, and duplicate files.
You can delete these files using the above-mentioned techniques and solutions. However, if they’re not successful in your case, then go to Settings >> System >> Storage. Here, windows will give you a complete overview of the storage disk installed on the computer.
On this page, you can see what’s using the most storage space on the disk. And once you find it, use the above-mentioned solutions to free up disk space on Windows 10.
Part 4: FAQ
Q 1: How to Clean C Disk Windows 10?
There are different tools in Windows 10 to clean up the disks when running low on storage. However, you can use the cleanup disk feature to free up space in the C drive in Windows 10. Navigate to this PC, right-click on C Drive >> Properties >> Cleanup Disk.
Q 2: What Is Taking up Space on My Hard Drive Windows 10?
Go to Settings, choose System category, and select the Storage option from the left side menu bar to see what’s taking up the space on your hard drive in Windows 10. This will show how much space on the storage is being used and how much is free.
Q 3: What Can I Delete from C Drive?
You can delete many things from the C Drive to free up space, such as updates files, leftover update files, internet temporary files, OS temporary files, junk, duplicates, and recycle bin.
Concluding Thoughts
The disk space in Windows 10/11 can get filled with time and will show an error message when it’s about the limit. This usually has a direct effect on the system's performance. This guide tells how to free up disk space on Windows 10. Having duplicate files on the disk can also take up a lot of space. Refer to the 4DDiG Duplicate File Deleter to identify and delete them from the disk.
 ChatGPT
 Perplexity
 Google AI Mode
 Grok
Grok

