How to Convert HEIC to JPG on Mac [N Easy Methods]

5 mins read

Updated on 2026-10-10 12:22:44 to Photo Tips

HEIC is Apple’s default photo format, but JPG remains easier to use across websites, apps, and devices. If you need to know how to convert HEIC to JPG on Mac, you have several built-in options. Preview handles individual images, while Finder Quick Actions can convert many files together.

Terminal provides more control, and dedicated converters simplify repeated tasks. This guide covers all four methods with step-by-step instructions.

Quick Answer:

Which Is the Best Way to Convert HEIC to JPG? For a single photo, Preview is the simplest option. For multiple images, Finder Quick Actions is faster, while a dedicated converter is more practical for frequent batch conversions.

Part 1. Why Are My Photos Suddenly HEIC Instead of JPG?

HEIC is Apple’s default image format on newer iPhones and other Apple devices. Apple introduced it to reduce storage requirements while maintaining good image quality. When your iPhone uses “High Efficiency” under “Camera > Formats,” photos are generally saved as HEIC instead of JPG.

This helps reduce file sizes, but HEIC is not supported equally across all platforms. You may notice HEIC files when transferring photos from your iPhone to your Mac. Converting them to JPG can make the images easier to upload, edit, print, or share with non-Apple devices.

Tip:

If you want to stop taking iPhone pictures in HEIC but using JPG, please check how to turn off HEIC on iPhone.

Part 2. How to Convert HEIC to JPG on Mac [4 Easy & Fast Methods]

macOS includes several ways to convert HEIC images without complicated software. The best method depends mainly on how many images you need to process and how much control you want over the output.

Method 1. Change HEIC to JPG Using Preview (Easiest Way)

Preview HEIC to JPG is already included with macOS, making it convenient for individual HEIC conversions. It lets you open a HEIC image, select JPEG as the export format, adjust quality, and save a separate JPG copy.

  • Locate the HEIC image on your Mac and double-click it. macOS should open the image in Preview automatically.

  • With the image open, click “File” in the macOS menu bar and select “Export.”

  • In the export window, click the “Format” dropdown and select “JPEG.”

    mac preview export heic as jpg
  • Use the “Quality” slider to adjust the output quality if needed. Higher quality generally creates a larger file, while lower quality produces a smaller JPG.

  • Choose a destination and enter a filename. Click “Save” to create the JPG version while keeping the original HEIC file unchanged.

Preview is ideal when you only need to learn how to change HEIC to JPG on Mac for one or a few photos and do not want to install another application.

Method 2. Batch Convert HEIC to JPG on Mac Using Finder Quick Actions (Fastest)

Finder Quick Actions can convert all HEIC to JPG Mac without opening each file individually. Once the correct action is available, you can select several images, right-click them, and convert them together. This makes it particularly useful for batch converting HEIC image to JPG on Mac.

  • Open Finder and navigate to the folder containing your HEIC images. Select one or multiple HEIC files that you want to convert.

  • Right-click the selected files and look for “Quick Actions.” Choose “Convert Image” if the action is available.

    mac finder quick actions convert heic to jpg
  • A conversion window will appear. Select “JPEG” as the format and choose the desired image size.

  • Click “Convert to JPEG.” macOS will process the selected images and create JPG copies in the same location.

Finder Quick Actions is one of the quickest ways how to turn HEIC to JPG on Mac for multiple images without processing each image separately.

Method 3. Batch Convert HEIC to JPG Without Losing Quality Using Mac Terminal

Terminal provides a more technical approach for users who want command-line control rather than the easiest way to convert HEIC to JPG. macOS can use built-in image tools for certain conversions, while additional utilities such as sips can provide broader batch-processing options.

This method is useful for developers and advanced users who need repeatable conversion commands or want to process large image folders.

Here is the step-by-step guide if you are looking to convert HEIC images to JPG using the Mac Terminal.

  • First, open Terminal from “Applications > Utilities” or search for “Terminal” using Spotlight.

  • Use CD commands to go to the folder containing your HEIC images, then run the following command:

    a. “for file in .HEIC; do

    b. sips -s format jpeg "$file" --out "${file%.*}.jpg"

    c. done”

  • Check the output folder after processing. Open several JPG files to confirm that the conversion completed correctly.

For quality-sensitive work, avoid repeatedly converting the same image between formats and use this method to batch convert HEIC to JPG on Mac.

Method 4. Using a Dedicated HEIC to JPG Converter for Mac

A dedicated converter is useful when HEIC conversion is a regular part of your workflow. Tools such as iMazing Converter provide a more focused interface than Terminal and can process multiple HEIC images together.

This approach suits users who frequently transfer large photo collections from iPhones and want a repeatable conversion workflow without manually opening each image.

  • Install and open iMazing Converter on your Mac. From the main interface, choose the option for converting HEIC images.

  • Drag your HEIC images into the application window. You can add multiple images together for batch processing.

    imazing convert heic to jpg
  • Choose JPEG as the output format and review the available quality or resolution options.

  • Start the conversion and wait for the process to finish. The application will create JPG versions of the selected HEIC images.

  • Open the output folder and check several converted images. Compare them with the originals if image quality is important.

A dedicated converter is most useful when you regularly handle large numbers of HEIC files and want a consistent workflow. Among many, iMazing is the best HEIC to JPG converter for Mac.

⚡ Part 3. Bonus: How to Repair Corrupted HEIC and JPG Files

Conversion tools cannot fix an image that is already corrupted. A damaged HEIC or JPG may fail to open, display distorted colors, show missing sections, or appear completely blank after transfer.

4DDiG Photo Repair is useful when the problem is file corruption rather than format compatibility. It can repair damaged HEIC and JPG images and provides advanced recovery options for files that standard photo applications cannot open.

Key features include:

  • Repairs photos across various errors: corrupted, damaged, unopenable, greyed-out, distored, ect.
  • Repairs corrupted HEIC and JPG files
  • Supports multiple image formats
  • Repairs severely damaged photos
  • Provides advanced repair capabilities
  • Supports batch photo repair
  • Previews repaired images before saving
  • Offers multiple output photo formats: JPG, PNG, or the original.
  • Preserves recovered image details
  • Available on Windows and Mac
FREE DOWNLOAD

Secure Download

Steps to Repair Damaged HEIC and JPG Files

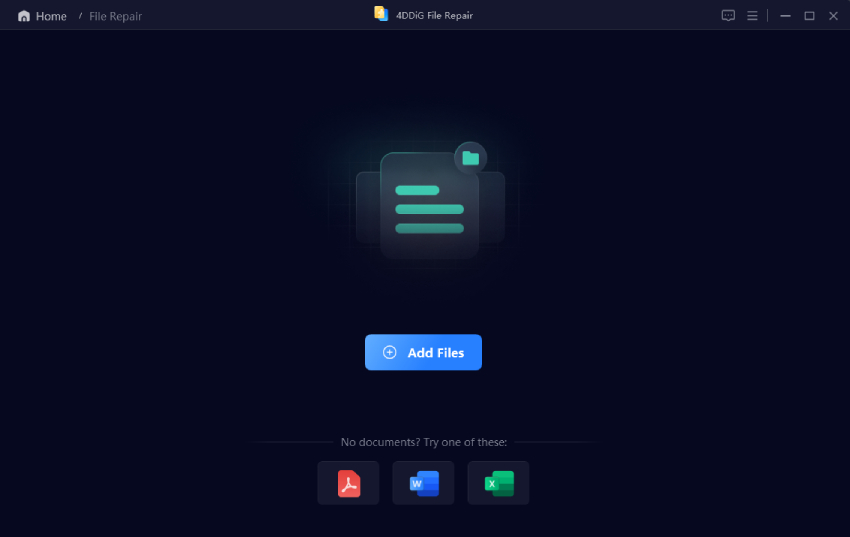
  • Launch 4DDiG File Repair on your Mac and select “Photo Repair” from the available repair options. Click “Add Photos” and select the corrupted HEIC or JPG files from your Mac. You can select multiple damaged photos for batch processing.

    add corrupted heic jpg files to 4ddig
  • After adding the images, click “Repair All” to begin the standard recovery process. 4DDiG will analyze the damaged image data and attempt to reconstruct usable files.

    repair all heic jpg files
  • Use the “Preview” feature to inspect the repaired photos before saving them. Check out important details such as faces, colors, and missing image areas.

    preview repaired heic jpg images
  • Select the output format for the repaired images and click “Save.” Choose a separate destination folder so the original corrupted files remain untouched.

    save repaired images in preferred output format

FAQs About Converting HEIC to JPG on Mac

Q1: How to Convert HEIC to JPG on Mac Without Losing Quality?

You cannot guarantee completely lossless conversion when changing HEIC to JPG because JPG uses lossy compression. To minimize quality loss, use a high JPEG quality setting and avoid converting the same image repeatedly.

For individual images, Preview provides a quality control option during export. For batch conversion, use a converter that lets you control output quality.

Q2: How Do I Make a Picture JPEG Instead of HEIC on Mac?

Open the HEIC image in Preview, select “File > Export,” choose “JPEG” from the Format menu, and save the new file.

If you want future iPhone photos to use JPG instead, change the camera format on your iPhone. Open “Settings > Camera > Formats” and select “Most Compatible.” New photos will then use JPEG instead of HEIC.

Conclusion

Learning how to convert HEIC to JPG on Mac gives you several practical options. Preview is convenient for individual images, Finder Quick Actions handles quick batch conversion, and Terminal provides more technical control.

A dedicated converter is useful for frequent photo workflows. If your HEIC or JPG files are already damaged, 4DDiG Photo Repair can repair corrupted images, process multiple files, and preview recovered photos before saving them.

Ehtsham Ahmed (senior editor)

Ehtsham Ahmed, the content writer for 4DDiG, is dedicated to offering workarounds for Windows Data Recovery, Windows Troubleshooting, iDevices System Repair, etc.

(Click to rate this post)

You rated 4.5 ( participated)