Youtube Stuttering/Lagging/Buffering? Why and How to Fix It?
Is YouTube stuttering ruining your video-watching experience? Learn how to fix YouTube stuttering with these simple and effective solutions.
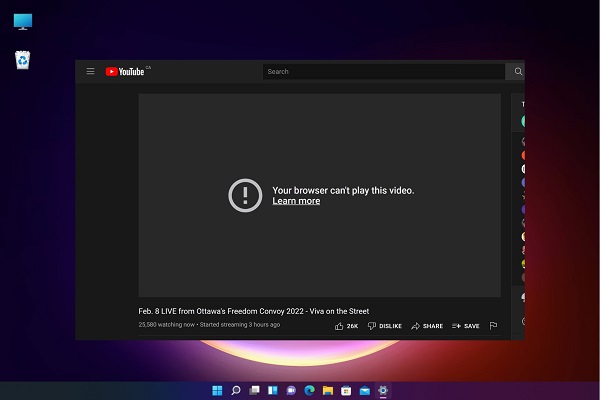
Sometimes, when you play videos on YouTube, you may experience stuttering, lagging or buffering issues multiple times for a few seconds. YouTube video stuttering is a frustrating situation and won't let you enjoy watching videos on YouTube. However, it is a common and fixable issue. In this guide, we will start by discussing the reasons behind the issue and then show you how to fix YouTube stuttering in the best-proven ways. So, let's get started!

Part 1. Why Is YouTube Stuttering/Lagging/Buffering?
Many reasons can cause the stuttering or lagging issue on YouTube. Some of the likely reasons behind YouTube is stuttering are as follows:
- Poor internet connection
- Video player-related issues
- Browser-related issues
- Conflicting or outdated browser extensions
- Incorrect hardware acceleration settings
- Excessive cookie and cache data
Part 2. How to Fix YouTube Stuttering/Lagging/Buffering Windows 11?
Just like there are multiple reasons behind the YouTube stuttering issue, there are also multiple ways to fix it. So, go through the below seven methods one by one until you resolve the issue:
Method 1. Check Your Internet Connection
Stuttering on YouTube mostly occurs due to poor internet connection. So, the first fix is to ensure that your internet connection is stable. You can run an internet speed test using Ookia or other sites to validate that your internet connection is stable.
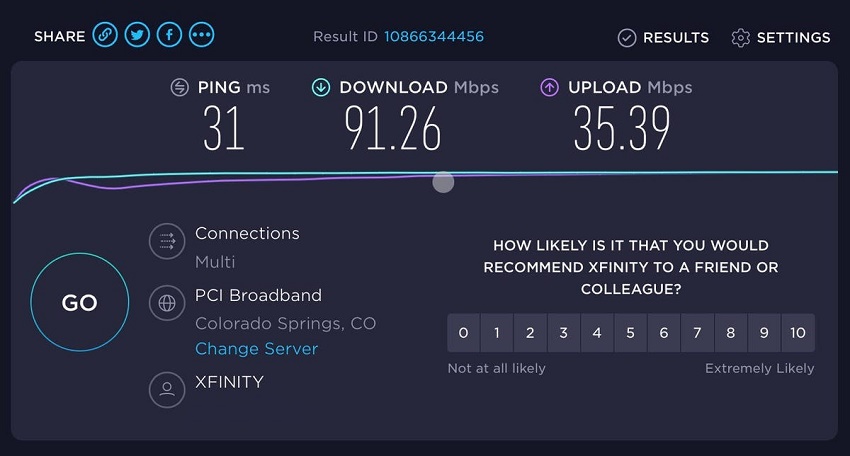
If you suspect a poor internet connection, you can restart the router, disconnect other devices that are hogging bandwidth, or upgrade the connection from your Internet Service Provider (ISP).
Method 2. Lower the Video Quality
If your internet connection is working perfectly but you are still struggling with YouTube video stuttering, try lowering the video quality. For instance, if you are watching the video in 1080p resolution, lower it to 720p. This will reduce the loading time and will likely help you resolve the YouTube stuttering issue.

Method 3. Clear Browser Cookies and Cache
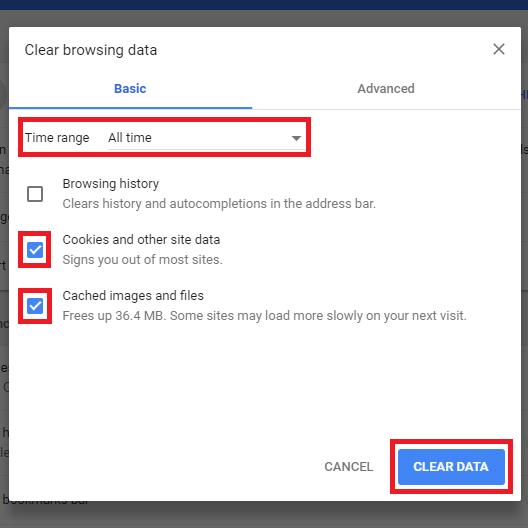
Sometimes, excessive cookies and cache data can also impact the browser performance and smooth loading of YouTube videos. If that is the case, then clearing browser cookies and cache should fix the issue. Here's how to fix YouTube stuttering in Chrome by clearing browser cookies and cache:
On Chrome:
- Click the "three-dots vertical" icon from the top right corner and tap "Clear browsing data".
-
Tick the cookies and cache checkboxes and then click "Clear data".

- Restart Chrome.
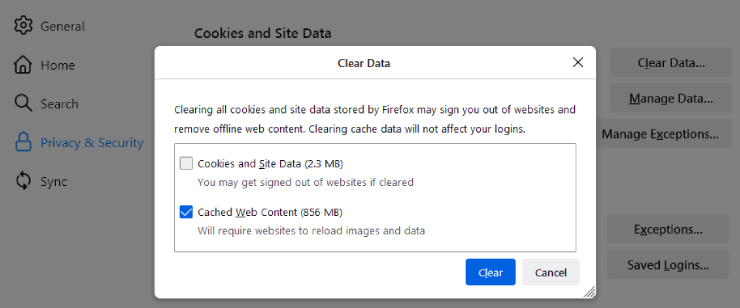
On Firefox:
- Click the "three-lines" icon from the top right corner and tap "Settings".
- Select the "Privacy & Security" tab and click "Clear Data" in the "Cookies and Site" Data section.
-
Tick the cookies and cache checkboxes and then click "Clear".

- Restart Firefox.
Once done, load YouTube and see if the YouTube stuttering issue is resolved.
Method 4. Update Your Browser
If you haven't updated your browser for some time, it can lead to issues like YouTube video stuttering. To update your browser, follow the below steps:
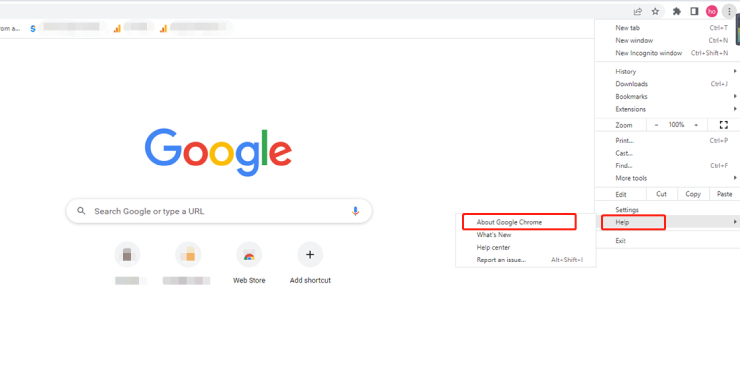
On Chrome:
-
Click the "three-dots vertical" icon from the top right corner and tap Help > About Google Chrome.

- Chrome will automatically look for available updates and start updating.
- Once the update is installed, relaunch Chrome.
On Firefox:
- Click the "three-lines" icon from the top right corner and tap Help > About Firefox.
- Firefox will automatically look for available updates and start updating.
-
Once the update is installed, relaunch Firefox.

After installing the update, load YouTube and enjoy videos without stuttering.
Method 5. Enable Hardware Acceleration
If you face YouTube stuttering while playing games, then you must enable hardware acceleration. It will help YouTube and other apps to run smoothly. Here's how to enable hardware acceleration:
- Click the "three-dots vertical" icon from the top right corner and tap "Settings".
- Select the "System" tab from the left sidebar.
-
Toggle on the "Use graphics acceleration when available" button and then relaunch Chrome.

Once hardware acceleration is enabled, YouTube videos should now run smoothly without stuttering.
Method 6. Update Graphics Drivers
Incompatible, outdated, or corrupted graphic drivers can also lead to YouTube stuttering on Windows 11. Therefore, you must update graphic drivers by following the below steps:
- Right-click the "Start" menu and tap "Device Manager".
-
Click "Display adapters", right-click the graphics driver, and tap "Update driver".

- Select "Search automatically for updated driver software". Afterward, follow the on-screen instructions to complete the update.
Once the graphics driver is updated, reload YouTube and see how the video plays this time.
Method 7. Pause or Buffer Videos
The last and another effective way to tackle stuttering on YouTube is to pause the video for a few seconds. This will allow the video to buffer and then offer a stuttering-free experience. So, pause the video, wait for a few moments to let it buffer, and then resume it.
✅ You May Also Like: How to Fix TikTok Videos Lagging Issue Quickly and Easily [100% Working]
Part 3. How to Fix Downloaded YouTube Video Stuttering?
Other than facing stuttering issues when watching YouTube videos online, sometimes downloaded YouTube videos also cause stuttering. Alternatively, you may face a black screen when playing the video, or the video may not play at all. If you are struggling with this issue, then don't worry. 4DDiG Video Repair serves as the one-stop solution for such issues. It's an AI-powered video repair software that can repair choppy, unplayable, jerky, corrupted, fuzzy, distorted, or grainy videos. Its AI algorithms can repair your downloaded YouTube video intelligently while preserving the original quality.
The key features of the 4DDiG Video Repair tool are as follows:
- It can repair videos in a wide range of formats, including MP4, MKV, AVI, M4V, etc.
- It provides a click-based interface to repair choppy, unplayable, jerky, corrupted, fuzzy, distorted, or grainy YouTube downloaded videos.
- Its AI technology can restore and colorize black-and-white videos.
- It can batch repair multiple downloaded YouTube videos simultaneously.
- It offers a high success rate in repairing choppy/corrupted video files.
- It allows you to preview the repaired video file before saving it.
- It is compatible with Windows and Mac.
Simply put, 4DDiG Video Repair is your all-in-one companion to fix downloaded YouTube video stuttering effortlessly. Here are the steps to use 4DDiG Video Repair to fix stuttering videos:
-
Install and launch 4DDiG Video Repair on your Windows/Mac system. Tap "Start" beneath the "Fix Video Errors" option.
FREE DOWNLOADSecure Download
FREE DOWNLOADSecure Download

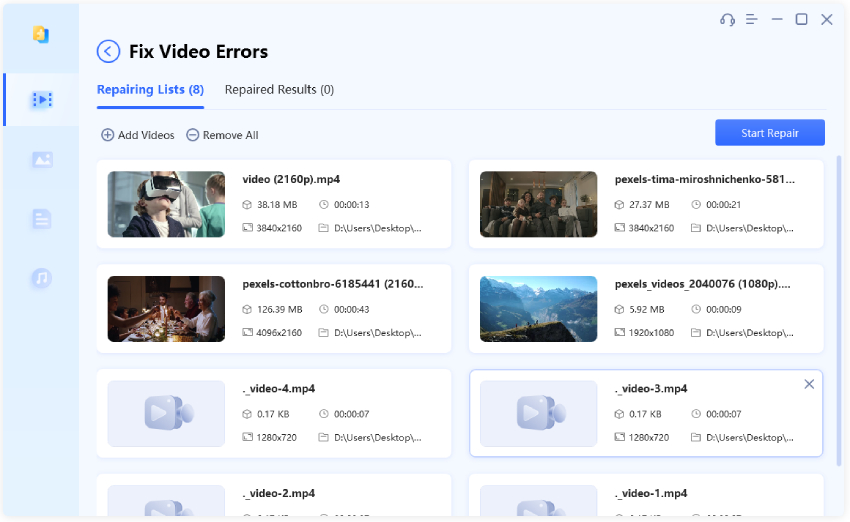
-
Click "Add Video(s)" and select the video(s) you want to repair. Then click "Start Repair" to begin repairing the videos. Wait until the videos are repaired.

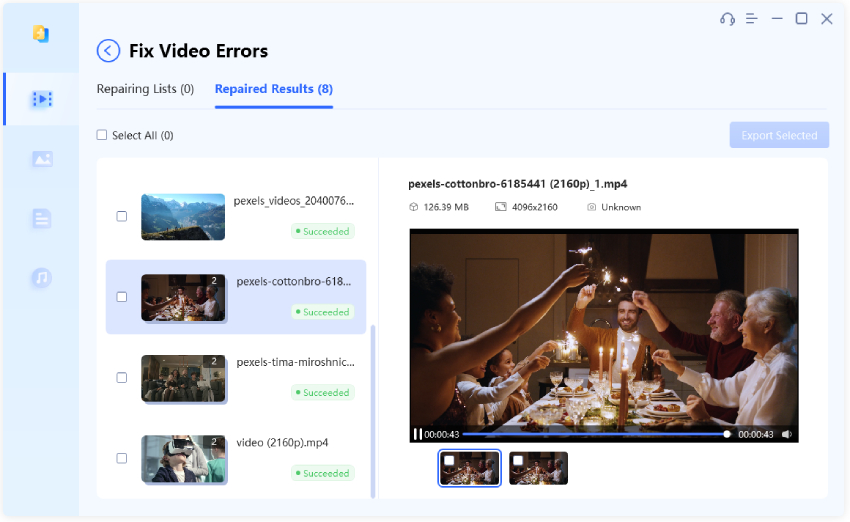
-
Preview the repaired videos. Afterward, select the videos and click "Export Selected" to save them to your computer.

That's it! This way, you can effortlessly repair video files with the intuitive approach of 4DDiG Video Repair software.
Final Words
YouTube stuttering is a common but annoying issue. Therefore, you should tackle it as soon as possible for a smooth experience. In this guide, we have discussed in detail how to fix YouTube stuttering issue using multiple methods. So, you must follow the above methods and steps one by one until your YouTube videos start running smoothly. Besides that, if you are facing a similar issue with downloaded YouTube videos, then leverage the powerful and intuitive interface of 4DDiG Video Repair to repair videos intelligently. Therefore, use this guide as your reference and tackle the YouTube video stuttering issue proficiently.
Secure
Download
Secure
Download
💡 Summarize with AI:
You May Also Like
- Home >>
- Video Tips >>
- Youtube Stuttering/Lagging/Buffering? Why and How to Fix It?



 ChatGPT
 Perplexity
 Google AI Mode
 Grok
Grok

