How to Backup and Restore Files with File History in Windows 10 and 11?
Data loss occurs instantly in our digital age because of system crashes and accidental deletions and hardware failures. Windows File History functions as your silent backup solution. The built-in Windows tool operates automatically to create backups of essential files so users can restore them when system failures occur. File History operates as a robust Windows 10 and Windows 11 feature which safeguards your essential files including documents and music and pictures so they remain accessible for recovery. This guide provides all the information needed to use Windows File History effectively for backup and restore operations.

Part 1: What is File History?
Windows includes a backup utility called File History which automatically creates data backups for future restoration purposes. The backup system monitors changes in Documents, Pictures, Music, Videos and Desktop folders before saving them to external storage or network destinations.
- Advantages of File History Windows 11:
- Disadvantages:
-
-
Once set up, runs in the background with little real effort.
-
Retrieve previous versions of files with just a few clicks.
-
No need for advanced technical knowledge to use it.
-
Supports external drives and network locations.
-
-
-
Only backs up personal folders, not full system backups.
-
It needs a separate drive or space to work.
-
Doesn’t connect directly to cloud storage services like OneDrive.
-
Part 2: Backup and Restore Files with File History
Now, let’s take a look at how you can back up and restore your files with File History on both Windows 10 and Windows 11.
Backup Files with File History on Windows 10
Setting up File History in Windows 10 is quick and simple. Just follow these steps to start backing up your important files automatically and ensure they’re always safe and easy to restore.
-
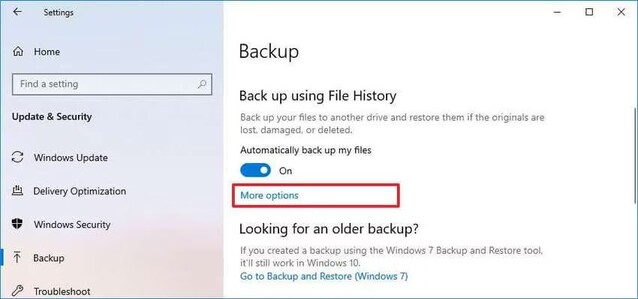
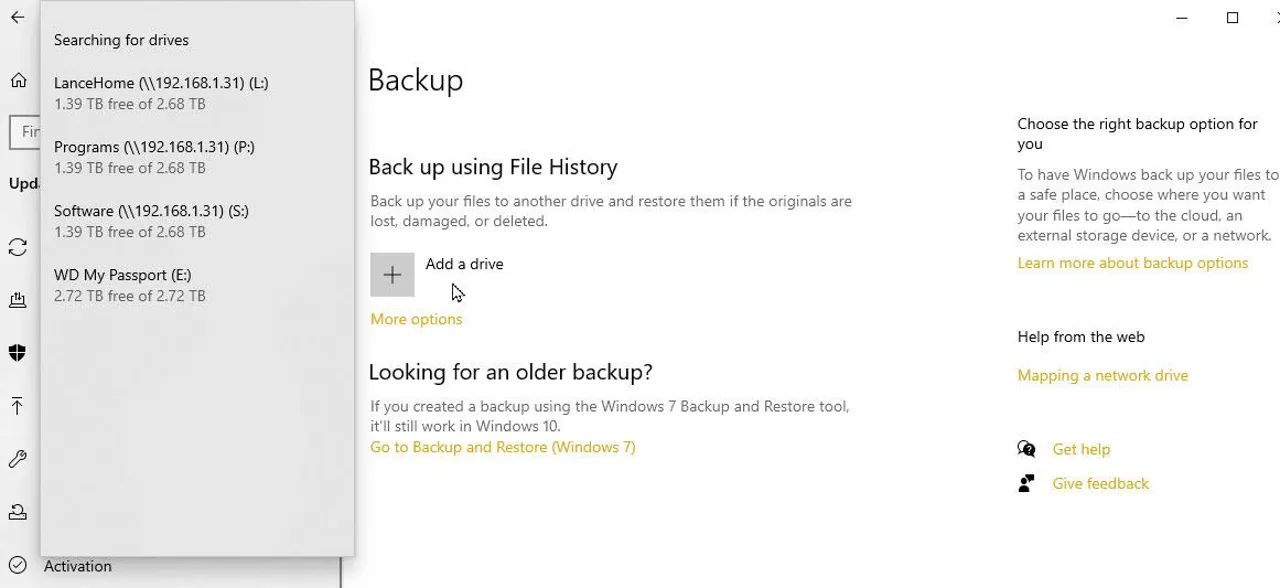
To start File History in Windows 10 you should navigate to Settings > Update & Security > Backup. Select the drive or device which will serve as your backup destination. Select "Add a drive" from the button and choose the storage device you want to use. This turns on File History.

-
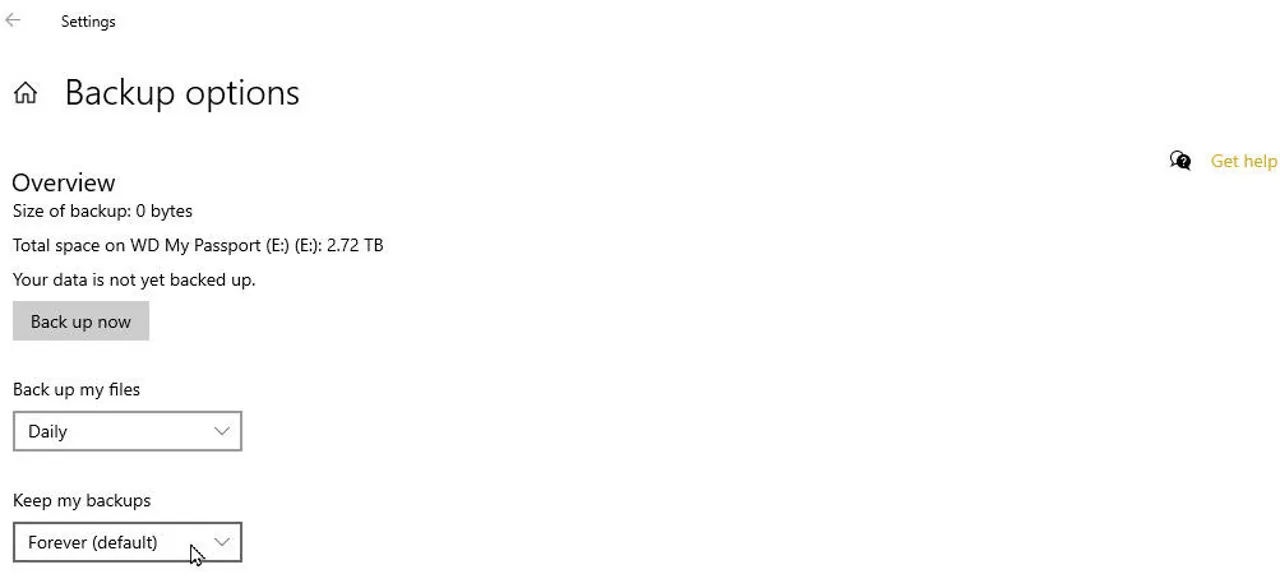
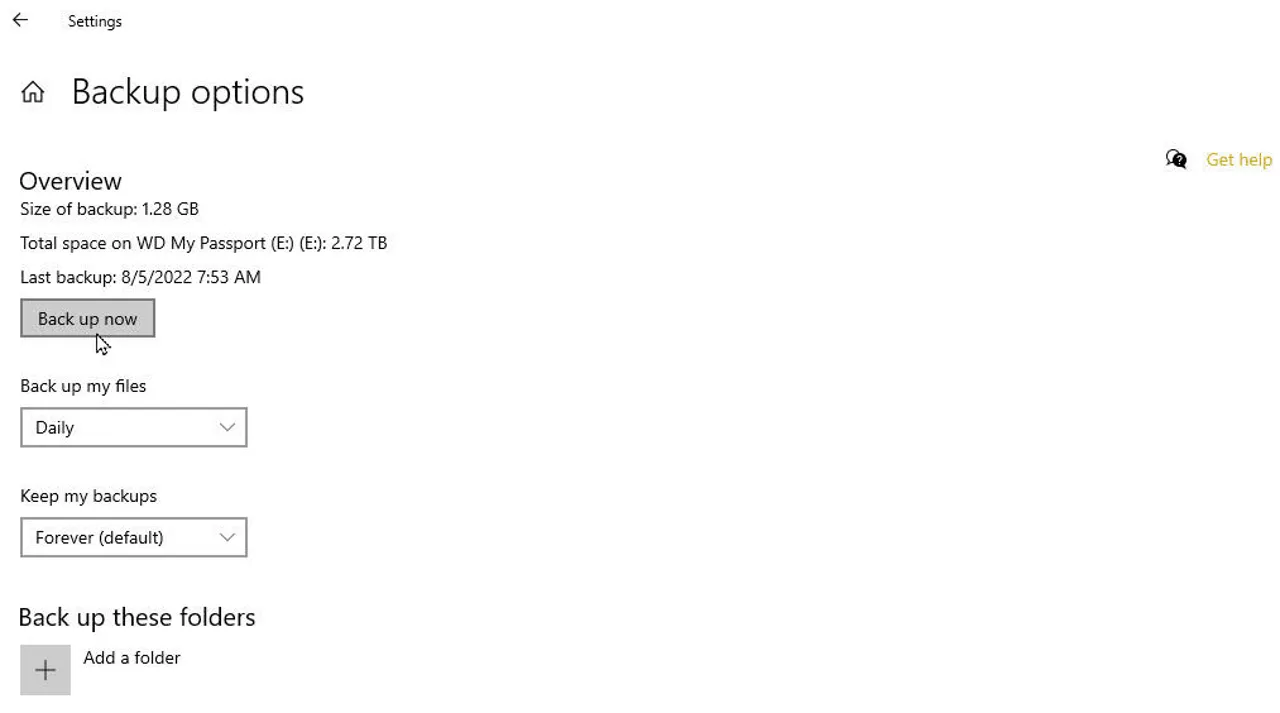
Select the "More options" link from the menu. Select the Backup options screen to access the dropdown menu for Back up my files and choose a backup interval between 10 minutes and daily. Under the Keep my backups menu you can determine the backup duration ranging from "Until space is needed" to Forever.

-
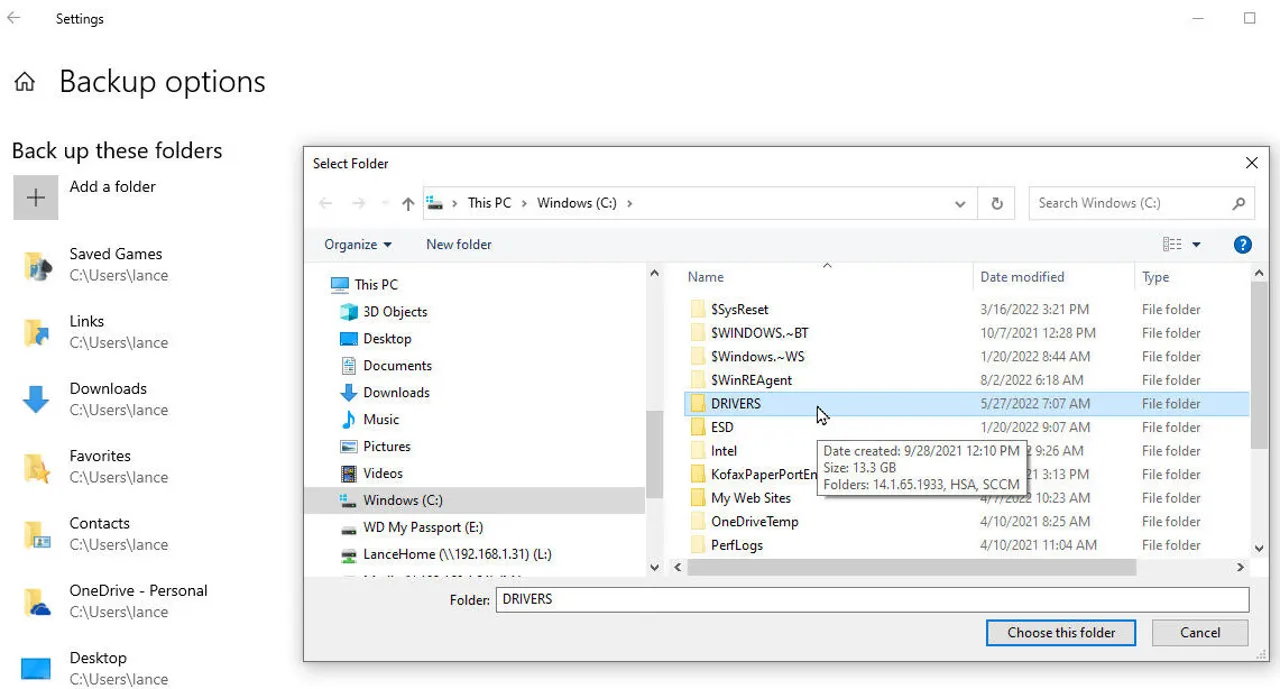
You can determine which folders should be included and excluded from the backup process at this point. Check the folders currently included in File History backup. To include a folder in the backup process click Add a folder then select the desired folder. Select any folder you want to exclude from backup then click the Remove button.

-
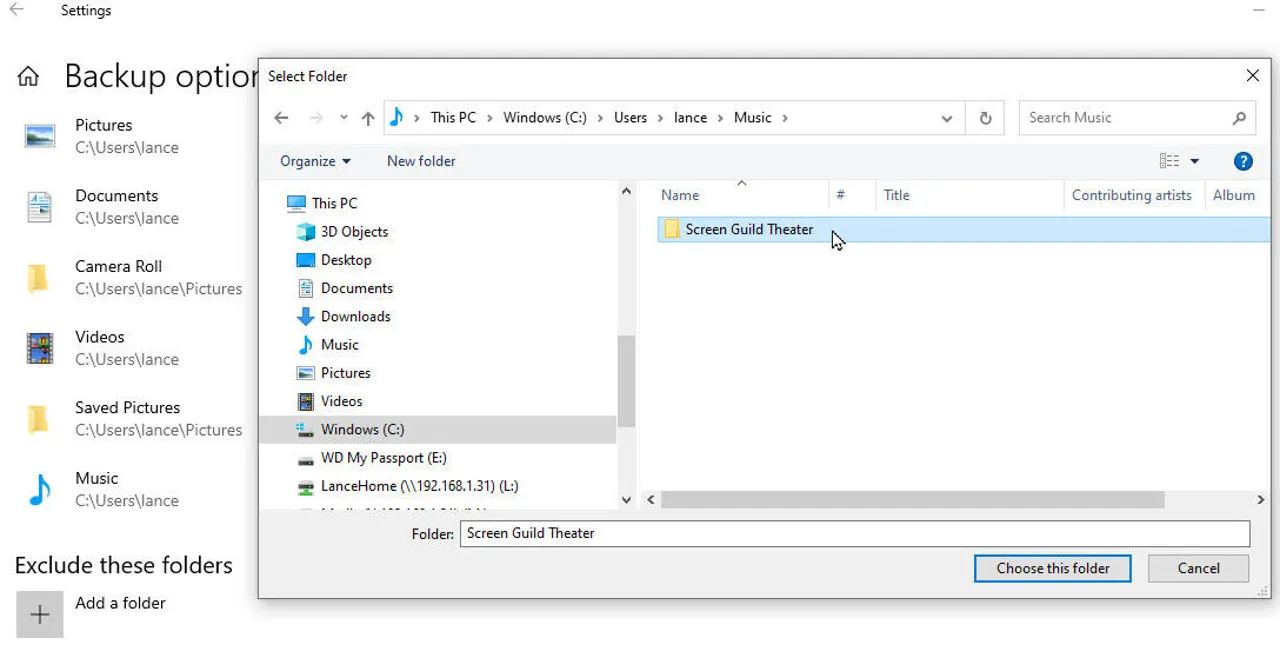
Users can prevent any hidden subfolders from backup by using the Add a Folder button under the Exclude these folders section to select the target folder.

-
The File History backup process may already be running based on the backup schedule you selected. Click the Back up now button which appears at the top of the screen.

-
The backup process will begin in the background and repeat itself according to the selected interval. The backup process runs in the background while you continue working on your tasks. The overview section displays the time and date of the most recent backup completion.
Restore Files with File History on Windows 10
If you ever lose or accidentally delete a file, File History makes it easy to get it back. Here’s how to restore your files using File History on Windows 10.
-
When files backed up through File History become unreadable or missing or corrupted you can restore them from the backup. Click the link "Restore files from a current backup" which appears at the bottom of the File History screen in Settings.

-
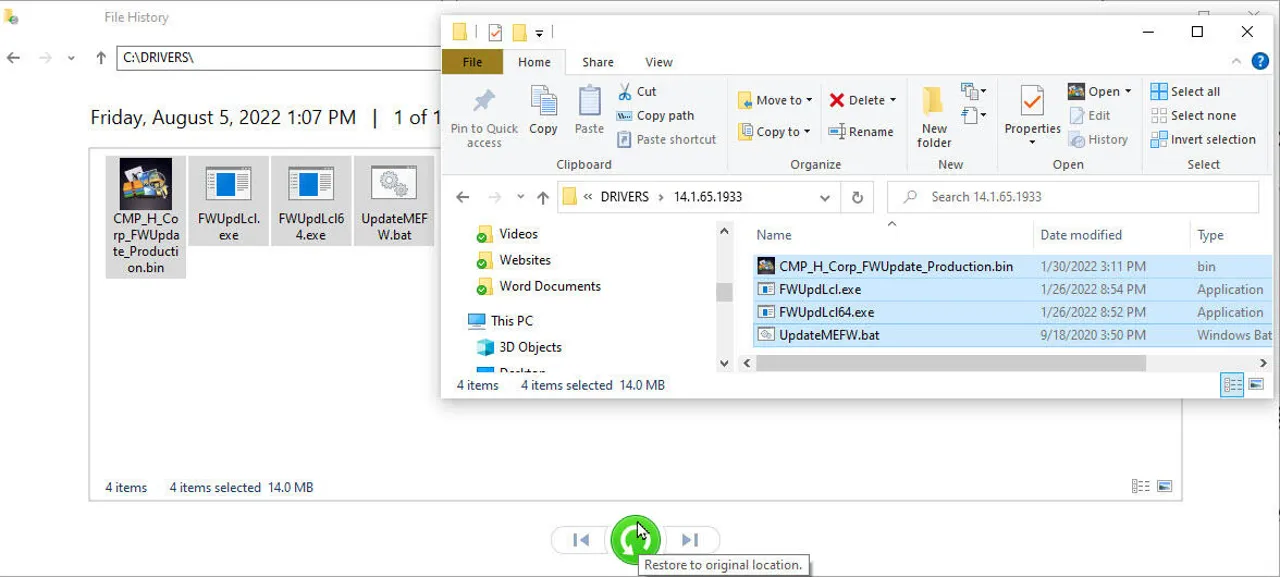
A File History window appears to display the most recent backup. To retrieve files from previous backups simply click the left arrow icon located at the bottom of the screen. You can navigate through time to each previous backup by repeatedly clicking the icon. You can advance by clicking the right arrow button.

-
Open the folder containing the files you want to restore then select them before clicking the Restore button located at the bottom of the screen. The files return to their original storage position.
Backup Files with File History on Windows 11
Backing up your files in Windows 11 using File History is a smart way to keep your personal data protected. Follow these steps to set up automatic backups and keep your files safe from unexpected loss.
-
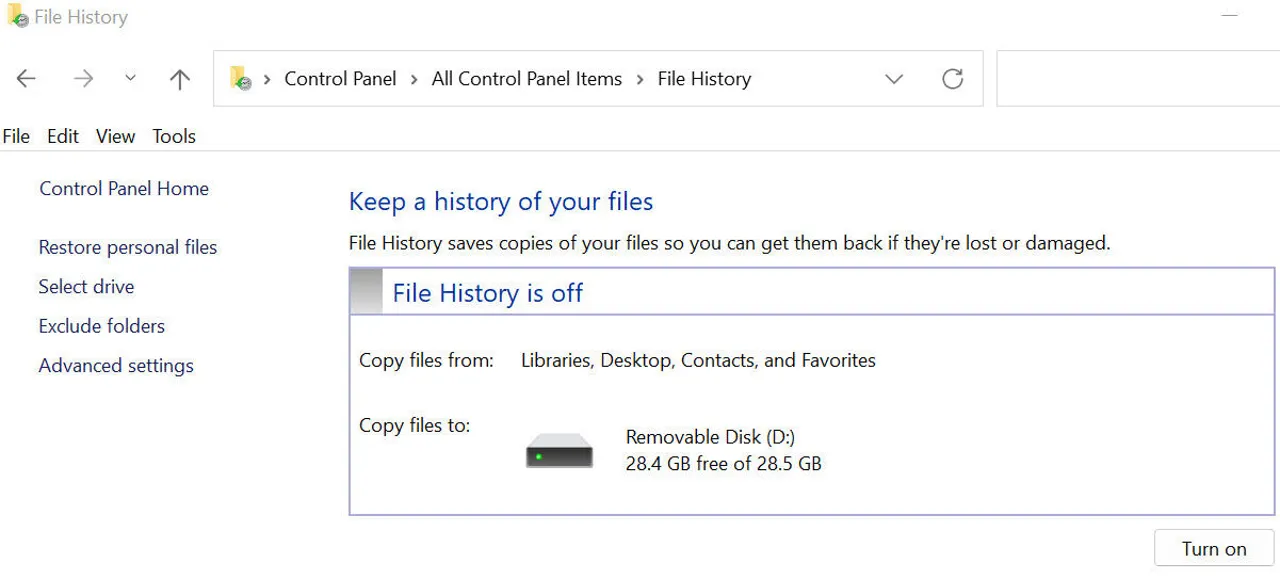
Before using File History in Windows 11 users must verify that their backup storage device is connected to the system. Open Control Panel in icon view then select the File History icon (alternatively search for File History through the Search icon and choose the result). The File History window should display the backup destination location under "Copy files to:"

-
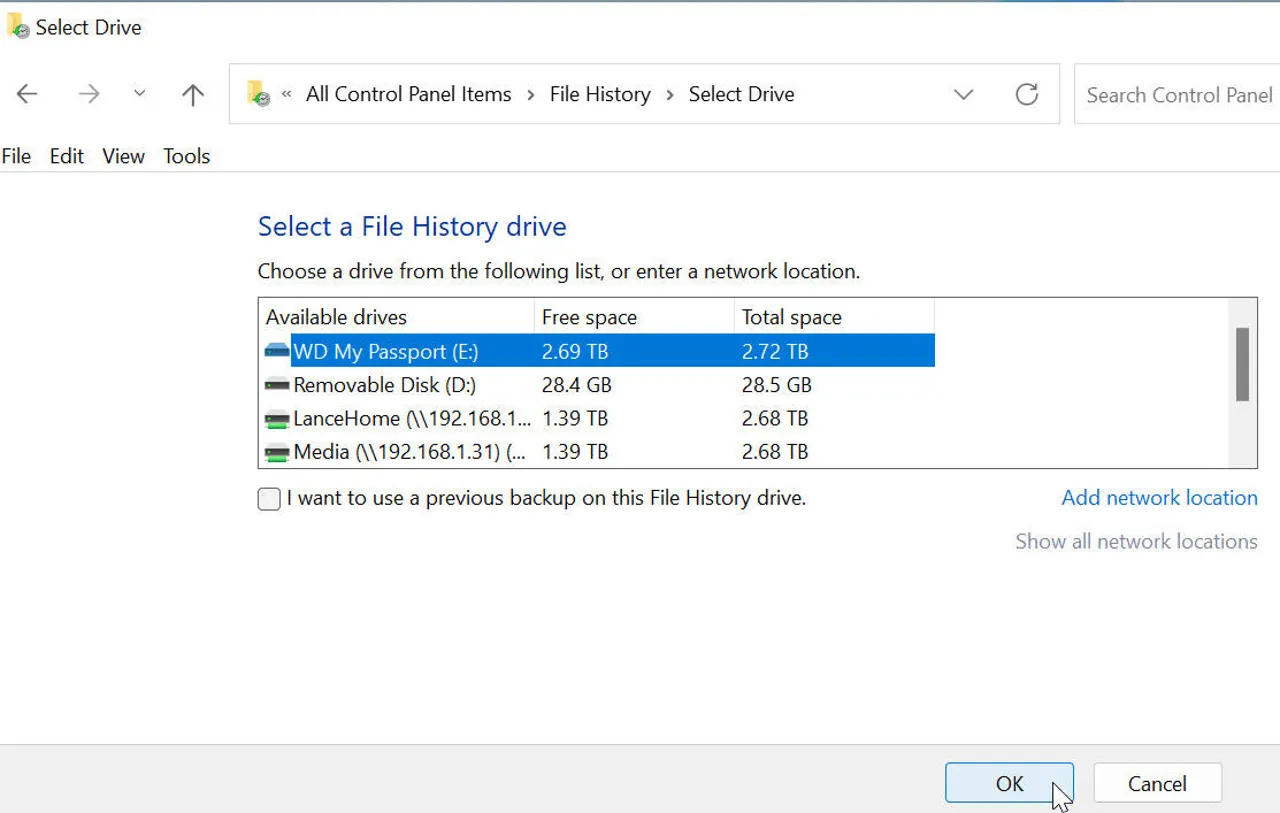
Click the Select drive link located on the left side to proceed. Click OK to select the backup drive from the list.

-
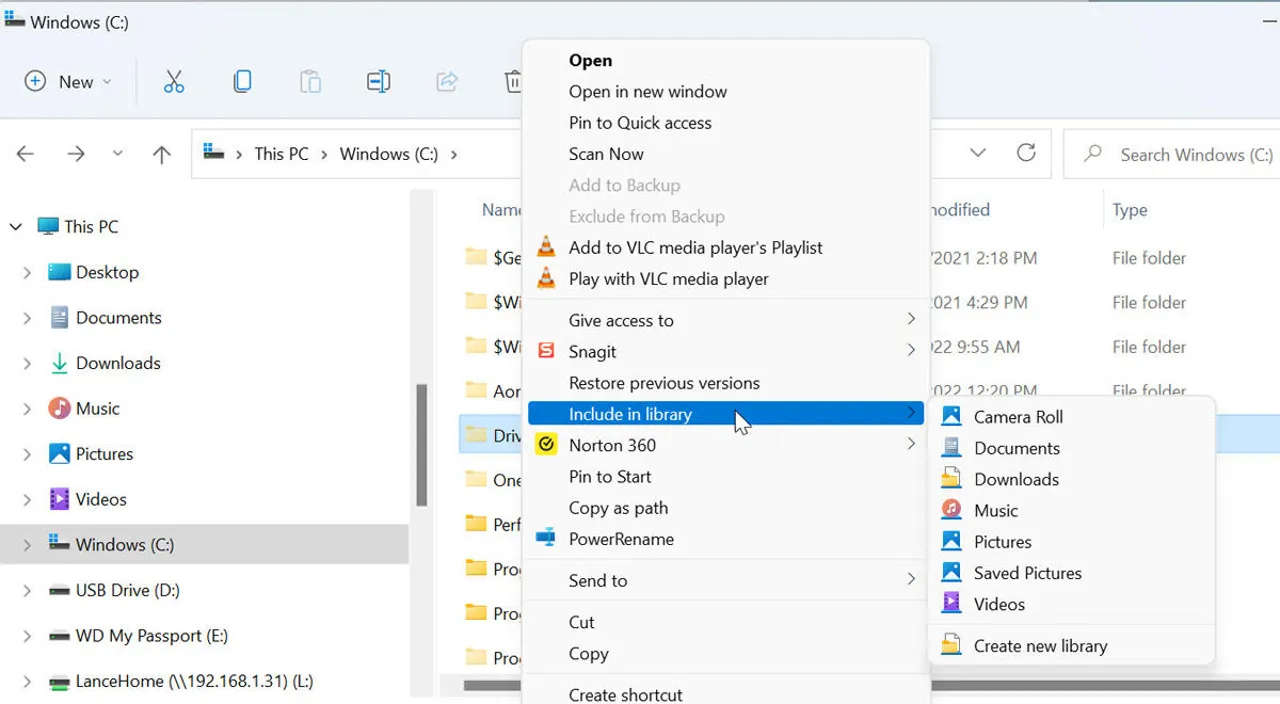
The process for adding additional backup folders to the default ones through File History requires some awkward steps. The default backup scope of File History in Windows 10 includes all folders located under Libraries. Right-click on the folder in File Explorer to access "Show more options" and add it to the backup. Select Include in library from the full context menu to add the folder into an existing library or create a new one. The selected folder becomes part of File History backup operations.

-
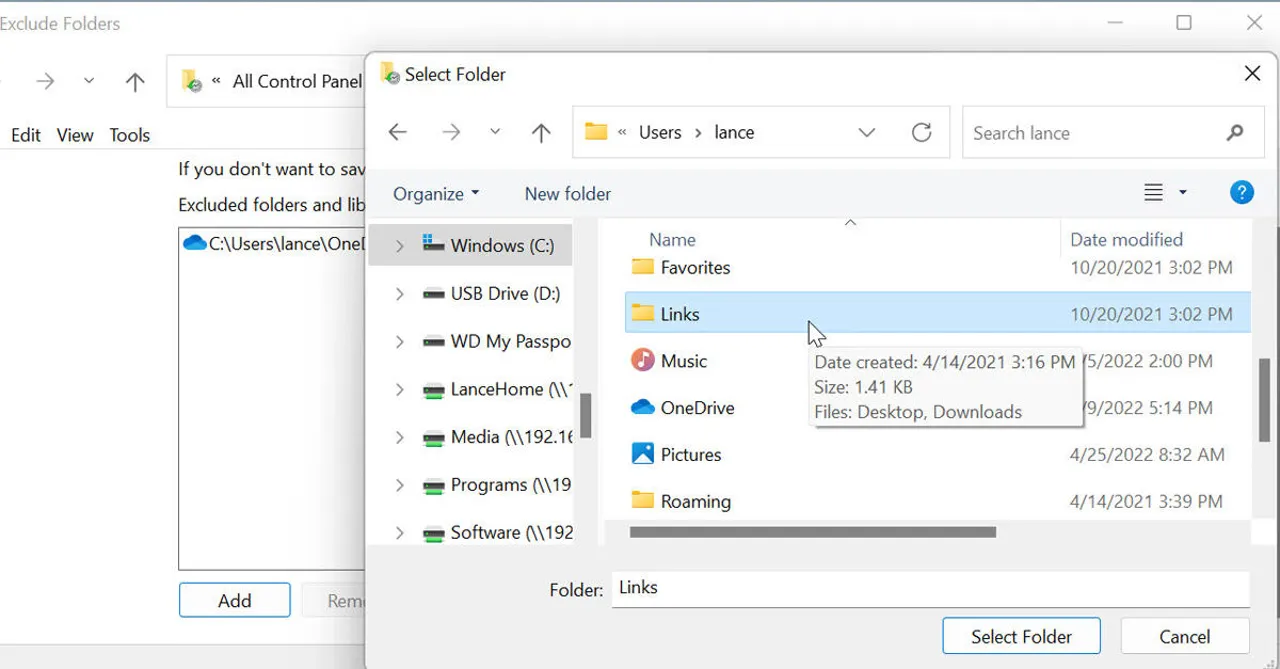
Click the link for Exclude folders to access the exclusion process. Select the Add button followed by choosing the backup-excluded folder from the list.

-
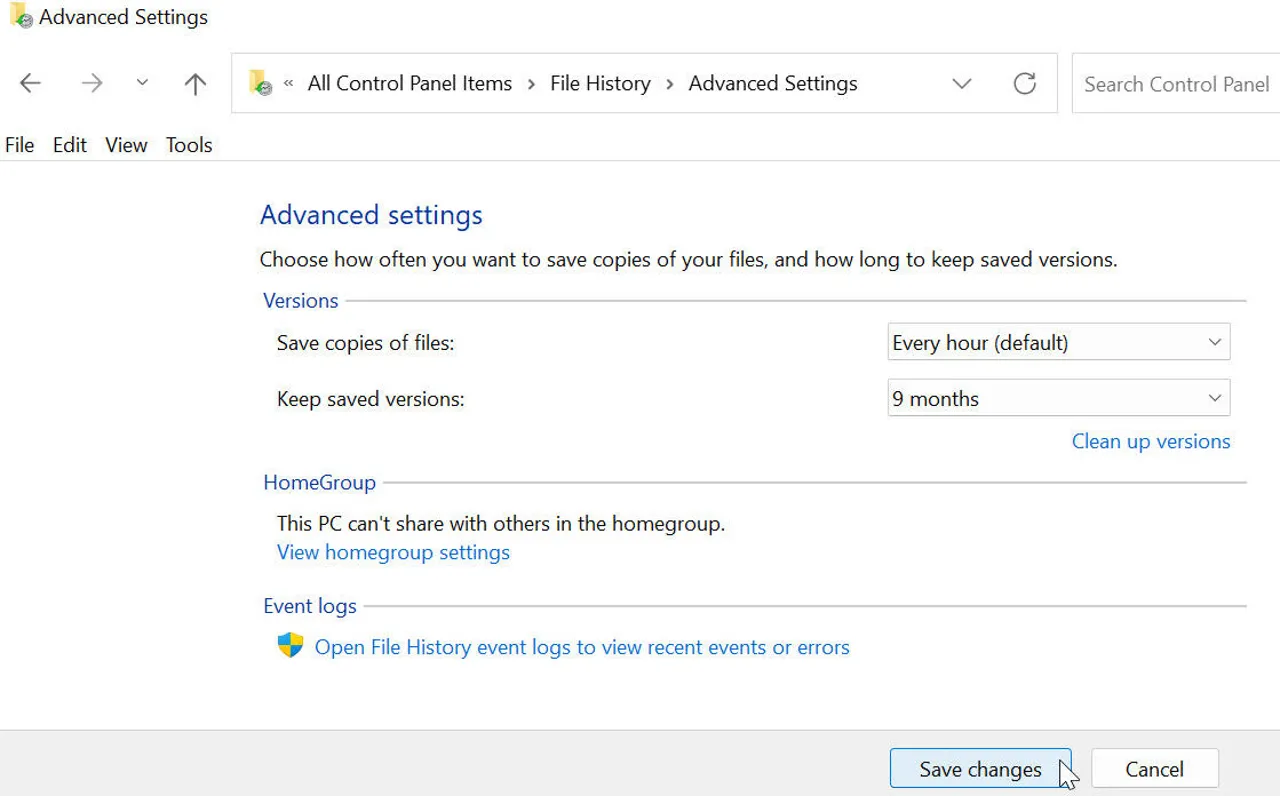
From the main File History Control Panel window select the link for Advanced settings. Select the dropdown menu under Save copies of files to set the backup interval. Select the dropdown menu for Keep saved version to determine the backup duration of File History. When done, click "Save changes".

Restore Files with File History on Windows 11
Accidentally deleted a file or need an earlier version? File History in Windows 11 lets you quickly restore lost or modified files with just a few clicks. Here's how to do it.
-
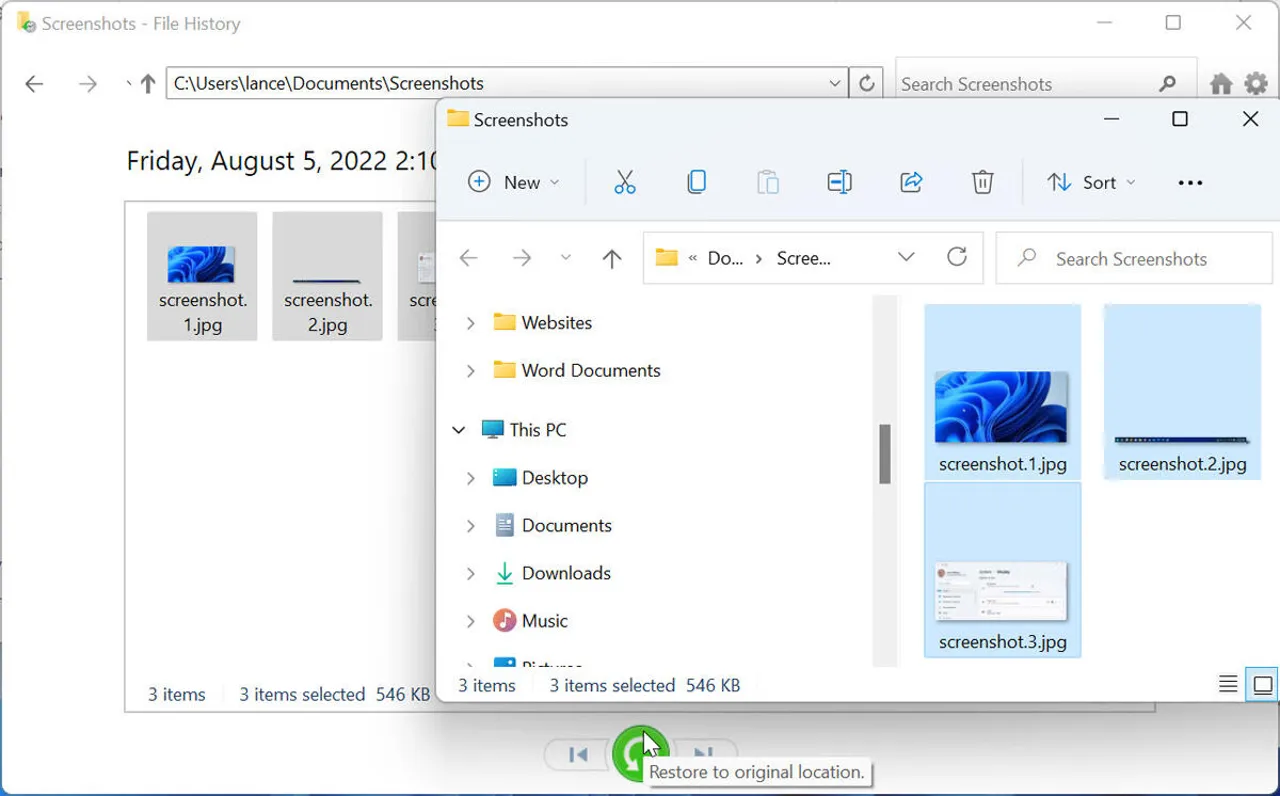
The backup process should be underway at this stage. Click the "Run now" link if the backup process has not started. You can access the File History screen in Control Panel to restore personal files by clicking the "Restore personal files" link.
-
Open the backup folder containing the file you want to restore through the backup search. Click the "Restore to original location" button after selecting the file. The restored file will return to its original location.

Extra Tip: Best Alternative to File History
Windows File History provides users with a dependable built-in backup solution yet many people seek additional backup customization options. The backup solution 4DDiG Partition Manager provides the necessary functionality.
The all-in-one disk management tool provides users with backup and restore simplification while delivering additional features for disk cloning and OS migration and partition recovery and many other functions. 4DDiG Partition Manager provides users with effortless solutions for system upgrades and non-bootable PC recovery and one-click file backup capabilities.
Secure Download
Backup Files with 4DDiG Partition Manager
-
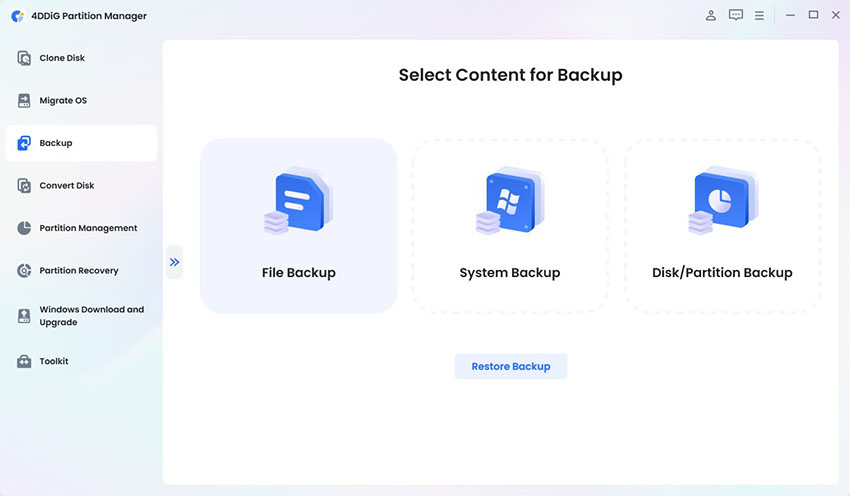
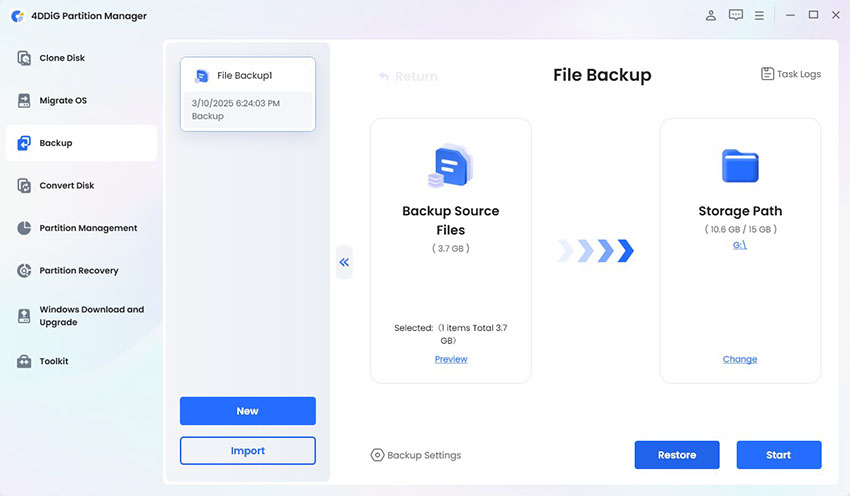
Launch 4DDiG Partition Manager after its installation and download. Select File Backup from the Backup section of the main interface.

-
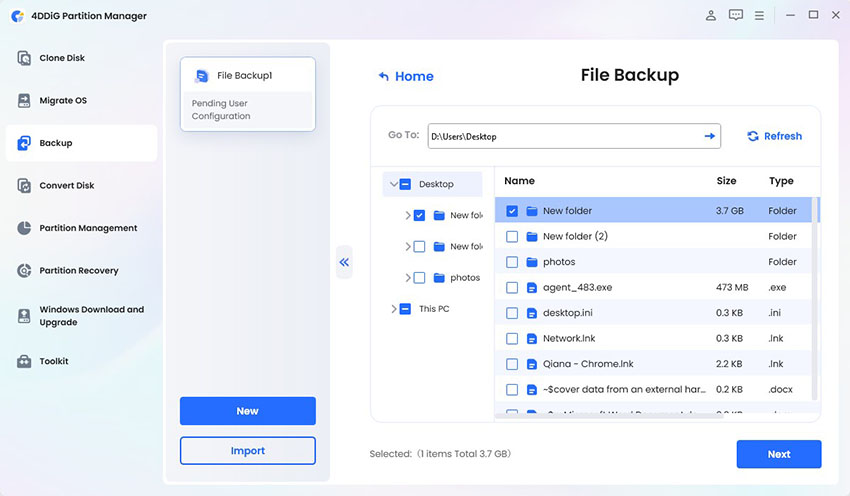
The program generates a fresh backup task. Click Next to continue after selecting the backup files or folders from the list.

-
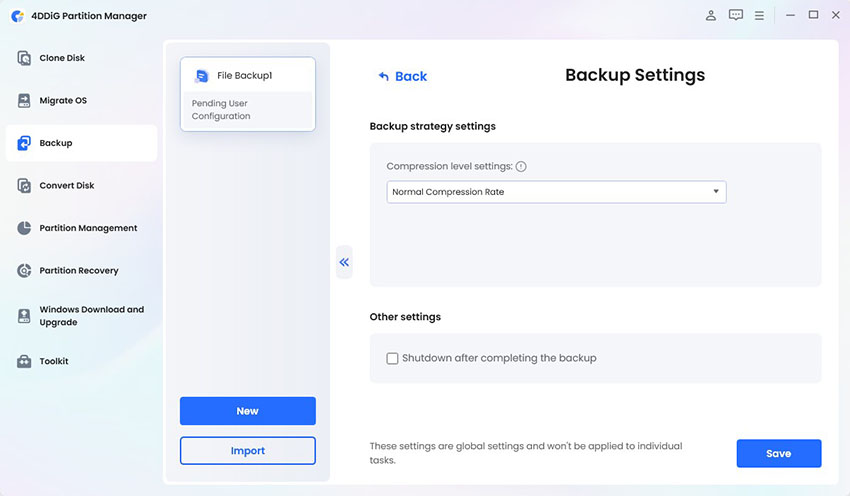
Select a storage location for your backup files. You can access backup settings through the bottom-left corner to modify compression settings and activate the "shut down after backup" feature.

-
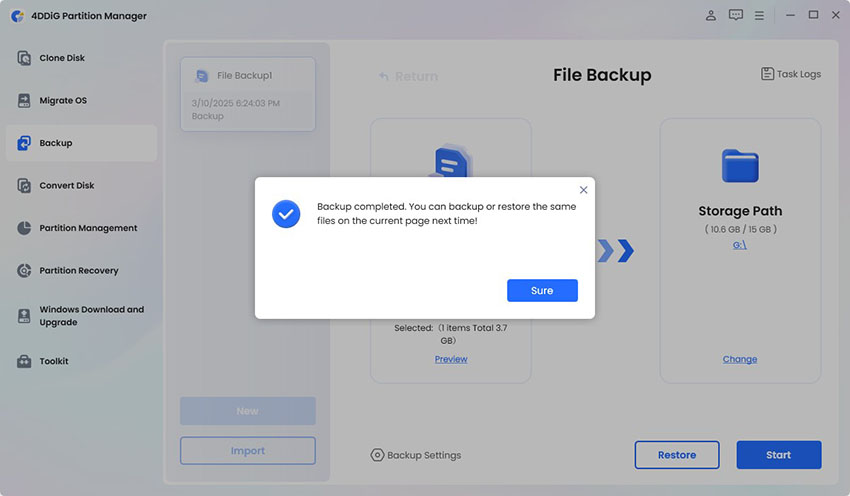
After setting everything click the Start button. The backup process will finish in a few moments while your files remain safely stored.

Restore Files from 4DDiG File Backup
-
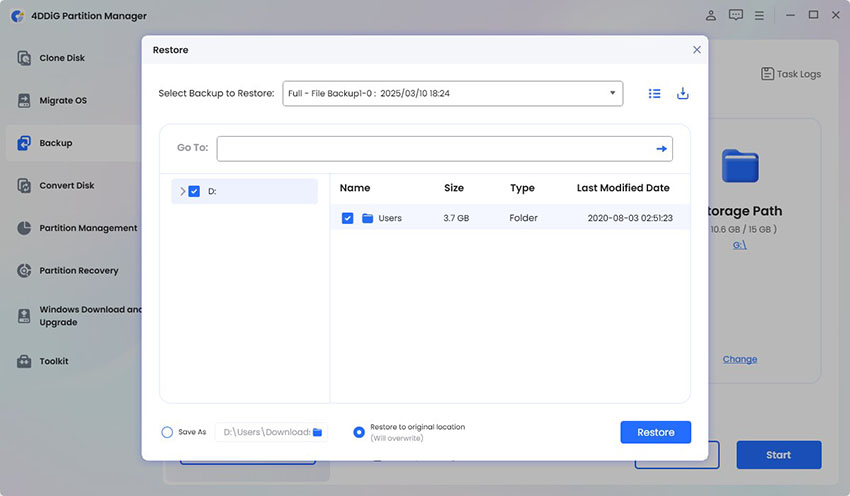
To restore your files navigate to the File Backup section and click Restore.

-
Select the backup file you wish to restore from the list. Users can decide between restoring files to their original storage location or selecting a new destination path.

-
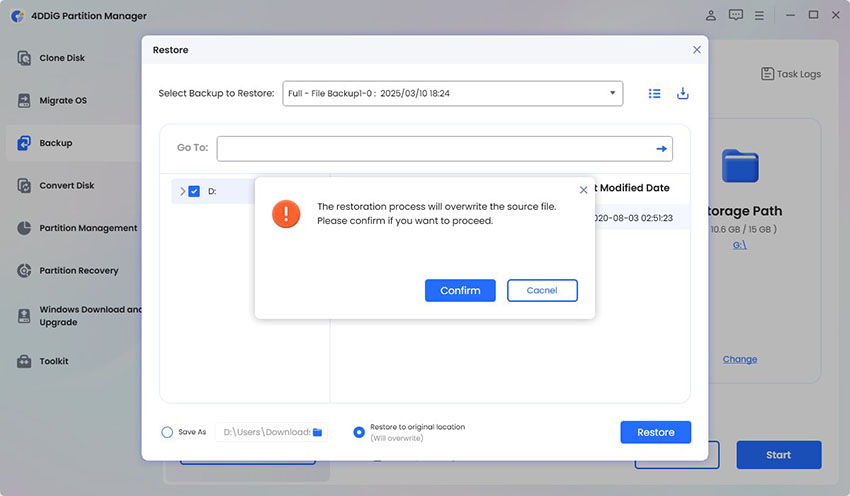
Restoring files to their original location will result in file overwrites of existing content. Click Start to initiate the restore process after confirming your selection.

-
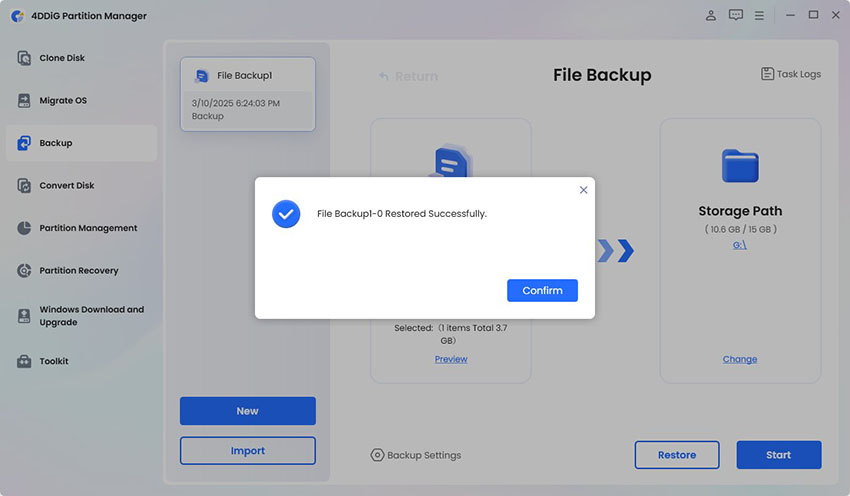
Your files will become usable after the restoration process finishes.

Conclusion
Data backup remains essential so Windows File History backup provides simple solutions for both Windows 10 and 11 users. The advanced features and full control of 4DDiG Partition Manager make it an effective alternative to native Windows backup solutions. The accessibility of file protection has reached new heights regardless of your preference between native solutions or third-party tools.
💡 Summarize with AI:
You May Also Like
- Home >>
- Hard Drive >>
- How to Backup and Restore Files with File History in Windows 10 and 11?

 ChatGPT
 Perplexity
 Google AI Mode
 Grok
Grok

