Windows Backup Not Working? [7 Simple Fixes]
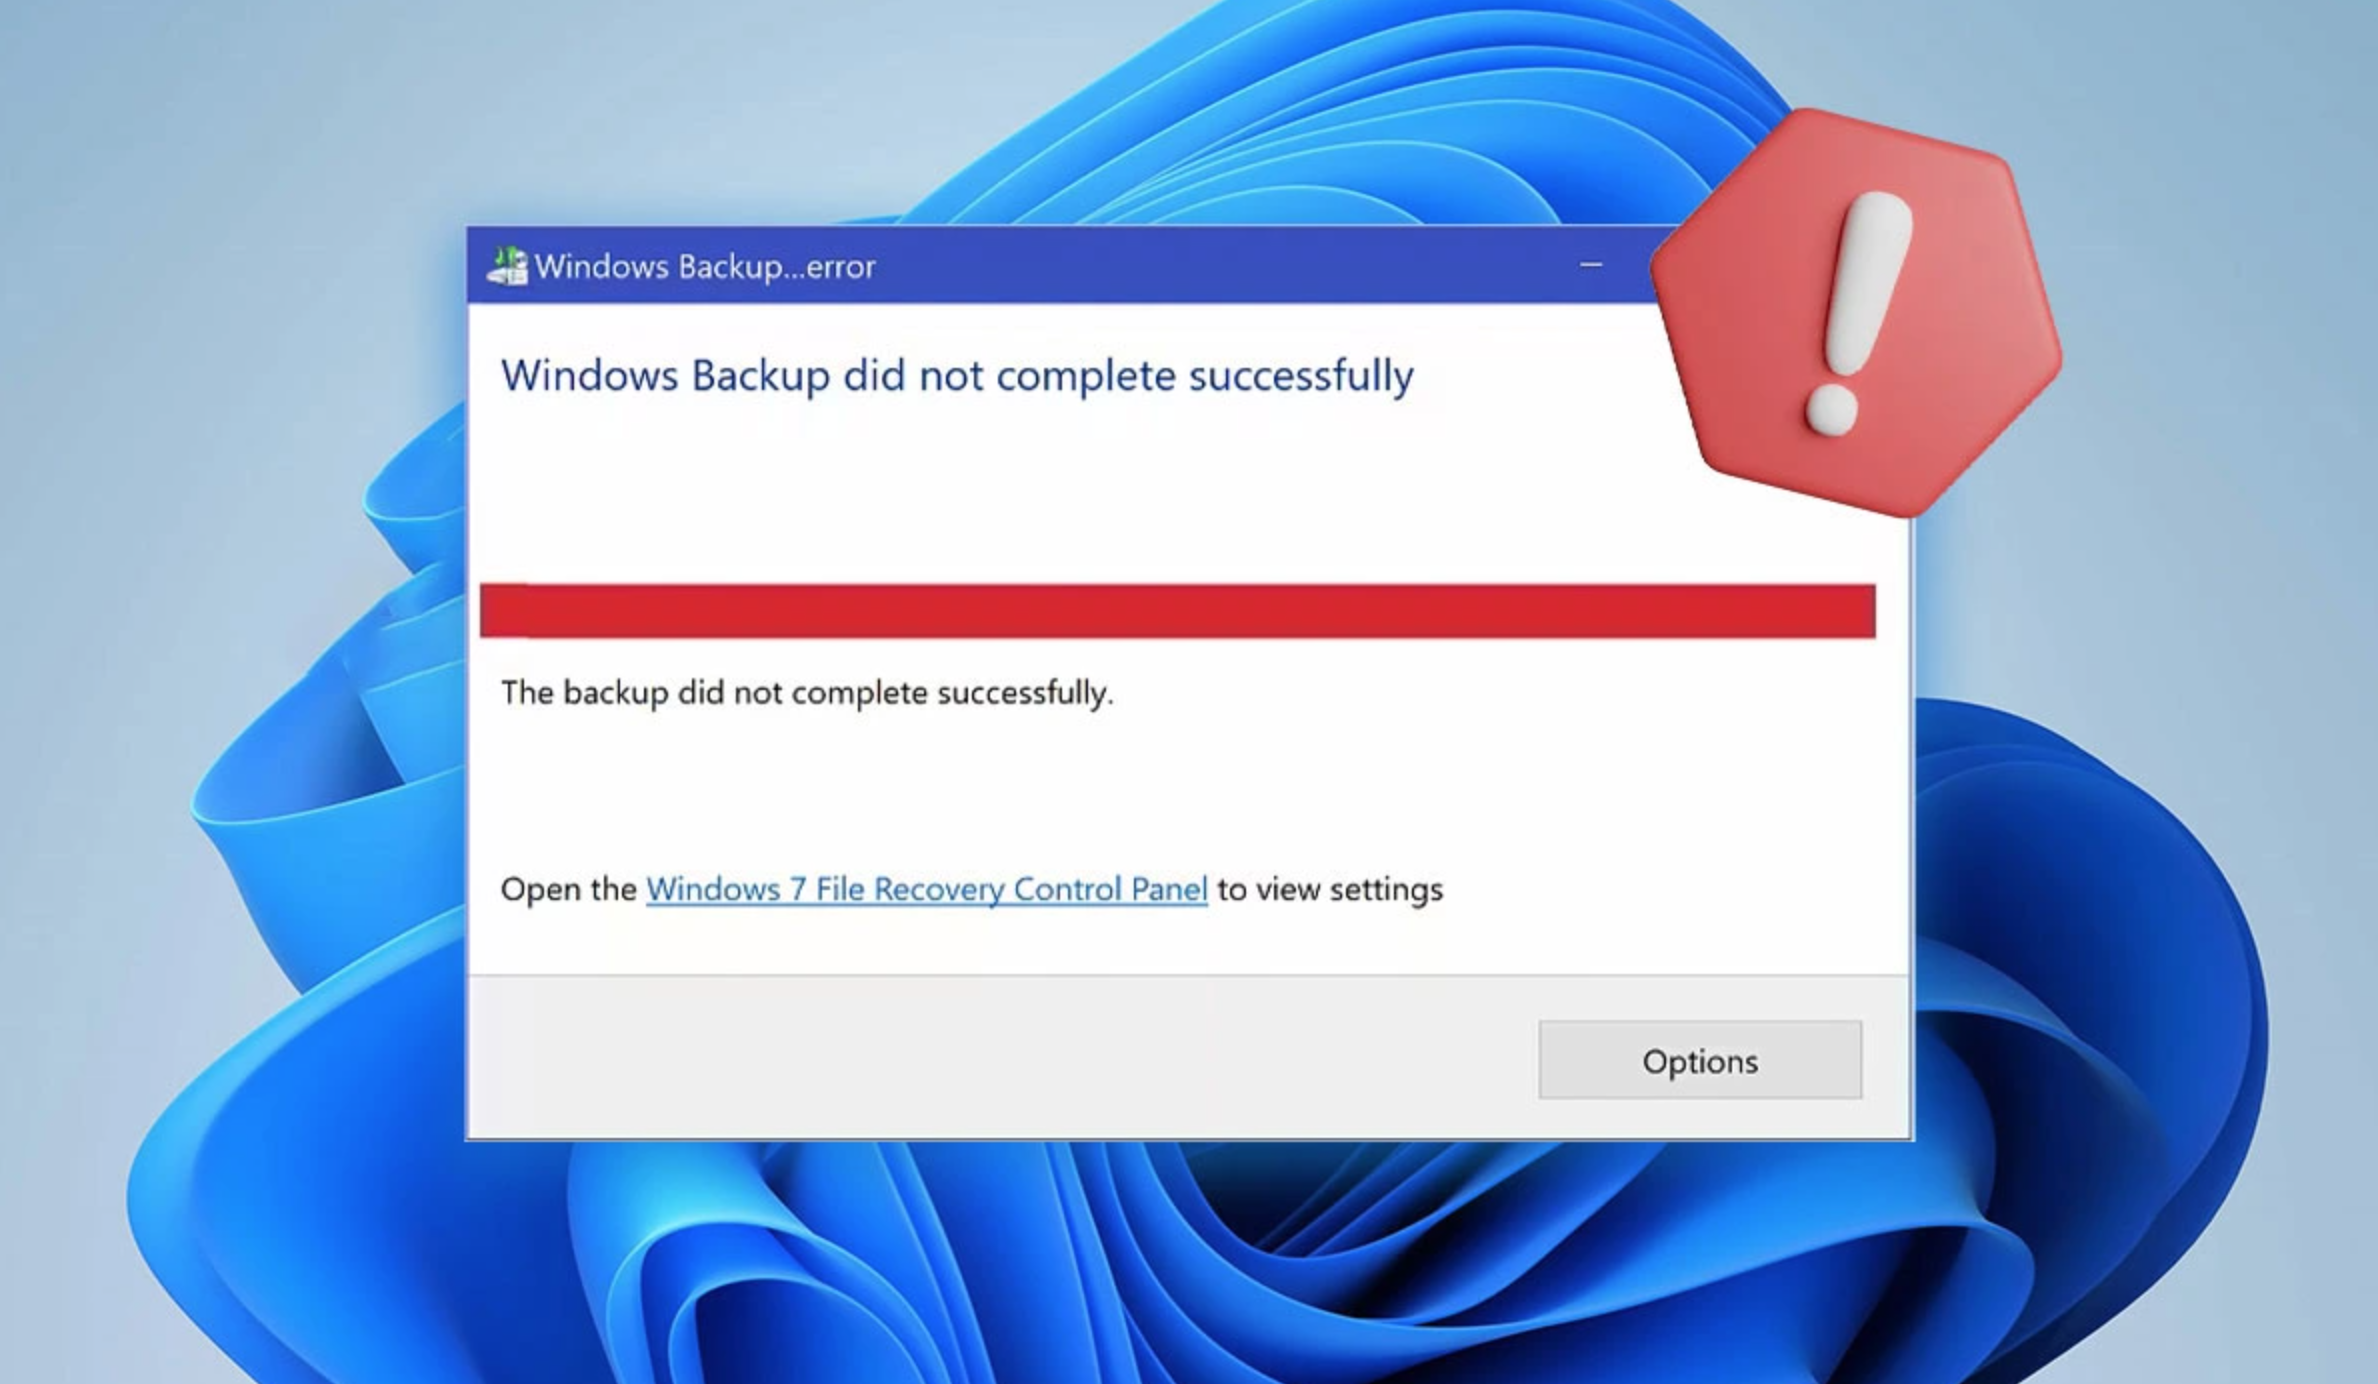
Is your Windows backup not working at critical times? Numerous users operating on Windows 10 and 11 encounter problems when File History or Backup and Restore fails to conduct backups properly. The process of experiencing backup errors while trying to protect files automatically or recover data puts the entire workflow at high risk.
The good news? Most of these problems are fixable with a few system tweaks. In this detailed guide, we’ll walk you through 7 simple but effective solutions to get your Windows backup working again—safely and smoothly.
Part 1: Why Windows Backup Not Working?
Before starting any fixes, it is essential to identify the potential reasons behind backup failures. Users frequently encounter the problem where ‘file history doesn’t recognize this drive’ which prevents the system from accessing the external hard drive. Other issues may include:
- File History is turned off or misconfigured
- System Protection is disabled
- Required Windows services are not running
- The backup drive is disconnected or damaged
- Errors in Event Viewer prevent backup processes
- Incompatible updates or third-party tools blocking backups
☞ If you want to back up game files, Homebrew video games in particular, you can also try to use the companion backup software Wii Backup Manager
Part 2: How to Fix Windows Backup Fails
Now that we know the causes, let’s dive into the most effective fixes.
Method 1: Verify That File Backup is Enabled in Settings
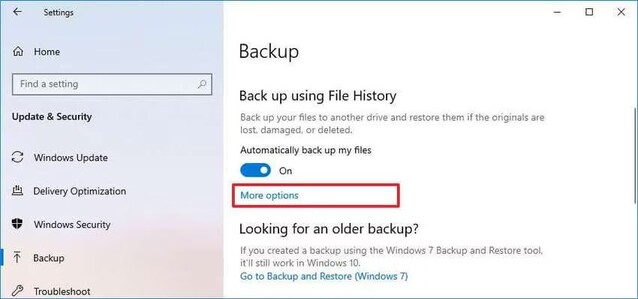
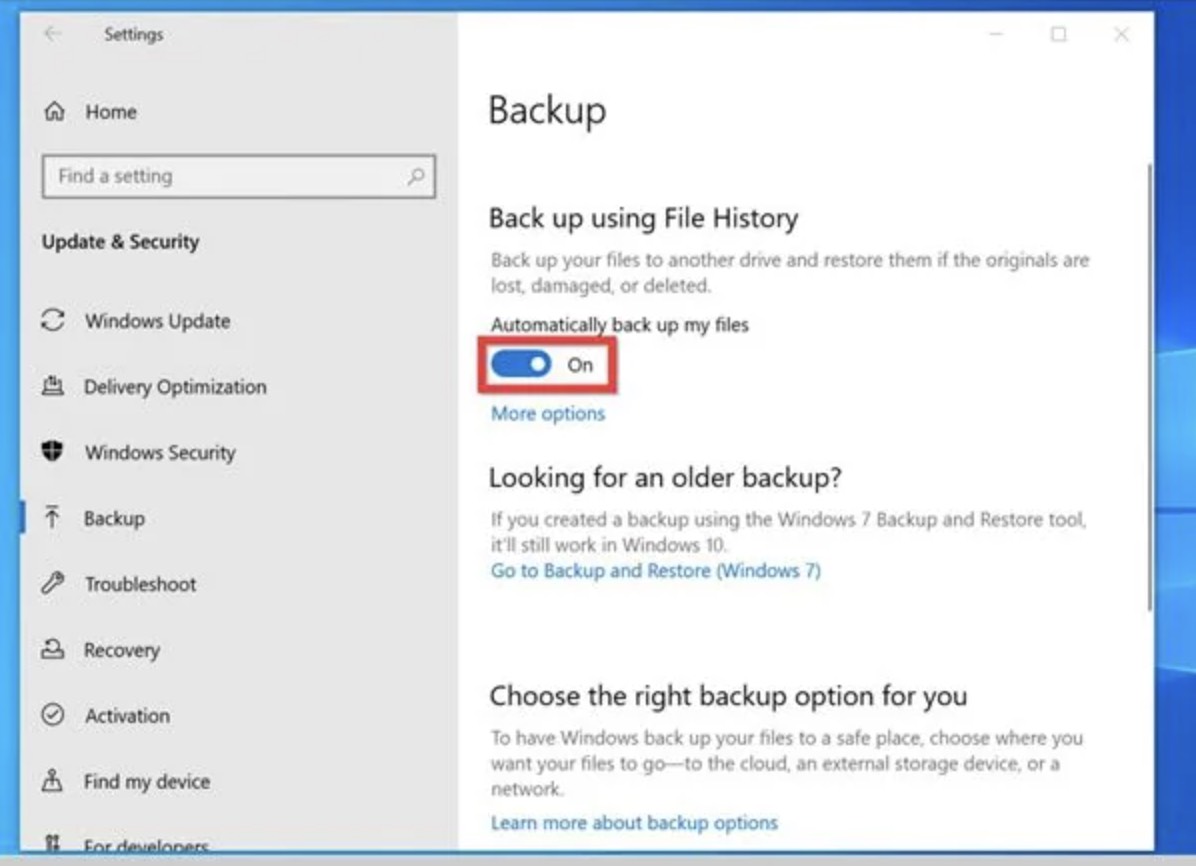
The automatic file backup feature stands as one of the essential yet frequently ignored settings within the Windows operating system. The backup process remains inactive even when a backup drive connects and Windows recognizes it because this option is disabled. The Windows update process or major system changes often reset this setting. Enabling this feature allows Windows to create regular backups of your essential files including documents and images. The first step to resolve Windows backup issues should focus on checking this setting.
-
Click the Start menu and select Settings.
-
Navigate to Update & Security.
-
Click Backup on the left sidebar.
-
Toggle the switch under Automatically back up my files to On.

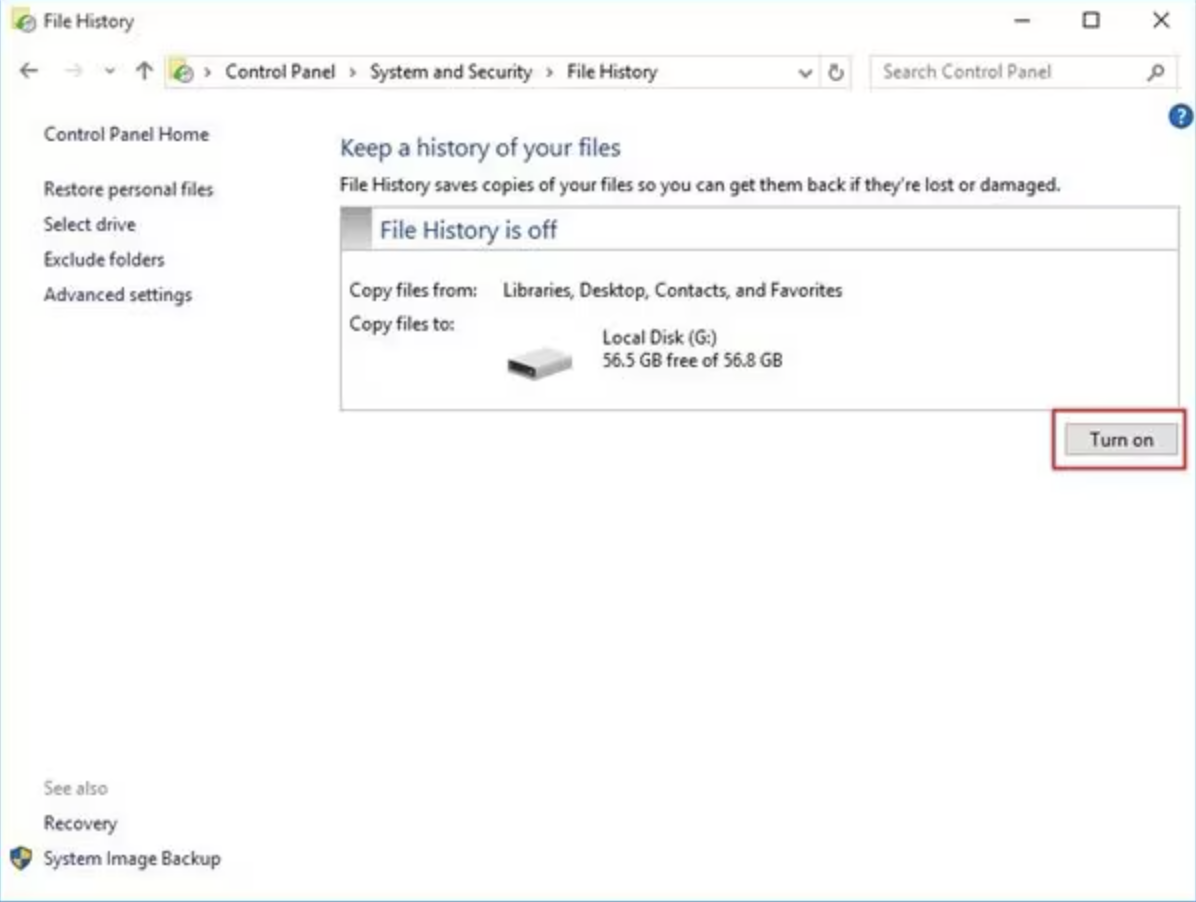
Method 2: Restart File History to Refresh Backup Settings
File History functions as the fundamental backup utility for Windows' backup system. The backup system can develop issues because of cache errors and interrupted backups and drive disconnections which cause unresponsiveness or bugs. A soft reset for File History occurs when you disable the tool followed by re-enabling it which refreshes its configuration and restores the backup drive connection. The drive recognition issue or unexpected backup stoppage can be resolved through this method.
-
Use the Windows search bar to look for File History.
Click to open the File History control panel.
-
If it’s already on, click Turn Off and wait for a few seconds.
-
Click Turn On to re-enable the feature.
-
Check that your preferred drive is selected.

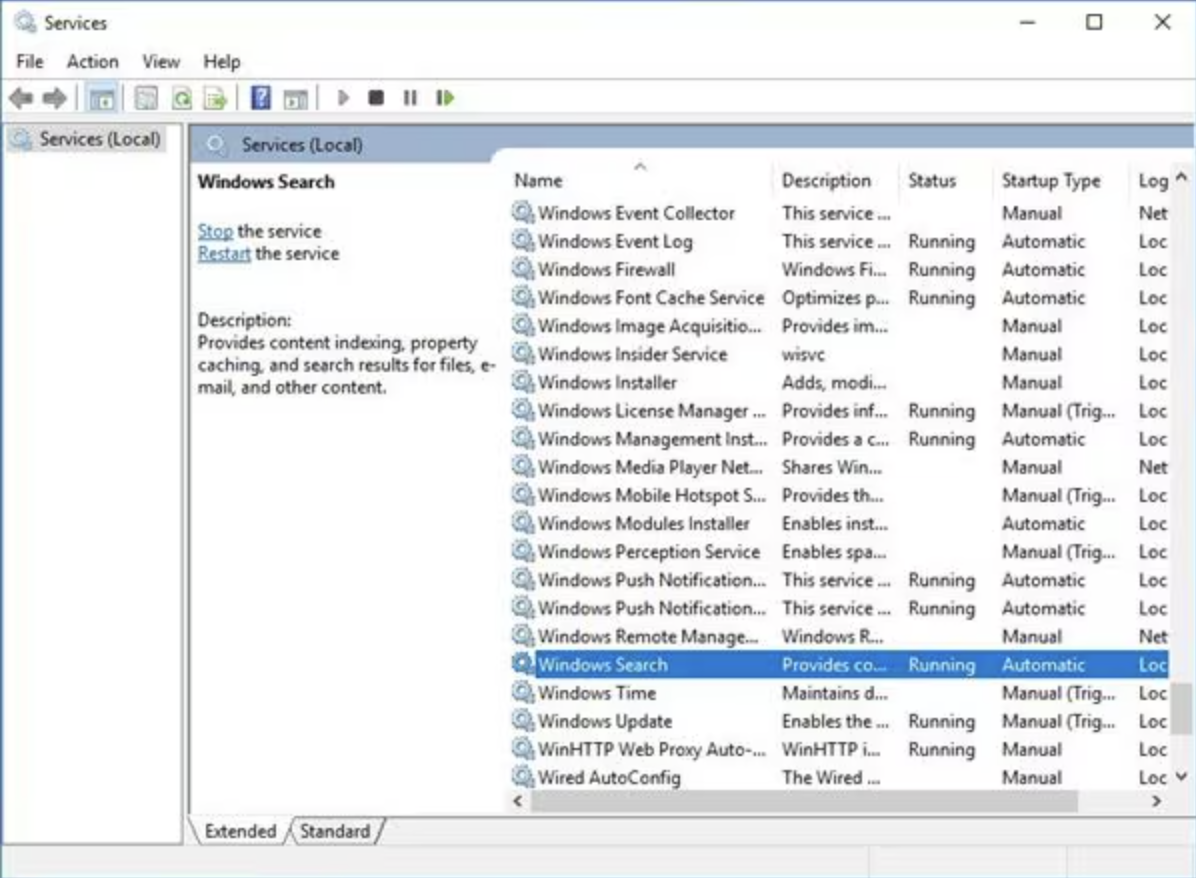
Method 3: Enable File History Service and Windows Search
Windows depends on multiple background services to maintain proper operation of File History and search capabilities. The backup process can be affected when File History Service or Windows Search are disabled or improperly configured. Your backup process may fail if your windows 10 backup does not work because you need to verify that these background services are enabled to start automatically and running actively.
-
Press Windows + R, type services.msc, and press Enter.
-
Scroll down and find File History Service.
-
Right-click it, select Properties, and set Startup type to Automatic.
-
Click Start if it’s not already running.
-
Repeat the same steps for Windows Search service.

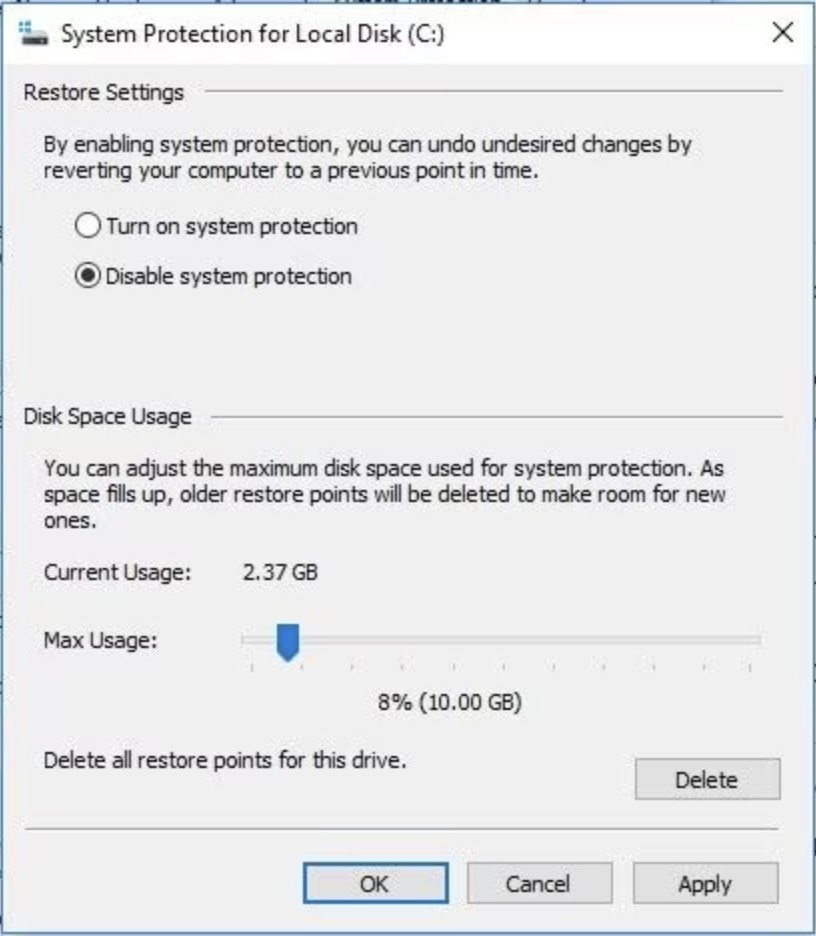
Method 4: Disable and Enable System Protection
System Protection functions as a Windows core feature that enables both restore points and shadow copies which File History and Backup and Restore require. Your system will stop creating restore points and maintaining older file versions when System Protection is disabled which results in backup errors. The process of enabling and disabling System Protection makes Windows refresh all settings and registry values related to System Protection. The method should be attempted when windows 10 backup fails to work particularly after system updates or restore operations.
-
Go to Control Panel > System and Security > System.
-
Click System Protection from the left panel.
-
Select your system drive (usually C:) and click Configure.
-
Choose Disable system protection and click Apply.
-
After that, choose Turn on system protection and apply changes.

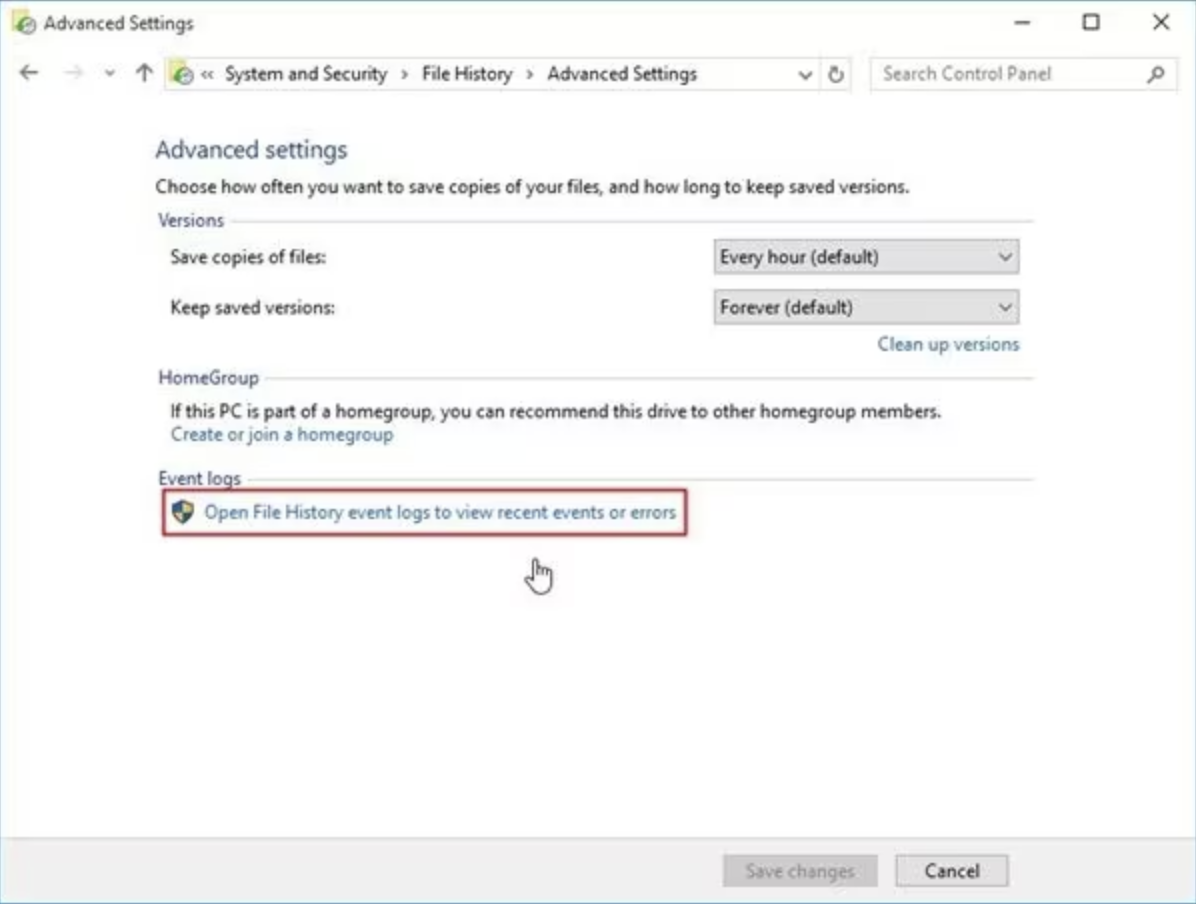
Method 5: Use Event Viewer to Diagnose Backup Failures
The built-in tool Event Viewer tracks all operations including backup attempts within Windows. The Event Viewer tool helps identify backup issues when your system fails to display error messages during the process. The tool records all system failures together with permission issues and drive conflicts as they occur in real time. The tool proves valuable for diagnosing Windows backup failures that continue without any apparent configuration errors.
-
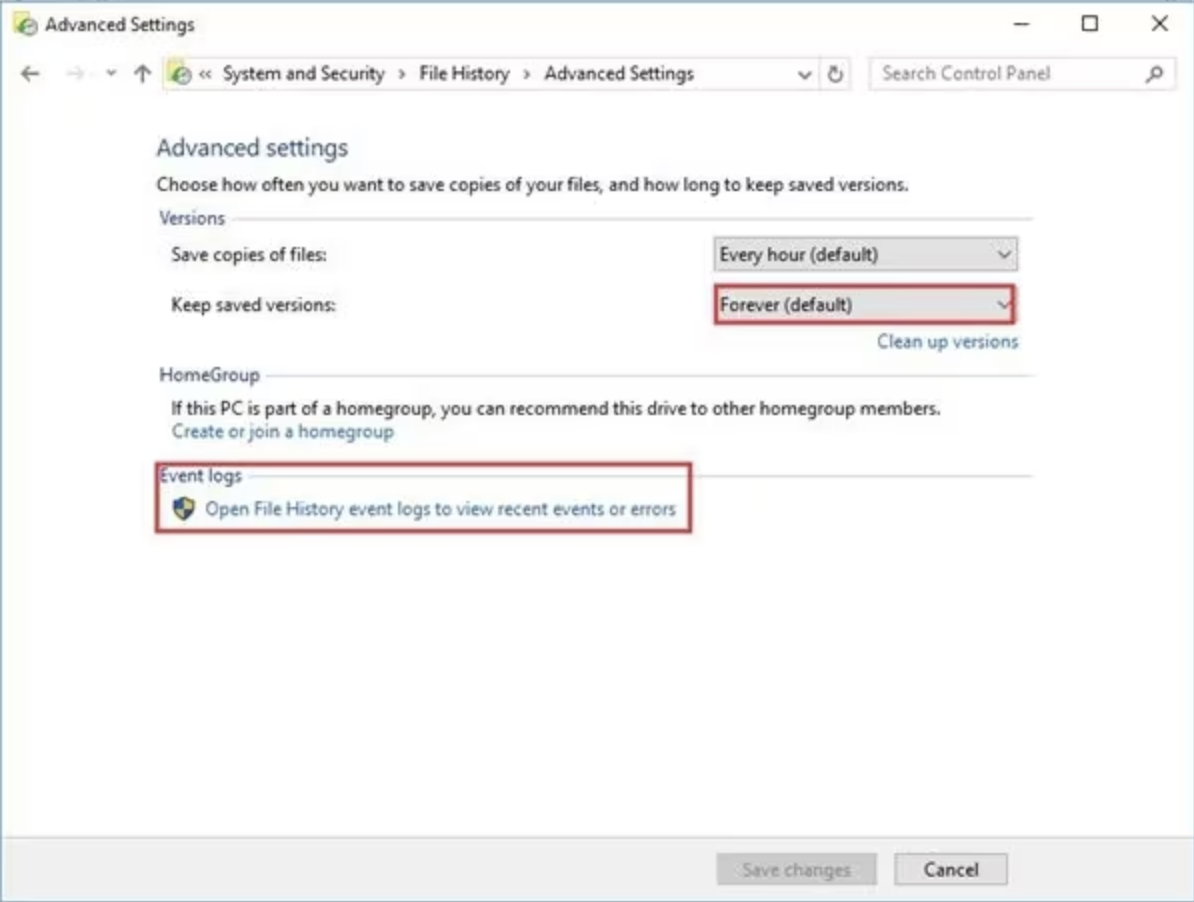
Go to Control Panel > File History > Advanced Settings.
-
Click Event logs, then select Open File History event logs.
-
Browse through recent log entries under “Administrative Events.”
Look for warnings or errors tied to File History.
-
Note the Event ID for deeper troubleshooting via Microsoft documentation.

Method 6: Switch to a Different Drive for File History
The error message file history doesn't recognize this drive indicates Windows has lost visibility into the selected backup drive's accessibility or validity. The drive becomes inaccessible due to corruption or improper removal or physical damage. The solution requires users to stop using the problematic drive and replace it with another one. Your backup process remains uninterrupted through this method because it allows backup operations to continue even if the original drive becomes unrecoverable.
-
Connect a different backup drive (external or internal) to your PC.
-
Open Control Panel > File History.
-
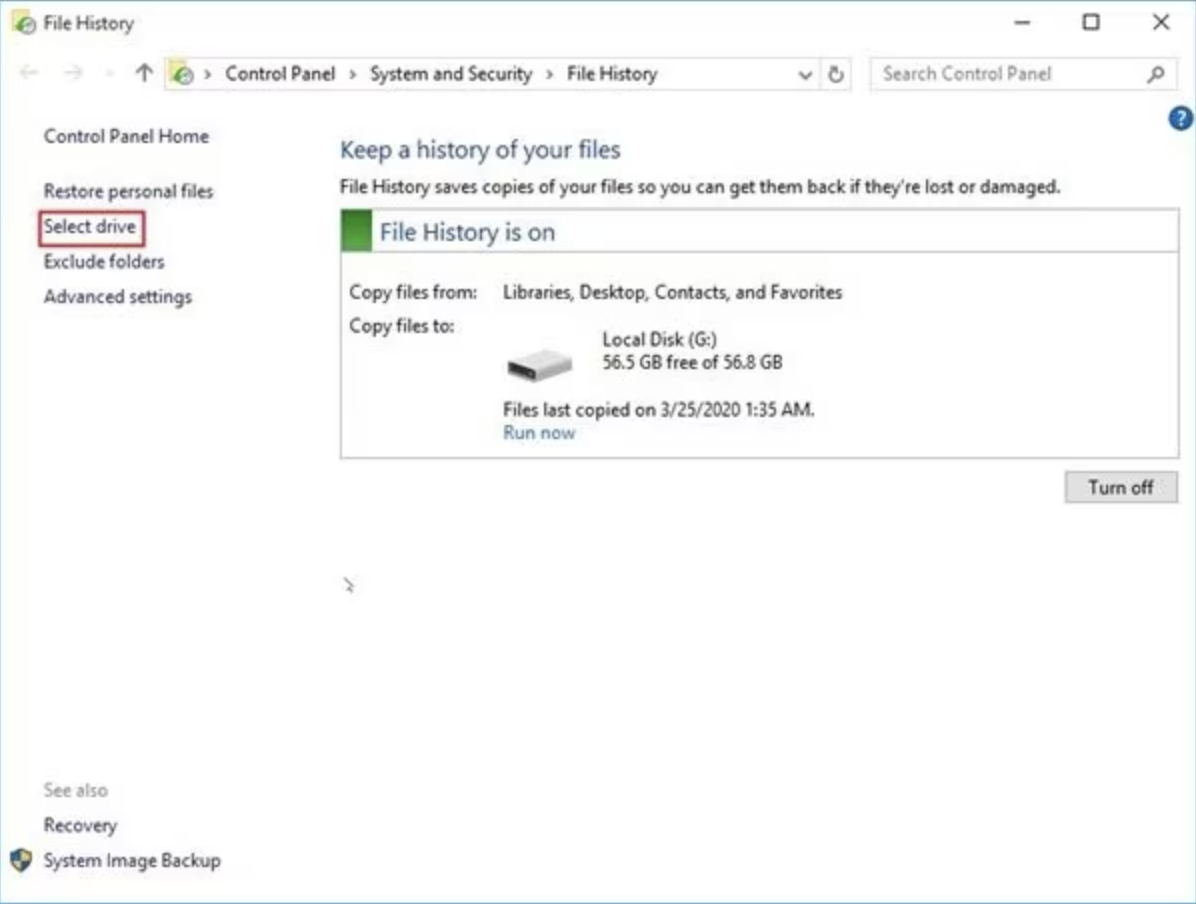
Click Select drive on the left panel.
Choose the new disk from the list.
-
Confirm the selection and restart File History.

Method 7: Set File Versions to Be Kept Forever
Windows automatically removes older backup versions to free up storage space after a predetermined time period. The backup system may prevent successful file recovery or rollback operations when earlier backups get deleted before you detect a missing file. The option to maintain saved versions indefinitely through setting adjustments prevents any data loss throughout time. Users who handle sensitive or project-based files should enable this feature because it ensures their data remains accessible.
-
Open File History from the Control Panel.
-
Click Advanced Settings.
-
Under Keep saved versions, select Forever from the dropdown menu.
-
Click Save Changes to finalize.

Part 3: Backup Windows Easily & Safely
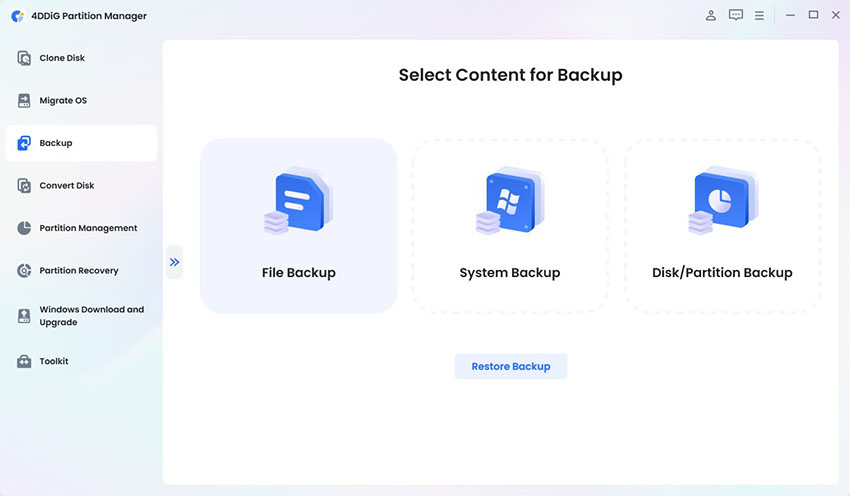
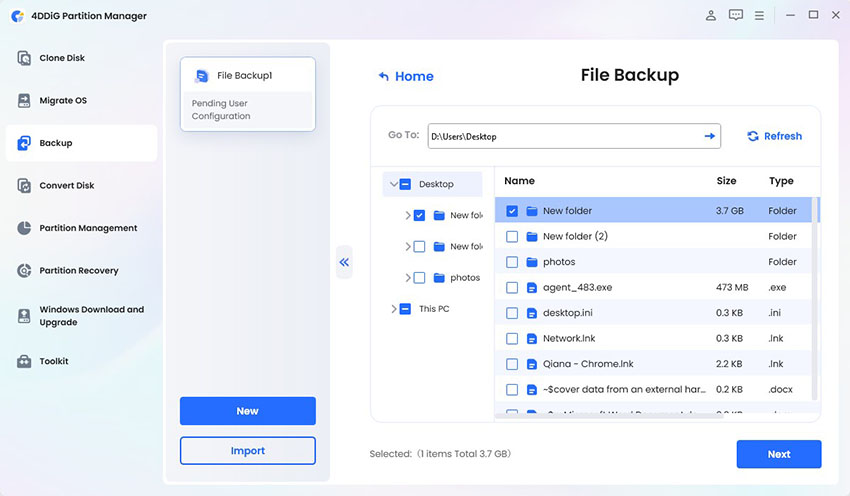
The constant Windows backup failures require you to switch to a different backup solution that provides both reliability and user-friendly features. The highly recommended tool 4DDiG Windows Backup provides both traditional Windows backup resolution.
The tool becomes particularly helpful when Windows built-in tools stop working or display errors such as file history doesn’t recognize this drive.
Secure Download
How to Backup Files Using 4DDiG Windows Backup
Follow the simple steps below to quickly and safely back up your computer:
-
Launch the Software
Download and install 4DDiG Windows Backup from the official website. Launch the application on your computer. On the main interface, click Create a backup task to start.
-
Choose Partitions to Backup
Now, you’ll see a partition selection window. Select the partitions you want to backup and a location to save the backup file. Click Start backup once you've selected the items.
-
Confirm to Start and Wait
Click Confirm on the pop-up dialogue. Wait for 4DDiD Windows Backup to complete the backup.
-
Complete the Backup Process
Now, you have a backup of your computer and your data will be safely stored in the location you specified.
Conclusion
A repetitive Windows 10 backup not working creates a situation where your essential files become exposed to system breakdowns and unintentional data loss. Windows Backup and File History fail because of various causes, including disabled settings and unrecognized drives, and corrupted services. The seven methods presented in this guide provide straightforward solutions that help restore your backup functionality.
The 4DDiG Windows Backup provides users with an exceptional alternative when they need a dependable solution with advanced features. The tool addresses backup problems while offering users one-click computer backup without causing data loss.


 ChatGPT
 Perplexity
 Google AI Mode
 Grok
Grok

