How to Transfer Data from One Switch to Another | Step-by-Step
For the estimated release of the Nintendo Switch 2 on April 2, 2025, a lot of users would like to transfer their data from the old Switch to the new one. Transferring data simply means that whether you're looking to keep save data, user profiles, or game progress you can pick right back up without missing a beat. In this guide, we explain how to transfer data from one Switch to another without experiencing any data loss, whether it’s a backup or any tips for dealing with your files.
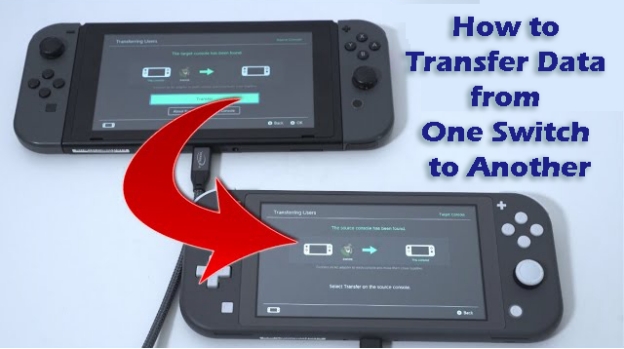
Part 1. Something You Need to Know about Nintendo Switch Save Data Transfer
The Switch doesn’t handle this as well as the other consoles I used in this experimental process. Transferring data between Nintendo Switch consoles involves several types of files:
- Game Data: The game files are already installed on your system or your SD card.
- Save Data: Get captures of your game progress and achievements.
- User Data: It contains profiles, Nintendo Account settings, and other user personalization information.
While it may sound like a complex process to transfer your data between your old and new Switch, it has multiple benefits including:
- Don't lose your hard work in the games ever.
- Continue to upgrade to the Switch 2.
- Maintain user profiles while on different devices.
Part 2. What Should We Prepare for Transferring Nintendo Switch Data [4 Things]
Before beginning with the data transfer, there are a few simple preparation steps that you need to take and we will elaborate on all of them in this section.
1. Transfer Switch Save Data to SD Card for Backup
It's important to make a backup of your saved data onto an SD card from the old Switch, to avoid losing data by accident. Here are the detailed steps. Before start, please ensure you have a Switch-compatible micro SD card.
-
Turn off your Switch and put your SD card into it (always into its back side).
-
Then turn on the console. On its home screen, tap on the System Settings option (like a cog icon).
-
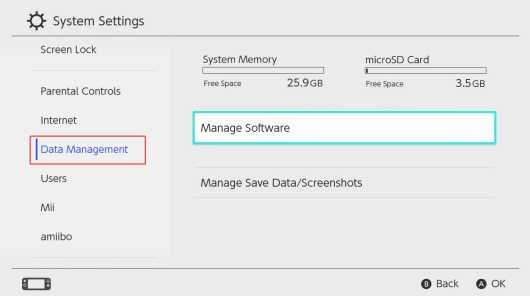
On the new screen, find and pick the “Data Management” label from the left and then touch on “Manage Software”.

-
Pick all games and activate the “Archive Software” option afterward. Pick “Archive” > “OK” when a prompt pops up.
-
Go back to the home screen and pick those games again. When a prompt displays, hot the “Download” button to start the data transfer to SD card.
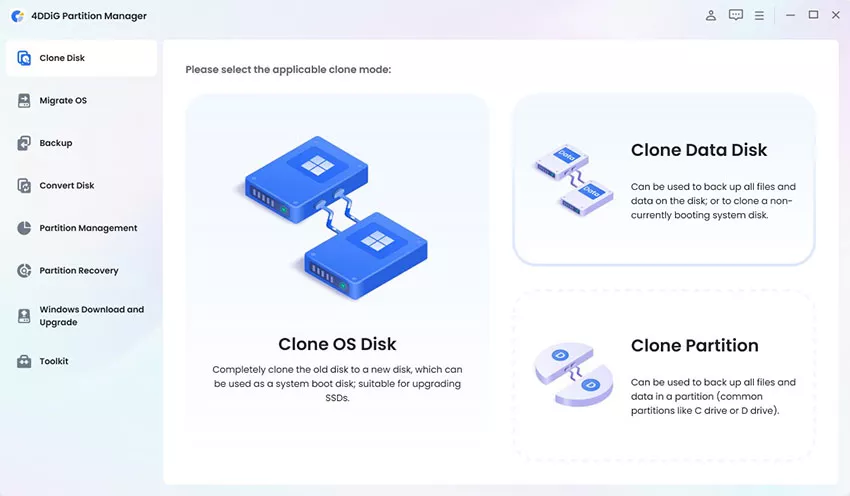
If you have moved the game data from the old Switch to a micro SD card but want to upgrade to a capacious SD card, don’t worry. It is not difficult to seamlessly share data between SD cards as long as you have an expert tool, such as 4DDiG Disk Copy. This powerful tool lets you enjoy no data loss while migrating data. You can also recover your drive in one step by cloning entire partitions or disks to new drives.
Secure Download
Main Features of 4DDiG Disk Copy
- Able to clone disk for hard drive or computer upgrade without data loss
- Make it much easier to transfer data between hard drives
- Make local backups for both entire disk and specific partition safely
- Migrate Windows OS to a new hard drive or a new computer without reinstalling the system
- Support multiple file systems: FAT32, NTFS, exFAT, and more
Step-by-Step Guide to Use 4DDiG Disk Copy
Follow the steps below to create a backup of your Switch micro SD card to another drive sfaely without data loss. Please connect the SD card from your Switch to your computer and connect the new SD card to the laptop too.
-
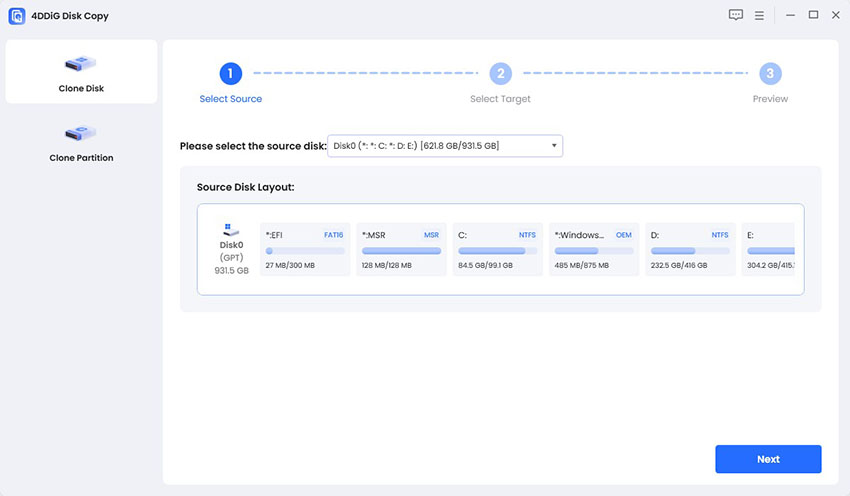
Open 4DDiG Disk Copy software. Here you will click the "Clone Disk" option, select the original micro SD card that contains the Switch data as the Source Disk, and then click "Next" to proceed.

-
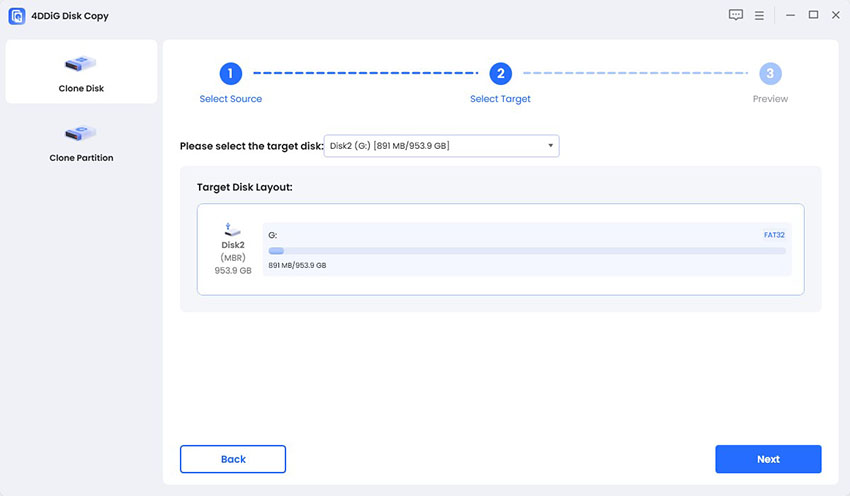
Select your new SD card as the Target Disk which can be any internal or external disk. Upon selection, click “Next” to proceed.

-
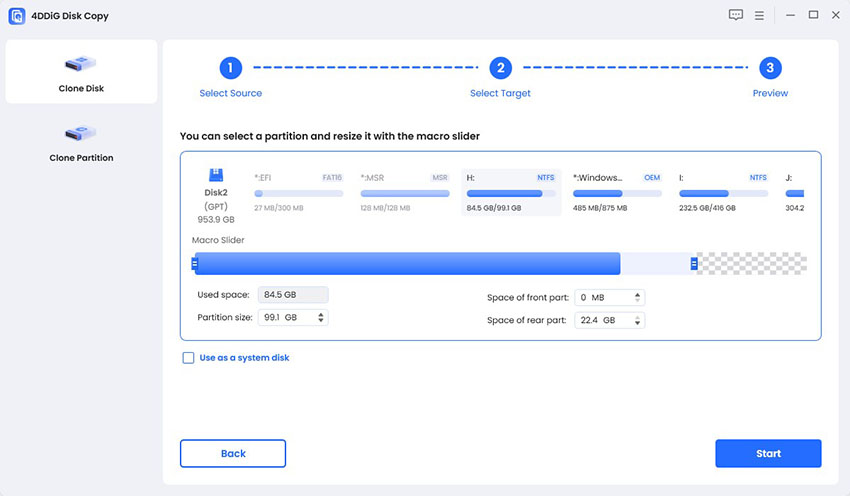
4DDiG Disk Copy will now display a preview of your data cloning that you can proceed by clicking "Start" and then click "Sure" to authenticate the process.

-
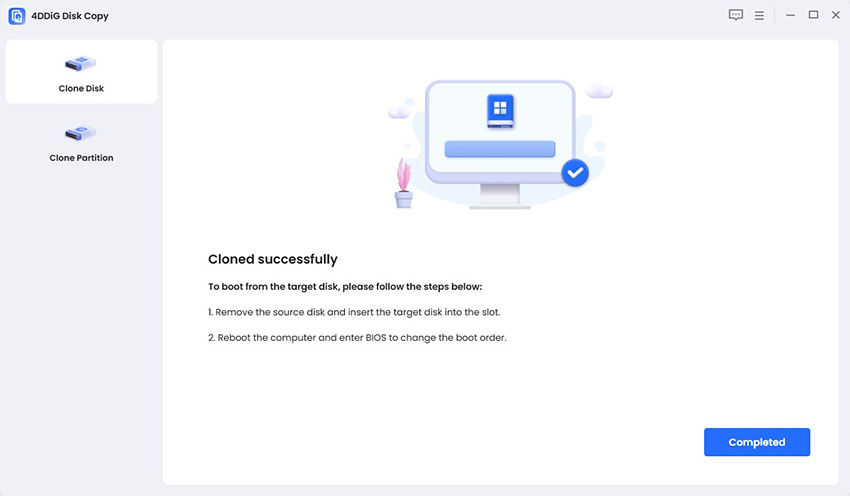
Now you just need to wait as 4DDiG clones your data for you and once you see the “Cloned Successfully” page you can click the “Completed” button and disconnect your SD Card.

Once the transfer is complete, the saved data file on the source console is deleted.
2. Ensuring both consoles are updated to the latest firmware.
To connect the source Switch to the target Switch and enable transfer features, the source and the target Switch must be running the latest firmware.
3. Save data can only be transferred between users that are linked to the same Nintendo Account.
Data saved in one profile cannot be transferred into another profile unless the profiles are linked to the same Nintendo Account. So, link your profiles accordingly.
4. Both consoles must have system version 8.0.0 or higher
Make sure that both consoles are running version 8.0.0 or higher. Additionally, they should be connected to the internet and placed near one another.
Part 3. How to Transfer Save Data from One Switch to Another
There's a direct way to move saved data between two consoles. It is a quick process and provides no data loss during the transfer.
On the source console:
-
On the home screen of Switch, tap on the cog icon to get into System Settings.
-
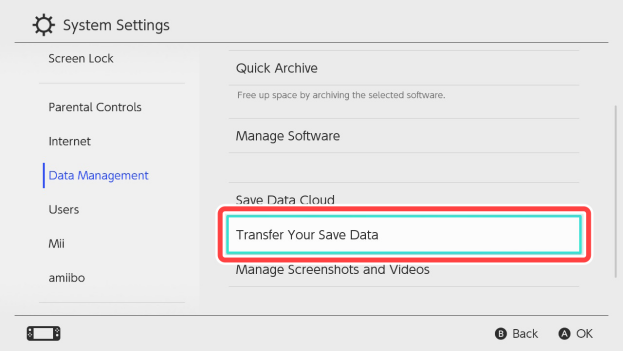
Under System Settings then pick “Data Management”. Here you will select "Transfer your Save Data".

-
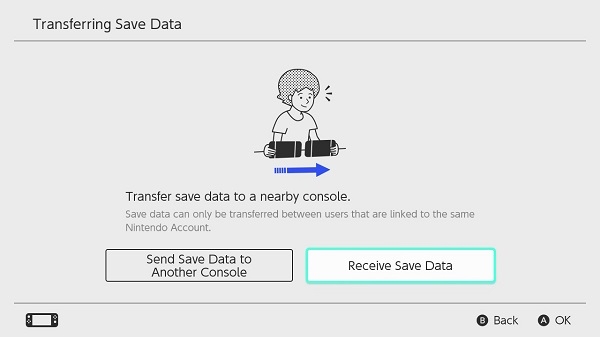
Choose “Send save data to another console” and proceed by choosing the user. Click “Send Save Data”
On the target console:
-
Under System Settings and click “Data Management”. Here you will select “Transfer your Save Data”.
-
Choose “Receive Send Save Data” and keep your consoles close

Data from the sources console will be deleted after a transfer, so make sure backups are present.
Part 4. How to Transfer User Data from One Switch to Another
Carrying over profiles, linked Nintendo Accounts and any personal settings requires transferring the user data.
On Source Console:
-
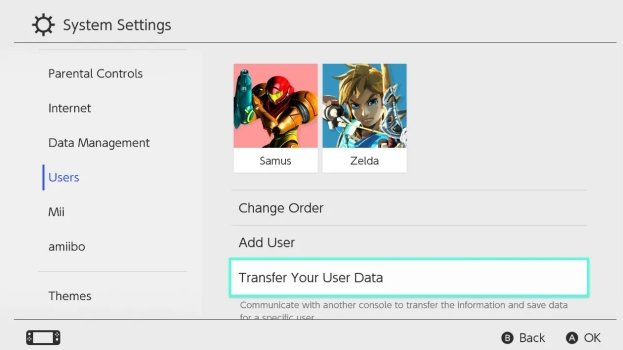
Select “System Settings” and then go to “Users” > “Transfer Your User Data”.

-
Select and send out the user data using the prompts. Click “Next” then “Next” again.
-
Now identify the source console, target console, and user that you want to transfer then click” Continue” and” Transfer” on the next screen.
On the target console:
-
Go to System Settings and here select Users then pick “Transfer Your User Data”. Click “Next” then “Next” and sign in with your Nintendo ID.
-
Continue the data transfer process on your new switch and once the data transfer is complete click “End” on both switches and you are done with the process.
Make sure that both devices are plugged in during the data transfer and that you have a stable internet connection.
Part 5. How to Transfer Animal Crossing Data to New Switch via Island Transfer Tool
Data from New Horizons cannot be backed up to the cloud. But Nintendo also has an Island Transfer Tool for moving your island and saving data from one console to another in a safe way.
-
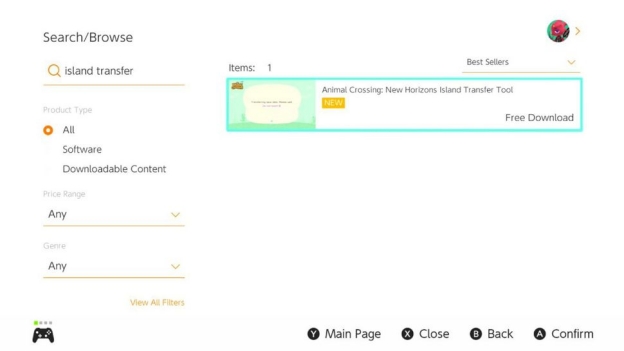
The Nintendo eShop on both consoles provides the free download of the Island Transfer Tool. Please get it from the eShop on the source and target consoles.

-
Launch the Tool on the old console, press the “A” button on the console and select “Continue.” from the screen.
-
You will be asked to make sure your two Switch consoles have got enough power. Then click “OK” > “Let’s Begin” > “Source” > “Yes” > “Continue”.
-
Once done, move to the new Switch. Open the Island Transfer Tool and use the A button to select “Continue” > “OK” > “Let’s Begin” > “Target” > “Proceed”.
-
Now, go back to the old Switch and choose “Continue” > “Transfer data”.
-
Wait for a while and you can receive the success transfer prompt.
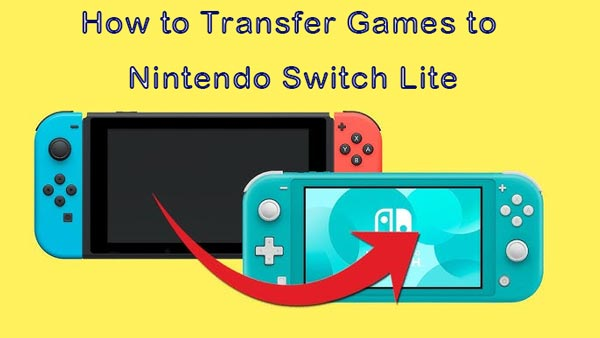
How to Transfer Games to Nintendo Switch Lite [Full Guide 2026]
Part 6. People Also Ask about How to Transfer Data from One Switch to Another
Q1: What happens when you transfer data from one Switch to another?
All save data and user profiles will be moved to the new console and deleted on the source device.
Q2: How long does it take to transfer data from one Switch to another?
It will take approximately from 5 to 30 minutes depending on the volume of data.
Q3: Will I lose my game progress if I get a new switch?
Basically no, as long as you transfer your saved data, also linking your Nintendo Account to the new console.
Q4: Can you transfer Nintendo Switch data from one SD card to another?
Yes, using tools such as 4DDiG Disk Copy, you’re able to migrate data without risk of any loss.
Q5: Can I make Nintendo Switch transfer save data without deleting it?
Inherently, save data transfer deletes just the file on the source console, but you can back it up if needed.
Conclusion
However, if the right steps on how to transfer data from one switch to another are followed, it's easy to transfer data between one Nintendo Switch and another. Preparation and the right tools are necessary e.g. no matter whether it is to upgrade to the Nintendo Switch 2, continue to game progress, or manage SD card storage. 4DDiG Disk Copy's cloning feature works flawlessly to back up or clone data on an SD card as a hassle-free solution.
Secure Download
💡 Summarize with AI:
You May Also Like
- Home >>
- Hard Drive >>
- How to Transfer Data from One Switch to Another | Step-by-Step
 ChatGPT
 Perplexity
 Google AI Mode
 Grok
Grok

