How to Format USB to FAT32 on Windows 10/11 without Limits?

5 mins read

Updated on 2026-09-17 15:42:09 to USB Recovery

Need to format a USB flash drive to FAT32 so it works on your TV, car player, or older devices, but Windows won’t show FAT32 as an option? This step-by-step guide covers 5 methods to format USB to FAT32 on Windows 10/11, from built-in tools (File Explorer, Disk Management, CMD, PowerShell) to a simple graphical tool that supports 64GB/128GB/256GB drives. Follow the method that fits your scenario, and if you lose files during formatting, we’ll also show you how to get them back.

Quick start: If you need to format a 64GB/128GB USB to FAT32 without using complex commands, jump to Method 1: Use 4DDiG Partition Manager.
how to format usb to fat32

Part 1: Why Should I Format USB to FAT32?

FAT32 is one of the most compatible file systems available. It works with many devices that may not support NTFS or exFAT.

  • Works with Windows, macOS, and Linux.
  • Compatible with many smart TVs, game consoles, car stereos, and media players.
  • Suitable for firmware updates and bootable USB drives.
  • Useful for older devices that do not recognize NTFS or exFAT.

Before You Start: Backup, Drive Size, and FAT32 Limits

Before you format a USB drive, make sure you understand the possible data loss and confirm that you have selected the correct device.

  • Back up important files: Formatting erases all data on the selected partition.
  • Check the drive letter: Confirm the USB drive letter in File Explorer before using any formatting command.
  • Check the drive size: Windows built-in tools may not offer FAT32 for drives larger than 32GB.
  • Choose the right file system: FAT32 has a maximum individual file size of 4GB.
Warning Warning

Double-check the selected disk or partition before formatting. Choosing the wrong drive may permanently erase your personal files.

Part 2: How to Format a USB Drive to FAT32 with 5 Methods?

Method Best For FAT32 Support
4DDiG Partition Manager All USB drive sizes (especially useful for large drives) Supports both ≤32GB and >32GB
File Explorer Quick formatting of small drives Limited to 32GB or smaller
Disk Management Managing existing partitions Limited to 32GB or smaller
Command Prompt Advanced users / scripting Usually limited to 32GB
PowerShell Automation and advanced tasks Usually limited to 32GB

Method 1: Format USB to FAT32 with Professional USB Formatter

When it comes to formatting USB drives, 4DDiG Partition Manager is a good choice. With its intuitive user-friendly interface, you can quickly get started with the USB formatting process using this tool. Moreover, this powerful tool supports formatting USB drives of various sizes, including 32GB, 64GB, 128GB, 256GB. Here's how to do:

  • Download and launch 4DDiG Partition Manager on your computer. Ensure your USB drive is connected to your computer. Then select "Partition Management" and right-click the USB drive that you want to format and select the Format option.

    FREEE DOWNLOAD

    Format USB to FAT32 in Clicks

    how to format usb to fat32
  • Select the desired file system (such as FAT32 or exFAT) and specify the volume label.

    how to format usb to fat32
  • Review the formatting configurations and click the "OK" button to initiate the formatting process.

    how to format usb to fat32 windows 10
  • Wait for the process to complete, and once finished, your USB drive will be successfully formatted to to FAT32.

    formatting a hard drive

Method 2: Format USB to FAT32 with File Explorer

Windows File Explorer can not only view and handle files, but it can also do essential disc management such as format flash drive to FAT32. If you don't want to use any software, you can format a USB drive to FAT32 on Windows 10/11 when the drive is 32GB or smaller.

  • Connect the USB drive to your Windows PC.

  • Press Win + E to open File Explorer, then select This PC.

  • Right-click the USB drive and select Format….

    format usb to fat32
  • Open the File system menu and select FAT32.

  • Keep the default allocation unit size and check Quick Format if appropriate.

  • Click Start, read the warning, and select OK to confirm. The drive should be prepared to use after this is completed.

Note

If the Windows Not Seeing FAT32 as Option to Format USB, this guide can help you resolve that.

Method 3: Forma Drive to FAT32 via Disk Management

Disk Management is useful when you want to view or manage the partitions on your USB drive. It is generally suitable for USB partitions up to 32GB.

  • Press Win + X and select Disk Management. Find your USB drive by checking its storage capacity and drive letter.

  • Right-click the USB partition and select Format….

    format usb drive to fat32
  • Select FAT32 as the file system if it is available.

  • Enter a volume label if needed and select Perform a quick format.

  • Click OK and confirm the formatting warning.

Once the process finishes, your USB drive will be formatted as FAT32.

Note

Use this tool with extreme caution. You will not be able to retrieve any partitions on your disc if you remove them by accident. Try Tenorshare 4DDiG Data Recovery to recover any lost data after formatting the USB via Disk Management.

Method 4: Format Flash Drive to FAT32 Using Command Prompt

You can use Command Prompt and DiskPart to format a USB drive. This method is intended for advanced users because selecting the wrong disk or volume may erase the wrong device. If you are not familiar with disk numbers, drive letters , or partitions, use 4DDiG Partition Manager instead of command-line tools.

  • Connect the USB drive to your computer. Search for cmd, right-click Command Prompt, and select Run as administrator.

  • Type the following commands one at a time. Press Enter after each command.

  • diskpart
    list disk
    select disk X
    list volume
    select volume Y
    format fs=fat32 quick
  • After the format process completes successfully, type exit to close DiskPart and Command Prompt.

Important Important

Replace X with the correct USB disk number and Y with the correct volume number. Verify the disk size carefully before running the format command.

Method 5: Format USB to FAT32 with PowerShell

PowerShell provides another command-line option for advanced users who want to manage storage devices or automate disk operations. The following DiskPart workflow can be launched from Windows Terminal or PowerShell with administrator privileges.

  • Connect the USB drive to your computer.

  • Press Win + X and select Terminal (Admin) or Windows PowerShell (Admin). Click Yes if the User Account Control prompt appears.

  • (Optional but recommended) Type the following command and press Enter to list all volumes and confirm the correct drive letter of your USB:

    Get-Volume
  • Run the following command (replace E with your actual USB drive letter):

    format /FS:FAT32 E: /Q
  • Type Y and press Enter if prompted to confirm.

  • Wait for the process to finish (this can take a long time on larger drives). When complete, type exit to close PowerShell.

FREE DOWNLOAD

Secure Download

Part 3: How to Recover Lost Data after Formatting USB to FAT32?

With above methods, formatting USB drive to FAT32 can be quite easy now. However, you may lose important data after formatting the flash drive. Tenorshare 4DDiG is a professional USB data recovery tool that can recover any lost, deleted or formatted files including videos, photos, audios, documents, etc. Now follow the steps below to figure out how to recover lost data after formatting USB to FAT32.

  • Recover data that was accidentally deleted lost due to formatting, partition loss, corruption, system crash, virus attack, and other factors.
  • Support to recover lost or deleted files from Windows/Mac/SD cards/external drives/USB drives/digital cameras, etc
  • Photos, videos, documents, and audio files are among the file types that can be retrieved.
  • 100% safe and easy to use.
  • Connect and select the USB
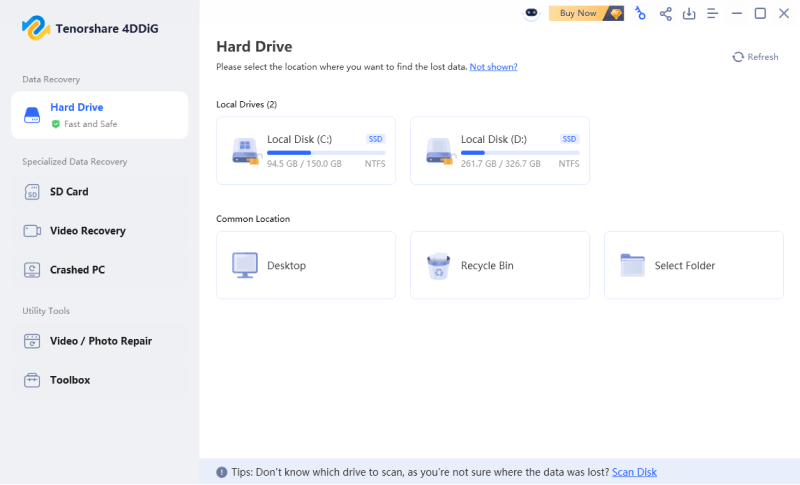
  • To begin, download and install Tenorshare 4DDiG Data Recovery. Start the program, connect your USB drive to the PC, and then pick the drive to begin scanning.

    4DDiG recover avast deleted files
  • Scan the USB Drive
  • Once the scanning starts, you'll see the recovered files as they are being found. You can preview these files. Once the scanning is complete go through the files that are found.

    scanning local disk
  • Preview and Recover Files
  • After discovering the target files, you may preview them and save them to a secure location. Please do not save to the same partition where you lost your data in the event of disc overwriting and permanent data loss.

    preview and recover files

More FAQs about Formatting USB to FAT32

1. Why can't I format USB to FAT32?

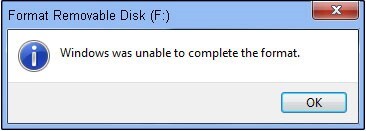
  • The size of the partition you need to format is greater than 32GB. You won't be able to format partitions larger than 32GB to FAT32 in Windows.
  • On a detachable drive, the partition that has to be formatted to FAT32 is not the first primary partition.
  • The USB drive has a write-protection feature.

2. How to format a USB drive to FAT32 for free?

You can do it free by following method 1, method 2, and method 3 mentioned above

3. What File System Should I Use for My USB Drive?

FAT32 is the most suitable file system for both older and newer computers (PC and Mac), as well as game consoles and other USB-connected devices.

4. Can I Format a 64GB or 128GB USB to FAT32 on Windows 10/11?

Yes. However, Windows File Explorer and Disk Management may not offer FAT32 for partitions larger than 32GB. To format a 64GB or 128GB USB to FAT32, use a dedicated FAT32 formatter such as 4DDiG Partition Manager or an advanced command-line method.

💡 How to Format USB Flash Drive to Fat 32 on Mac?

Summary

By thoroughly reading this article, you should now have a comprehensive understanding of how to format a USB drive to FAT32. Simply follow the provided methods diligently. Moreover, 4DDiG Partition Manager provides a reliable and user-friendly interface for formatting USB to FAT32. In the event of any accidental file loss during the formatting process, fear not, as the powerful 4DDiG USB Recovery tool can swiftly recover your files without hassle. Give it a try and experience its efficiency firsthand!

William Bollson (senior editor)

William Bollson, the editor-in-chief of 4DDiG, devotes to providing the best solutions for Windows and Mac related issues, including data recovery, repair, error fixes.

(Click to rate this post)

You rated 4.5 ( participated)