How to Create Partition in Windows 11 in 4 Ways
Creating a partition in Windows 11 can be crucial for organizing your files, setting up dual-boot systems, or even creating recovery options. However, many users encounter issues during partitioning, such as the dreaded "We couldn't create a new partition" error.
This article will guide you through how to create partition in Windows 11, ensuring you can manage your disk space efficiently. We'll also explore potential solutions to common problems that users face, such as the above-mentioned errors, and recommend tools to make the process easier and more effective.

Part 1: Is It Possible to Create Partition in Windows 11
Yes, it is entirely possible to create a partition in Windows 11. The operating system includes built-in tools like Disk Management and DiskPart, allowing you to partition your drives.
Certain restrictions might prevent successful partitioning, leading to errors such as "we couldn't create a new partition Windows 11." Thus, using third-party software like 4DDiG Partition Manager featuring advanced performances can be the best shot to avoid data loss.
Secure Download
Part 2: How to Create Partition in Windows 11
How to partition a hard drive Windows 11 is straightforward if you follow the correct steps. Here are four effective methods to get it done.
Method 1: Using 4DDiG Partition Manager [Recommend]
While testing, I also used other partition managing tools. Finally, I decided to recommend the 4DDiG Partition Manager for its high success rate and secure functionality with robust features. Particularly, this gadget makes it much easier to create new EFI or any other partition in Windows 11
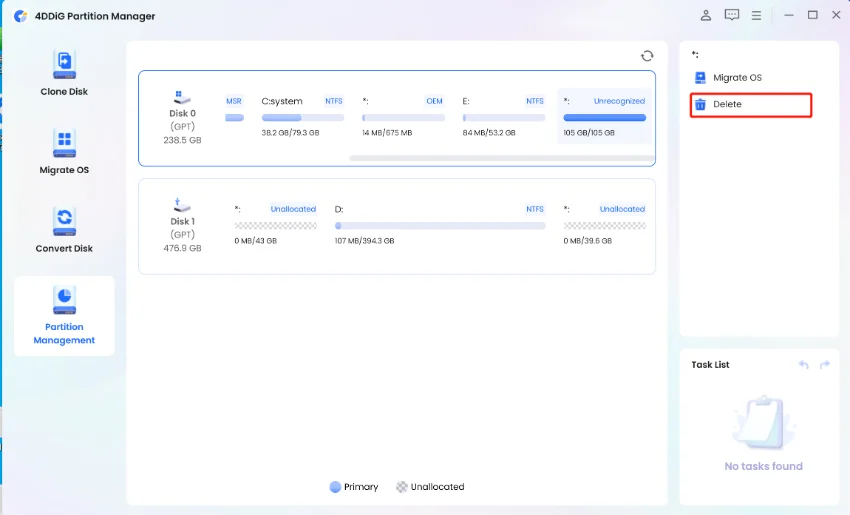
For those looking for a more comprehensive solution, 4DDiG Partition Manager is an excellent tool. It offers an intuitive interface and powerful features for managing your partitions, including creating, deleting, resizing, merging, and moving partitions without data loss. This efficient disk management tool has been downloaded for more than 4 millions times.
Appealing Features of 4DDiG Partition Manager
- Create Partitions: Built new partitions on various disks for clearer management.
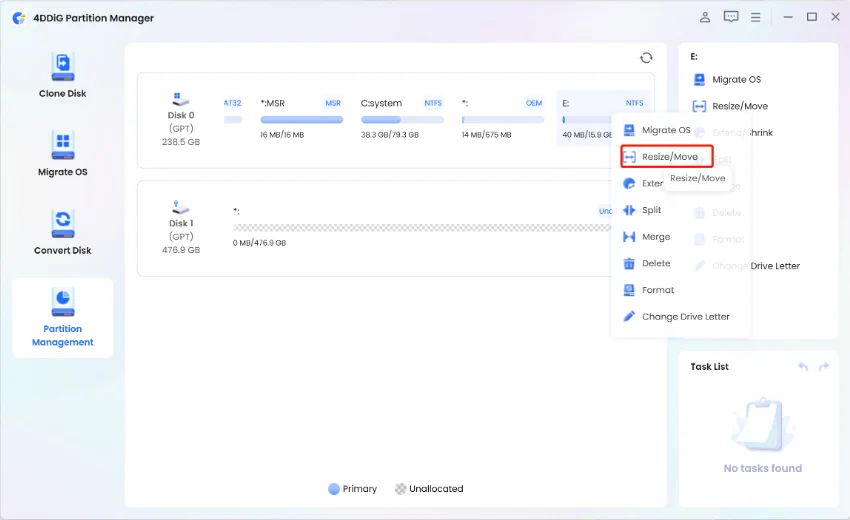
- Resize Partitions: Adjust the size of partitions without data loss.
- Clone Partitions: Simply back up and move data or files from one specified patition to another.
- Delete Partitions: Delete unwanted partitions and chage it to unallocated space.
- Recover/Repair Partitions: Recover damaged partitions or lost/inaccessible one and repair any partition erros.
- Extend/Shrink Partitions: Extend partition from unallocated space or shrink it to enlarge others.
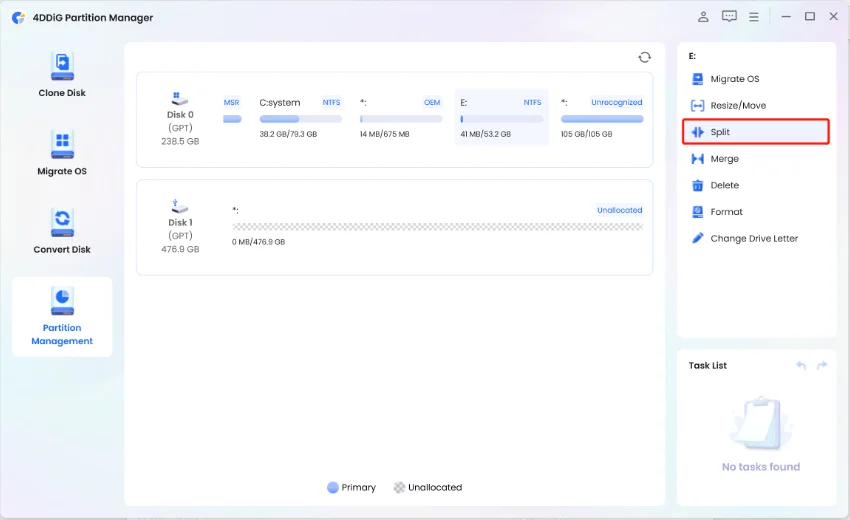
- Split Partitions: Split one partition to two partitions to save different data.
- Comprehensive Partition Management: Flexibily optimize your disk space according to your specific needs.
- Without Data Loss: Safely ensure the original data preservation.
Steps to Create a Partition with 4DDiG Partition Manager
-
Download the 4DDiG Partition Manager and install it on your computer.
FREE DOWNLOADSecure Download

-
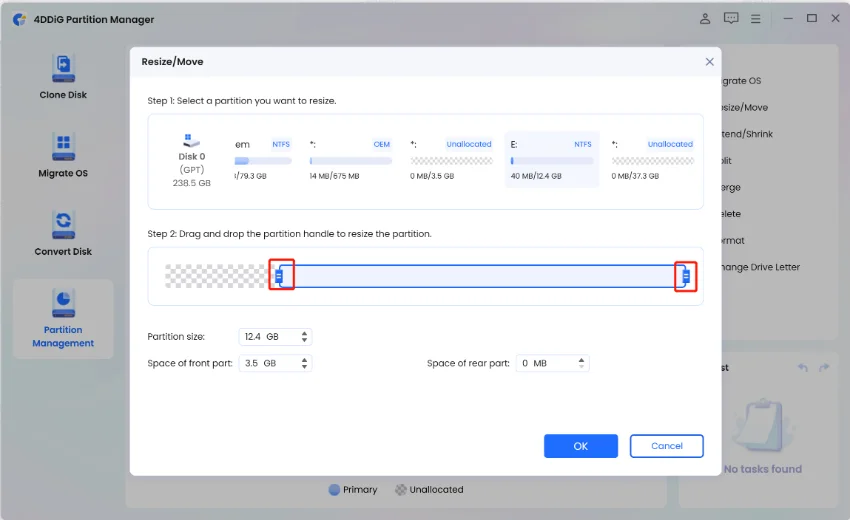
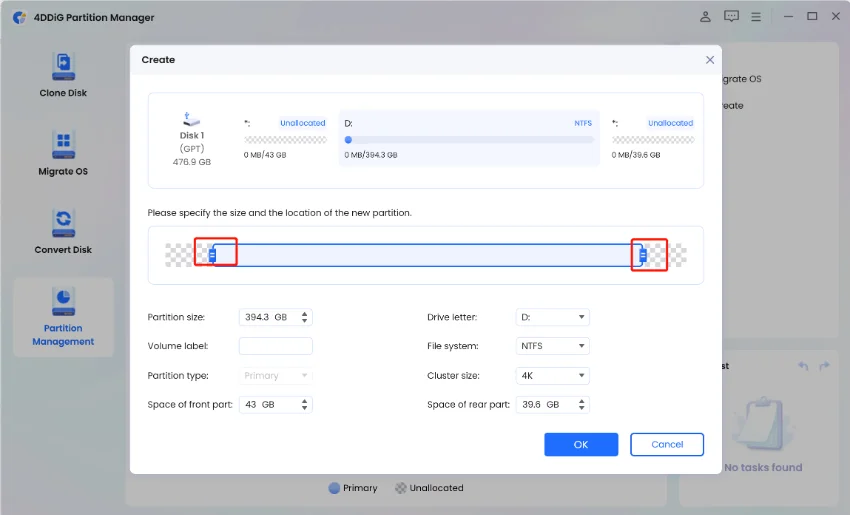
Open the software and select the disk to create a partition. Then clcik "Create".
Note:
If having unallocated space, we can create new partitions from the space. Otherwise, we need to shrink other prtitions to make room for the creating a new one.

-
Once selected, Set new parameters such as drive letter, size, file system (FAT16, exFAT, NTFS, or FAT32), and volume label for the new partition.

Method 2: Using Disk Management
Create new partition Windows 11 using Disk Management, a built-in Windows tool that allows you to easily manage your disk drives and partitions. Here's how to create a partition using this tool:
Right-click the Start button and select "Disk Management".
-
Right-click on the existing partition (usually C: drive) and select "Shrink Volume". Enter the space you want to allocate to the new partition and click "Shrink".
You will now see the unallocated space. Right-click on it and select "New Simple Volume". Follow the wizard to assign a drive letter and format the partition.

Method 3: Using DiskPart Command
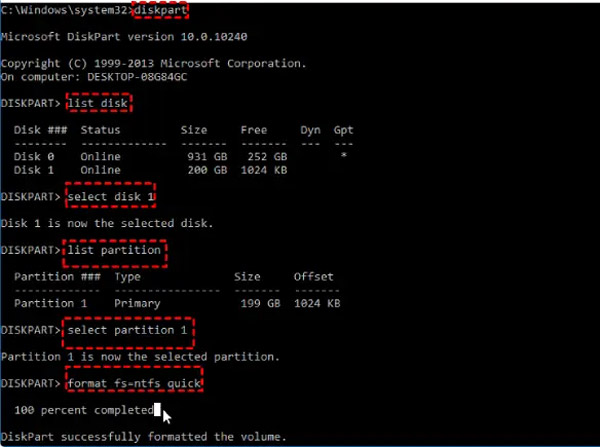
DiskPart is a command-line utility that provides more control over your partitions. Here’s how to use it:
-
Press the Win + R keys > type "cmd" > press Enter to launch Command Prompt.
-
Please type the commands below in subsequence:
- diskpart
- list disk (aims to see all the drives)
- select disk X (replace X with the disk number you want to create partition)
- create partition primary size=XXXX (replace XXXX with the amount of space in MB)
- format fs=ntfs quick (format the partition as NTFS)
- assign letter=X (replace X with your desired drive letter)

Method 4: Using Windows 11 Settings
If you prefer a more graphical interface, you can also create partitions through Windows 11 settings:
-
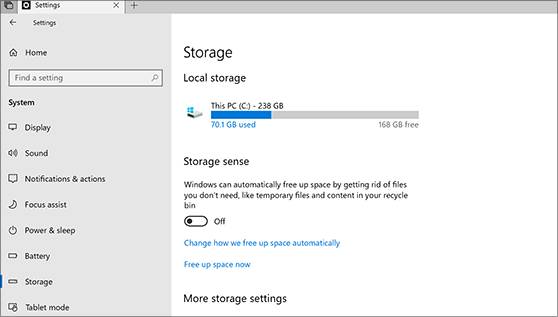
Press Win + I to open Settings, then go to "System" > "Storage".
-
Scroll down and click "Advanced storage settings", then select "Disks and volumes".
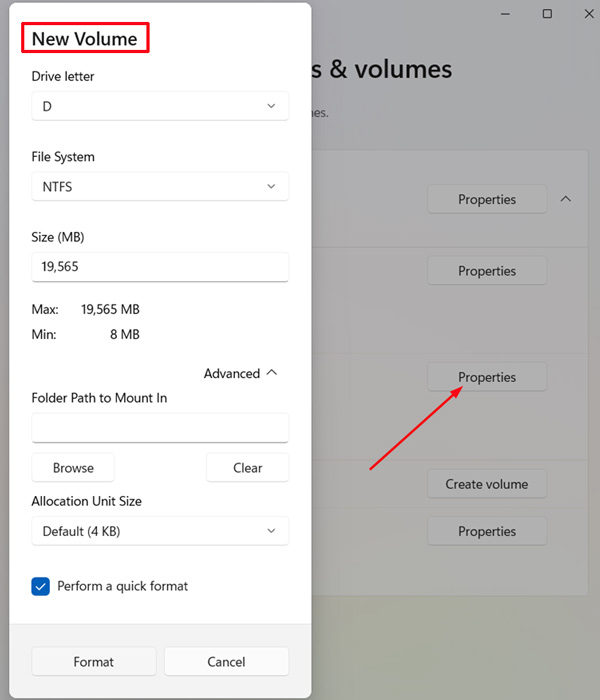
- Select the drive you want to partition and click "Properties".
-
Similar to Disk Management, you can shrink the volume and create a new partition with the unallocated space.

Part 3: Fix Issue: We Couldn't Create a New Partition Windows 11
If you encounter the "We couldn't create a new partition Windows 11" error during installation or while trying to create partition Windows 11, here are some potential fixes:
1. Disconnect Other Drives
Sometimes, having multiple drives connected can cause issues. Disconnect all other drives except the one you're installing Windows on.
2. Convert to GPT
If your disk is in MBR format, you might need to convert MBR to GPT, which is necessary when learning how to create EFI partition Windows 11. This can be done using DiskPart by typing convert gpt after selecting the disk.
3. Clean the Disk
Use create recovery partition Windows 11 DiskPart by cleaning the disk with the "clean" command after selecting the disk. Be cautious, as this will erase all data on the drive.
4. Use 4DDiG Partition Manager
If you prefer a more straightforward solution, 4DDiG Partition Manager can help resolve partitioning issues without data loss.
Final Words
Creating partitions in Windows 11 is possible and straightforward with the right tools and methods. You can manage your disk space efficiently by using built-in tools like Disk Management and DiskPart or opt for third-party software like 4DDiG Partition Manager. Always follow the correct steps and precautions, especially when dealing with errors like "We couldn't create a new partition."
Remember, creating a partition in Windows 11 doesn’t have to be daunting. With the right guidance and tools, you can easily organize your drives and optimize your system’s performance.
Secure Download

 ChatGPT
 Perplexity
 Google AI Mode
 Grok
Grok


