3 Best Ways to Recover DSS File
Download the 4DDiG Windows Data Recovery tool to recover lost DSS files effortlessly. Losing crucial DSS files during transferring or accidental deletion is a common issue, but recovery doesn’t have to be complex with a reliable data recovery tool.
DSS files, commonly used for audio recordings, can sometimes get lost or accidentally deleted, causing inconvenience. But don’t worry - recovering them is simpler than you think. In this guide, we’ll introduce three practical methods to help you recover DSS files effectively. Discover three reliable methods, including the powerful 4DDiG Data Recovery, to restore your lost files quickly and effectively.
- How to Recover DSS FileHOT
- Way 1: Use 4DDiG Data Recovery
- Way 2: Check for Backups
- Way 3: Contacting Dahua Technical Support

Part 1: Why Do Your DSS Files Get Lost
DSS files, commonly used for storing professional audio recordings, can be lost due to several reasons. Physical damage, such as accidental drops or exposure to water, can render files inaccessible. Accidental deletion is another frequent issue, often happening during file management tasks. Hard drive corruption, caused by system crashes or bad sectors, can prevent access to stored data.
Software failures, including sudden crashes or glitches, may also result in file loss if unsaved data is affected. Additionally, interruptions during file transfers - such as abrupt shutdowns or disconnections - can cause incomplete transfers or damage to files. Understanding these scenarios can help you take preventive measures and choose the right recovery methods when needed.
Part 2: How to Recover DSS File
Recovering DSS files effectively requires the right tools and approaches, especially when dealing with accidental deletion or file corruption. If you've lost important DSS files, advanced recovery methods like using specialized software can help restore them. One of the best solutions available is 4DDiG Data Recovery, which provides a comprehensive way to recover your data efficiently and without complications.
Way 1: Use 4DDiG Data Recovery
4DDiG Windows Data Recovery is a robust tool tailored for recovering lost or deleted DSS audio files. It excels in handling complex data loss scenarios such as accidental deletion, drive formatting, or even system crashes. DSS files, often used in professional settings for voice recordings, are particularly sensitive to corruption during storage or transfer. With 4DDiG Windows Data Recovery, users can retrieve these files with ease, ensuring no compromise on their quality or functionality. The software’s advanced scanning algorithms make it a dependable solution for recovering even severely damaged DSS files.
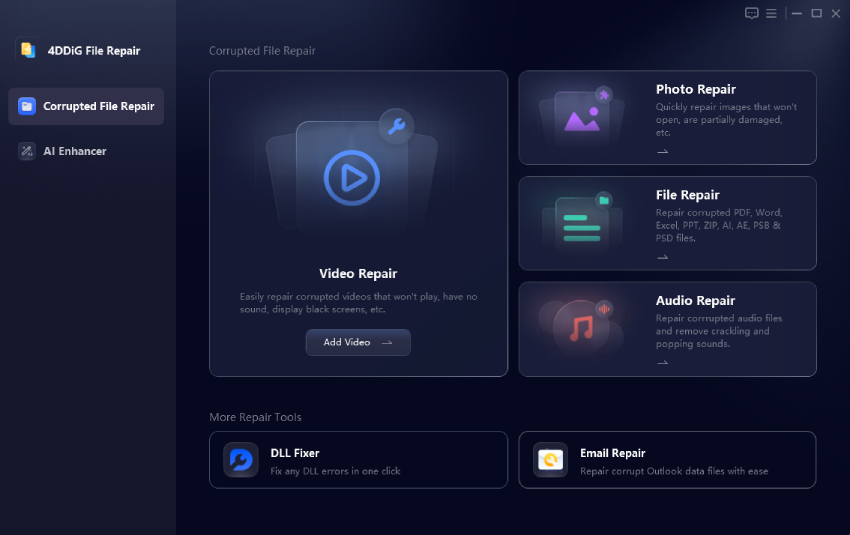
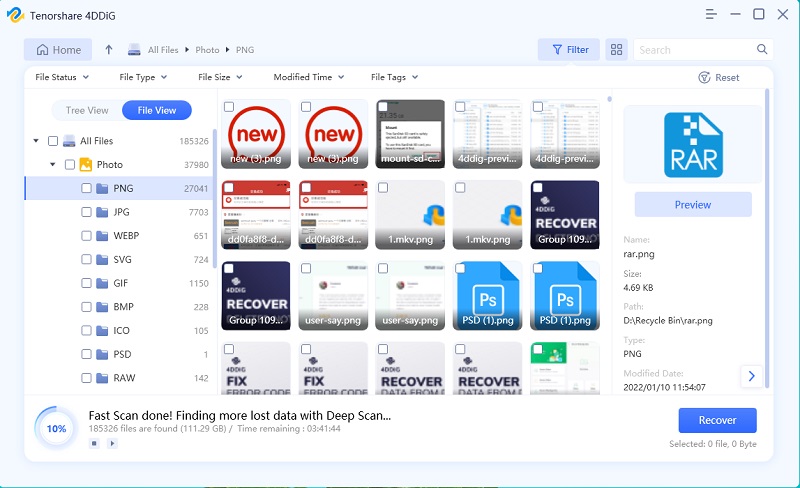
4DDiG simplifies the recovery process by allowing you to filter search results by file type. This feature is particularly helpful for audio professionals or users who need to recover DSS files quickly without navigating through a long list of unrelated data.
Here are some key features of 4DDiG that make it the ideal choice for DSS file recovery:
- Recovers DSS and over 2000 other file types, ensuring that all your data recovery needs are covered.
- Its scanning algorithms are optimized to locate and restore audio formats like DSS without distortion or loss of quality.
- Allows you to preview recovered DSS files before saving them, so you can confirm their integrity.
- Supports recovery from a range of devices including USB flash drives, external hard drives, SD cards, and more, making it a flexible choice for users handling DSS files across multiple platforms.
Secure Download
Secure Download
Here are some simple steps to recover DSS files using 4DDiG Windows Data Recovery:
-
Install and Launch
Download and install 4DDiG Windows Data Recovery on your computer. Open the program and select the drive or storage device where the TIFF file was stored.
-
Scan the Drive
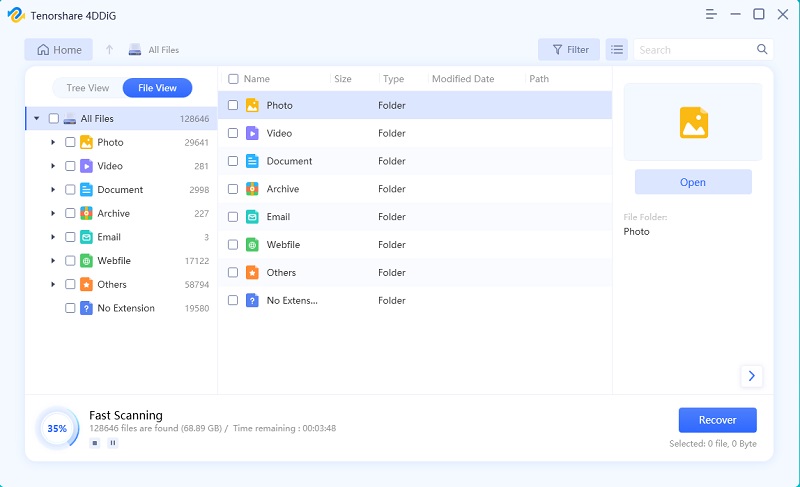
Initiate the scan using either Quick Scan or Deep Scan, depending on your needs. Use filters to narrow down the results by file type, such as images, for easier navigation.
-
Preview and Recover
Once the scan completes, preview the recoverable TIFF files to confirm their integrity. Select the desired files and click Recover, saving them to a secure location on your computer.

Way 2: Check for Backups
Backups are one of the most reliable methods for recovering lost DSS files. If you frequently work with audio recordings, especially using software like DSS Player Lite for DS2 files, it's crucial to create regular backups. Check your external drives, cloud storage, or even local backup folders for any previously saved DSS files. These backup copies can save you time and effort, ensuring your recordings remain accessible.
Follow these steps to recover DSS Files using backups:
-
Locate Your Backup Source: Search your external drives, cloud storage platforms (like Google Drive or Dropbox), or system backups for DSS files. If you’ve recently used a backup tool, check its output directory.
-
Restore the Backup Files: Once you find the DSS files, copy them back to their original or new location. Ensure they are properly stored on a reliable device to avoid future loss.
-
Verify File Integrity: Open the recovered DSS files using a compatible player, like DSS Player Lite, to ensure they are complete and free of corruption.
Way 3: Contacting Dahua Technical Support
If backup recovery doesn’t work, contacting Dahua Technical Support is a practical solution, particularly if you’re using Dahua recording devices. Their team specializes in troubleshooting hardware and software issues related to DSS files and can assist in recovering inaccessible or corrupted data. This approach is particularly helpful if the problem originates from proprietary recording systems.
Here are steps to contact Dahua Technical Support for DSS file recovery:
-
Gather Relevant Details: Before reaching out, collect information about your device, DSS file issues, and the steps you’ve already taken to recover them. This will help the support team assist you more efficiently.
-
Visit Dahua’s Official Website: Access the official Dahua website and locate their support section. Submit your query through their support form or contact their helpline.
-
Follow Their Recommendations: After contacting Dahua Technical Support, follow their instructions carefully. They may guide you through a specialized recovery process or recommend professional tools tailored for their systems.
Part 3: FAQs
Q 1: How to open the DSS file in HEC-HMS?
To open DSS files in HEC-HMS, you need to install the HEC-DSSVue software, a tool developed for managing DSS files. Once installed, launch the software, select "Open File," and navigate to your DSS file. You can then view or analyze the file’s contents. Ensure the DSS file is not corrupted before opening.
Q 2: How to Convert DSS Files?
DSS files can be converted to more common formats like MP3 or WAV for broader compatibility. Use dedicated audio converters, such as DSS Player Pro or online tools. Open the DSS file in the converter, select your desired format, and start the conversion process. Always verify the output file to ensure it retains the original quality.
Q 3: How do I restore an existing database?
Restoring an existing database involves using the backup copy. Locate your database backup file, often stored in formats like .bak or .dss. Open your database management software (e.g., SQL Server or HEC-DSSVue), select the "Restore Database" option, and upload the backup file. Confirm the restoration and ensure the database operates as intended.
Final Words:
Losing DSS files can be frustrating, but recovery is possible with tools like 4DDiG Data Recovery. Whether through advanced recovery software, checking backups, or seeking help from Dahua Technical Support, your valuable recordings can be restored efficiently. Download 4DDiG Data Recovery now to ensure a hassle-free recovery process for lost DSS files.


 ChatGPT
 Perplexity
 Google AI Mode
 Grok
Grok

