How to Fix Windows Cannot Run Disk Checking on This Volume Because It is Write Protected?
Discover how to solve the 'Windows cannot run disk checking on this volume because it is write-protected' error. Learn effective fixes and safeguard your data by downloading 4DDiG Recover Files from Hard Drive before considering formatting.
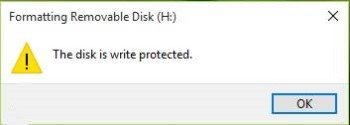
When your volume/drive is damaged or credited to Read Only, the error 'Windows cannot run disk checking on this volume because it is write protected' occurs. CHKDSK is a command-line service in Windows that allows you to search for poor sectors and check the authenticity of system files saved on your drive. Running the utility may occasionally prompt you with an error stating that the drive is distorted or write-protected. If one of your drives is write shielded, this implies you won't be able to modify or delete the files of that drive. Simply stated, write-protected demonstrates that the volume is set to read-only. In this guide, you’ll get the detailed fixes to resolve the issue of windows cannot Run Disk Checking on this Volume Because it is Write Protected.

Part 1. Why Windows Cannot Run Disk Checking On This Volume Because It is Write Protected?
A good illustration would be the write protection of USB sticks and SD cards, which happens to everyone sometimes and prevents you from copying the contents of the drive to the desktop or vice versa. It is safe to say that everybody confronts this error from time to time, which is generally caused by:
- Enabled Write protection on the drive: If your drive is set to read-only, the error cannot run disk checking because it is write protected will appear because of the limited permissions.
- A faulty drive: If your drive is broken or corrupted as a result of a bad system file contained in it, the error may appear.
Part 2: How to Fix Windows That Cannot Run Disk Checking?
Fix 1. Remove Write Protection via CMD
PRAM stands for Parameter Random Access Memory and it stores details like system configuration, display settings, hard disk configuration, etc. Likewise, NVRAM (Non-Volatile Random Access Memory) device, display, and other permanent system component details. You can reset the PRAM and NVRAM in 3 simple steps.
To begin with, there have been indications that the mistake was resolved using a distinct chkdsk instruction. This was recommended by Microsoft Support, so it is certainly worth a shot. What you must do is:
- Launch an elevated command prompt by pushing Winkey + X and then selecting Command Prompt (Admin) from the menu.
-
When it opens, enter the following: Chkdsk D: /f /r /x

- Press the Shutdown button to turn your Mac off.
Where D: is the defective drive, replace it as necessary.
The parameters mean the following:
- The /f parameter scans your drive for errors and attempts to repair them.
- The /r parameter will inspect your drive for and repair bad sectors.
- The /x parameter unmounts your drive, which means that if your drive is currently in use, it will no longer be so until the search is finished.
It's worth noting that some users have reported that their issue persevered even after attempting this, in which case you'll need to try the other solutions listed below.
Fix 2. Remove Write Protection via Diskpart
DiskPart is a command-line utility for creating partitions on your hard drive. It can be used to modify the properties of a drive, which is what we'll do here. This is how to put it to use:
- Go to the Start Menu and type in 'diskpart' to access it.
- Once the utility has loaded, enter: List volume
- Look at the listed volumes on your hard disk and type as: Select volume #
- All you need to do is replace # with another drive’s alphabet.
-
After that, type in : Attributes disk clear read-only

- Wait until it completes.
Fix 3: Clear Read-Only in Registry Editor
If the Microsoft remedy does not work for you, you can try removing the write protection through the Windows Registry. Windows Registry can cause serious problems, so make sure you cautiously follow the steps. Here's what you should do:
- Open Run by pressing the Winkey + R combination.
- Enter Regedit.
-
Once the Windows Registry is accessible, copy and paste the following into the address/location bar:
HKEY_LOCAL_MACHINE\SYSTEM\CurrentControlSet\Control\StorageDevicePolicies - Change the value of the 'WriteProtect' key from 1 to 0 by double-clicking it.
If you can't locate the StorageDevicePolicies folder in your Windows Registry, here's another option:
-
Copy and paste the following path into the address bar:
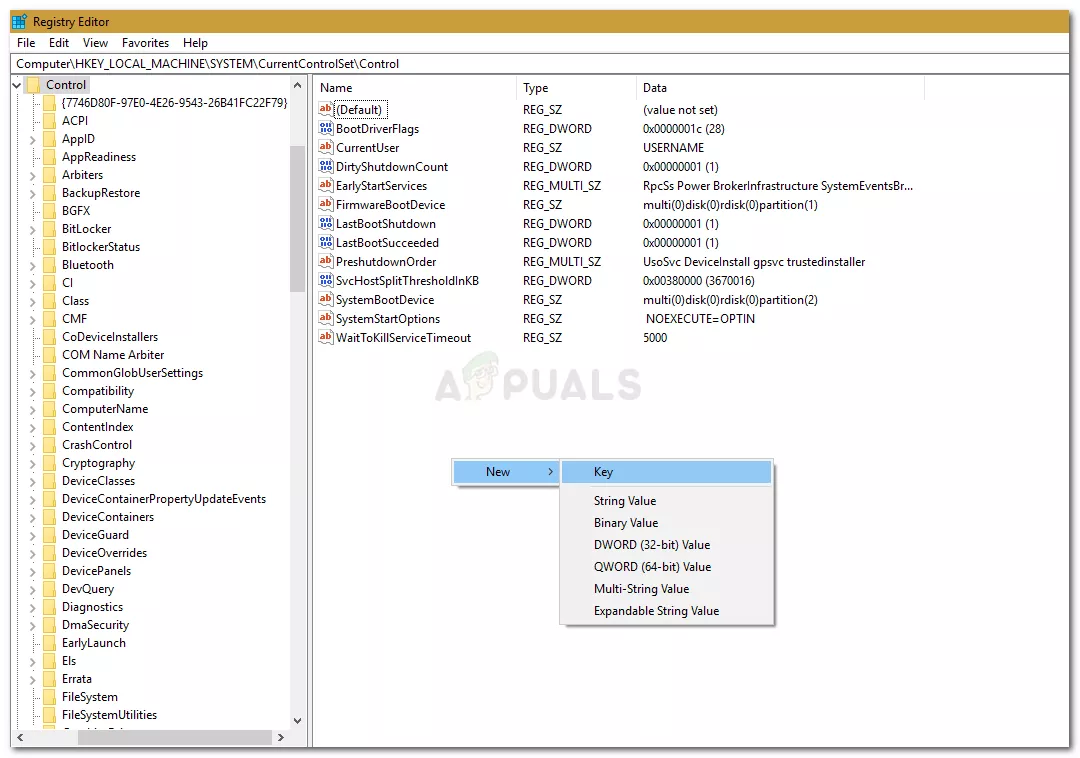
HKEY_LOCAL_MACHINE\SYSTEM\CurrentControlSet\Control -
Right-click in the mid pane and choose New > Key.

- A new folder called 'StorageDevicePolicies'will be formed. Make sure you don't misspell the name.
- Next, select the freshly formed folder, right-click in the middle pane, and choose DWORD (32-bit) Value.
- Give it the name WriteProtect and change the value to 0.
Fix 4: Scan Drive for Corruption
One final thing you can do to resolve this cannot run disk checking write protected error is to inspect your hard drive for corrupted files that is one of its causes. Here's how to go about it:
- Launch 'This PC.'
- Select Properties from the context menu when you right-click the faulty drive.
- Navigate to the Tools tab.
- When you're there, select the 'Check' option.
- If prompted by a UAC dialogue box, select “Yes.”
-
Wait for the scan to finish.

Fix 5. Recover Files from Hard Drive and Format It
In the digital environment, data loss is unavoidable. It is very simple to inadvertently delete sensitive information, causing you to worry about how to recover these files. Tenorshare 4DDiG data recovery is your best option for recovering all lost data on Windows/Mac computers from different failure scenarios such as deletion, formatting; Windows cannot run disk checking write protected errors, and so on, with satisfactory results.
- 4DDiG endorses over 1000 file formats, including NTFS, FAT, APFS, HFS+, HFS X, and others.
- 4DDiG can retrieve data from any medium, including Flash Drives, Hard Drives, Memory Cards, and so on.
- Data will be recovered fully using patented technology, keeping the original format and size.
- Quick scans provide a free preview then you can quickly locate your deleted files.
- 4DDiG claims 100% protection of files from being overwritten.
Secure Download
Secure Download
-
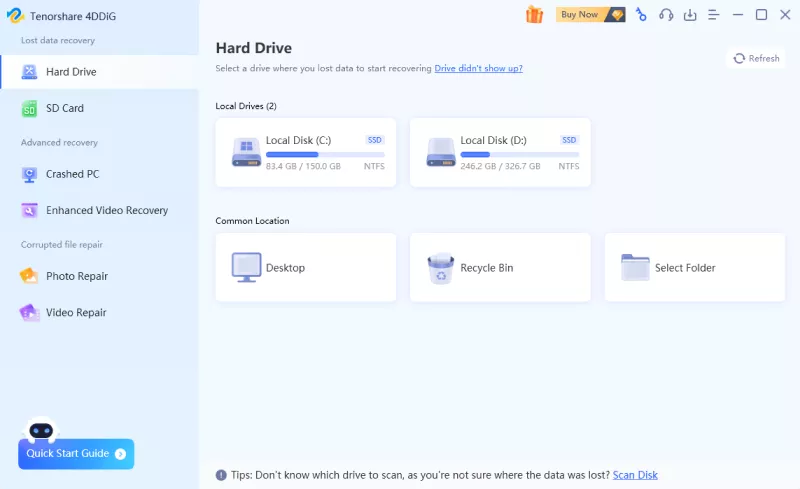
Choose a Local Disk
Once the installation of Tenorshare 4DDiG Windows Data Recovery is done, you’ll see the default home display. To format a drive to retrieve data from a write-protected disk, choose the drive and click start to proceed.

-
Scan Hard Disk Drive
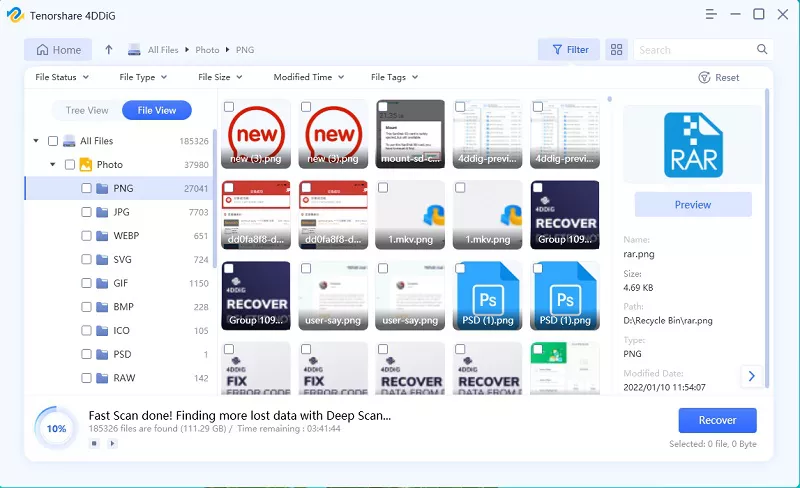
4DDiG instantly scans your chosen hard drive all over for lost data. As 4DDiG continues to find deleted files on the drive, it records the digitized items in Tree View and File View. An advancement bar shows how far you've come. You can also wait or stop the scanning at any time especially as you've discovered the files you want to retrieve.

Following that, you can see the monitoring result, which demonstrates how many files were found. If you are unable to locate the desired lost data, you can perform a Deep Scan at the underside of the interaction to recover deleted files, which may take some time.
-
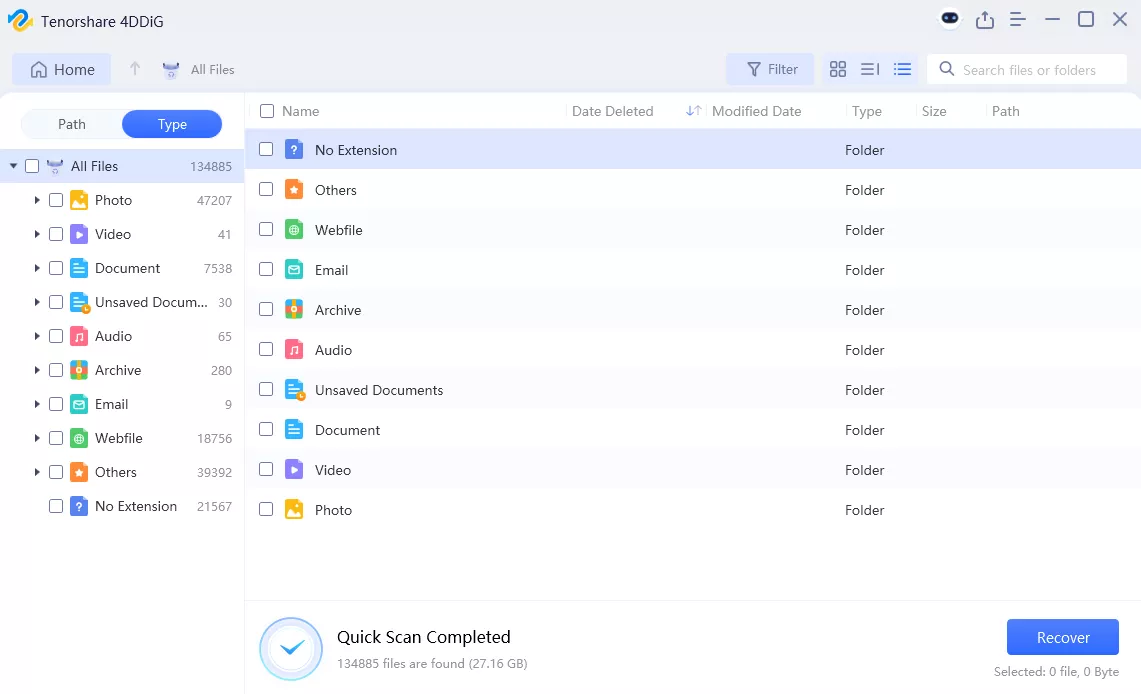
Preview and Select Files to Recover
Tenorshare 4DDiG allows you to preview and recover various file types. You can choose specific file categories, preview them for verification, and then recover them by clicking "Recover." When you click "Recover," a dialog box will prompt you to select a destination for the recovered files. After selecting your preferred location, click "OK." Your files will be successfully recovered. To avoid data loss from disk overwriting, never save the recovered files to the same partition where they were deleted.

FAQs
1. How do I run chkdsk on write-protected?
When you see the CHKDSK /f volume is write-protected problem, as per Microsoft support, you can try some other command in CMD: chkdsk/ f / r / x. Try it by typing others like Chkdsk F: /f /r /x and hit Enter. You can change F to another drive letter.
2. How do you fix Windows that can't check the disk while it's in use?
If you get the message"Windows didn't verify the disk while it's in use," you can either click "Schedule disk check" or Cancel the scan. We recommend scheduling a disk check and restarting your Windows 7 computer. When it reboots, you only have 10 seconds to withdraw the operation by pressing any key.
3. How do I unprotect my hard drive?
- Perform a disk check. Install the boot disk or USB drive and turn on the desktop.
- Check the system files. As in stage one, boot the computer from the disk or USB.
- Carry out a startup repair.
- Perform a system restore.
- Restart your computer.
4. Why can I not run Chkdsk?
Start a cmd as Administrator in Windows. Run Chkdsk with the "/f" (fix filesystem data errors) or "/r" (repair disk physical errors) options. As you'll see, the result is "Chkdsk cannot run because the volume is used by some other process." Running windows is also considered a specific task. Chkdsk must be the only program that has access to a disk in terms of fixing or repairing it. In the error message, volume is merely another word for the disk, or more precisely, partition; the process is another word for the program. If another program has a file accessible on the disk, it's regarded as "in use," and Chkdsk won't be able to get the entirely separate access it requires.
Conclusion:
The solutions vary based on why you are facing "Windows cannot run disk checking on this volume because it is write protected." we have discussed various Solutions to Chkdsk Write Protected. The cause for the error Windows cannot run disk checking on this volume because it is write protected windows 10 are quite explicit. As a result, the solutions to the error are obvious: remove write protection or repair file system errors. We hope one of the outlined fixes can assist you in completely repairing your faulty hard drive. However, Tenorshare 4DDiG is a highly recommended and professional tool to assist you with a crashed drive to recover your precious data with very easy steps.
💡 Summarize with AI:
You May Also Like
- Home >>
- Windows Recovery Solutions >>
- How to Fix Windows Cannot Run Disk Checking on This Volume Because It is Write Protected?



 ChatGPT
 Perplexity
 Google AI Mode
 Grok
Grok

