Have you ever lost a cherished media file? It can be heart-wrenching, especially if the file is important to you for work or personal reasons. In this digital age, media files are essential. No matter what purpose the files are being used for, losing access to precious files can be stressful and frustrating. Thankfully, there are ways to recover media file, even if it's seemingly gone forever. Are you looking for ways to recover your lost or damaged media files? Fortunately, you've come to the right place. This blog post will outline several methods to recover media files. We will also provide a detailed guide on how to use each method. You don't have to worry about losing photos, videos, or music files! Let's get started.
Part 1: The Overview of Media File
Before we get into file recovery methods, it's important to understand what media files are. In short, media files refer to any type of digital file that can be viewed, played, or accessed on a device. This includes photos, videos, and music files. In other words, media files are those digital memories you hold dear to your heart. There are a variety of formats available for media files. The most common photo format is JPEG, while MP4 is a popular video format. As for music files, the common formats are MP3 and AAC. There are other less common formats, but these are the three that you're likely to encounter.
Part 2: Causes OF Media Files Being Deleted or Lost
Accidental deletion or loss of media files in your computer has become a reality that most people have to face. The following demonstrates several reasons for the deletion or loss of media files.
- Deletions caused by objective reasons:
- Malware or viruses:
- Hide files feature:
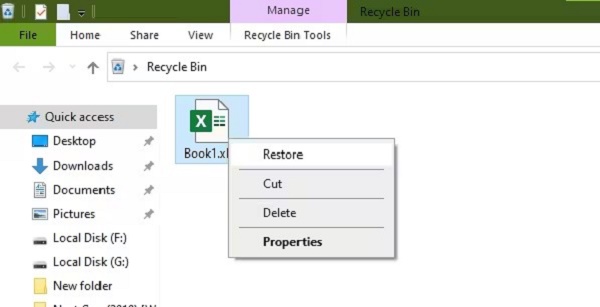
Some media files are deleted from your computer and it is possible that this happened accidentally. However, if you delete media files and empty the Recycle Bin folder, these files will be permanently deleted from your computer.
Either malware or viruses may attack media files in your computer. Media files may be lost or deleted, but you can use Tenorshare 4DDiG to recover these files.
When you use this feature, the media files will be hidden. And you do not set to show hidden files, you will default your media files are lost or deleted.
Part 3: How to Recover Media File from PC?
The process of recovering media files from your PC can be accomplished in a few different ways. Here are a few of them. If you're using Windows 10 or 11, then you're in luck. This is because Windows 10 and 11 have a feature called File History. File History automatically backs up files on a regular basis. If a file is accidentally deleted, You can use the File History backup to restore it. To access File History, open the Start Menu and type in "File History." Once you see the File History option, it has a file History feature. Simply click on it to open the File History window. In the File History window, you will see a list of all the files that have been backed up. To restore a file, simply find it in the list and click on the "Restore" button. As soon as the file has been restored, it will return to the original position.
Solution 1: Recover Media File from File History
If you're using Windows 10 or 11, then you're in luck. This is because Windows 10 and 11 have a feature called File History. File History automatically backs up your files on a regular basis. By using File History, you can simply restore a deleted file if you accidentally deleted it. Follow the steps given below:
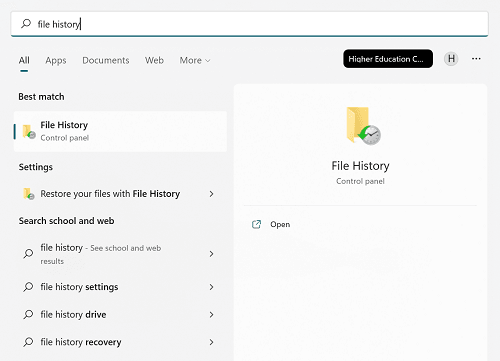
Step 1: To access File History, open the Start Menu and type in "File History". Once you see the File History option, it has a feature called File History. Simply click on it to open the File History window.
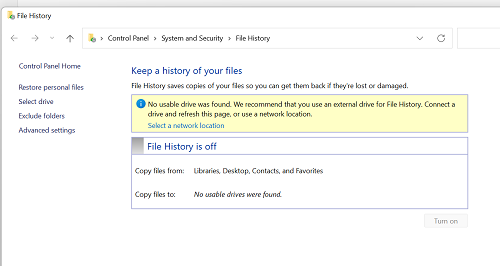
Step 2: In the File History window, you will see a list of all the files that have been backed up.
Step 3: To restore a file, simply find it in the list and click on the "Restore" button. Once the file has been restored to its original location , it will be placed back in its original location.
File History must be enabled on your computer for this method to work. If you're not sure, then you can check by opening the control panel and going to the system and security. In the Update & Security section, click on the "Backup" tab. If you see the "File History is turned off" message, then you will need to enable it.
Solution 2: Restore Media File from Previous Version
If you don't have File History enabled, then your next best bet is to restore a previous version of the file. In a restore point, Windows automatically saves copies of files and folders from previous versions. That way, if you ever accidentally delete a file or make changes to a file that you later regret, you can simply restore the file to a previous version.
Step 1: To access the previous versions of a file, right-click on the file and select the "Properties" option.
Step 2: In the Properties window, click on the "Previous Versions" tab. You will now see a list of all the previous versions of the file.

Step 3: To restore a previous version, simply select it and click on the "Restore" button. The previous version of the file will then be restored.
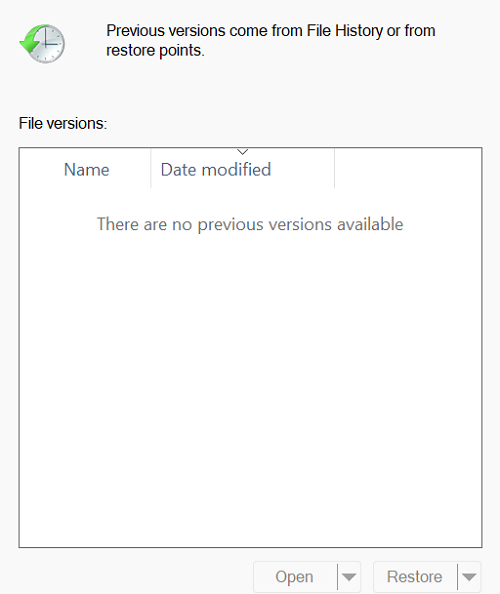
This solution has the drawback of only working if your computer has a restore point. If you don't have a restore point, then this solution won't work for you.
Solution 3: Recover Media File Uing Tenorshare 4DDiG
If you have lost media files like photos, videos, or audio files from your computer and are unable to recover them, then you can use Tenorshare 4DDiG data recovery software to recover them. This data recovery software can recover lost or deleted files from hard drives, SSDs, USB drives, and memory cards. It supports file types like photos, videos, audio, documents, emails, etc. The software works both on Mac and on Windows, and on Mac, you no longer need to disable SIP to use this software.
- Recover files lost by accident, corruption, virus assault, and so on.
- Recover deleted files not In Recycle Bin.
- Recover data from SD card/ USB flash drive/ external storage devices, etc.
- Support recovery of 1000+ file types, such as photos, videos, audio, documents and others.
- Support Windows 11/10/8/8.1/7 and Mac
- No any viruses or malware.
To use Tenorshare 4DDiG, follow the three easy steps below:
For PC
Secure Download
For MAC
Secure Download
- Select a Local Disk
- Scan the Selected Disk
- Preview and Recover Files from the Local Disk
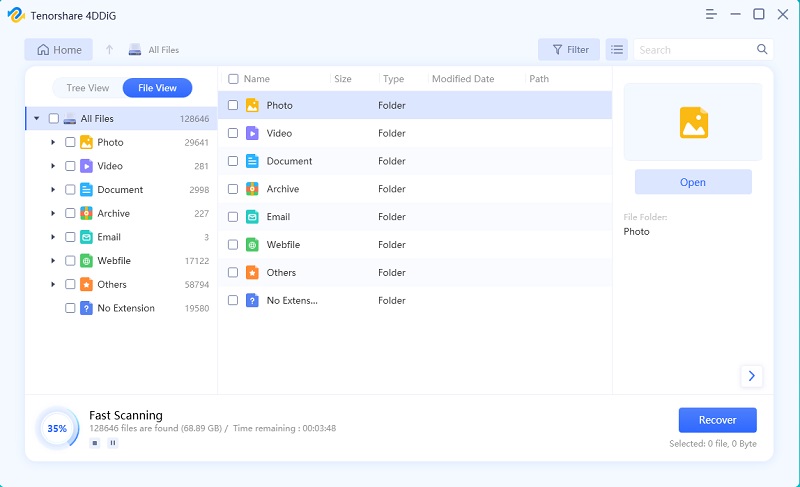
Once you have installed the software, you will see a home screen that includes data recovery and advanced options. You will see a list of hard drives where you need to select a disk in order to recover data, and once you choose the file type, it will automatically start scanning.
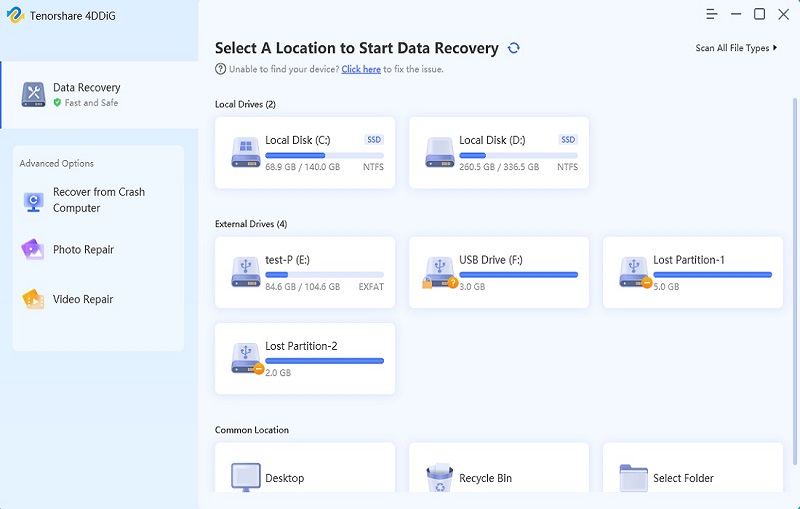
After you identify the files you want to recover, 4DDiG immediately checks the selected drive for missing data all around, and you may pause or stop the search at any time. In the Tree View, you can find categories such as Deleted Files, Existing Files, Lost Location, RAW Files, and Tag Files. In the File View, you can also view file types such as Photos, Videos, Documents, Audio, Emails, etc. Using the right side of the panel; you can also search for target files or use Filters to narrow down your search.
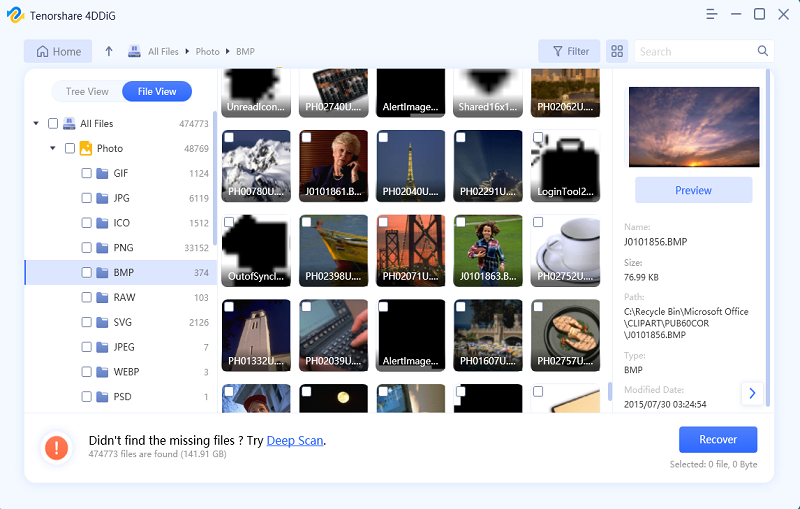
Once the target files have been discovered, you can preview them and recover them in a secure location. Please do not save your data to the same partition where you lost it in the event of disk overwriting and permanent data loss.
Solution 4: Get Media File Back via the Windows Backup Function
If you're not using File History and you don't have any restore points saved, then your last resort is to use the Windows backup function. The Windows backup function is a built-in feature that allows you to create backups of your files. Whenever necessary, you can restore your files using these backups.
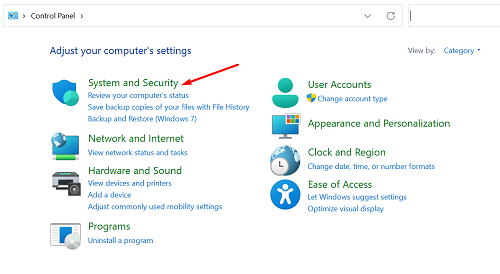
Step 1: To access the Windows backup function, open the Control Panel and go to the "System and Security" section. Find the Backup and Restore option in System and Security and click on it.
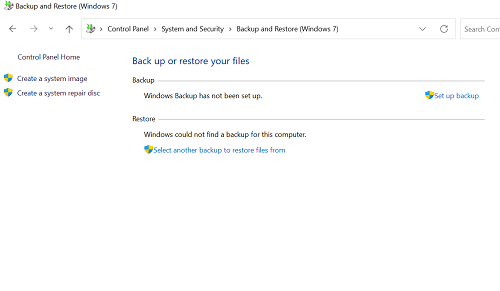
Step 2: In the Backup and Restore window, you will see two options: "Create a system image" and "Create a system repair disc." You want to click on the "Create a system image" option. This will open the "Create a system image" wizard.
Step 3: In the "Create a system image" wizard, you will be asked where you want to save the backup. You can save it to an external hard drive, USB flash drive, or network location. Once you've selected a location, click on the "Next" button. The next step is to select what to include in the backup. You want to make sure that the "Include a system image of drives: System Reserved, C:" options are selected.
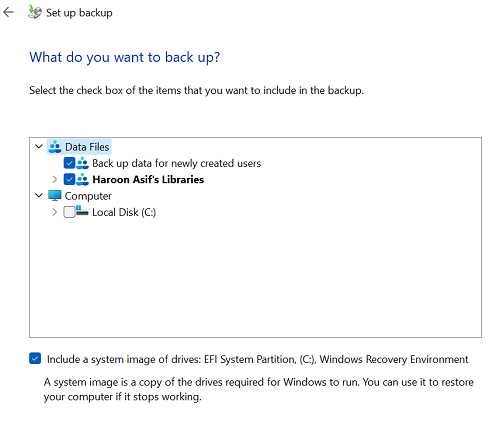
Step 4: Once you've made your selections, click on the "Next" button. The next screen will ask you to confirm your selections. Ensure that everything is correct before clicking "Start backup." The backup process will now start, and it may take a while to complete.
Your files can be restored after the backup has been completed. Simply open the Control Panel and go to the "System and Security" section. On the System and Security page, select the "Backup and Restore" option. And then click on the "Restore my files" button.
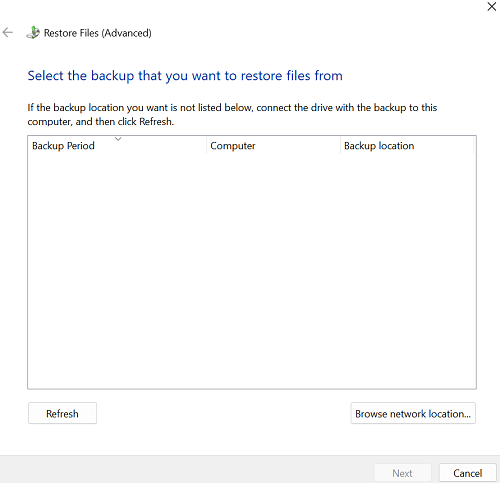
Your backup disk will appear here if you attach it. If you have taken a backup on an internal disk, then you can select it from here and restore it. You can use this method to recover media files from PC.
FAQs about Media File Recovery
1. How Do I Recover Lost Media on Android?
There are a number of ways that you can recover lost media on your Android device. One way is to connect your device to a computer and use 4DDiG data recovery software to scan your device for lost files.
2. How Do I Recover Deleted Media Files on My Computer?
There are a number of ways to recover deleted media files from your computer. Depending on how the files were deleted, you may be able to use recovery software like 4DDiG to Undelete Files.
3. How Do I Recover Media from My SD Card?
You can easily recover media from your SD card. You only need to connect it with your computer as an external drive and use 4DDiG software to scan it for lost files and recover them.
Conclusion
So, there you have it - a comprehensive guide on media file recovery. Hopefully, these methods will help you restore your videos and photos. Don't hesitate to download Tenorshare 4DDiG data recovery for help if you're still having trouble recovering your media files, don't hesitate to reach out for help. Whether you have questions or concerns, we would be pleased to assist you.
 ChatGPT
 Perplexity
 Google AI Mode
 Grok
Grok
