2 Best Ways to Recover Files Deleted by Robocopy /Mir
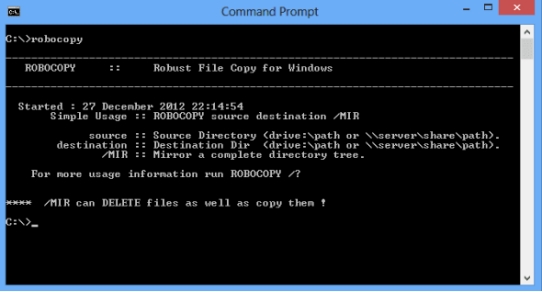
Robocopy /Mir (short for Mirror) is a powerful command for mirroring directories, but it can also lead to unintended file deletion. If you’ve found that you’ve accidentally deleted files due to Robocopy Mir, stay calm - there’s nothing to worry about.We'll explore how robocopy /mir can delete files and then dive into two recovery methods to recover your deleted files. So, let’s learn how “/mir robocopy” can delete your files on its own.
Part 1: Can Robocopy /Mir Delete Files?
Yes! Robocopy /mir has a critical downside: if a file exists in the destination but not in the source, Robocopy Mir will delete it to maintain an exact mirror image. Therefore, if you accidentally delete or move files from the source folder before running Robocopy /Mir, those files will also be removed from the destination folder during the mirroring process.
Essentially, the destination folder will reflect the changes made in the source, including deletions. This can lead to unintended data loss. But don't panic! While the files are no longer directly present in the mirrored location, you can try using the most reliable and professional tool to recover your accidentally deleted files by robocopy /mir without permissions.
Part 2: How to Recover Files Deleted by Robocopy Mir
Method 1: Recover Deleted Files via 4DDiG Data Recovery
Accidentally deleted files using Robocopy /Mir? Don’t worry, 4DDiG Windows Data Recovery has got you covered! It’s a powerful tool specifically designed to recover over 2000+ deleted file formats from over 2000+ storage devices. So, whether it's accidental deletion by a wrong click, or while mirroring the essential Windows files using Robocopy Mir, use 4DDiG-Windows to recover any sort of file deleted by Robocopy /Mir without permissions. 4DDiG Windows Data Recovery is a perfect recovery companion for deleted files while mirroring through Robocopy /Mir.
- Recovering deleted files by Robocopy /Mir takes less than 5 minutes with an amazing 99% accuracy.
- Retrieves non-accessible Windows files that are not being recognized by any other app.
- Recover different types of file systems deleted by Robocopy Mir including NTFS, FAT32/FAT16, exFAT, EXT4/EXT3/EXT2, HFS/HFS+, and more.
- Preview recoverable files deleted by Robocopy /Mir to filter out any unnecessary files.
- The recovered files can be restored on cloud storage including Google Drive and OneDrive.
Secure Download
Secure Download
In order to use 4DDiG Windows Data Recovery tool, you need to follow the following 3-step guide:
-
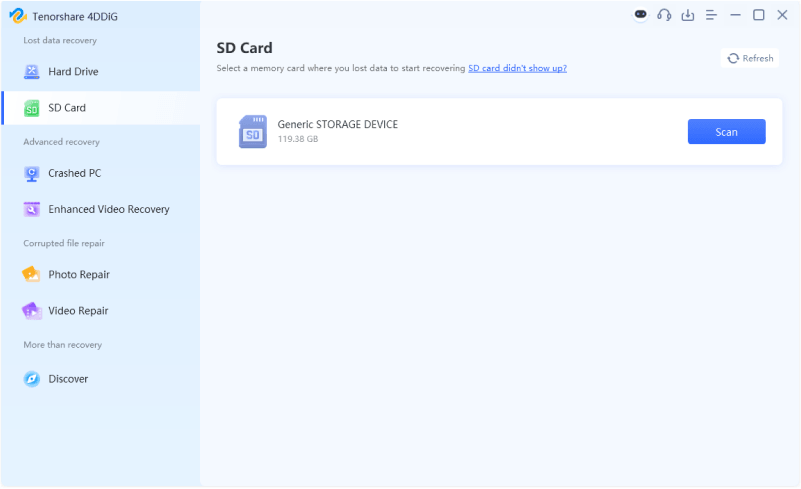
Install and Launch 4DDiG: Download, install, and launch 4DDiG-Windows on your computer. Select your drive to proceed with scanning.

-
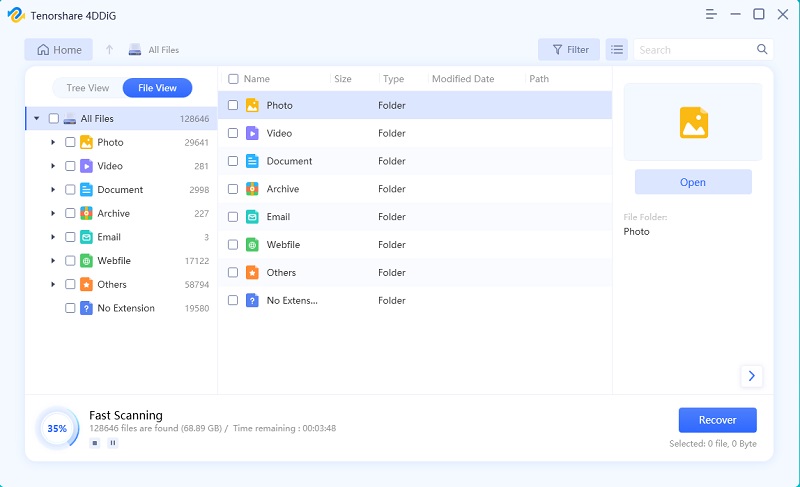
Scan Your Drive: Choose between Quick Scan and Deep Scan to locate lost files by Robocopy /Mir. Filter results by file type (e.g., videos, images, documents) for easier navigation.

-
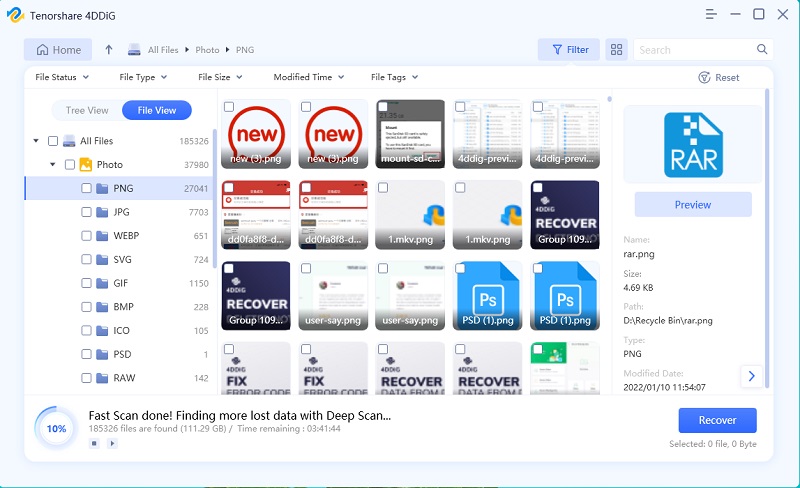
Recover and Save: You can preview the recoverable files before retrieving them. Select the files you want to recover and save them to a safe location on your computer.


This is how easy it is to use 4DDiG Windows Data Recovery to recover your deleted files by Robocopy /Mir. It only takes a few clicks to restore your lost files.
Method 2: Use File History to Recover Files Deleted by Robocopy Mir
File History is a built-in Windows feature that automatically backs up files to a separate drive. If it's enabled before the files are deleted by robocopy /mir, it can be a lifesaver.
File History periodically copies files from your selected folders to a designated backup location. It keeps multiple versions of these files, allowing you to go back in time and retrieve older versions, even if they've been deleted from the original location.
File History only works if it was turned on before the files were deleted. If it wasn't active, it won't have any backups to restore from. File History only backs up files in the folders you've specifically included in its settings. If the deleted files weren't in a backed-up folder, they won't be recoverable via File History.
Here’s how to use File History to recover files deleted by Robocopy Mir:
-
Open File History: Go to Control Panel > System and Security > File History.

-
Navigate to the Folder: In the File History window, you'll see a list of your backed-up folders. Locate the folder that contained the files deleted by Robocopy /Mir.

-
Browse Through Versions: Once you've selected the correct folder, you'll see a timeline or a way to browse through different versions of your files. Use the left and right arrows to go back in time and find the versions from before the Robocopy /Mir command was run.
-
Select the Files: Once you find the version of the folder containing the files you need, select the individual files you want to recover.
-
Restore the Files: Click the green "Restore" button. File History will restore the selected files to their original location by default.

-
Alternate Restore Location: You can choose a different folder to restore the files to. This is a good idea to prevent overwriting current files.
After the restore process is complete, navigate to the restored files' location and verify that the files have been recovered correctly.
Part 3: How to Protect Files Being Deleted by Robocopy Mir
There are several protective measures you can take to prevent Robocopy Mir from deleting your files. Here are some strategies to protect your files from accidental deletion when using this command:
- Test with /L (List Only): Before running the actual robocopy /mir command, use the /L switch. This switch tells robocopy to perform a "dry run" and only list the files that would be copied, deleted, or updated. This allows you to preview the changes without actually making them.
- Enable File History or Backup: Always keep File History enabled or use Windows Backup and Restore to recover files easily. Before running robocopy /mir, ensure you have a recent backup of both the source and destination folders.
- Test on a Sample Folder: Before mirroring important directories, run Robocopy /Mir on a test folder to avoid data loss.
- Understand the /mir Behavior: Remember that /mir creates an exact mirror. If a file is in the destination but not the source, /mir will delete it. This is the core functionality, but it's also the source of potential problems.
- Use “/E” Instead of /MIR: If you only need to copy files and subdirectories and don't need to delete files in the destination, consider using the “/E” switch instead of /mir. The “/E” copies subdirectories, including empty ones, but it won't delete files in the destination.
- Use /XX Switch: Add the /XX switch to prevent Robocopy from deleting extra files in the destination folder.
Part 4: FAQs
Q 1: Does Robocopy MIR delete destination files?
Yes, Robocopy /Mir does delete files in the destination folder if those files are not present in the source folder. It ensures that the destination folder becomes an exact replica of the source, including the removal of any files that don't exist in the source.
Q 2: What is the difference between E and Mir Robocopy?
The /E switch copies subdirectories, including empty directories, from the source to the destination. It does not delete files in the destination that are not in the source. It copies all subdirectories, including empty ones. While the /Mir does the same as /E, but also deletes destination files that are missing in the source. The /MIR switch mirrors a directory tree and creates an exact mirror image.
Q 3: Does Robocopy Mir copy permissions?
Yes, by default, robocopy does copy file and folder permissions from the source to the destination. However, you can modify this behavior using specific options if needed (though it's usually best to keep the default behavior for mirroring).
Final Words:
Robocopy /Mir is a powerful and efficient tool for synchronizing directories, but its file deletion behavior requires careful attention. If you've experienced data loss due to robocopy /mir or any other reason and need the most reliable solution, 4DDiG Windows Data Recovery is here to help you with data recovery needs. Download NOW to enjoy the preview of 2GB of recoverable data!



 ChatGPT
 Perplexity
 Google AI Mode
 Grok
Grok

