Top 6 Ways to Fix the Device Is Not Ready Error in Windows
Storage devices like external hard disks, SD cards, USB flash drives, etc., come extremely handy when you have to save a huge amount of data. However, they are not totally error-free. Hence, when such devices are not ready in any possible way, Windows operating systems will show you an error, i.e., virtual disk manager the device is not ready.
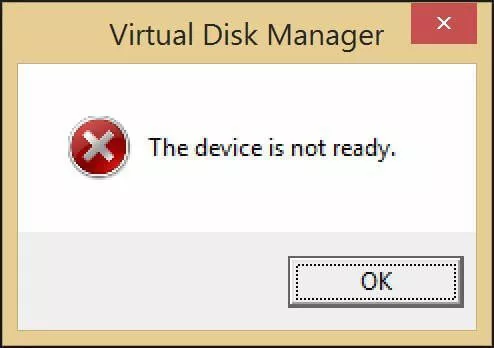
If you are also encountering this error on your PC, then there can be many reasons that can cause this error. However, you don’t have to panic because, in the upcoming parts of the article, you will learn about some effective ways to fix the issue of virtual disk manager the device is not ready Windows 10. So, let’s begin right away!
Part 1. What Does "The Device Is Not Ready" Mean?
In Windows 11, 10, 8, and 7, an error like virtual disk manager the device is not ready may appear when you are trying to access data from flash drives, CDs, DVDs, hard drives, and other storage devices. Though it is a common error, it is still crucial to know why your computer system is showing such a kind of error.
Generally, the device is not ready error is related to virtual disk manager and diskpart, and there is not just one reason that leads to it. Hence, you can face the device is not ready see the system event log for more information because of the following reasons:
- Faulty connections
- Physical damage to the digital device
- Hardware failure
- Compatibility issues
- Windows file system corruption
- External storage device already in use
- Virus infection or any malware
- Corrupt or faulty drive
- Drive with bad sectors
- Corrupted USB controller drivers
Indeed the reasons are many, but the good part is that you don’t have to meet an IT expert if diskpart has encountered an error the device is not ready; instead, you can try some manual fixes to get past the situation.
Part 2. How to Fix The Device is Not Ready in Windows
Now that you are well-versed with the possible reasons for a storage device or external hard drive device not ready let’s explore some ways to resolve this issue. Just ensure to follow all the steps in a particular order to get the desired result.Now that you are well-versed with the possible reasons for a storage device or external hard drive device not ready let’s explore some ways to resolve this issue. Just ensure to follow all the steps in a particular order to get the desired result.
Fix 1. Check the Device Connection - USB/External Drive
The very first and foremost way to resolve the issue of the device is not ready windows 10 is by ensuring whether the error is occurring due to any damaged computer USB ports or faulty connections. Hence, if the device is not ready, then consider checking the device connection in the following manner:
- Unplug the device and insert it again into your computer system using the same USB port to verify if it was loosely connected
- Disconnect the device and wait for 2 minutes or so. Now, plug the device again into your computer by using another USB port. Repeat it with other USB ports until the external storage device normally appears in the operating system
- If not, consider changing the USB cable that matches the device. Connect it again to check if the error still occurs
- Connect the storage device to another PC to check whether the device is readable or not
However, if none of the above ways work, then try out the next solution.
Fix 2. Reinstall the USB Driver
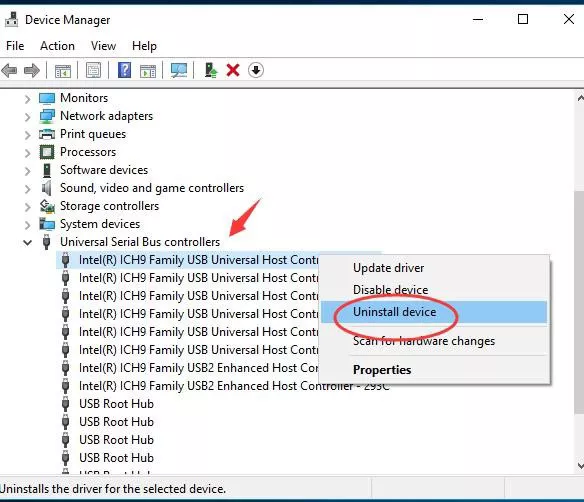
As mentioned above, often, an unstable or corrupted USB driver can cause the issue of initialize disk device not ready. Hence, you can consider reinstalling the device’s driver to fix the error message. Here are the steps that you need to execute:
- Open the Device Manager in your PC and locate the Universal Serial Bus Controllers option.
-
Now, right-click on the corrupted device and select the Uninstall option.

- After uninstalling the faulty USB driver, reboot the computer system.
Fix 3. Run CHKDSK to Fix the Device is Not Ready Due to File System Error
Sometimes file system errors can create a virtual disk manager the device is not ready error. So, examining disk errors or bad sectors on the drive can fix the issue. Follow these instructions to do so:
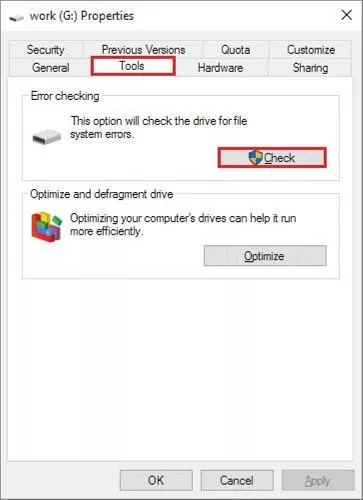
- Right-click on the drive that has a file system error and click on the Properties option.
-
Go to the Tools section and click on the Check button under the Error checking section.

- Tap on the Scan and repair drive option. Then, restart your PC to make the changes.
Alternatively, you can also consider using Command Prompt to remove the bad sectors. Here’s how:
-
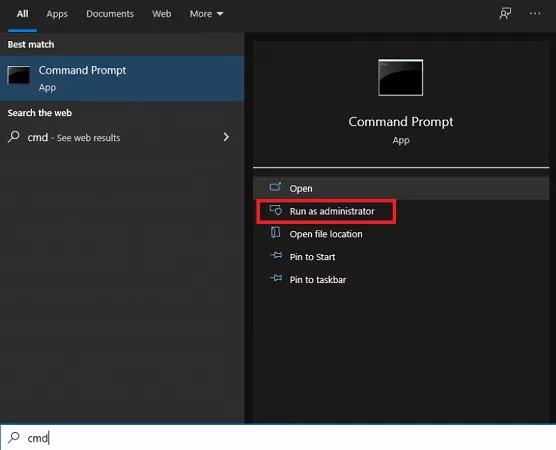
Open the search box, type cmd and click on the Run as administrator option.

-
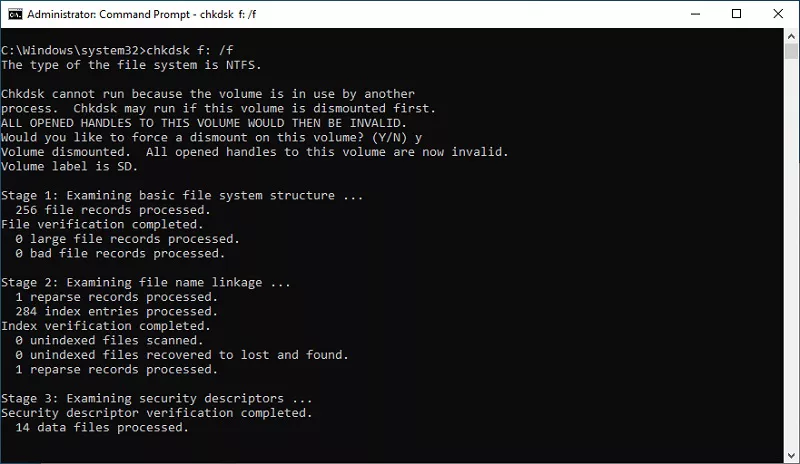
Type the chkdsk *:/f command in the Command Prompt window and press the Enter key. Just replace * with the correct drive letter.

With this, the device is not ready cmd error should fix.
Fix 4. Run SFC Scannow to Fix The Device is Not Ready
In order to connect a drive to the operating system of a PC system, files are required. However, when these files get corrupted or damaged, then detection problems and connection errors start taking place. But using the System File Checker, i.e., SFC available in Windows, you can check the corruptions. Use these steps to examine errors:
- Search for Command Prompt and select the Run as administrator option.
-
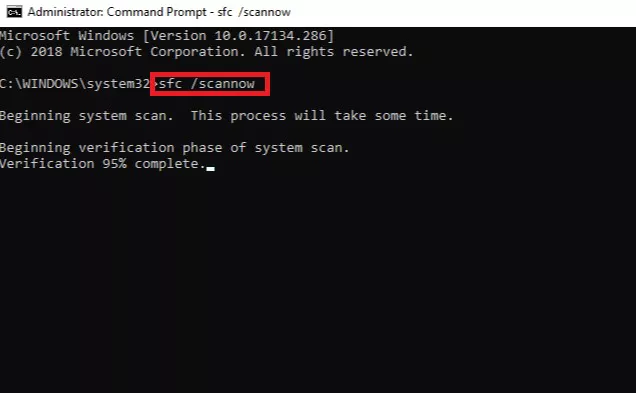
Now, enter the sfc /scannow command and press the Enter key.

That’s how you can fix the device is not ready command prompt with SFC.
Fix 5. Fix Diskpart Has Encountered an Error the Device is Not Ready
You will have diskpart has encountered an error the device is not ready error if the disk is failed or when the storage controller is corrupted. However, you can fix it in the following manner:
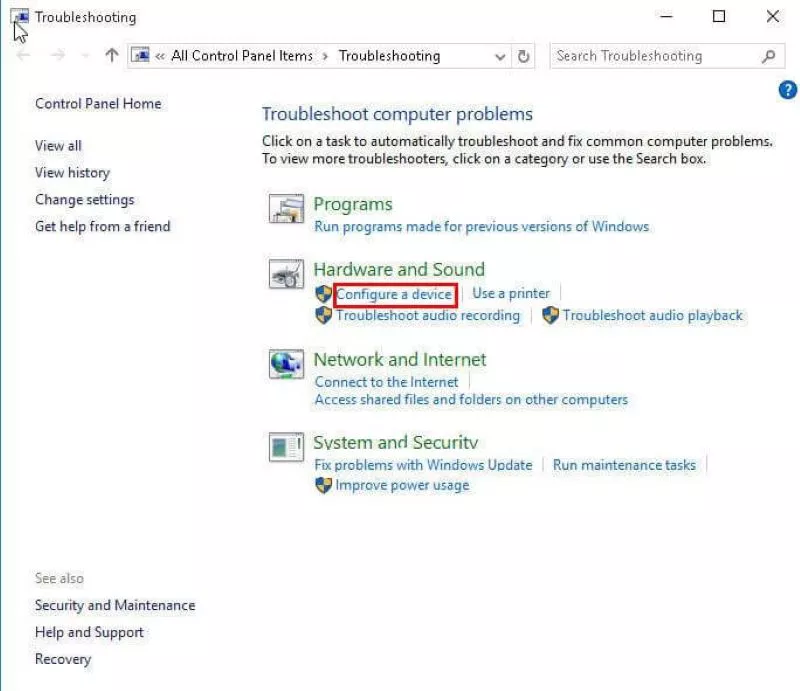
- Type Troubleshooting in the search box and open it.
-
In the Hardware and Sound section, tap on the Configure a device option.

- Tap on the Advanced option and mark the Apply repair automatically option in the new window.
- Click on the Next button to begin the repair process.
Fix 6. Fix Virtual Disk Manager "The Device is not ready."
When the driver does not initialize, you receive the virtual disk manager the device is not ready error. But you can fix it with the following steps:
-
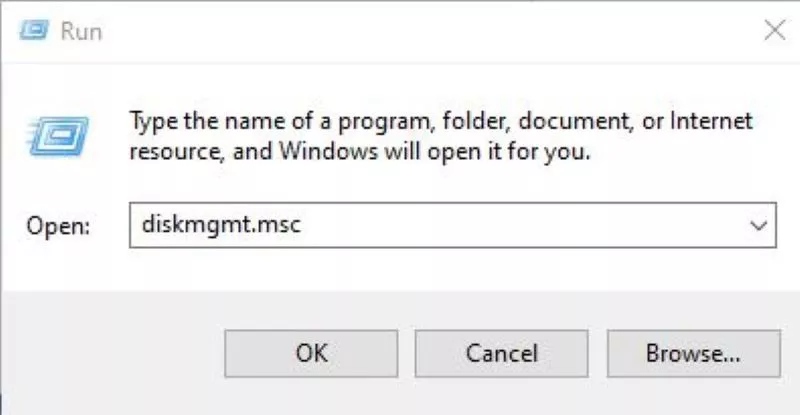
Press Win + R keys on the keyboard and type diskmgmt.msc in the search box. Then, press the Enter key.

-
Right-click on the disk entry and choose the Initialize Disk option from the provided list.

- Now, just follow the steps shown on your screen.
Check again whether the issue has been solved or not.
Part 3. How to Recover Data from Drive with "The Device Is Not Ready"
If you have the device is not ready error on your PC, then the storage device will become inaccessible, along with its data. Hence, in order to recover your precious data from an inaccessible external storage device, you would need professional data recovery software. Now, there are a lot of options available on the internet, but make sure you don’t fall for a random tool that claims to be the best.
Thus, to protect your data and device, it is recommended to use reliable data recovery software like Tenorshare 4DDiG Windows Data Recovery Software. It is a high-end software that will help you in dealing with faulty drives. It effectively recovers files that are lost or deleted due to accidental deletion, crashed operating system, formatted devices, or any other cause.
Secure Download
Secure Download
Moreover, you're not required to have any tech-related knowledge to be able to recover your files via using this professional data recovery software. It has a user-friendly interface for users, which makes recovery smooth and super-quick. Following are some highlighted features of Tenorshare 4 DDig Windows Data Recovery Software:
- Recovers more than a thousand plus file types, including audios, videos, photos, documents, and others
- Recover data from USB flash disk, internal & external drives, laptop or PC, SD cards, and other storage devices
- Recovers files in different data loss scenarios like Lost Partition Recovery, Formatted Drive Recovery, RAW File Recovery, and others
Guided Tutorial to Use Tenorshare 4DDiG Windows Data Recovery Software
To recover data from inaccessible hard drives, start by downloading Tenorshare 4DDiG Windows Data Recovery Software on your PC. Once done, follow these steps:
-
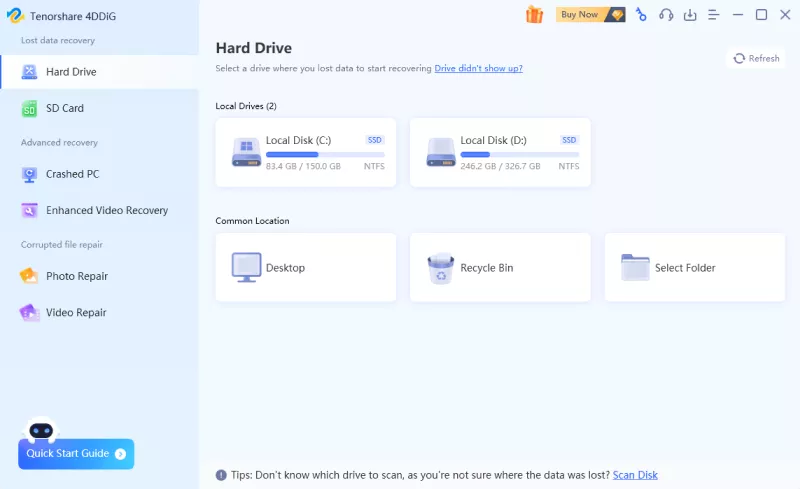
Run and install Tenorshare 4DDiG on your PC. After launching it, connect your drive and select the location from where you want to recover files. Then, click on the Start button.

-
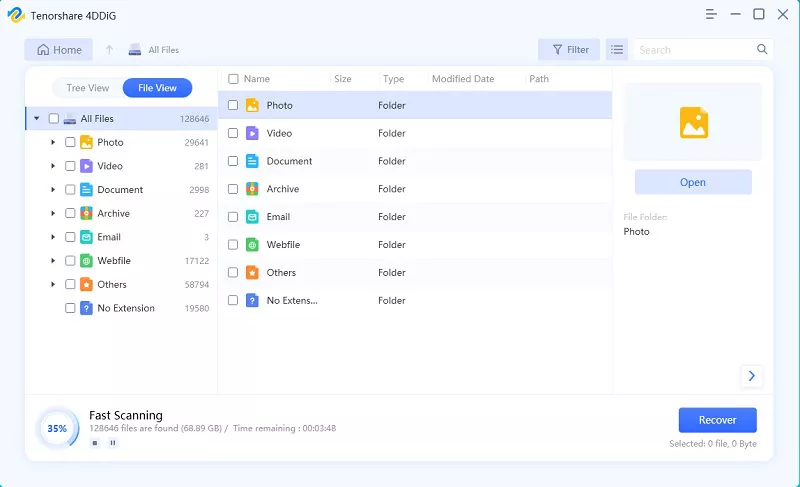
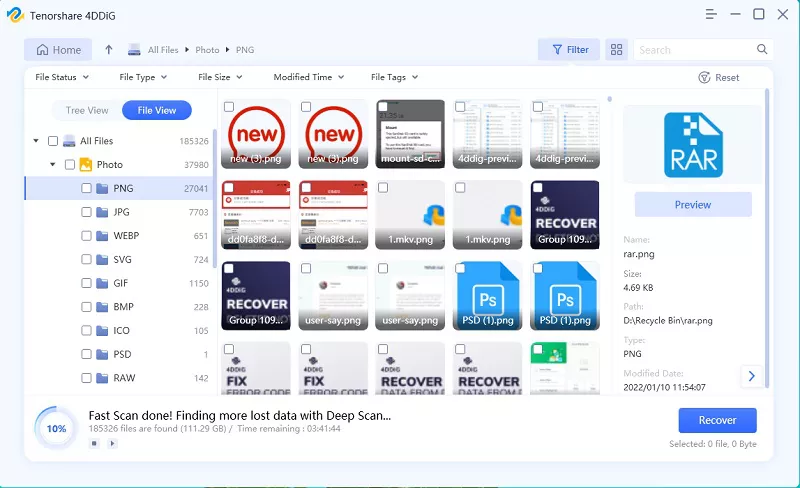
The scanning process will begin. The time is largely depended on the drive size.

-
Lastly, preview and select the desired files. Then, click on the Recover button and choose a location to save the found files. Click on the Ok option at the end.

With this, you will be able to recover files from an inaccessible storage device in just three quick steps.
Secure Download
Secure Download
The Bottom Line
As you know, virtual disk manager the device is not ready can occur due to varying reasons. But don’t panic if you see it next time. Instead, head over to the solutions mentioned above to fix the issue. Also, don’t forget to use Tenorshare 4DDiG computer data recovery to recover its data and have a hassle-free experience.

 ChatGPT
 Perplexity
 Google AI Mode
 Grok
Grok

