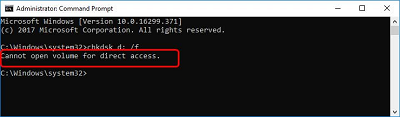
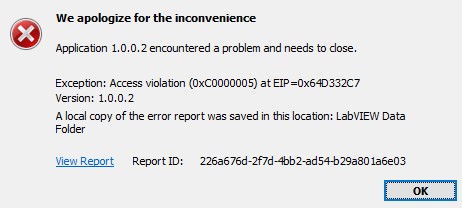
Fix CHKDSK Cannot Continue in Read-only Mode William Bollson 5 mins read Updated on 2026-07-22 15:54:25 to Windows Fix You May Also Like How to Fix CHKDSK Cannot Open Volume for Direct Access How to Fix Error Code 0xc0000005 in Windows 11/10? 3 Ways to Recover Lost/Corrupted MDT Files Home >> Windows Fix >> Fix CHKDSK Cannot Continue in Read-only Mode