4 Ways to Unhide the Hidden Files
Download4DDiG Data Recoveryto quickly recover and unhide the hidden files from your USB drive, hard disk, or external storage. This guide will show you practical solutions to make hidden files visible. Keep reading!
Are your files suddenly missing or invisible on your USB drive, hard disk, or external storage? It’s frustrating, but the good news is they might just be hidden—not lost. Understanding how to unhide the hidden files can save you from unnecessary stress. Files are often hidden by viruses, incorrect system settings, or permission issues. This guide will show you 4 ways to unhide the hidden files effectively. The solutions provided here are clear, practical, and proven. Follow along to recover and make your hidden files visible again.
- How to Unhide the Hidden Files?
- Way 1: Recover Hidden Files with 4DDiG Data RecoveryHOT
- Way 2: Unhide the Hidden Files Using Attrib CMD
- Way 3: Use Disk Management to Unhide Files
- Way 4: Use Windows Control Panel
Part 1: Why Are Hidden Files Hidden?
First, you need to know why files disappear before you start recovering hidden files. There are lots of reasons why files can become hidden. Here are the most common causes:
- Virus or Malware Attacks: Files are often hidden by malware to prevent you from gaining access or corrupting your data. As a virus, it can make you change the file’s attributes and make sure they become invisible on your system.
- Accidental Changes of File Attributes: Sometimes in the properties of files or folders they are accidentally marked as “hidden”. It can happen on manual operations or software actions.
- System Errors or Corruption: Files can become hidden or inaccessible temporarily due to system issues such as drive corruption, or bad sectors.
- Permission Restrictions: The system may lock hidden files and folders if you lack the necessary administrative permissions.
- Software or Update Issues: File attributes may be altered by faulty software installations or incomplete updates, causing files to disappear from view.
- Human Error: Sometimes users may accidentally move or rename files, hiding them away, seemingly lost, but they are actually elsewhere.
Fixing these issues yourself will result in you losing your data. Stop using the device at once and find a safe and effective way to recover your data with reliable tools such as 4DDiG Data Recovery.
Part 2: How to Unhide the Hidden Files?
Now that you know why files become hidden, let’s move on to solutions. Here are the 4 proven ways to unhide the hidden files on your system. Let’s get started!
Way 1: Recover Hidden Files with 4DDiG Data Recovery
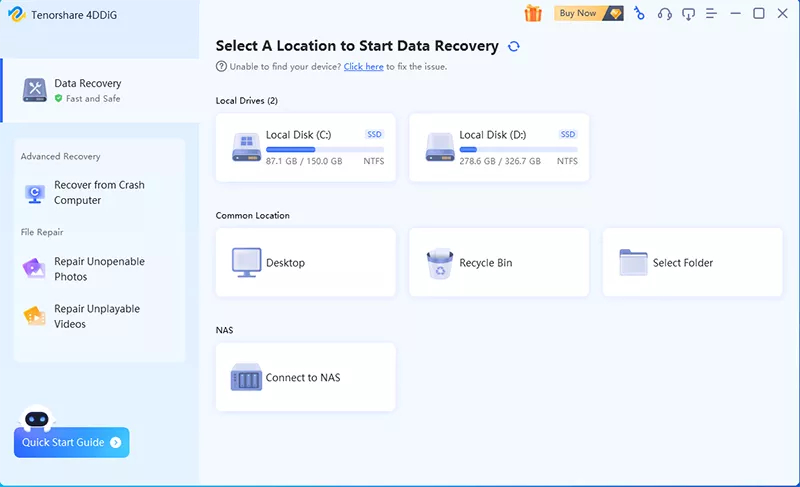
If you need to recover hidden files and lost data on your Windows computer, 4DDiG Windows Data Recovery tool is a lifesaver. This tool is designed to recover files that either may be accidentally hidden, were lost as the result of system crashes or were deleted by mistake.
4DDiG can recover your lost data, regardless of your data loss scenario, system error, accidental deletion, or malware attack. This is especially useful when the partitions are lost or formatted, and files vanish from view, making it a good solution to recover them.
- Quick Recovery: 4DDiG enables fast recovery of lost files, even from drives with corrupted or damaged sectors.
- Supports Multiple Storage Devices: It works across various devices, including USB drives, external hard drives, and SD cards.
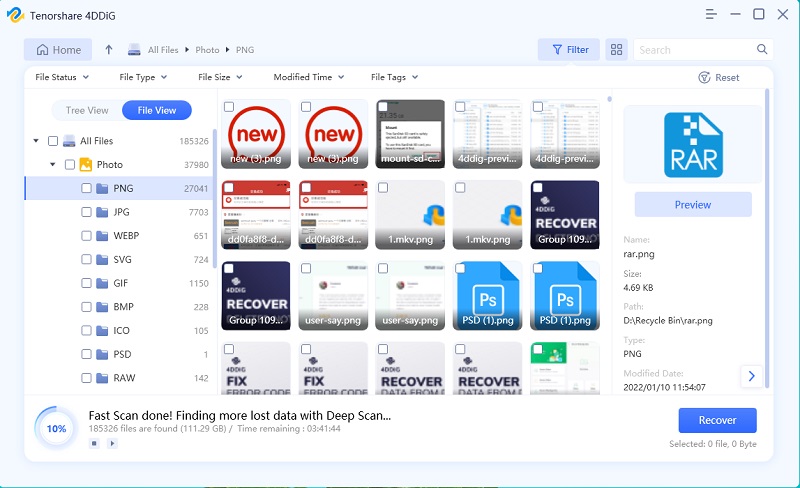
- Advanced Preview: Before recovery, you can preview the hidden files to ensure they are the correct ones.
- Easy-to-Use Interface: Simple and intuitive, making file recovery stress-free for anyone, even beginners.
Secure Download
Secure Download
Here is how you can use 4DDiG to recover the hidden files:
-
Download and Install
First you need to download and install 4DDiG Data Recovery on your Windows PC. Just make sure it is on a different drive than the drive you are recovering data from. Once you have installed, launch the software.
-
Select the Drive and Scan
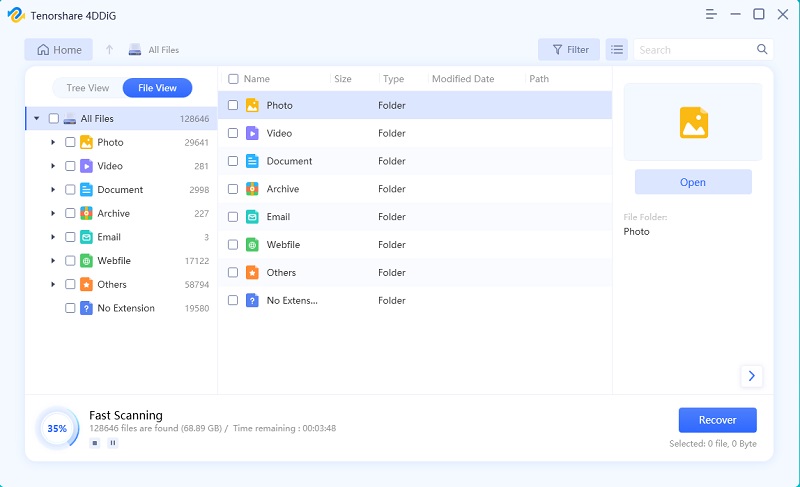
Select the drive that your hidden or lost files were on. Tap the “Scan” button to begin scanning for recoverable files. After that, the software will automatically detect and scan the drive for hidden or deleted data.
-
Preview and Recover
After the scan completion, preview recoverable files. Choose the files you wish to restore and hit "Recover." To avoid overwriting any of the existing data, save them to a different drive.

People Also Read:
Way 2: Unhide the Hidden Files Using Attrib CMD
If you can't find your files due to them being hidden by a virus or manual action, you can use the Attrib CMD method to reveal them. This method works for files hidden on internal drives or external storage devices like USB drives and SD cards.
-
Press Windows + X and select Command Prompt (Admin). Alternatively, you can search for Command Prompt in the Start menu, right-click it, and choose Run as Administrator. This ensures you have the required permissions to execute the command.

-
Identify the drive or device where the files are hidden. If it’s an external device like a USB drive, note the drive letter assigned to it.
-
Open the Command Prompt window, and enter the following command:
attrib -h -r -s /s /d G:.
Replace “G” with the letter corresponding to your drive.
Here’s what each part of the command does:
- -h removes the hidden attribute
- -r removes the read-only attribute
- -s removes the system attribute
- /s applies the changes to all matching files in the folder and subfolders
- /d applies the changes to folders as well as files
Press Enter. This command will unhide the files, clear read-only and system attributes, and ensure that all files and folders are shown.
Way 3: Use Disk Management to Unhide Files
If your files remain hidden, using Disk Management can help you unhide partitions or drives that might be causing the issue. Sometimes, a drive can become unallocated or not visible due to incorrect settings. Here’s how to fix it.
-
Press Windows + X and select Disk Management from the list. This will open the disk management window where all your drives and partitions are listed.
-
Look for the drive or partition where the hidden files are stored. If the drive has no letter assigned or is marked as unallocated, right-click on it and select Change Drive Letter and Paths.

-
In the window that appears, click Add and choose a letter for the drive. Click OK to confirm. Now, the drive should appear in File Explorer, and you can access the hidden files on it.
Way 4: Use Windows Control Panel
You can also try using the Windows Control Panel to unhide your files. This option allows you to modify the settings in File Explorer and display hidden files on your PC or external devices.
-
Open the Control Panel by pressing Windows + R, typing control, and hitting Enter. Once the Control Panel opens, go to File Explorer Options (or Folder Options in older versions of Windows).
-
In the File Explorer Options window, navigate to the View tab. Look for the Hidden files and folders section, and check the option Show hidden files, folders, and drives.

-
Click Apply, then OK. Now, open File Explorer again and check the drive or external storage where the files were previously hidden. You should be able to see them now.
Bonus Tip: What Is the Best Way to Show Hidden Files
To help you decide which method is most suitable for recovering your hidden files, we’ve put together a comparison table. This will give you a clearer understanding of the different fixes available, based on your situation and the type of device you're using.
- Method
- Attrib CMD
- CMD Alternative
- Control Panel Settings
- Data Recovery Software
- Best for
- Hidden files due to virus or wrong operations
- Quick file visibility without technical steps
- Revealing hidden files in File Explorer
- Recovering lost or hidden files due to virus, system errors, or permissions issues
- Devices Supported
- Windows hard drive, USB, SD cards, external hard drives
- Windows hard drive, USB, SD cards, external hard drives
- Windows hard drive, partitions
- Windows, USB drives, SD cards, external hard drives
- Ease of Use
- Requires command line knowledge
- Easy and quick with simple commands
- Very user-friendly, no technical skills needed
- Simple interface, but requires installation
- Operating System
- Windows only
- Windows only
- Windows and Windows Server OS
- Windows, Windows Server, and macOS
- Key Features
- Recovers hidden files from command line operations
- Quick visibility fix for simple cases
- Shows hidden files in File Explorer settings
- Powerful recovery from hidden, lost, or corrupted files
- When to Use
- When files are hidden due to virus or command errors
- When quick unhiding of files is needed
- When you need a simple way to view hidden files
- When data loss, file corruption, or virus issues make files invisible
If your files are hidden on external devices, make sure to connect them before applying these solutions.
Part 3: Frequently Asked Questions
Q 1: How to change hidden files to unhide in Windows 11?
Ans: To unhide files in Windows 11, go to File Explorer > View > Show > Hidden items. You can also use the "attrib" command in Command Prompt for more advanced recovery.
Q 2: How do I turn off hidden files?
Ans: To turn off hidden files, open File Explorer > View > Show > Uncheck Hidden items. Alternatively, use the "attrib" command to hide files again via Command Prompt.
Q 3: What is the shortcut to show hidden files?
Ans: You can quickly show hidden files by pressing Ctrl + Shift + . in File Explorer. This will toggle the visibility of hidden files.
Final Words
If you've been struggling with hidden or lost files on your Windows PC or external devices, we've shared some effective fixes. However, if these methods don’t work, we recommend using 4DDiG Data Recovery Software. It’s an easy-to-use tool that helps recover hidden or lost files from various devices, offering a reliable solution to restore your important data quickly.


 ChatGPT
 Perplexity
 Google AI Mode
 Grok
Grok


