How to Fix Snapchat Camera Quality in Proven 9 Ways
Why is my Snapchat camera quality so bad and grainy? Snapchat has become an integral part of our daily communication, allowing us to share moments with friends and family through images and videos. However, a common frustration among users is the inconsistent camera quality on the platform. Blurry and grainy photos, pixelated images, and overall poor camera performance can hinder the Snapchat experience.
How to fix Snapchat camera quality to make it better and clearer? In this comprehensive guide, we will explore the factors causing bad camera quality on Snapchat and provide optional 9 effective ways available for different scenarios to fix it. Also, you can learn how to make the video quality better befor uploading to Snapchat.

Part 1. Why Is My Snapchat Camera Blurry?
Understanding the root causes of low camera quality on Snapchat is crucial before diving into solutions. Several factors contribute to this issue that are:
- Outdated Smapchat: Using an outdated version of the Snapchat app can lead to compatibility issues with your device's operating system, affecting camera performance.
- Device Compatibility: Different devices may have varying levels of compatibility with Snapchat, and issues can arise due to the specific hardware and software configurations of your device.
- Internet Connectiuon Issue: Unstable or slow internet connections can result in low-quality images and videos on Snapchat, as the app relies heavily on a robust network for real-time content sharing.
- Excessive Data Cache: Over time, the accumulation of cache data within the Snapchat app can impact its overall performance, including the quality of the camera.
- App Bug & Glitches: Bugs and glitches within the Snapchat app or your device's operating system can lead to camera quality issues, necessitating troubleshooting and fixes.
- Limited Storage Space: Running multiple resource-intensive apps simultaneously or having limited available storage on your device can impact the Snapchat app's ability to deliver high-quality camera performance.
- Device Camera Hardware: The specifications and capabilities of your device's camera hardware may impose limitations on the quality of photos and videos taken through Snapchat. In some cases, this could be a hardware-related constraint.
Part 2. Increase Snapchat Resolution Up to 8K Before Uploading
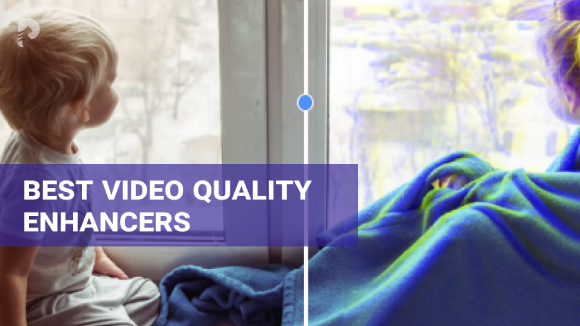
If you upload videos recorded by your device camera from the gallery, it is recommended to improve the video quality using 4DDiG AI Video Enhancer in advance. This way, you can get better visual experience using it 4 awesome AI Models after uploading the video to Snapchat or other social media.
This advanced and AI-powered tool specializes in improving video resolution to 4K and up to 8K, making it an ideal choice for resolving camera quality problems. Apart from video enhancement, this feature-rich software is up to colorize black-and-white video, remove noise and grain, reduce blemishes, sharpen videos to add clarity at the same time with only one click.
Secure
Download
Secure
Download
✨ Outstanding Features of 4DDiG Video Enhancer
- Colorize black-and-white videos to restore old clips to vivid.
- Improve video quality and resolution up to 8K.
- Eliminate unwanted grain and noise, making viaodes clearer.
- AI sharpen videos automatically, increasing clarity.
- Have 4 great AI models (General Denoise, Anime, Face, and Colorize), suitable for any user across various scenarios.
- Retouch videos with blemish removal (inclusing take off pimples, acne, zit, papules, and more).
✨ Steps to Upscale Snapchat Video Quality with 4DDiG AI
-
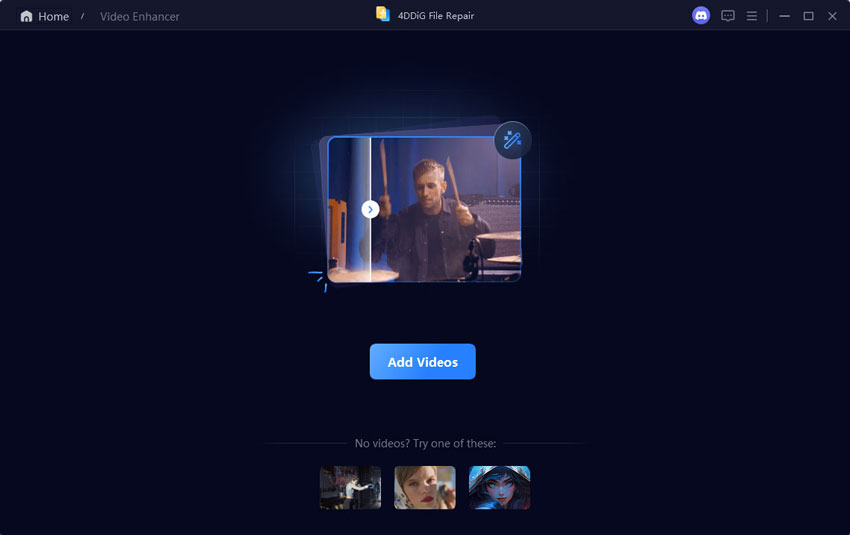
Commence by opening the 4DDiG File Repair executable on your computer. Navigate to the "AI Enhancer" option and click "Video Enhancer" to acquire the comprehensive video enhancement toolkit.

-
Choose either the "Add Videos" button or utilize the drag-and-drop function to effortlessly add the low-quality Snapchat video.

-
Once you've added the video, select from three available AI models—General Model, Anime Model, or Face Model—for quality enhancement. If necessary, fine-tune the resolution (4X is recommended), and then proceed by clicking "Enhance".

-
4DDiG Video Enhancer initiates the video enhancement, providing a preview of the initial 10 improved frames. Be patient during the process. After completion, review the enhanced Snapchat video. If it falls short, experiment with alternative AI models or adjust the resolution. Upon achieving your desired result, close the preview and select 'Save'. The software will then process the entire video and make Snapchat camera quality better.

Part 3. How to Fix Snapchat Camera Quality on iPhone/Android [Optional 9 Ways]
Having explored the specialized solution of 4DDiG File Repair in Part 2, we now turn our attention to alternative ways of fixing Snapchat camera quality issues. While 4DDiG File Repair is a powerful tool, it's essential to have a repertoire of strategies, from basic troubleshooting to app-specific interventions. In this Part, we present a variety of approaches, each addressing different aspects of the problem.
- Fix 1: Upload Less-Compressed Video Using SnapEnhance
- Fix 2: Change Snapchat Camera Settings
- Fix 3: Update the Snapchat App and Device
- Fix 4: Clear Snapchat Cache
- Fix 5: Check Internet Connection
- Fix 6: Restart Your Device
- Fix 7: Relaunch the Snapchat App
- Fix 8: Reinstall the Snapchat App
- Fix 9: Record Video with Device's Camera & Select Video from Gallery
Way 1: Upload Less Compressed Video Using SnapEnhance
SnapEnhance is a third-party Snapchat client for Android that offers additional features not available in the official Instagram app. This app empowers you to upload less-compressed viudeo content you your account. Meanwhile, it is an open source, which means you can enjoy free dark mode, fliters, and more. This method had been proven by Reddit users.
Way 2: Change Snapchat Camera Settings
The Snapchat camera settings can be adjusted to get better quality:
Enable HD Upload:
Navigate to your Snapchat Profile and click the cog icon to access Snapchat Settings.
Then head to "Advanced Settings" > "Upload Quality" and select "HD".
Disable Auto Night Mode:
First, make sure the device camera comes with better settings: Go to "Settings" > "Camera" > "4K60fps" > enable "HDR Fusion".
Then go to Camera on Snapchat. Long-press on the camera icon
Swipe to "Pro Mode" and select "Manual exposure lock".
Alternatively, you can go to "Night Mode" and turn off the "Reduces motion blur in low-light environments" option.
Way 3: Try Updating Snapchat and Device
One of the fundamental steps in addressing Snapchat camera quality issues is ensuring that both the app and your device's operating system are up to date. Outdated software can lead to compatibility issues and performance glitches, affecting the quality of images and videos captured through Snapchat.
Update Snapchat:
- Open your device's app store.
- Locate Snapchat in the app list and tap on it.
-
If an update is available, select the "Update" option.

Update Device Software:
- Go to your device's settings.
- Navigate to the "Software Update" or "System Update" section.
- If an update is available, follow the on-screen instructions to install it.
- After updating, restart your device to apply the changes.
- Open Snapchat and test the camera to see if the quality has improved.
Way 4: Cache Data Clearing to Improve Snapchat Camera Quality
How to fix my snapchat camera quality? Accumulated cache data can significantly impact the performance of Snapchat, including its camera quality. Clearing cache data is a routine maintenance task that can resolve various issues, including blurry photos and pixelated images. Below is a step-by-step guide on clearing cache data, offering users a simple yet effective way to enhance Snapchat camera quality.
- Open Snapchat and go to your profile.
- Tap on the gear icon in the top-right corner to access settings.
- Scroll down and select "Clear Cache" or "Clear All" under the Account Actions section. Confirm the action when prompted.
-
Close the app completely and reopen it. Test the camera to see if the quality has improved.

Way 5: Make Sure the Internet Is Well Connected
A stable internet connection is integral to Snapchat's seamless functionality, affecting not only the speed of content sharing but also the quality of the camera.

How to Improve Snapchat Camera Quality by Checking Internet Connection:
Check Wi-Fi or Data Connection:
- Verify that your device is connected to a stable Wi-Fi network or has a strong cellular data connection.
- Consider switching between Wi-Fi and data to see if either improves camera quality.
Restart Router or Modem:
- If using Wi-Fi, restart your router or modem to refresh the connection.
- Wait for the connection to stabilize and check Snapchat's camera quality.
Disable Data Saver Mode:
- Ensure that your device's data saver mode is turned off.
- Data saver settings may limit the app's performance, impacting camera quality.
Way 6: Rebooting Your Device
The age-old solution of rebooting your device can work wonders when it comes to resolving temporary glitches affecting Snapchat camera quality. A simple restart can refresh your device's system, potentially eliminating any underlying issues that may be impacting the camera's performance.
- Turn off your device completely.
- Allow a brief pause before turning your device back on.
- Open Snapchat and check if the camera quality has improved post-reboot.
Way 7: Restart Snapchat
How to fix snapchat camera quality on android? Similar to restarting your device, restarting the Snapchat app can address temporary glitches and improve camera quality. This quick and straightforward solution is explored in this section, providing users with an instant remedy for potential issues affecting their Snapchat experience.
- Fully close the Snapchat app on your device.
- Open the Snapchat app again.
- Check the camera quality by capturing a photo or video to see if the issue persists.
Way 8: Reinstalling Snapchat to Improve Snapchat Camera Quality
How to fix your camera quality on snapchat? For persistent camera quality issues, a more drastic approach involves uninstalling and reinstalling Snapchat. In this section, we guide you through the steps of safely uninstalling the app and subsequently reinstalling it, providing a clean slate that may resolve underlying camera-related problems.
- Locate the Snapchat app on your device and uninstall it.
- On most devices, you can do this by pressing and holding the app icon and selecting the uninstall option.
- After uninstalling, restart your device to ensure a complete removal of Snapchat.
- Visit your device's app store and reinstall the Snapchat app.
- Open the app and test the camera to check for improvements in quality.
Way 9: Record Video with Default Camera and Select Video from Gallery
If the Snapchat camera look grainy and blurry still after the above methods, you'd better record videos using the phone's default Camera app istead of Snapchat camera settings. Then choose the pre-recorded videos from the gallery and upload them to the Snapchat app.
☞ How to Fix Windows Movie Maker Low Quality Export Video in 4 Ways
Bonus: How to Fix Corrupted Saved Snapchat Videos
Whether the video you want to upload to Snapchat or the downloaded videos from the app can be fixed with the powerful video repair took - 4DDiG Video Repair. It is professionally designed to work with a wide range of video issues, including corrupted, damaged, no sound, unplayable, freezing, jerky, and more in batch.
Besides, it supports many different video formats: MP4, MOV, GIF (supported by Snapchat), AVI, and more. Most importantly, no matter how seriously damaged your video is, this tool can analyze and repair it successfully. It is such high success rate that attracts many users.
Secure
Download
Secure
Download
Here's how to batch reapir corrupted videos for Snapchat using 4DDiG Video Repair:
On the 4DDiG File Repair program, select the left "Corrupted File Repair" and then tap on the "Video Repair" box.

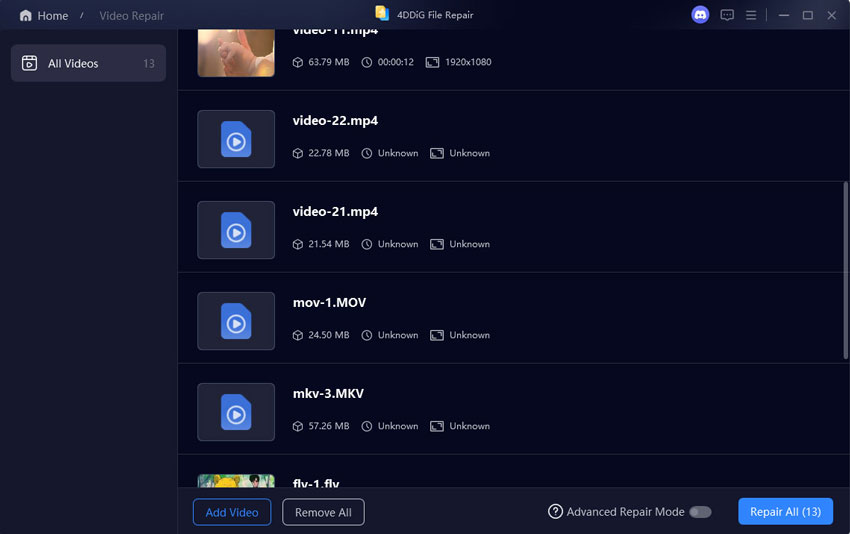
Proceed to hit the "Add Videos" button to select and import multiple videos to the repairing utility.

Once added, hit the bottom-right "Repair All" button to start fixing all videos at once for Snapchat.

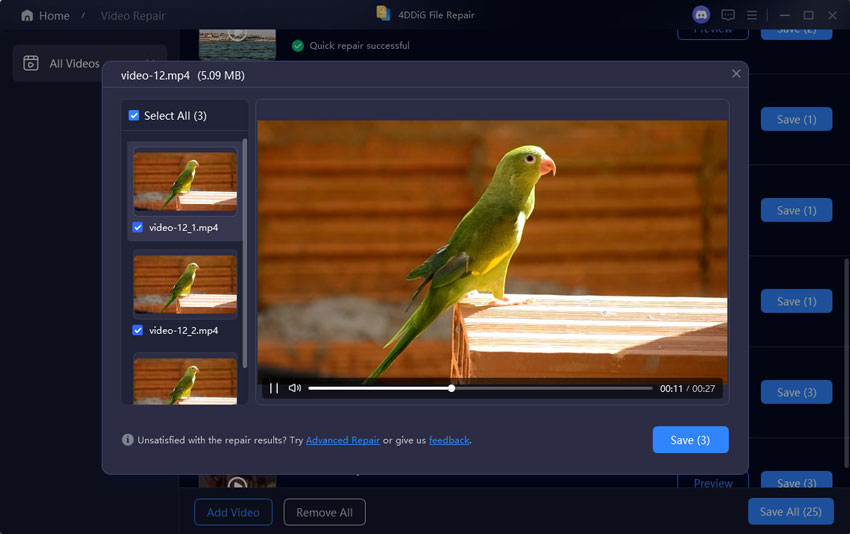
When finished, you can check the effect and store them via the "Preview" and "Save All" tab.

Part 4: FAQ
Q 1: Why Are Snapchat Photos Blurry?
Snapchat photos may appear blurry due to various reasons, often linked to issues with the app, device, or network, all discussed in Part 1.
Q 2: How Do You Change Camera Settings on Snapchat?
To change camera settings on Snapchat, open the app, access your profile, tap the gear icon, and navigate to "Additional Services." Adjust various preferences under "Camera Settings" to customize your experience.
Q 3: How Do You Fix the Focus Camera on Snapchat?
To fix focus issues on Snapchat, clean the camera lens, ensure proper lighting, and tap on the screen to set focus manually. Troubleshoot persistent problems with relevant in-app settings.
☞ What Is the Best 4K Video Camera You Can Pick [Top 9 Picks]
Conclusion
Now you know how to fix Snapchat camera quality? Resolving Snapchat front camera quality issues involves a multifaceted approach. By understanding the root causes of low camera quality and implementing the suggested fixes, users can enjoy a seamless and enhanced experience. Whether you're a casual user or a Snapchat aficionado, these 9 ways to fix camera quality ensure that your shared moments are captured with the clarity they deserve. Apply these solutions and elevate your Snapchat photography and videography to new heights.
Also, if you want to get better video visual experience, you can turn to 4DDiG Video Enhancer to improve the video resolution up to 8K. This tool also help you take blemishes off face or close-up in videos.
Secure
Download
Secure
Download






 ChatGPT
 Perplexity
 Google AI Mode
 Grok
Grok

