How to Recover Unsaved Word Document after Computer Restart
How to recover unsaved word document after computer restarts? Losing an unsaved Word document after your computer unexpectedly restarts can be a deeply frustrating experience, especially if you've invested time and effort into your work. However, it's important to note that there are several methods to recover unsaved Word documents after a PC restart. In this comprehensive guide, we will explore how to recover word document after computer restart, ensuring that your valuable data doesn't go to waste.

Part 1: Can I Recover Unsaved Word Document after PC Restarts
Before delving into the solutions, let's address the fundamental question: Is it even possible to recover unsaved Word documents after a computer restart? The answer is generally yes, thanks to Microsoft Word's built-in features to help users recover their work after unexpected interruptions.
Part 2: How to Recover Unsaved Word Document after Restart
Fix 1: Recover Lost Word Document via 4DDiG Data Recovery
How to recover a word document after computer shutdown? Opting for 4DDiG Windows Data Recovery, you choose a comprehensive and reliable tool for recovering unsaved Word documents and other valuable data. It offers a range of features and capabilities to ensure that your work is retrieved, even after a computer restart.
4DDiG Windows Data Recovery is a versatile software tool with a robust solution to recover lost Word documents and other file types following a computer restart. Here's why you might consider using 4DDiG Windows Data Recovery: This software can retrieve many files, including Word documents, Excel spreadsheets, photos, videos, and more. It offers a comprehensive solution for your data recovery needs.
Secure
Download
Secure
Download
-
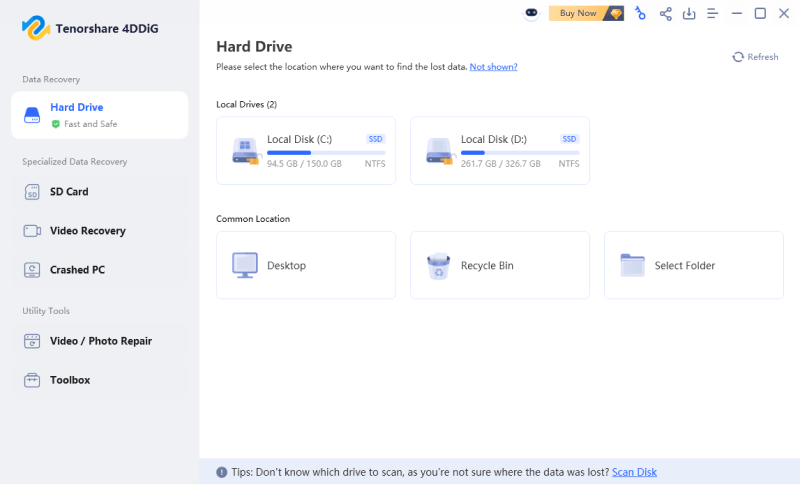
Once you've got 4DDiG Windows Data Recovery up and running, the main screen will pop up. Choose your local disk from the list of hard drives where you lost your data, and hit 'Start' to kick off the recovery process. Or, you can first pick the file types you're after in the top right corner before you start the scan."

-
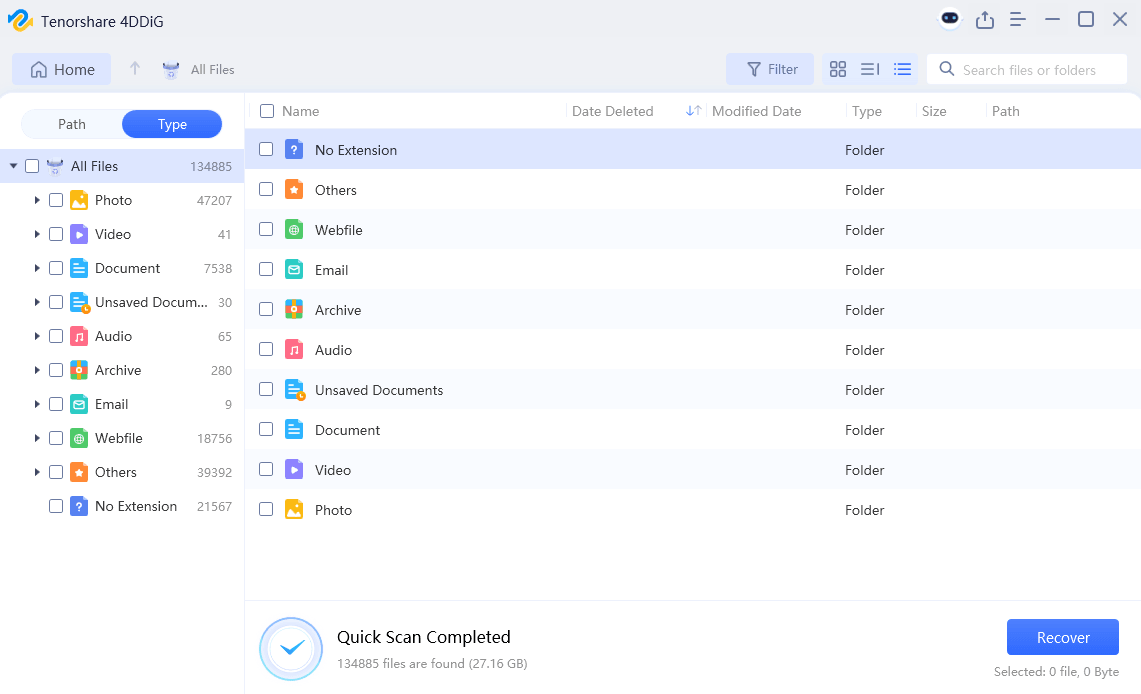
4DDiG gets to work with a deep scan of the drive you selected to find your missing data. If you spot the files you're after, you can pause or stop the scan. The software neatly organizes files into categories like Deleted, Existing, Lost, RAW, and Tag files in the Tree View. You can also switch to File View to look at specific file types like Photos, Videos, Documents, Audio, and Emails. And if you're hunting for something specific, you've got the handy search and filter options on the right panel.

-
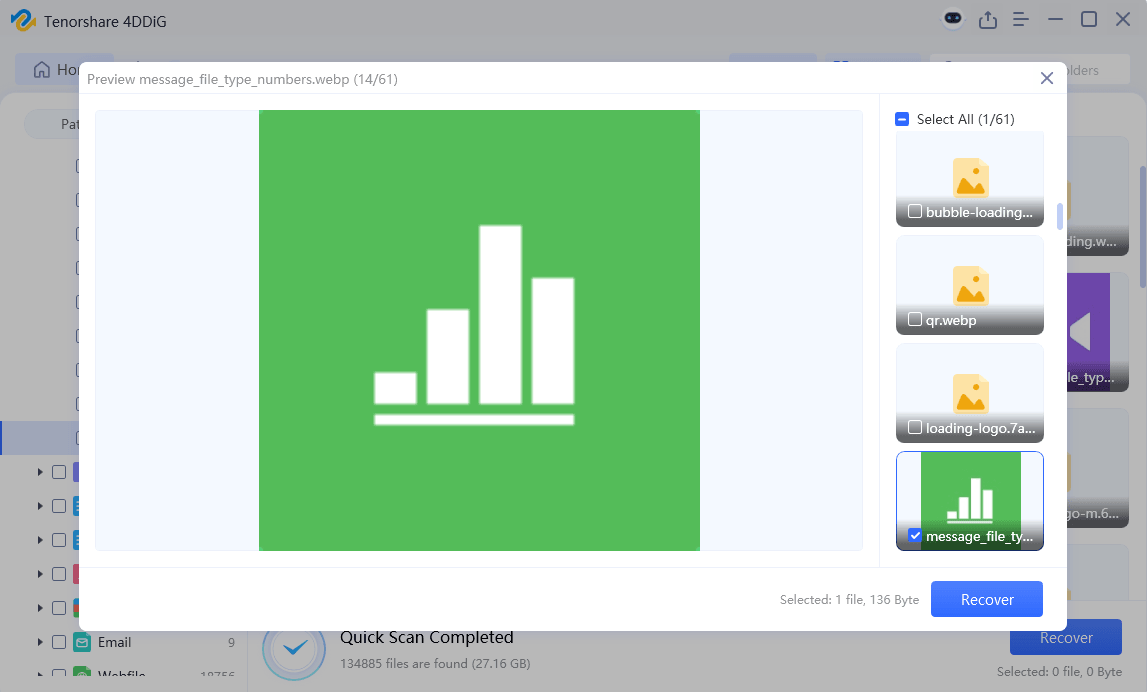
When you've found the files you're looking for, take a moment to preview them, then go ahead and recover them to a secure location. Be sure not to save them on the same partition where they went missing to prevent any data overwriting and permanent loss.

Fix 2: Recover Unsaved Word Document after Restart via AutoRecover
How to recover unsaved word document after computer restarts shutdown? Microsoft Word includes a feature called AutoRecover, which is designed to save your work at regular intervals automatically. This feature can be a lifesaver for recovering unsaved documents after a computer restart. Here's how to use AutoRecover:
- Open Microsoft Word.
- Click on "File" and then select "Open."
- In the "Open" dialog box, click on the drop-down menu next to "Files of type" and choose "All Files."
- Navigate to the location where you were working on the unsaved Document.
- Look for files with the ".asd" extension. These are AutoRecover files.
-
Please select the file with the most recent modification date and open it.

AutoRecover can be a reliable built-in feature, but it's important to remember that it works only if it was enabled before the computer restart. If you've configured AutoRecover correctly, it can be a dependable method for recovering your lost work.
Fix 3: Use Recent Documents
If your unsaved Word document was recently opened and edited, you may find it in the "Recent Documents" list within Microsoft Word. This method is quick and straightforward. Here's how to access your recent documents:
- Open Microsoft Word.
- Click on "File."
- Look for the "Recent" tab on the left-hand side.
- You will see a list of recently opened documents. Click on the one you want to recover.
-
This method can be beneficial if you have not restarted your computer since you last worked on the Document.

Fix 4: Recover Word Document After Restart via Manage Document
How to recover unsaved word document? Microsoft Word provides a feature called "Manage Document," which is often overlooked but can help recover unsaved documents. Follow these steps:
- Open Microsoft Word.
- Click on "File."
- Select "Info."
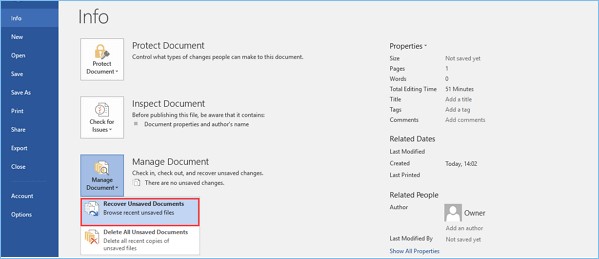
- In the "Info" pane, click on "Manage Document."
-
Choose "Recover Unsaved Documents" from the drop-down menu.
This feature will display a list of recently unsaved documents you can recover. Remember that this method may not be foolproof, as it relies on the automatic save function and may only sometimes have your latest work.
Fix 5: Recover Lost Word Document from Backup
If you have a habit of regularly backing up your computer or have saved your Word documents to a cloud service, you can recover unsaved word document from a backup. Here's how:
- Access your backup source, whether an external drive or a cloud service like OneDrive or Google Drive.
- Search for the folder where your Word documents are stored.
- Look for a previous version of the Document you were working on.
- Restore the most recent version from the backup.
- This method relies on proactive backup practices, but it can be an effective way to recover your work after a computer restart.
Fix 6: Open Temporary Files to Recover Lost Word Document
While you work on a Word document, temporary files are created by the software, and sometimes, these files can be recovered after a computer restart. To access these temporary files:
- Open Microsoft Word.
- Click on "File."
- Select "Open."
- In the "Open" dialog box, click on the drop-down menu next to "Files of type" and choose "All Files."
- Navigate to the folder where you were working on the unsaved Document.
- Look for files with the ".tmp" extension. These are temporary files.
-
Please select the file with the most recent modification date and open it.

Temporary files can be a valuable resource if you still need to enable AutoRecover or other backup methods. However, it's essential to act quickly, as these files may be automatically deleted after a certain period.
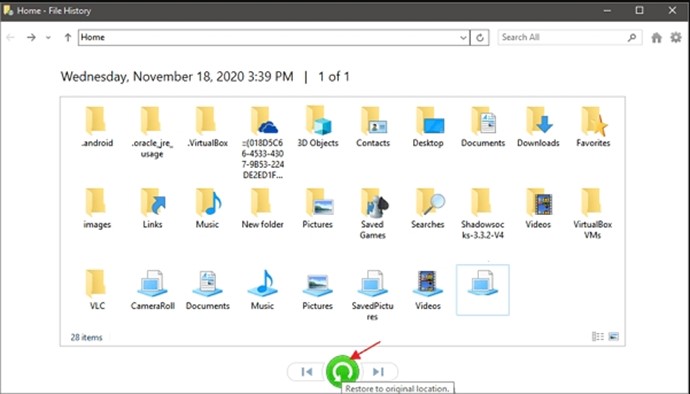
Fix 7: Recover Word Document After Computer Restart via File History
How to recover word document? Windows features a built-in tool called File History that automatically backs up your files and allows you to recover previous versions of your documents. To retrieve an unsaved Word document using File History:
- Go to the folder where your Document was located.
- Right-click the folder and select "Restore previous versions."
- In thwe "Previous Versions" tab, you'll see a list of available versions of your folder.
- Select the version that contains your unsaved Word document.
- Click "Restore" to recover the file.
-
File History can be a lifesaver if you enable it on your computer and maintain regular backups. It provides a way to recover previous versions of files, including unsaved Word documents.

Part 3: FAQ
Q 1: Where are temporary Word files stored?
Temporary Word files are typically stored in specific directories on your computer. The locations vary depending on your operating system:
- For Windows: Temporary Word files are often found in the following directory: C:\Users
\AppData\Local\Microsoft\Office\UnsavedFiles - For Mac: On Mac systems, you can locate temporary Word files in this directory: /Users/
/Library/Containers/com.microsoft.Word/Data/Library/Preferences/AutoRecovery - Accessing these files may help you recover your unsaved work.
Q 2: How do I open the document recovery pane in Word?
To open the document recovery pane in Microsoft Word, follow these steps:
- Open Microsoft Word.
- Click on "File."
- Select "Open."
- In the "Open" dialog box, look for the "Recover Unsaved Documents" option, usually at the bottom of the recent documents list.
- The document recovery pane provides access to unsaved documents and allows you to retrieve your work.
Q 3: How to recover unsaved Word documents on Mac without AutoRecovery?
If you're using a Mac and haven't enabled AutoRecovery, you can attempt to recover unsaved Word documents using the following method:
- Open Microsoft Word.
- Click on "File."
- Select "Open."
- In the "Open" dialog box, click on the drop-down menu next to "Files of type" and choose "All Files."
- Navigate to the folder where you were working on the unsaved Document.
- Look for files with the ".tmp" extension (temporary files) and open the one with the most recent modification date.
- This method allows you to access temporary files, which may contain your unsaved work. However, it's essential to act promptly, as temporary files can be automatically deleted after a specific time.
Conclusion
How to recover unsaved word document after computer restarts? Losing an unsaved Word document due to a sudden computer restart can be frustrating, but it doesn't have to spell the end of your hard work. This guide has seven effective methods to recover unsaved Word documents, each with advantages and limitations.
While 4DDiG Windows Data Recovery stands out as a comprehensive third-party solution for data recovery, built-in features such as AutoRecover, Recent Documents, Manage Document, and the use of temporary files offer reliable options for Microsoft Word users to retrieve their lost work without the need for external software. Additionally, maintaining regular backups and utilizing File History can provide extra protection against data loss.
💡 Summarize with AI:
You May Also Like
- Home >>
- Windows Recovery Solutions >>
- How to Recover Unsaved Word Document after Computer Restart


 ChatGPT
 Perplexity
 Google AI Mode
 Grok
Grok


