4 Ways to Fix First Aid Could Not Unmount the Volume for Repair
Download 4DDiG Mac Data Recovery to fix your unmountable volumes and save your important files. Our guide shows you how to repair disk issues and recover data safely. Keep reading for simple solutions!
Are you struggling with First Aid on your Mac saying it "could not unmount the volume for repair"? This common error pops up when you try to fix disk issues using Disk Utility. It happens when your Mac can't disconnect a drive to start repairs. Think of it like trying to fix your car while the engine is running – it just won't work. Your Mac needs to fully disconnect the drive first. When programs are still using the drive, or system processes are active, First Aid gets stuck. But don't worry. We've got four proven fixes to help you solve this Mac First Aid error. Plus, we'll show you how to protect your data during the repair process. This guide walks you through each solution step by step. Whether you're a beginner or tech-savvy, you'll find the right fix for your situation.
- Quick Tip: Recover Data from Unmountable Hard Disk on Mac HOT
- Way 1: Use Terminal to Unmount the Volume
- Way 2: Unmount the Volume via Safe Mode
- Way 3: Reformat the Disk
- Way 4: Repair the Disk via Recovery Mode
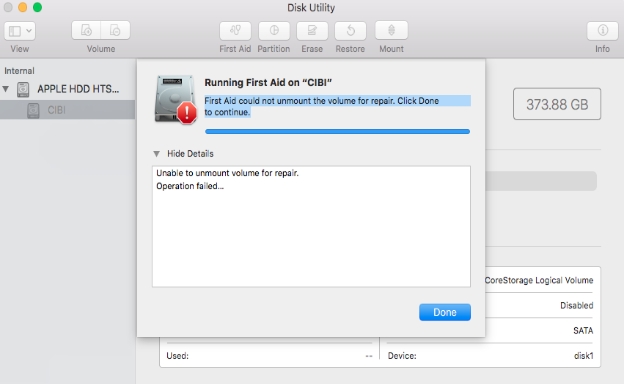
Part 1: What Cause First Aid Could Not Unmount the Volume for Repair?
Before learning about fixes, let's understand why First Aid gets stuck with the unmounting error. Knowing these causes helps you pick the right solution for your Mac's specific problem.
- Running Programs: Active apps prevent disk unmounting. Even when your screen looks clear, hidden background programs might still be accessing your files.
- System Processes: macOS background tasks like Spotlight indexing or Time Machine backups can keep your disk busy and block unmounting.
- Corrupted Files: Damaged file systems or bad disk sectors make it impossible for your Mac to safely disconnect the drive for repairs.
- Improper Shutdowns: Sudden power loss or force-shutdowns can leave your disk in a locked state, preventing First Aid from unmounting it properly.
- Hardware Issues: Faulty cables or failing drive components can interrupt the unmounting process and trigger First Aid errors.
- Permission Problems: Wrong file or system permissions might stop First Aid from getting the access it needs to unmount and fix your drive.
Attempting to force unmount your drive or using incorrect repair methods could lead to permanent data loss. We recommend backing up your important files with 4DDiG Mac Data Recovery before trying any fixes.
Quick Tip: Recover Data from Unmountable Hard Disk on Mac
Facing an unmountable disk on your Mac? 4DDiG Mac Data Recovery can help you grab your files before trying any fixes. This tool works even when your Mac can't access the drive normally, giving you a safety net for your important data.
The software bypasses common unmounting errors to reach your files directly. It works with corrupted drives, crashed systems, and even drives that won't show up in Disk Utility. Whether First Aid failed you or your disk won't mount at all, you can still rescue your data.
- Deep Scan Technology finds files on problematic drives other tools can't see
- Safely Recover data without changing the disk's condition
- Check your files before recovery to ensure they're intact
- Works with internal drives, external HDDs , and SSDs
- Choose exactly which files you want to save.
Secure Download
Secure Download
Here's how to use 4DDiG Mac Data Recovery to recover files from your unmountable drive:
-
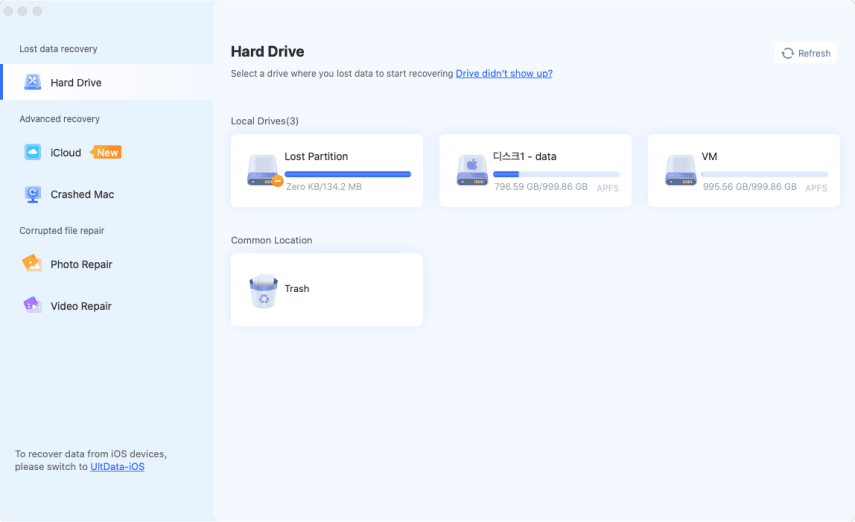
Choose the Unmountable Drive
Launch 4DDiG on your Mac and select the problem drive from the main screen. Even if your Mac can't mount it, 4DDiG will show it in the list.
-
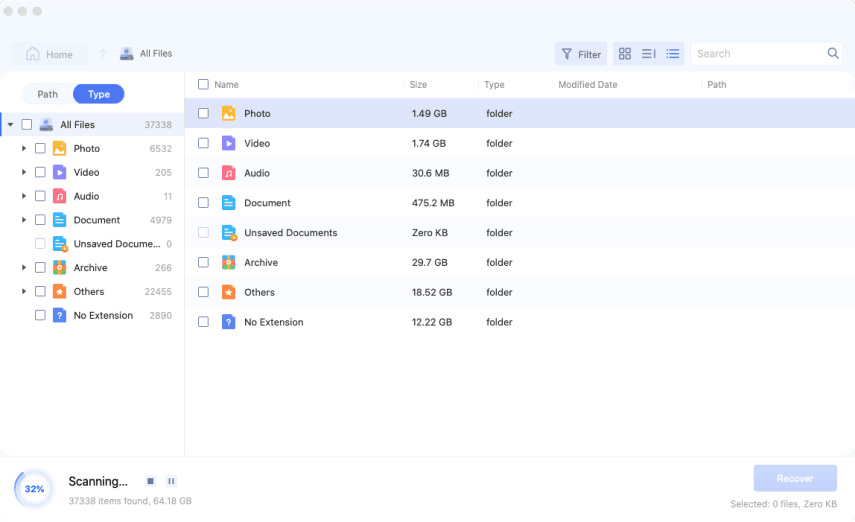
Run a Thorough Scan
Click " Scan " to start. The tool will search deep into your drive to find all recoverable files. You can check results in real-time as they appear.
-
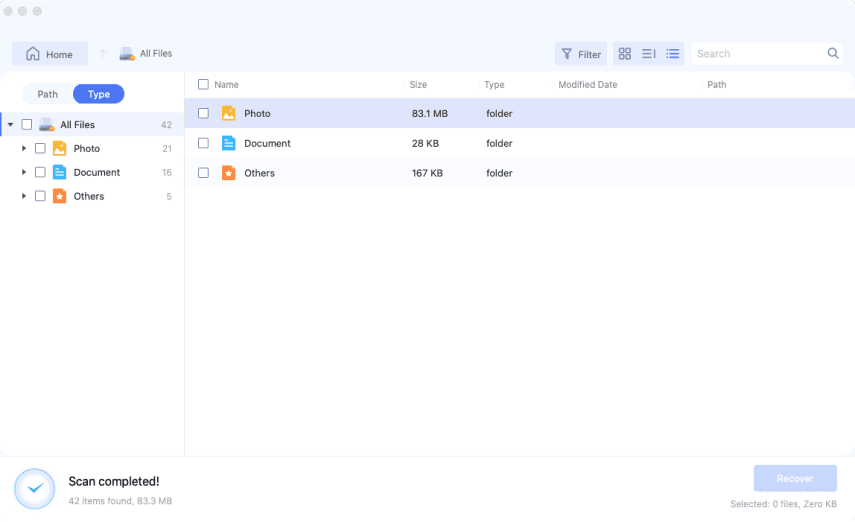
Save Your Files
Preview the found files to check their quality. Select what you need and click " Recover ." Save them to a different drive to prevent any data overlap.
If you see error -69673 or your drive isn't showing up, don't keep trying First Aid. Use 4DDiG first to secure your data, then proceed with disk repairs to avoid permanent data loss.
Part 3: How to Fix First Aid Could Not Unmount the Volume for Repair?
Want to fix that stubborn First Aid unmounting error? We've got four proven methods that work. Start with the simplest fix and work your way down the list if needed. Remember to back up your data with 4DDiG Mac Data Recovery first; it's always better to play it safe before trying any repairs.
Let's start with these solutions:
Way 1: Use Terminal to Unmount the Volume
Need a more direct approach? The Terminal gives you powerful control over your Mac. You can force-unmount stubborn volumes with a few simple commands.
- Open Spotlight by pressing Command + Space. Type " Terminal " and click to open it.
- In the Terminal window, type this command: "diskutil list" and press Enter . This shows all drives on your Mac.
- Look through the list for your problem drive. Note its identifier (it looks like disk2s1 or similar).
- Type this command and press Enter: "sudo diskutil unmount force /dev/[your-disk-id]". Replace [your-disk-id] with your drive's number.
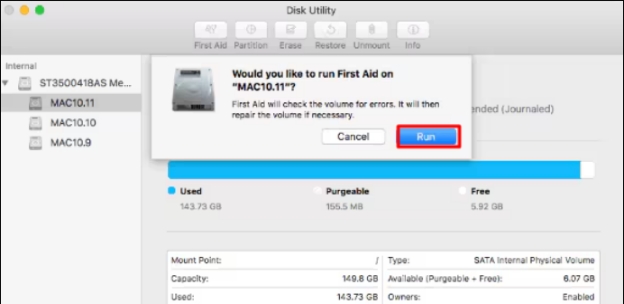
- Once the drive unmounts, open Disk Utility and run First Aid again. The repair should work now.
Write down your disk identifier before starting. It helps avoid mistakes when typing commands.
Way 2: Unmount the Volume via Safe Mode
Safe Mode turns off extra background tasks that might keep your drive busy. This gives First Aid a better chance to unmount and fix your drive.
-
Shut down your Mac completely. Wait 10 seconds to ensure all processes stop properly.
-
Press the power button and immediately hold down the Shift key. Don't let go until you see the login screen.
-
You'll notice your Mac runs slower; that's normal in Safe Mode. Log in to your account (you might need to log in twice).
-
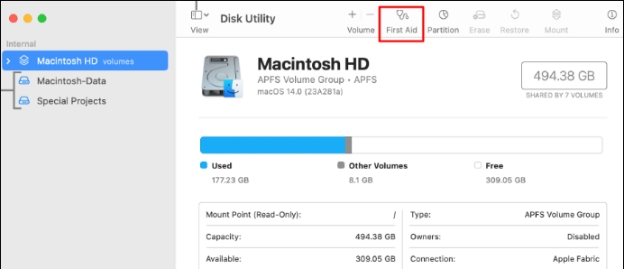
Open Disk Utility from your Applications > Utilities folder . Select your problem drive.
-
Try running First Aid now. With fewer background processes, your drive should unmount successfully.

-
After the repair, restart your Mac normally without holding any keys.
Safe Mode disables many startup apps, so your Mac might look different. Don't worry; everything returns to normal after a regular restart.
Way 3: Reformat the Disk
Recovery Mode gives you special tools to repair disk problems. It's like working on your Mac from the outside, where running drives won't interfere.
-
Turn off your Mac. Press the power button and immediately hold Command + R . Keep holding until you see the Apple logo.
-
When the Recovery menu appears, choose Disk Utility from the list of tools.
-
Select your problem drive from the left sidebar. Make sure you pick the main drive, not just a volume.
-
Click First Aid at the top. Since you're in Recovery Mode, the drive should unmount more easily.

-
Let the repair finish. If it works, click Done and restart your Mac normally.
-
If First Aid still fails, write down any error codes you see. You might need them for other fixes.
Always backup your data with 4DDiG before using Recovery Mode. Some repairs might need to erase your drive.
Way 4: Repair the Disk via Recovery Mode
This is your last resort. Only use this method if other fixes fail and you've backed up your data with the Data Recovery Tool.
-
Backup everything on your drive. Once you reformat, all data will be erased permanently.
-
Open Disk Utility from Applications > Utilities . Click View and choose " Show All Devices ."
-
Select your problem drive from the sidebar. Be extra careful to pick the right one.
-
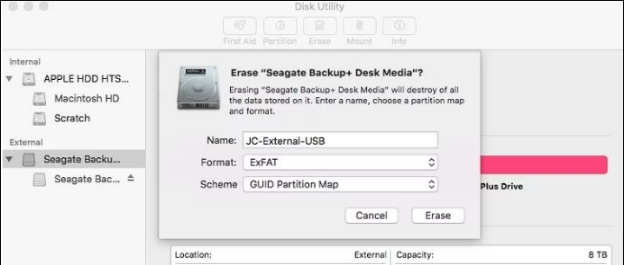
Click " Erase " at the top. Choose " APFS " for newer Macs or " Mac OS Extended " for older ones.

-
Give your drive a name and click Erase. Wait for the process to finish.
-
Run First Aid on the fresh drive to ensure it's working properly.
If you're reformatting your startup drive, boot into Recovery Mode first (Command + R at startup).
Need help getting your data back after reformatting? Try 4DDiG Mac Data Recovery to restore your important files.
How to Fix Mac Won't Boot into Recovery Mode after macOS 15 Update?
Part 4: Frequently Asked Questions
Q: How to fix volume could not be unmounted?
Ans: Try closing all running apps first. If that doesn't work, use Terminal's force unmount command. For stubborn drives, boot into Safe Mode and try again.
Q: Why is my Mac unable to unmount First Aid?
Ans: Usually, background processes or apps are using your drive. Check Activity Monitor for any programs accessing the disk. Sometimes, corrupt files can also block unmounting.
Q: How to fix unable to unmount volume for repair (- 69673)?
Ans: Error -69673 means your system can't release the drive. Restart your Mac and try Safe Mode. If problems continue, use Recovery Mode's Disk Utility.
Q: How do I remove mounted volume?
Ans: Click the eject button next to the drive in Finder. For external drives, try right-clicking and selecting "Eject." Use Terminal's diskutil unmount command for stuck volumes.
Final Words
Dealing with First Aid unmounting errors can be frustrating, but you now have four reliable fixes to try. Remember to always back up your data first; that's where 4DDiG Mac Data Recovery proves invaluable. It lets you safely recover files from unmountable drives before attempting repairs. Try the free version of 4DDiG today to protect your important data.
💡 Summarize with AI:
You May Also Like
- Home >>
- Windows Fix >>
- 4 Ways to Fix First Aid Could Not Unmount the Volume for Repair
 ChatGPT
 Perplexity
 Google AI Mode
 Grok
Grok


