Repair Photos Library with 4 Quick & Easy Solutions
Mac users facing corrupted or damaged the photos library is not a fresh occurrence, In fact, numerous users have reported this problem which makes the photos library inaccessible. Suddenly losing access to the photos library can be very frustrating. Therefore, you need to quickly check out these workarounds that will help you repair photos library without any professional assistance.
In this guide, you will find step-by-step instructions on how to repair photos library and regain access to your photos on the Mac. We will be including 4differnet solutions and recommend you try all of these fixes as you are going through our guide.

Part 1: What Causes The Photo Library Corrupted Problem on Mac?
There can be several different reasons that can potentially cause the photos library to be corrupted on a Mac system. If you aren’t sure how the problem occurred in your system and wish to know more about it, here are the possible reasons behind this problem.
- Out-of-Date OS: The majority of the problems on a Mac system are caused because of an older system version which is incompatible with the new versions of programs and applications. So, you are likely to face problems like a damaged photos library if you are operating on an older version of MacOS.
- Impact of a Virus/Malware: Keeping your Mac system protected from viruses and external threats is very important. Once the MacOS is infected with a virus, you will face similar problems in many different components, including the photos library.
- Corrupt System Files: If the MacOS is not able to access the data files of the program, it will give you an error every time you try to open it. One of the reasons for this is corrupted system files. Now, it can be part of a problem with the OS files, or the configuration data of the photos library.
- Hardware Problems: Unless the problem lies in the software, there is a good chance that there can be a physical issue with the hardware that is causing the problem. Any hardware damage can be reflected in the inability of the system to access certain components of the OS.
- Bad Sectors in Storage Drive: When it comes to hardware problems, a damaged storage drive is probably the reason behind most of the common MacOS problems. If you want to repair iphoto library, you might wanna start by checking the integrity of your storage drive first.
Part 2: How to Repair Apple Photos Library?
Compared to other critical MacOS problems, it is relatively much easier to repair photos library. Here, you will find 4 quick solutions to fix MacOS photo library and regain access to your photos easily.
Method 1: Use The Apple Photo Library Repair Tool
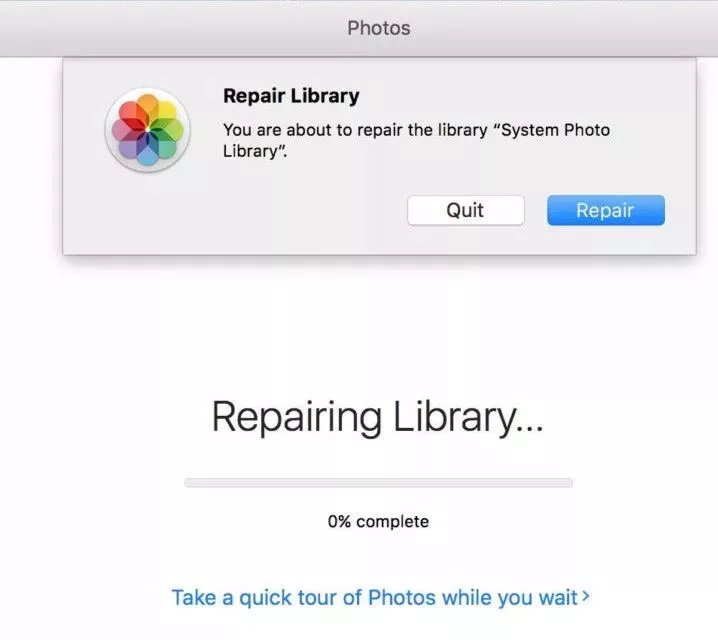
Before you try any other method, you should try out the built-in repair tool of MacOS. This tool can quickly recognize and fix problems with your system. This can be used for the photos library app, or even other apps in your system that might be showing similar errors.
-
If you are Photos Library app is already open, close it first.
-
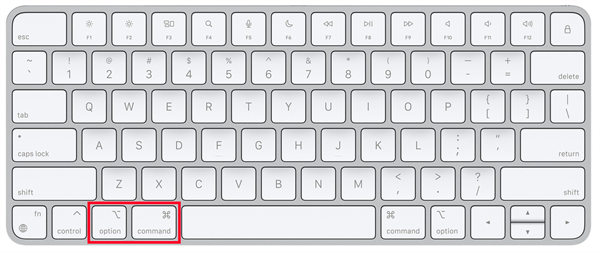
Then, open the Photos Library app while holding down the “Command” and “Options” buttons.

-
Click on the “Repair” button in the pop-up. This will begin the troubleshooting procedure. If asked, you will also have to provide your Apple account credentials.

Method 2: Use Disk Utility to Repair Photos App
If the built-in troubleshooter did not work out for you, you can use the Disk Utility to repair photos library. This is also a built-in feature of MacOS which works as a quick troubleshooter for problems like this. As the name suggests, this tool will check your disk and repair it if needed.
-
Open the Disk Utility window on your system.
-
Once you are in Disk Utility, click on “Show All Devices”
-
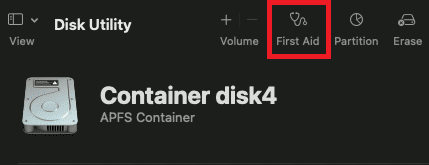
Here, you will find a “First Aid” option that allows quick troubleshooting.

-
Now, simply click on “Run” and then “Continue” to begin troubleshooting your system.
Method 3: Rebuild Photos Library
Instead of troubleshooting or restoring a backup, you can try to rebuild the photos library. However, it is a slightly advanced process and will need a little more of your attention. So, make sure you follow all of these steps carefully.
-
Open the “System Preferences” section from the Apple Menu on the desktop.
-
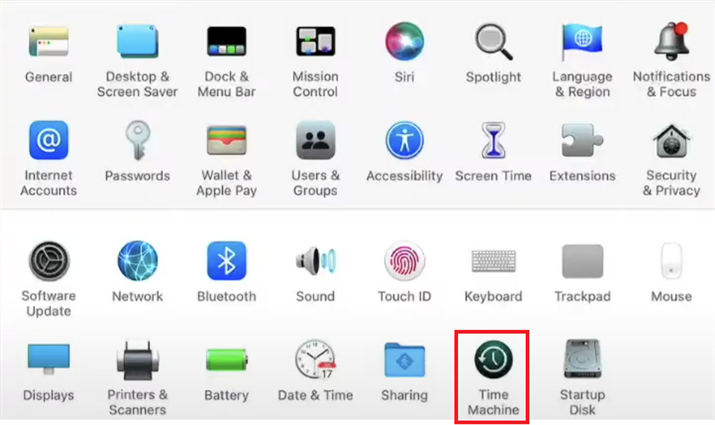
Now, click on the “Time Machine” option from this section. This tool will help you create a backup of your library before you rebuild it.

-
You can also backup the “Photoslibrary.photoslibrary” directly from “Go” > “Home” > “Pictures” > if Time Machine is not working.
-
Once you have created a backup, head over to the “First Aid” tool as specified in the 2nd method. ‘
-
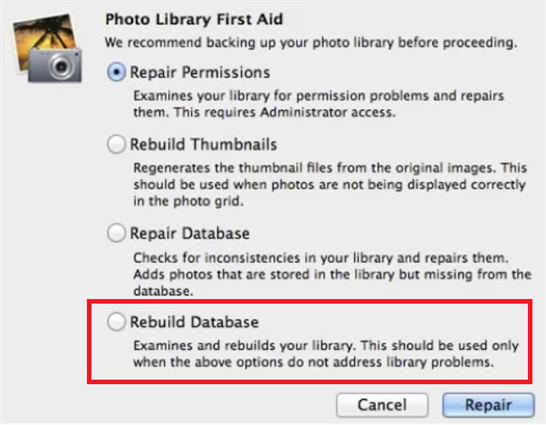
Here, you can select the “Rebuild Database” option and click on “Repair” to start rebuilding your photos library.

-
If you face any problems during the process, you can always revert back to the previously saved backup of your photos library file.
Method 4: Update Your MacOS
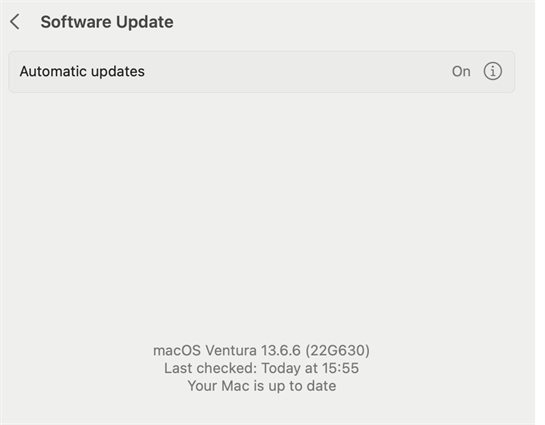
Choosing the latest version of the operating system usually resolves a lot of problems in the system. The maintenance team at Apple is always working towards fixing such problems. The fixes for such issues are usually included in the latest version of the MacOS as patches.
-
Open the “Software Update” section from “Apple Menu” > “System Preferences”.
-
Click on the “Update Now” button. Now, the system will automatically find the latest MacOS version available for your system. ‘

-
Once the update process has started, just wait until the system update finishes. You should restart the system after the update to check the status of the problem.
Part 3: How to Repair Corrupted Photos in Photo Library?
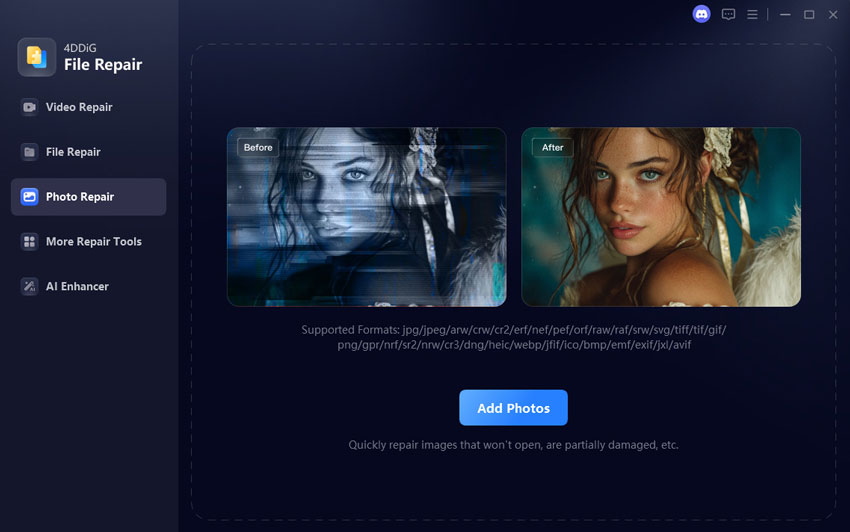
If you are noticing corruption issues with selected images, you should try the AI-powered 4DDiG Photo Repair tool instead of repairing the photos library entirely. This is a very smart and handy tool that helps you repair pixelated or even corrupted photos with a single click. More importantly, the tools use AI-enhance to not only maintain the original image quality but also sharpen the details and remove noise from the image. It works with a wide range of image formats such as JPG, JPEG, PNG, RAW, SRW, CRW, RAF , and more.
Key Features
- Repairs grey areas, damaged colors, missing headers, and more.
- 3 well-trained AI models are available
- Restores and colorizes B&W Photos
- Batch operation can be used for up to 3,000 images at once
- Supports a wide range of image formats.
Steps to Repair Corrupted Photos > in Photos Library :
Once you have downloaded the program, install it in your system so that you can easily repair Corrupted Photos using AI. Once installed, you can follow these steps:
Secure Download
Secure Download
-
After launching the application, click on the “Corrupted File Repair” option from the left menu.
-
Here, you can choose how you wish to repair the photo. Click on the “Photo Repair” to start the process.

-
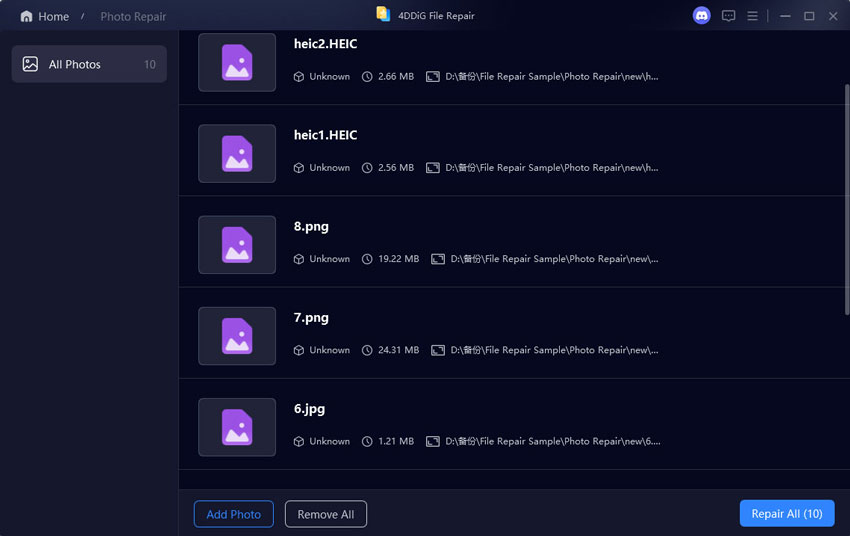
Now, you can directly import the corrupted photos into the program. Once done, you can click on the “Start Repair” button to start the process.


-
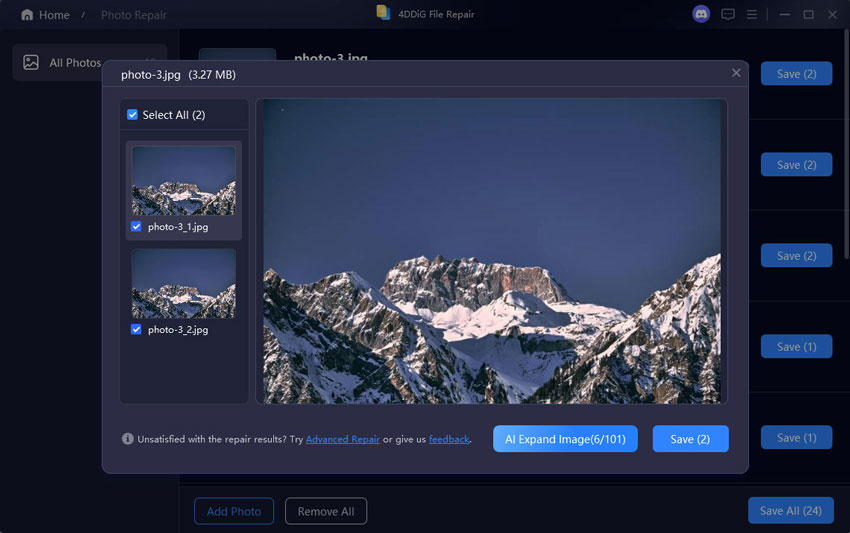
With that, the program will now automatically fix the errors in the images using AI. Upon completion, you will also get a chance to review the repaired images.

-
If you are satisfied with the results, you can store the repaired photos at any location on your storage drive.
Repair Photos Library FAQs:
Q1: how long does it take to repair photos library
The time it takes for your system to repair photos library depends on the sheer size of the library as well as which method you prefer. If you are using the built-in troubleshooting in MacOS to fix the problem, it might take anywhere between 10 minutes to even an hour. But, you should prefer using the photos repair library tool if you wish to fix selective images that are corrupt.
Q2: How to clean up the photo library on MacOS?
Cleaning up the photos library is quite easy as you simply need to perform a few tasks as follows:
- Remove duplicate images from the photos library.
- Organize the images in dedicated albums for quicker navigation.
- Timely remove unwanted images from your system to avoid clutter.
- The “Optimze Mac Storage” feature also helps you store low-resolution images to save storage space.
Q3: What can cause the photos library to not open on MacOS?
There can be several reasons that can cause the photos library to not open at all on your MacOS system. There can be corrected files of software problems that might make the contents of the program inaccessible to the system. Also, the problems can be caused by hardware issues such as bad sectors in your storage drive.
Conclusion
If your photos library is not working as expected on your MacOS system, it can either be a problem with a few images, or the feature entirely. However, fixing the problem is equally easier in either case. If you wish to try out the standard troubleshooting methods, you can check out the 4 methods to repair photos library explained in this guide. But, we will strongly recommend trying out the AI-powered 4DDiG Photo Repair tool for its extensive set of features such as high-speed repair, batch repair, and advanced repair options for exceptional precision.
Secure Download
Secure Download


 ChatGPT
 Perplexity
 Google AI Mode
 Grok
Grok

