How to Fix Mac Won't Boot into Recovery Mode?'My Macbook pro just won't boot into recovery mode or log in. I have tried all the possible combinations. Any new methods to get into recovery?'
Mac has a long list of cool features that make it the best in the business. The recovery mode is one such cool feature that enables users to restore macOS without much effort. Apart from that it also offers users access to many utilities that are aimed to solve common errors which occur on Mac. But what if your mac won't boot into recovery mode? What if you are hung out to dry with a Mac that you can't restore? It's a big dilemma that carries no easy answers. But not to worry because we are here to do the difficult work and give you working solutions. Read on to find out ways in which you can get out of the mac won't boot into recovery mode problem, what to do in cases of data loss, and much more in this succinct guide.

Part 1: Why Won't My Mac Boot into Recovery Mode after macOS 15 Update?
The reasons why your macbook pro won't boot into recovery mode are varied and not singular. The most common ones include :
- Running an old version of Mac like Snow Leopard or older that does not have a recovery partition.
- Damaged or defective keyboard.
- The Bluetooth keyboard is not connected to the Mac.
- The recovery partition is missing or damaged.
- New Macs have different ways of entering into recovery mode preventing you from accessing it.
Part 2: How to Fix Mac Won't Boot into Recovery Mode after macOS 15 Update?
Now that we have answered your question of 'why my mac won't boot into recovery mode' after macOS 15 Update, let's see what you can do to fix it.
Fix 1: Check Your Keyboard
Defective Command or 'R' buttons may be a big reason behind the mac recovery mode not working. Check your keyboard by using these buttons in other applications or by using a different keyboard for your Mac. You can repair the keys if they are faulty or replace the keyboard entirely.
Fix 2: Try a Different Keyboard Shortcut
In Macs that are equipped with a T2 security chip, the classic keyboard shortcut to enter into recovery mode may not work thus causing the mac can't start recovery mode problem. In these laptops you have to try a different keyboard shortcut to avoid the mac won't enter recovery mode error. If you have a Mac with a T2 chip try the following keyboard shortcut: Option/Alt + Command (⌘) + R.
Macs that have a T2 chip include,
- iMac Pro
- Mac Pro 2019
- Mac mini 2018
- MacBook Air 2018 or later MacBook Pro 2018 or later
Fix 3: SMC Reset
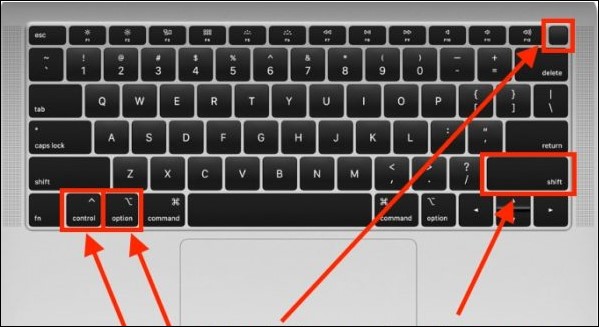
The System Management Controller (SMC) is an essential part of Mac's functioning as it controls features like power, battery, fans, etc. A bug in the SMC may explain why your macbook won't boot to recovery. To reset the SMC:
Step 1: Shut your Mac down and unplug it completely.
Step 2: Plug it back and press and hold the 'Control-Shift-Option' keys along with the Power button for 10 seconds. Release all the buttons and restart. Your SMC has been reset.
Fix 4: Create a Bootable Installer for MacOS
If your imac won't boot into recovery mode a possible solution would be to create a bootable installer and restore mac. Before starting this fix make sure you have a working USB.
Step 1: Go to the utility tab on your Mac by going to the 'Options' tab during startup.
Step 2: Click on the 'Disk Utility' option and insert your USB.
Step 3: Select the drive from the pop-up list which will restart the Mac. Repair Mac on startup.
Congratulations if it works then you've successfully navigated the m4 mac won't boot into recovery mode problem
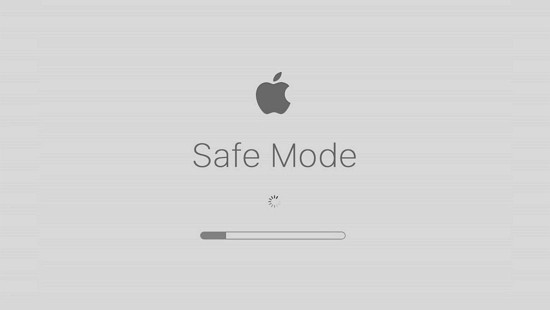
Fix 5: Use Safe Mode on Mac
Safe mode strips Mac of its non-essential features so you can pinpoint the exact cause of why the mac won't boot into recovery mode. To enter safe mode in Mac:
Step 1:Turn off your Mac and press and hold the 'Power' button until the Startup disks and Options appear on your Screen.
Step 2: Now press and hold the 'Shift' key and click 'Continue in Safe Mode'.
Try to boot into recovery mode once you are done using the safe mode.
Fix 6: Use Time Machine Backup
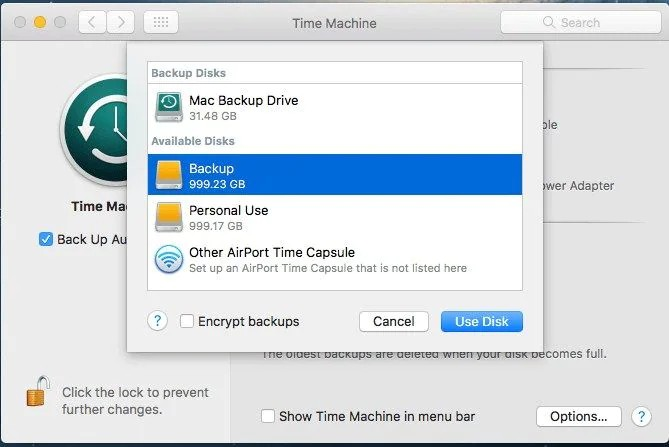
If the recovery mode isn't helping you restore your Mac then the Time Machine definitely will, here's how.
Step 1: Turn your Mac off and plug in your Time Machine Backup into the Mac.
Step 2: Press the Power button and at the same time press and hold the 'Options' key. Release the key once you see the Startup Manager on the screen.
Step 3: Select the backup drive and click on 'Return'. Now your Mac will enter into the OS X installer window from where you can restore Mac from the Time Machine backup.
Fix 7: Use the Mac Internet Recovery feature to Reinstall macOS
In a mac OS won't boot into recovery mode situation you are not left with many options to install macOS. One of the ways to do it is through the Internet recovery mode. To use the internet recovery:
Step 1: Shut down your Mac and then power it up.
Step 2: After you press the power button, immediately press and hold the Option + Command + R keys until you see a spinning globe and a progress bar. Release the keys and follow the wizard to reinstall macOS.

Part 3: How to Recover Data from a Mac That Won’t Boot?
A Mac which can't boot recovery mode mac may suggest problems with the recovery partition. This puts your data at risk and if you are extremely unlucky you may also end up losing your data. If you Mac won't boot, you require a trusted friend that can boot your Mac and bring your data back without any fuss. Introducing the Tenorshare 4DDiG data recovery software that is, without doubt, the best recovery software in the market. Made with features that will astound you, the Tenorshare 4DDiG is the perfect amalgamation of modern technology and precision to combat data problems while solving the mac not going into recovery mode. Some of its best features include:
- Creat a bootable drive and recover data from unbootable Mac.
- Recover data from emptied trash.
- Data recovery from Local & External Disks, Lost Partitions, Bit locker Encrypted devices, Crashed PCs, etc.
- Support to recover photos, videos, documents, audio, email, etc.
- Support all operating macOS System including the latest macOS Sonoma.
- Faster with a greater success rate than other apps available in the market.
Before data recovery from unbootable Mac, prepare yourself with another working Mac and a blank USB. Now follow the video or steps below to figure out how to boot Mac and recover data. If your mac mini won't boot into recovery mode and you have lost your data after fixing the issue, 4DDiG can also get them back.
Secure Download
Secure Download
- Download 4DDiG Mac
- Create the Bootable Drive
- Recover from Crashed Mac
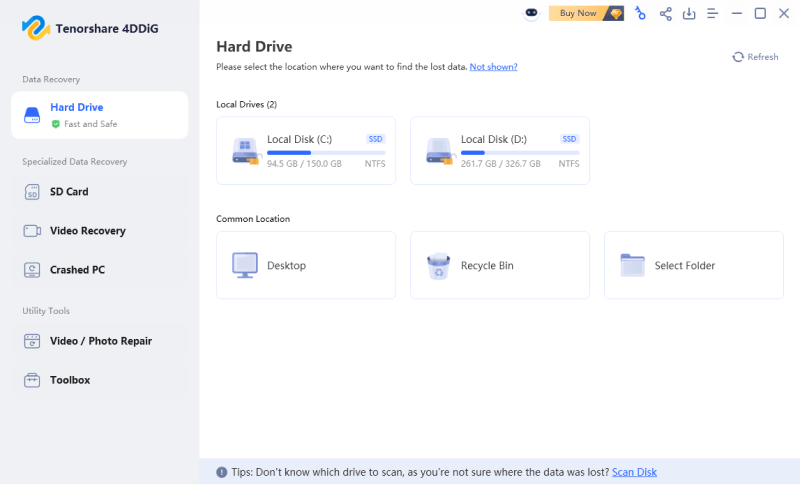
After you download the 4DDiG Mac Data Recovery on a functioning Mac PC, open the program and click 'Start' after choosing "Recover Data from Crashed System."
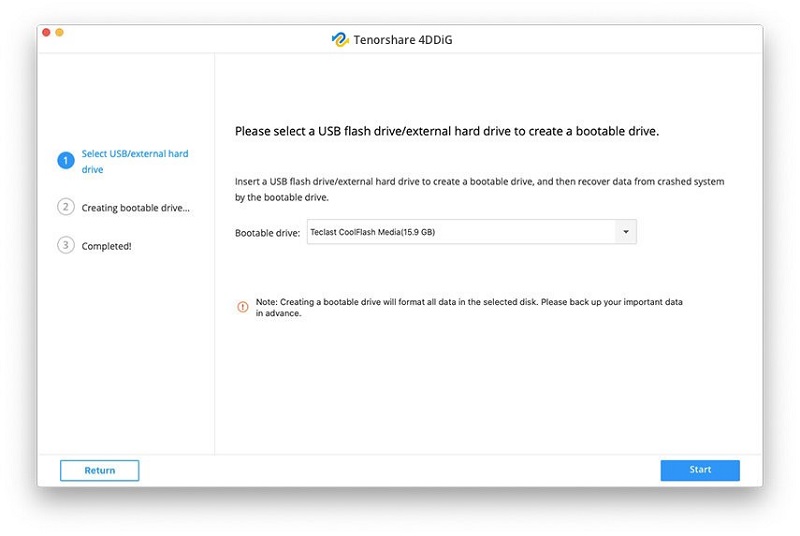
Insert the USB drive/external portable hard drive in the bootable Mac; at that point in the "Bootable drive," pick the one you just installed and click "Start." The format will begin, and a bootable system is formed.
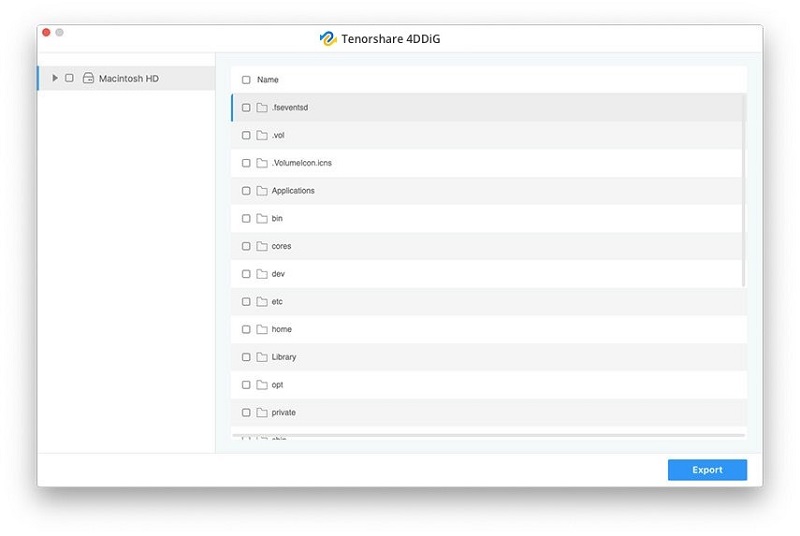
Put the USB drive into your crashed Mac; at that point, boot the Mac by holding the "Option" button. Select "4DDiG for Mac Data Recovery" to boot the disc. After entering the system, you can pick the data to send out by tapping on "Export."
Part 4: Related FAQs
1. What Is Mac Recovery Mode?
Macs recovery mode is a useful utility that is designed to recover your Mac and solve other issues in case your Mac is failing to boot.
2. How to Boot into Recovery Mode Mac?
To boot into mac air recovery mode, turn your Mac off and power it up again, immediately press and hold the 'Command and R' keys.
3. How do I restore my Mac to factory settings without recovery mode?
If you can't get imac into recovery mode you can use the internet recovery mode to restore Mac. To do it shut down your Mac and press the 'Options + Command + R' keys and follow the wizard thereon.
Summary
The guide is now complete and we hope we have answered your question of why your mac pro won't boot into recovery mode. In addition to that, we have also primed you with a powerful solution, the Tenorshare 4DDiG data recovery tool, to fix any data loss problems that may accompany this issue. Happy fixing!
 ChatGPT
 Perplexity
 Google AI Mode
 Grok
Grok
