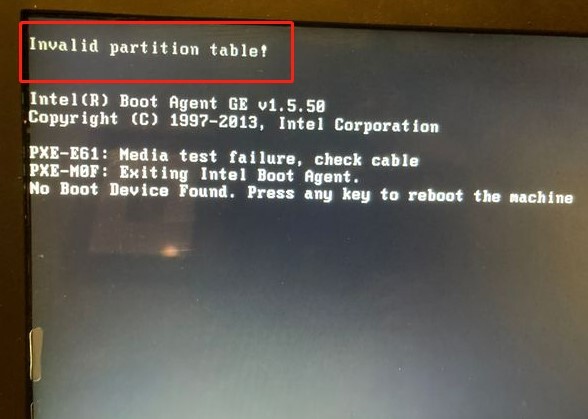
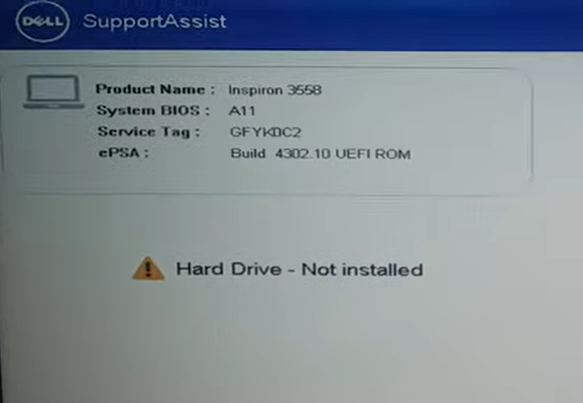
What Is & How to Bypass Dell BitLocker Recovery Key?
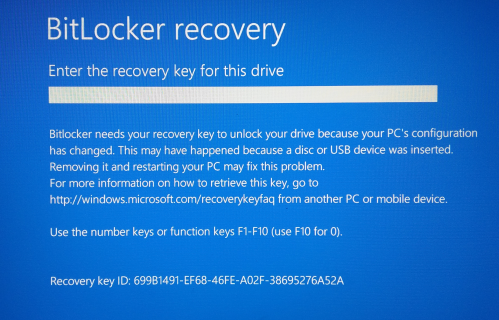
You turn on your Dell laptop, and instead of loading the screen, it asks for a long BitLocker recovery key. You feel confused. Where did that key come from? Why is it asking for it now? Don’t worry.
This guide breaks down what the Dell BitLocker recovery key means, why it suddenly appears, and how to recover access to your device safely.
What Is Dell BitLocker Recovery Key?
Before finding or using the Dell BitLocker recovery key, it helps to know what BitLocker is and why this key exists.
What Is BitLocker on Dell Devices?
BitLocker is a security feature built into Windows that protects your Dell laptop’s data by encrypting the whole drive. Once it’s turned on, your files are locked and can’t be opened without permission.
Many Dell laptops have BitLocker turned on by default, especially those with a TPM chip. This keeps your information safe if the device is lost, stolen, or changed without your knowledge.
What Is BitLocker Recovery Key on Dell?
The BitLocker recovery key is a special 48-digit code that lets you unlock your Dell laptop if BitLocker cannot verify your device or if you forget your password. It acts as a backup method to access your encrypted drive.
Whenever BitLocker detects changes to your system, such as a BIOS update, TPM reset, or hardware change, it may ask for this recovery key. Without it, you won’t be able to access the files on your laptop.
Why Is My Dell Asking for a BitLocker Recovery Key?
If the BitLocker keeps asking for recovery key on your Dell laptop, it can be confusing. This usually happens when BitLocker detects a change in your system. Understanding the common reasons behind can help you unlock your device safely and prevent them from happening again.
| Reasons | Description |
|---|---|
| 📌 BIOS or firmware updates | Changing system firmware can trigger BitLocker to ask for the recovery key. |
| 🧐 TPM issues | If the TPM is reset, cleared, or fails, BitLocker may require the key. |
| 💾 Hardware changes | Adding, removing, or replacing hardware components can make Dell laptop asking for Bitlocker recovery key after every reboot. |
| 💻 Windows updates or reinstallation | Major updates or reinstalling Windows can sometimes cause BitLocker to request the recovery key. |
| ⚙️ Incorrect startup or boot attempts | If the system detects tampering or multiple failed unlock attempts, it may ask for the key. |
If you’ve lost the hard drive’s data due to BitLocker encryption, stop using your computer immediately and look for a powerful BitLocker data recovery software. Get a reputable software with a high success rate to get back your lost data.
How to Find Dell BitLocker Recovery Key?
Now that you understand why your Dell laptop might ask for a BitLocker recovery key, the next step is knowing where to find it. Your recovery key is stored in specific locations depending on how BitLocker was set up, and finding the correct one will let you unlock your drive quickly.
Option 1: Microsoft Account
If you’ve linked your Dell laptop to a personal Microsoft account, BitLocker may have automatically saved the recovery key there. You can access it online anytime.
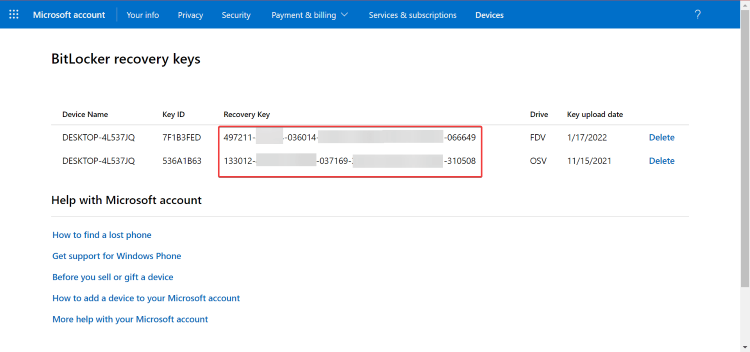
- Sign in to your Microsoft account.
- Look for the recovery key linked to your Dell device.
- Copy or note down the 48-digit key to unlock your laptop.
Option 2: USB Drive
You might have saved your recovery key to a USB drive during BitLocker setup. This allows you to unlock your drive even without internet access.
- Plug in the USB drive where you previously saved your BitLocker recovery key.
- Look for a text file named something like BitLocker Recovery Key.txt or the file you saved during setup.
- Double-click the text file to view the 48-digit recovery key.
Option 3: Active Directory
For corporate or enterprise devices, the recovery key is often stored in your organization’s Active Directory. IT administrators can retrieve it for you. Here's how to find BitLocker recovery key for Dell laptop.
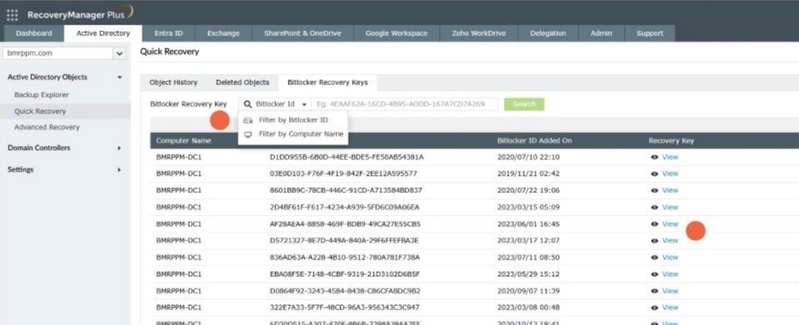
- Provide your device information or Key ID to your IT admin.
- The admin retrieves the recovery key from Active Directory.
- Use the key to unlock your Dell laptop.
Option 4: Azure Active Directory
If your Dell laptop is joined to a work or school account, the recovery key could be stored in Azure AD. You may be able to access it online or contact IT support. Let's go through how to get BitLocker recovery key for Dell laptop.
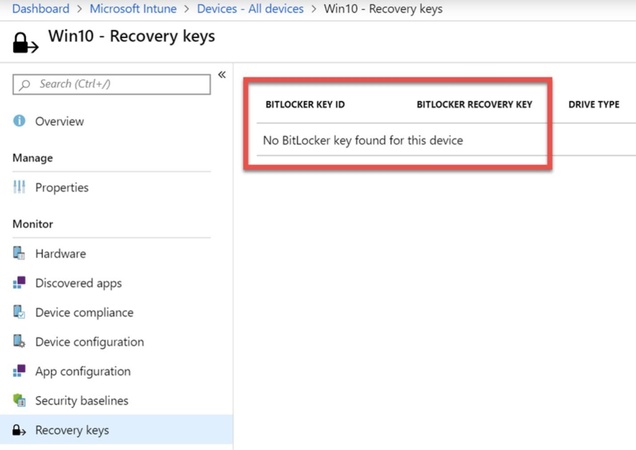
- Sign in to your Azure AD account with your work or school credentials.
- Locate the recovery key for your Dell device in the device management portal.
- If access is restricted, contact IT support to retrieve the key.
Option 5: File Saved in Somewhere
During BitLocker setup, you can choose to save the recovery key as a file to whereever you like. Storing it externally ensures you can access it if your drive is locked.
- Go to the location where you saved the recovery key during BitLocker setup. This could be a USB drive, external hard drive, or another unencrypted folder.
- Look for a .txt file containing the 48-digit recovery key.
- When prompted by BitLocker, type in the 48-digit recovery key from the file.
The next time you want to save the recovery key, do not save it on the encrypted drive itself. In the meantime, ensure the storage location is secure and backed up if needed.
Option 6: Printed Copy
In some cases, you're allowed to print a physical copy of the recovery key for safe storage. If you've performed this before, look for the copy and you can find the BitLocker recovery key.
How to Bypass BitLocker Recovery Key on Dell Laptop?
Actually, the safest way to unlock a BitLocker‑locked Dell laptop is to use the actual BitLocker recovery key. It’s the one method designed for recovery and when entered correctly, it lets you regain access without risking your data. Here's how to do when Dell keeps asking for BitLocker recovery key:
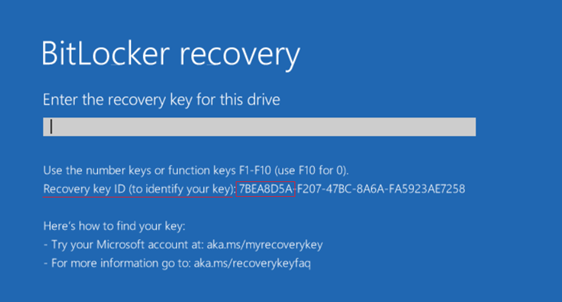
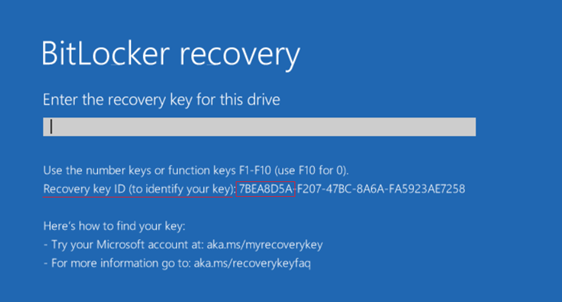
- Take a photo or write down the Recovery Key ID shown on the BitLocker screen.
- Locate your saved 48‑digit recovery key (Microsoft account, Azure/AD, USB, file, or printed copy).
- Confirm the Key ID matches the one on the screen, then enter the full 48‑digit key at the prompt.
- Press Enter to unlock your Dell; if it fails, double-check the digits and Key ID or try another saved key.
If you can’t enter the recovery key at the pre‑boot screen, you can use Command Prompt or PowerShell to bypass Dell BitLocker recovery key on Windows 10/11.
Unlock BitLocker Recovery Key on Dell Laptop via Command Prompt
If you prefer to work inside Windows/WinRE, you can use Command Prompt to unlock the drive. This method still requires a valid credential and is especially useful for admins. To do so, follow these steps:
- Click "Start", type
cmd, right-click Command Prompt, and select "Run as administrator".
- Check BitLocker protectors and Key IDs by typing:
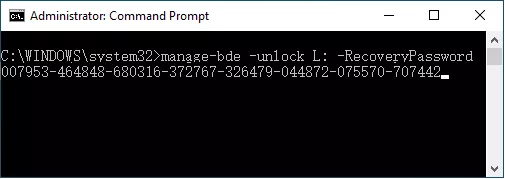
manage-bde -protectors -get C:. Look for the "Recovery Password ID" and match it with the Key ID shown on your Dell screen. - Once the Key ID matches, unlock the drive by typing:
manage-bde -unlock C: -RecoveryPassword 123456-123456-...-123456. Replace the numbers with your 48-digit recovery key.
- Verify the drive is unlocked by typing:
manage-bde -status C:. You should see "Lock Status: Unlocked".
If your Windows fails to boot and enter the page, you can select the "Skip this drive" link at the bottom. Then follow here to get to the cmd: "Advanced options → Troubleshoot → Advanced options → Command Prompt".
Bypass BitLocker Recovery Key on Dell Laptop via PowerShell
If you prefer a modern, option or need to run commands remotely, use PowerShell to unlock BitLocker on your Dell XPS. Like the previous method, this requires a valid unlock credential and must be run in an elevated PowerShell session (Windows or WinRE).
- Open PowerShell as an administrator: click Start, type
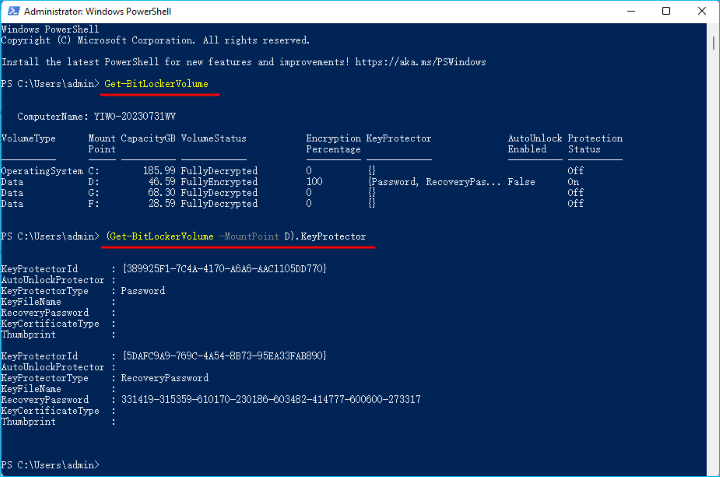
PowerShell, right-click Windows PowerShell, and select "Run as administrator". - List BitLocker volumes and protector IDs by typing:
Get-BitLockerVolume | Format-List. Find theRecoveryPasswordIdand match it with the Key ID shown on your Dell screen. - Once the Key ID matches, unlock the drive by typing:
Unlock-BitLocker -MountPoint "C:" -RecoveryPassword "<YOUR 48-DIGIT RECOVERY KEY>". Replace the placeholder with your actual recovery key.
- Confirm the volume is unlocked by typing:
Get-BitLockerVolume -MountPoint "C:" | Format-Listand checking that the volume shows as unlocked.
How to Recover Files from a BitLocker-encrypted Dell Laptop?
When your Dell laptop is locked by BitLocker and you can’t open your files, Tenorshare 4DDiG can help. This professional tool is designed to recover lost or inaccessible data from BitLocker-encrypted drives, even if you don’t have the recovery key.
It supports various storage devices such as internal and external hard drives, SSDs, USB flash drives, and SD cards. With its powerful deep scan and user-friendly interface, 4DDiG makes it easy to retrieve deleted, hidden, formatted or encrypted lost files without any technical hassle.
Secure Download
Secure Download
Steps to perform Dell BitLocker recovery using 4DDiG Windows Data Recovery:
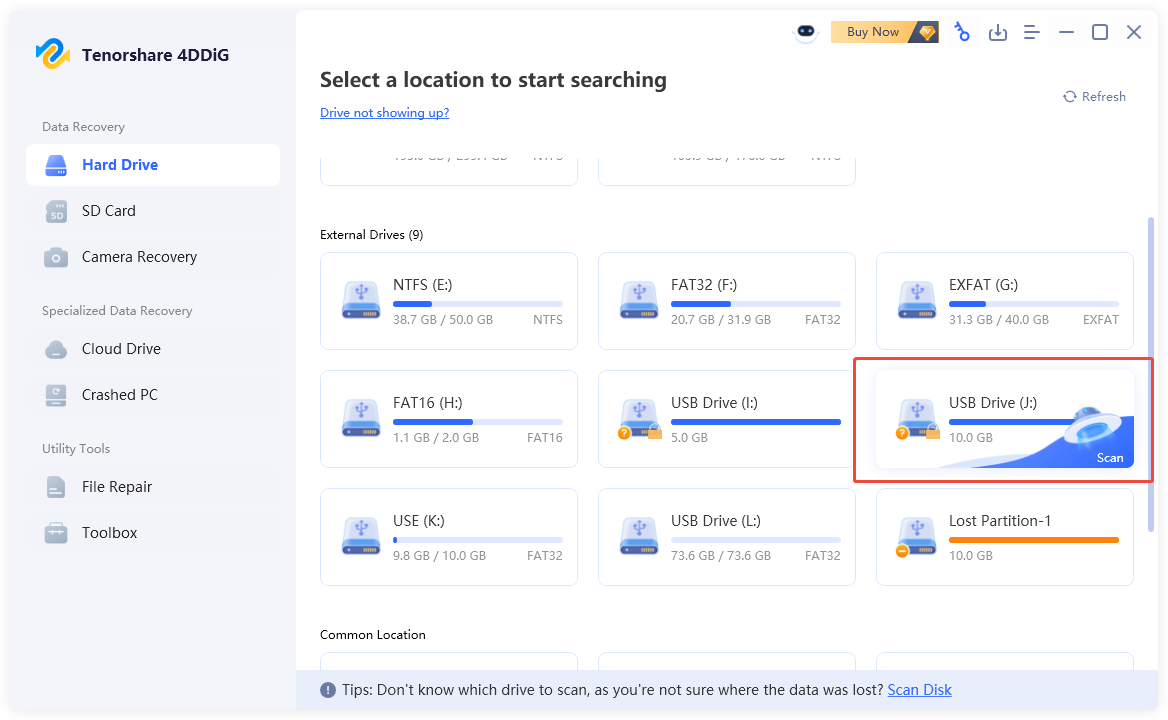
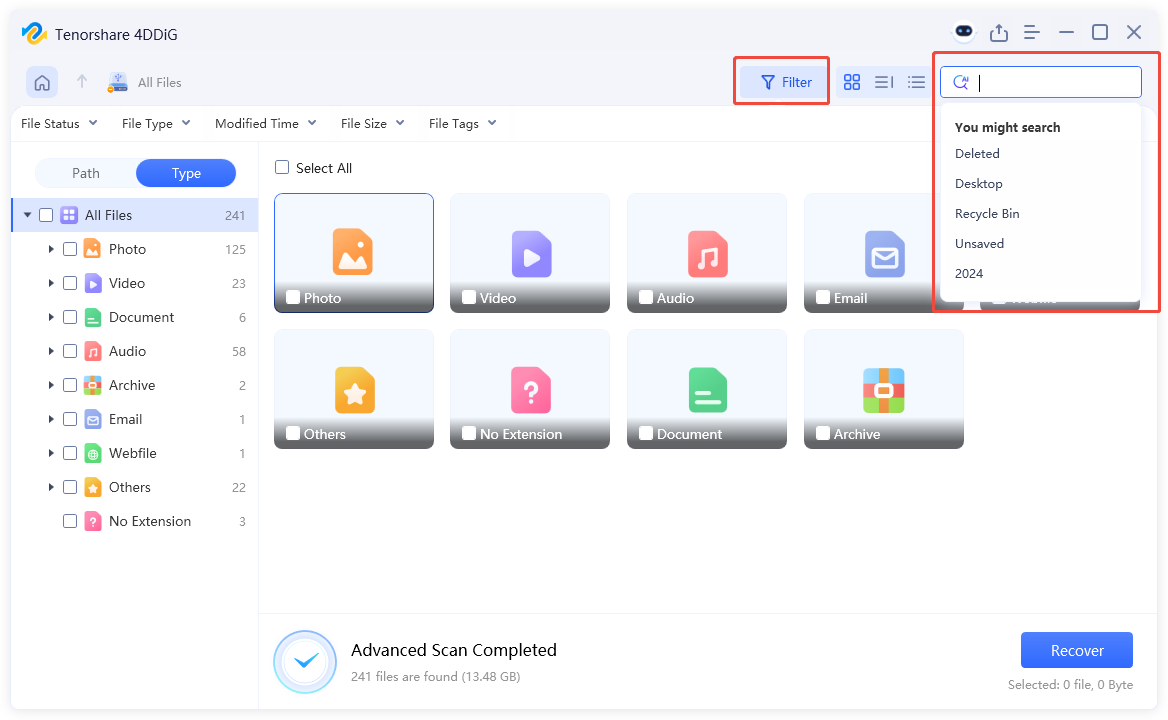
- Once 4DDiG Windows Data Recovery is launched, all detected drives will appear. Locate the BitLocker-encrypted drive, and select it to start scanning.

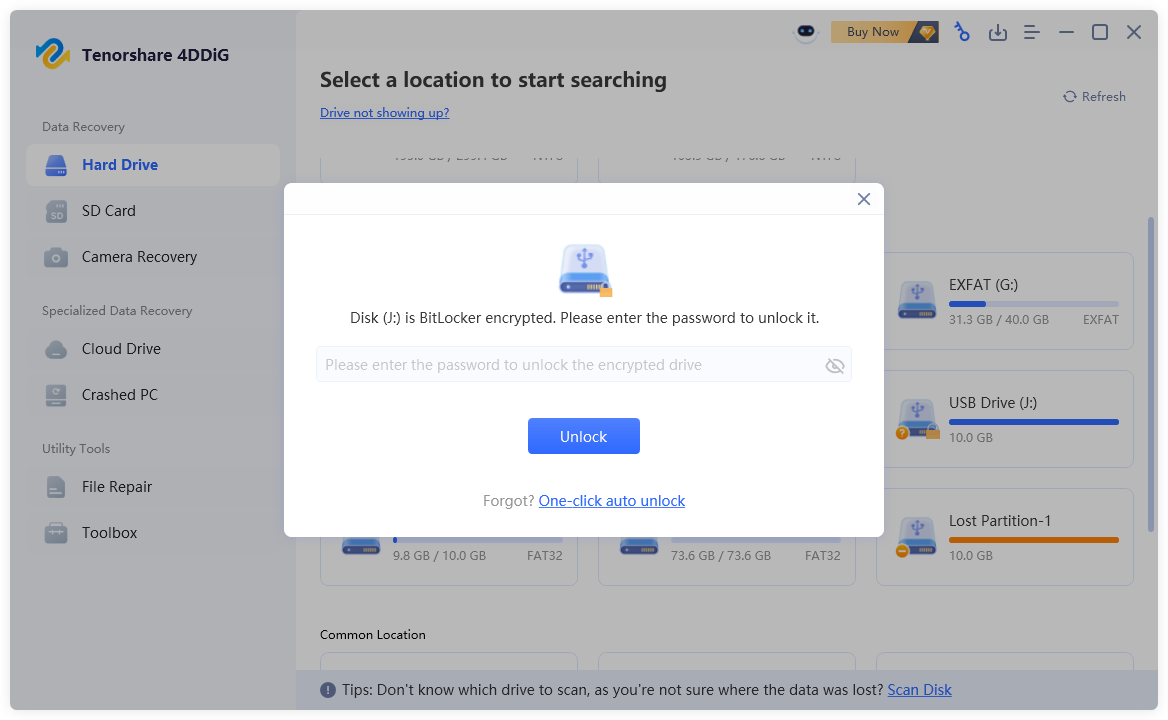
- You’ll be prompted to enter the password, or you can use the "One-click auto unlock" feature to automatically find the key in your Microsoft account or on your C drive.

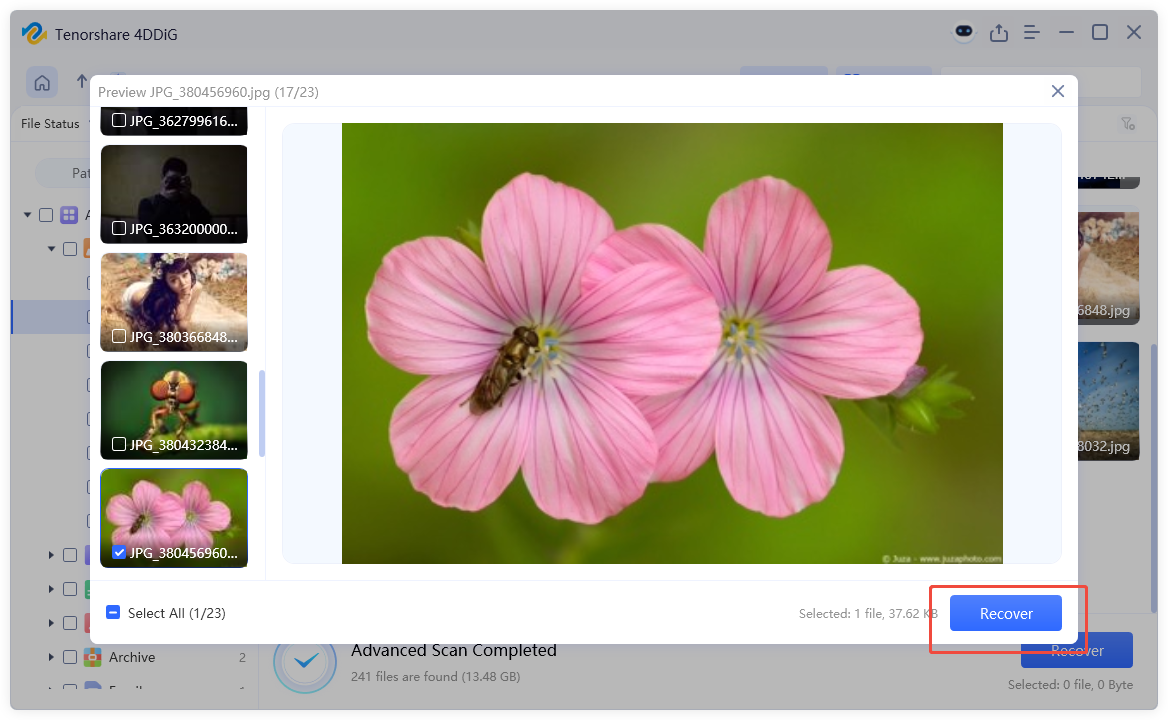
- The software will scan the drive for recoverable files, allowing you to preview the ones you need after that.

- Click "Recover" to restore the selected files, then save them to your computer or cloud storage.

FAQs About Dell BitLocker Recovery
Q1: Is BitLocker Automatically Enabled on Dell Laptops?
Yes, BitLocker is often automatically enabled on Dell laptops. When you sign in with a Microsoft account during setup, Windows may turn on BitLocker by default to protect your data. This means your drive could be encrypted even if you didn’t manually enable it.
Q2: Is It Safe to Turn Off BitLocker on Dell?
Turning off BitLocker on your Dell laptop is usually safe, but it removes data protection. Once disabled, your files are no longer encrypted and can be accessed by anyone. If you’re the only user and your laptop is in a secure place, it’s okay to turn it off.
Q3: How do I turn off BitLocker permanently?
You can go to Control Panel > System and Security > BitLocker Drive Encryption. Find your drive and click "Turn off BitLocker". Then, confirm to decrypt the drive, this will remove encryption completely.
Q4: How do I reset my Dell laptop without BitLocker recovery key?
You’ll need to fully format the drive and reinstall Windows, which will erase all data. Once it’s reset, you can use the 4DDiG Windows Data Recovery tool to recover the deleted data.
Q5: Can Dell Support help retrieve my recovery key?
No, Dell Support can’t retrieve your BitLocker recovery key. The key is linked to your Microsoft account, organization account, or where you chose to save it during setup. You’ll need to check those locations to find it.
Conclusion
The Dell BitLocker recovery key is essential for accessing your encrypted drive when Windows prompts for it. And this article has introduced what it is and how to bypass it. For cases where files are inaccessible, 4DDiG Windows Data Recovery provide a reliable way to recover important data from your encrypted Dell's drive.
Secure Download
Secure Download
💡 Summarize with AI:
You May Also Like
- Home >>
- Windows Recovery Solutions >>
- What Is & How to Bypass Dell BitLocker Recovery Key?

 ChatGPT
 Perplexity
 Google AI Mode
 Grok
Grok


