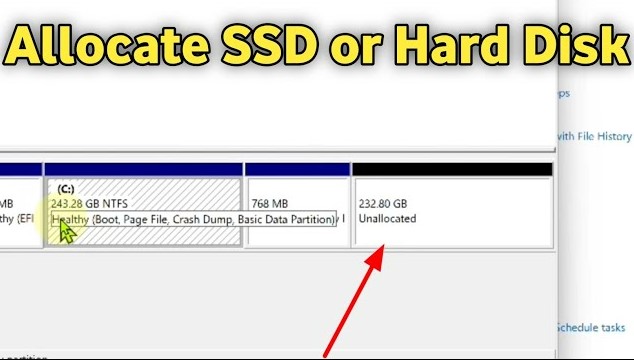
NVMe Data Recovery: Recover Data from NVMe SSD

5 mins read

Updated on 2024-04-17 15:11:49 to Windows Recovery Solutions

In the rapidly evolving landscape of digital storage, NVMe (Non-Volatile Memory Express) SSDs (Solid State Drives) have become increasingly popular due to their exceptional speed and reliability. However, NVMe SSDs are not immune to data loss like any data storage medium. Whether due to accidental deletion, formatting, or hardware failure, the need for NVMe data recovery has grown in tandem with the adoption of these high-performance storage devices.

In this comprehensive guide, we will explore the intricacies of NVMe data recovery in 2024, covering aspects such as the recoverability of M.2 NVMe SSDs, the best software tools for m.2 nvme data recovery, steps to disable TRIM for recovery purposes and address frequently asked questions surrounding the process.

nvme data recovery

Part 1: Can M.2 NVMe SSD be Recovered?

M.2 NVMe SSDs, characterized by their compact form factor and exceptional speed, have become integral components in modern computing devices. However, like any storage medium, M.2 NVMe SSDs are susceptible to data loss due to various factors such as accidental deletion, formatting errors, or hardware failures. The pivotal question in such situations is whether M.2 NVMe SSDs can be effectively recovered.

Factors Influencing M.2 NVMe SSD Recoverability:

  • Nature of Data Loss: The recoverability of an M.2 NVMe SSD largely depends on the nature of the data loss. Accidental deletion, file corruption or partition formatting may have different implications for recovery. At the same time, simple deletions may be more straightforward, and complex issues such as partition loss may require specialized recovery techniques.
  • File System and Format: The file system used on the NVMe SSD, such as NTFS, FAT32, or exFAT, can impact the recovery process. Additionally, the drive's format, whether a quick format or a complete format, influences the chances of successful recovery.
  • Hardware Integrity: The physical condition of the M.2 NVMe SSD is a critical factor. Recovering data from a drive with hardware damage may require specialized tools and, in some cases, professional assistance. Users should assess whether the data loss results from logical issues or physical damage.
  • Overwriting of Data: The extent to which new data has overwritten the lost data plays a crucial role. If the data has been partially overwritten, the chances of recovery are higher. However, continuous usage of the drive after data loss increases the risk of overwriting and diminishes the likelihood of successful recovery.
m2 nvme data recovery

Part 2: What's the Best NVMe Data Recovery Software

In the dynamic realm of data recovery, selecting an effective and reliable software tool is paramount when recovering data from NVMe SSDs. One notable contender in this field is the 4DDiG Windows Data Recovery software. This section will explore why 4DDiG is considered a top choice for nvme data recovery software in 2024, exploring its key features, functionalities, and advantages.

Key Features of 4DDiG Windows Data Recovery:

  • Comprehensive File Recovery: 4DDiG Windows Data Recovery is equipped with advanced algorithms that facilitate the recovery of a wide range of file types. Users can expect a comprehensive recovery solution, whether it's documents, photos, videos, or other multimedia files.
  • Support for NVMe SSDs: A critical feature that sets 4DDiG apart is its compatibility with NVMe SSDs. The software is optimized to recognize and recover data from these high-performance storage devices, ensuring a tailored and efficient recovery process.
  • Preview Functionality: 4DDiG offers a preview feature that allows users to preview recoverable files before completing the recovery process. This feature enhances user control and confidence, as users can selectively recover the specific files they need.
  • Selective Recovery Options: Users can choose specific files or directories for recovery, minimizing the time and resources required for the process. This selective recovery option is valuable when users only need to retrieve specific data from their NVMe SSD.
FREE DOWNLOAD

Secure Download

FREE DOWNLOAD

Secure Download

  • Choose a Local Disk
    Upon installing and launching Tenorshare 4DDiG Windows Data Recovery, you'll encounter the home interface, featuring options for Data Recovery and Advanced Options. In our scenario, select the local disk where your data loss occurred from the list of hard drives. Click on Start to initiate the scanning process, or alternatively, you can specify target file types in the upper-right corner before commencing the scan.

    select local disk
  • Perform a Scan on the Local Disk
    4DDiG promptly conducts a thorough scan of the chosen drive to locate any missing data. You have the flexibility to pause or stop the search at any point if you've identified the files you intend to recover. The Tree View provides categories such as Deleted Files, Existing Files, Lost Location, RAW Files, and Tag Files.

    select local disk
  • Preview and Recover Files from the Local Disk
    Once the desired files are discovered, you can preview them before initiating the recovery process. To prevent disk overwriting and permanent data loss, it is crucial not to save the recovered files to the same partition where the data loss occurred. Choose a secure location for the recovery process to ensure the integrity of your retrieved files.

    save-recovered-files

Part 3: Disable TRIM to Perform NVMe Data Recovery

TRIM is critical in modern SSDs, including NVMe SSDs. It is designed to enhance the performance and longevity of SSDs by proactively marking data blocks as no longer in use, allowing the drive's controller to collect garbage and optimize storage space. While TRIM is beneficial for routine SSD maintenance, it becomes a hindrance when attempting data recovery, as it may lead to overwriting potentially recoverable data. This section will explore the significance of disabling TRIM before undertaking NVMe data recovery and provide insights into the process.

Steps to Disable TRIM for NVMe Data Recovery:

  • Right-click on the Start button.
  • Select "Command Prompt (Admin)" or "Windows PowerShell (Admin)."
  • Enter the command:fsutil behavior query disabledeletenotify
  • If the result is "DisableDeleteNotify = 0," TRIM is currently enabled.
  • To disable TRIM, enter the command:< fsutil behavior set disabledeletenotify 1
  • Verify the change by running the previous query command, and the result should now be "DisableDeleteNotify = 1."
  • With TRIM disabled, proceed with the data recovery using a reliable recovery tool like 4DDiG Windows Data Recovery.
  • After completing the data recovery, it's advisable to re-enable TRIM for regular SSD maintenance.
  • Use the command: fsutil behavior set disabledeletenotify 0

    disable trim

Part 4: FAQ about NVMe Data Recovery

Q 1: Does TRIM Affect NVMe Data Recovery?

Yes, TRIM can significantly impact NVMe data recovery. TRIM is a feature designed to enhance the performance and longevity of SSDs by proactively marking data blocks as no longer in use. However, this feature becomes a challenge during data recovery, as it may lead to the overwriting of potentially recoverable data. It is recommended to temporarily disable TRIM before initiating the data recovery process to improve the chances of successful recovery.

Q 2: Is NVMe SSD Data Recovery Difficult?

The difficulty of NVMe SSD data recovery depends on various factors, including the nature of data loss, the extent of overwriting, and the health of the SSD. Using specialized recovery software like 4DDiG Windows Data Recovery can make the process relatively straightforward in cases of simple data loss, such as accidental deletion or formatting. However, if physical damage to the SSD or extensive overwriting has occurred, professional assistance may be required, making the recovery process more challenging.

Q 3: Why Do You Need NVMe Data Recovery?

Several reasons may necessitate NVMe data recovery:

  • Users may unintentionally delete essential files or folders, requiring recovery to retrieve the lost data.
  • Formatting the NVMe SSD by mistake or due to a system error can lead to data loss, necessitating recovery.
  • Issues with partitions, such as accidental partition deletion or corruption, may result in data loss, requiring recovery to restore access to the data.
  • Corruption of the file system on the NVMe SSD can render data inaccessible, prompting the need for recovery to repair and retrieve the data.
  • Physical damage or malfunctioning components in the NVMe SSD can lead to data loss, necessitating professional recovery services.

Q 4: Can NVMe Data Recovery be Performed at Home?

In many cases, NVMe data recovery can be performed at home using specialized recovery software like 4DDiG Windows Data Recovery. This software is designed to cater to NVMe SSDs and provides a user-friendly interface for the recovery process. However, seeking professional assistance is advisable to increase the likelihood of successful recovery for more complex scenarios involving physical damage or extensive overwriting.

Conclusion

The landscape of NVMe ssd data recovery in 2024 requires a nuanced understanding of the storage medium, recovery software, and the precautions necessary for success. M.2 NVMe SSDs are recoverable under the right circumstances, and tools like 4DDiG Windows Data Recovery are pivotal in this process. Disabling TRIM is a critical step, and addressing common FAQs provides a holistic view of the challenges and solutions in NVMe data recovery. As technology advances, so do our methods for retrieving valuable data from high-performance storage devices, ensuring that users can navigate the complexities of data loss and emerge with their crucial information intact.

William Bollson (senior editor)

William Bollson, the editor-in-chief of 4DDiG, devotes to providing the best solutions for Windows and Mac related issues, including data recovery, repair, error fixes.

(Click to rate this post)

You rated 4.5 ( participated)