How to Recover Tesla Dashcam Footage?
Have you ever been in a situation where your Tesla's Dashcam footage could have been crucial evidence, only to find out that it's gone? It's a heart-sinking feeling, isn't it? Tesla, the pioneering electric car manufacturer, has revolutionized vehicle safety with its cutting-edge Dashcam technology. This built-in feature records your car's surroundings while driving, providing a sense of security and peace of mind. However, even the most advanced technology isn't immune to mishaps.
Dashcam footage loss can occur due to various reasons, from user error to technical glitches. Accidentally deleting clips, overwriting old footage, or experiencing corruption on your USB drive can all lead to the disappearance of valuable recordings. But don't worry. In this article, we'll explore four proven methods to recover your lost Tesla Dashcam footage. By the end of this article, you'll be prepared to handle any footage loss situation with confidence. Let's get started!
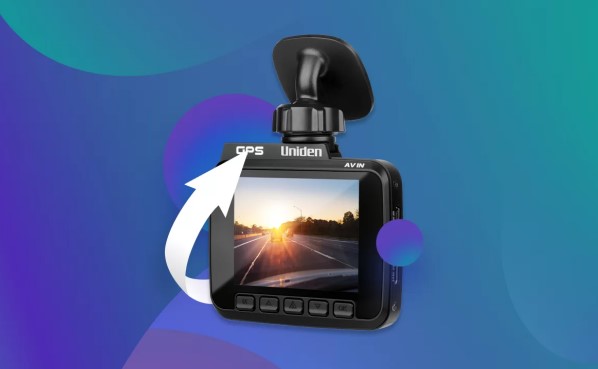
Part 1: Can You Recover Tesla Dashcam Footage?
When it comes to recovering lost or deleted Tesla Dashcam footage, the possibility of success depends on the type of storage used. Let's break it down:
- Tesla USB drive: Recovery is often possible using data recovery software, even if the footage is no longer visible, formatted, corrupted, or manually deleted.
- SD card dash cam: Deleted videos can usually be recovered from SD cards, even in cases of corruption, accidental deletion, or formatting issues, using specialized recovery tools.
- Internal memory: Recovery may be more challenging and require professional assistance from data recovery services specializing in retrieving data from these devices.
-
Cloud storage: Recovering lost footage involves contacting the cloud service provider, as they often offer ways to restore deleted files or access earlier versions of your data.

In most situations, swift action and the use of appropriate recovery methods can help you retrieve lost Tesla Dashcam videos. The sooner you initiate the recovery process, the higher the likelihood of success.
Part 2: How to Recover Tesla Dashcam Footage?
Now that you know it's possible to recover lost Tesla Dashcam footage, you might be wondering how to go about it. In the following sections, we'll explore the most effective methods to retrieve your lost footage and get you back on track.
Way 1: Recover Tesla Dashcam Footage via 4DDiG
When it comes to recovering lost Tesla Dashcam footage, 4DDiG Windows Data Recovery is a top-notch solution. This powerful software is designed to retrieve deleted, formatted, or corrupted files from various storage devices, including USB drives used by Tesla Dashcams.
What sets 4DDiG apart is its user-friendly interface and advanced recovery capabilities. With a success rate of up to 98%, it can recover over 2000 file types, ensuring your precious Tesla Dashcam videos are never lost forever.
Some of the standout features of 4DDiG include:
- Recovers deleted, formatted, or lost files from various storage devices
- Supports over 2000 file types, including videos
- Offers a preview function to view recoverable files before saving
- Provides a user-friendly interface for easy navigation
To use 4DDiG Windows Data Recovery to recover your Tesla Dashcam footage, follow these simple steps:
Secure
Download
Secure
Download
-
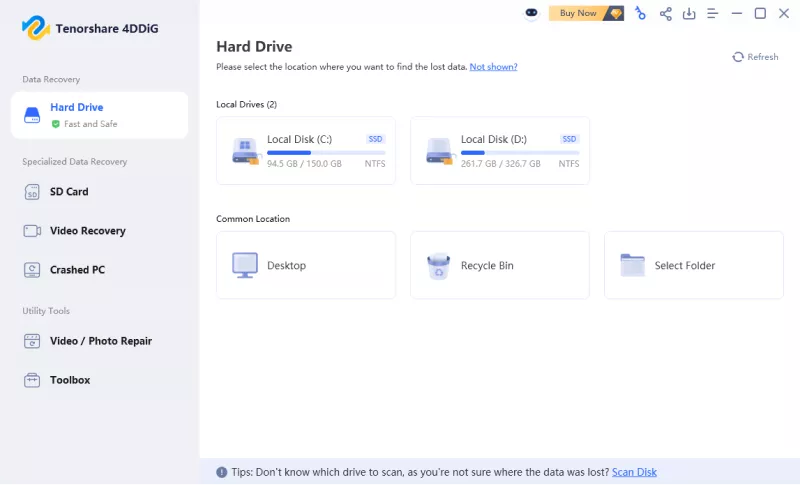
Select the USB Drive:
Connect the USB drive used for your Tesla Dashcam to your computer. Open 4DDiG Windows Data Recovery and select the USB drive from the list of available devices. Click "Start" to begin the scanning process.
-
Scan the USB Drive:
4DDiG will perform a thorough scan of your USB drive, searching for any lost or deleted Tesla Dashcam footage. You can pause or stop the scan at any time if you spot the files you need. Use the "Tree View" or "File View" options to browse through the recovered files.
-
Preview and Recover Your Footage:
Once 4DDiG has found your missing Tesla Dashcam videos, you can preview them to ensure they're the correct files. Select the videos you want to recover and choose a safe location on your computer to save them. Click "Recover" to complete the process and restore your lost footage.
Way 2: Assign a New Drive Letter
If you're struggling to access your Tesla Dashcam footage, one simple solution is to assign a new drive letter to your USB stick. This quick fix can often resolve any issues preventing your computer from properly reading the drive.
To change the drive letter of your USB stick, follow these steps:
- Connect the USB stick containing your Tesla Dashcam footage to your computer.
-
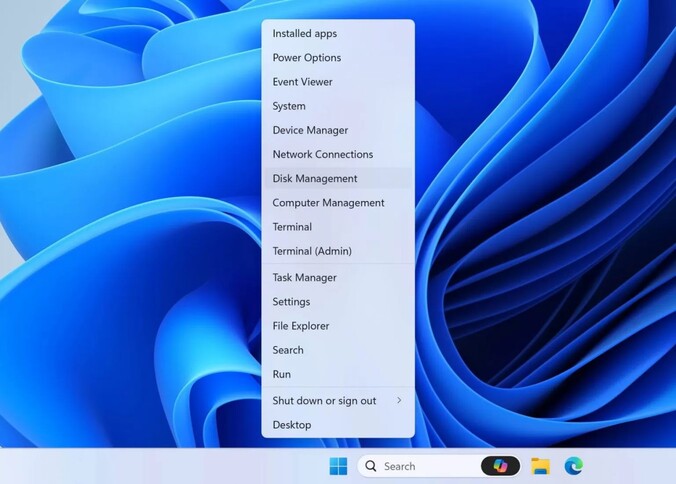
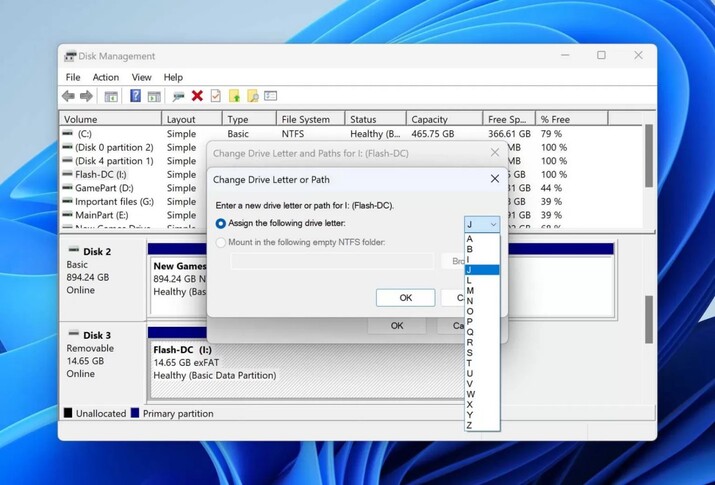
Open the Disk Management tool by right-clicking on the Start menu and selecting "Disk Management." Alternatively, you can press Windows + R, type "diskmgmt.msc," and hit Enter.

-
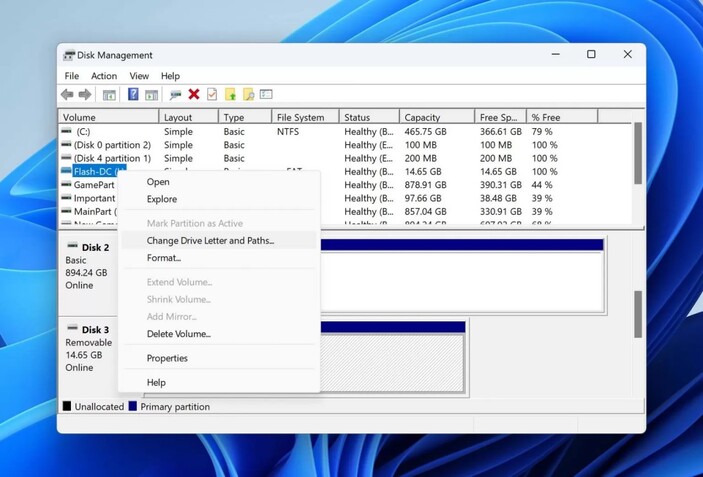
In the Disk Management window, locate your USB drive in the list of connected devices. Right-click on the drive and choose "Change Drive Letter and Paths."

-
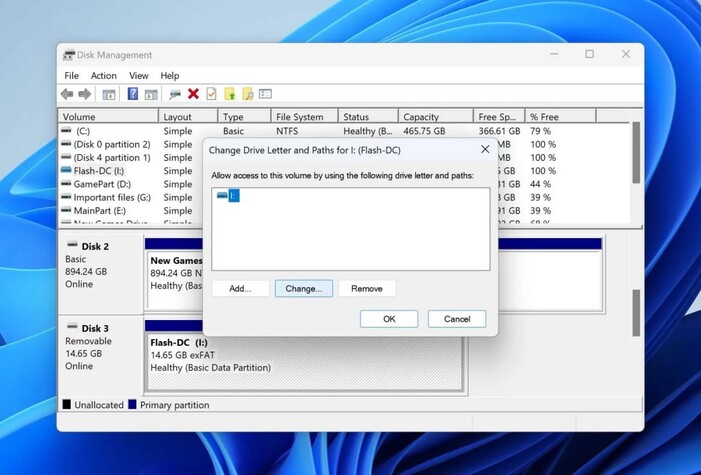
In the new window that appears, click on the "Change" button.

- From the dropdown menu, select an available drive letter that isn't currently in use. Click "OK" to assign the new letter to your USB stick.
-
Click "OK" again to confirm the changes and close the Disk Management tool.

After completing these steps, your computer should now recognize your USB drive under the newly assigned letter. This should allow you to access your Tesla Dashcam footage without any further issues.
Way 3: Recover Tesla Dashcam Footage from SD Card via CHKDSK
If you've lost access to your Tesla Dashcam footage due to corruption or file system issues, the CHKDSK (Check Disk) utility can help. This handy tool, built into Windows, can fix logical errors and make the contents of your storage device accessible again.
To use CHKDSK and recover your Tesla Dashcam footage, follow these steps:
- Connect the storage device containing your Dashcam footage to your computer.
-
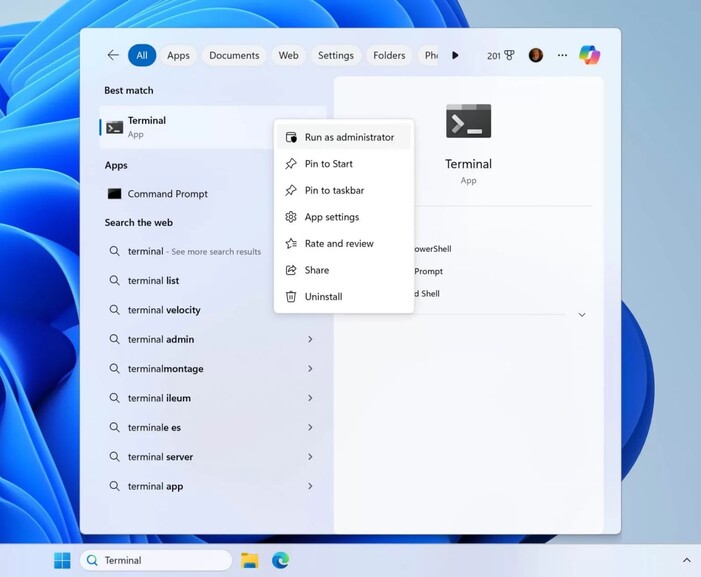
Open the Command Prompt (Terminal) by pressing Windows + R, typing "cmd," and hitting Enter.

-
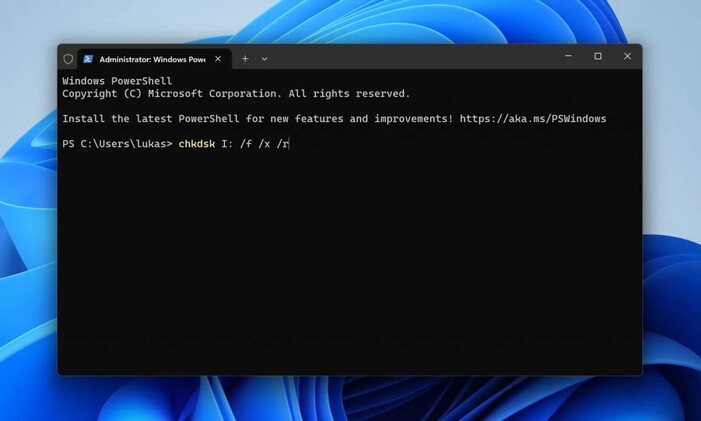
In the Command Prompt window, type the following command: chkdsk X: /F /X /R
Replace "X" with the actual drive letter assigned to your USB stick or SD card. You can find this letter by opening File Explorer and navigating to the "This PC" section.

-
Press Enter to execute the command. CHKDSK will now begin scanning your storage device for errors and attempting to fix them.

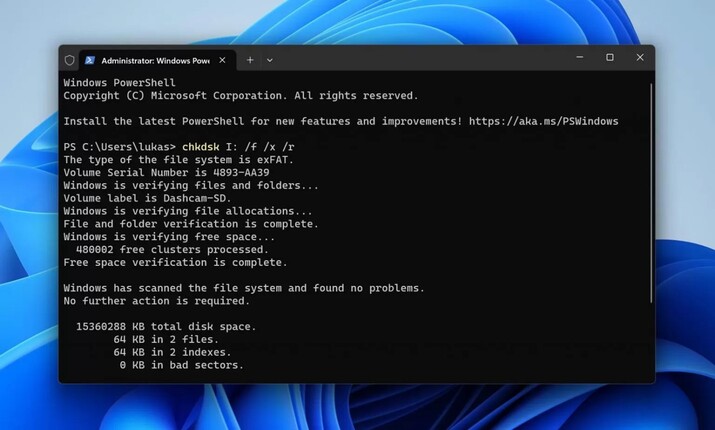
- Be patient as the process may take some time, depending on the size of your device and the extent of the issues. Once CHKDSK finishes, it will display a report detailing any errors found and fixed.
After the process is complete, try accessing your Tesla Dashcam footage again to see if the issue has been resolved.
Way 4: Use a Data Recovery Service to Recover Tesla Dashcam Footage
If you find the idea of using data recovery software to retrieve your deleted Tesla Dashcam videos a bit intimidating, or if you're dealing with a physically damaged storage device, it's time to call in the professionals. Data recovery services have the expertise and tools necessary to handle complex recovery cases that software alone can't solve.
Here's what you can expect when working with a professional data recovery service:
- Research and choose a reputable data recovery service provider. Look for companies with proven experience, positive reviews, and a strong track record of successful recoveries.
- Contact the data recovery service and explain your situation. Provide them with details about your Tesla Dashcam footage loss and the storage device you were using (USB stick, SD card, etc.).
- Follow their instructions for securely packaging and shipping your storage device to their facility. Most services will provide you with specific guidelines to ensure your device is protected during transit.
- Once the data recovery service receives your device, they will assess the damage and provide you with a detailed quote for the recovery process. Review the quote carefully and approve the service if you wish to proceed.
- The data recovery experts will work their magic, using advanced techniques and specialized tools to recover your lost Tesla Dashcam footage. The duration of this process can vary depending on the complexity of the recovery.
After the recovery is complete, the service will send you your recovered data on a new storage device or via a secure online download. They will also securely erase any remaining data from your original device before returning or disposing of it, ensuring your privacy.
Part 3: FAQ about Recovering Tesla Dashcam Footage
Q: How to view my Tesla Dashcam footage on the car touchscreen?
Ans: To view your Tesla Dashcam footage on the car's touchscreen, tap the Dashcam icon at the top of the display. From there, you can select and play the desired video clip.
Q: How do I retrieve my Tesla Dashcam footage?
Ans: To retrieve your Tesla Dashcam footage, remove the USB drive from your car and connect it to a computer. Navigate to the TeslaCam folder, where you'll find your saved video clips.
Q: How to Protect Tesla Dashcam Footage?
Ans: To protect your Tesla Dashcam footage, always use a high-quality USB drive and format it properly in FAT32. Regularly transfer important footage to another device or cloud storage for safekeeping.
Final Thoughts
Losing Tesla Dashcam footage can be a frustrating experience, but no need to worry. In this article, we've explored four effective methods to recover your lost videos. For the best chance of success, we recommend trying 4DDiG Windows Data Recovery first. Its user-friendly interface and powerful recovery capabilities make it the perfect tool for retrieving your precious footage. Don't let lost Tesla Dashcam videos ruin your day – take action now and recover your files with 4DDiG!


 ChatGPT
 Perplexity
 Google AI Mode
 Grok
Grok

